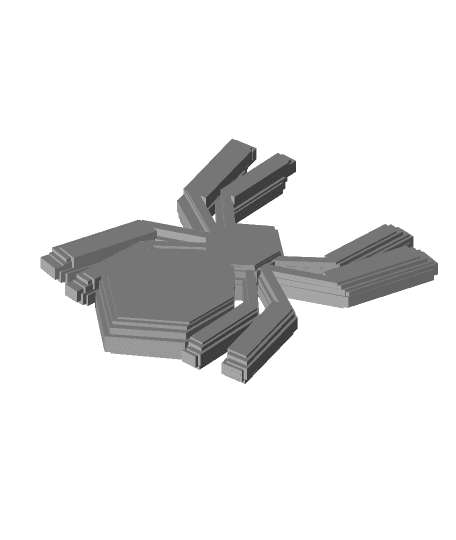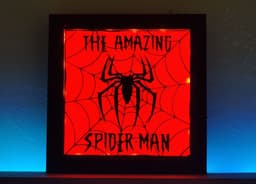

Amazing Spider-Man Wall Art - Easy Filament Swap
A super easy filament swap print for those who want to try it out. This print can be used as a cool bit of wall art as I show in the picture, simply put it in a frame and add some color-changing LEDs behind it and this print really pops.
Here are my print settings:
Layer height: .32mm Walls: 3 Top & Bottom: 6 layers Infill: 8% tri-hex pattern (no actual infill will print, it will be all top / bottom layers) Material: PLA+, 208F hotend, 60F bed Support: None
I used white PLA+ for the bottom and black PLA+ for the graphic. Use whatever material you like, but I highly recommend they are the same type and brand, just different colors. This eliminates a lot of variables and makes sure they bond together as best as possible.
In Cura, insert a Filament Change at Layer 4. You should have 3 layers of background material, then the rest will be the graphic, so you will need to change prior to layer 4 starting if you decide to pause and do it manually. I recommend having your nozzle move up and away so that you can push some extra filament through. This prevents smears of the previous color ending up in your graphic.
PS: For the frame, I simply cut out some black construction paper to fit a 9" x 9" shadow box, and then cut a rectangle out slightly smaller than the print itself and mounted the print inside of it. Then I just ran a cheap RGB LED strip around the back. Cool effect for cheap :)
PPS: I obviously don't own the art copyright itself, I used publicly available images and fonts for this private work of fan-art.
Amazing Spider-Man Wall Art - Easy Filament Swap

Spider-Chunk - Spider-Man Marvel Kit | No Supports, No AMS, No Glue

Amazing Spider-man and Venom

SPIDER-MAN STRING-ART / MARVEL / SPIDER MAN (LOGO)
Spider-Man Web-Shooting Bookends
Spider-Man No Way Home Wall Art

Derpy Spider-Man Mask 3D Printer File STL
.jpeg&w=3840&q=75)
Spider-Man Rivals Mask Bundle 3D Printer File STL

Spider-Man Poster 3D Printer STL File
.jpg&w=3840&q=75)
Miles Morales Spider-Man Bust | Across the Spider-Verse Statue | Street Art Base | Multi-Color

Spider-Man Mini 3D Printer File STL
.png&w=3840&q=75)
Miles Morales Spider-Man Bust | Spider-Verse Hero Statue | Marvel Fan Art 3D Print
.png&w=3840&q=75)
Spider-Man Brand New Day Face Shell 3D Printer STL File

Prowler Helmet from Spider-Man: Across the Spider-Verse

Spider-Man Marvel Rivals Face Shell 3D Printer File STL

Spider-Man Brand New Day Symbol 3D Printer STL File

Spider-Man Brand New Day Web Shooters 3D Printer STL File

Iron Man vs Spider-Man Chibi STL for 3D Printing ChibiSTL 3DXM
.jpeg&w=3840&q=75)
Ultimate Spider-Man (2024) Spider Logo Keychain (.step and .stl only)
.png&w=3840&q=75)
Miles Morales Spider-Man 3D Print - Streetwear Edition Figure - Spider-Verse STL