


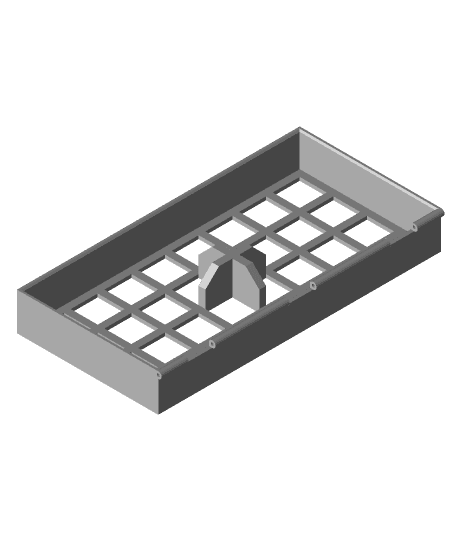
Chess Board Hinged Box
Model originally uploaded to Thingiverse at https://www.thingiverse.com/thing:4880797.
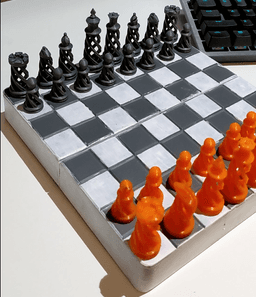
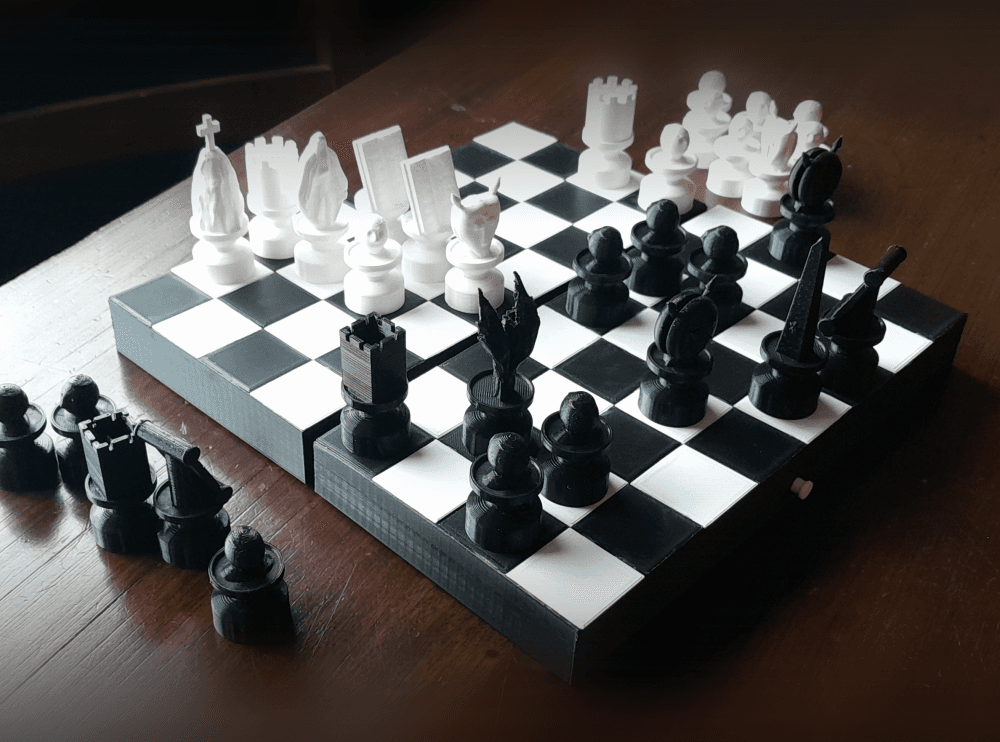
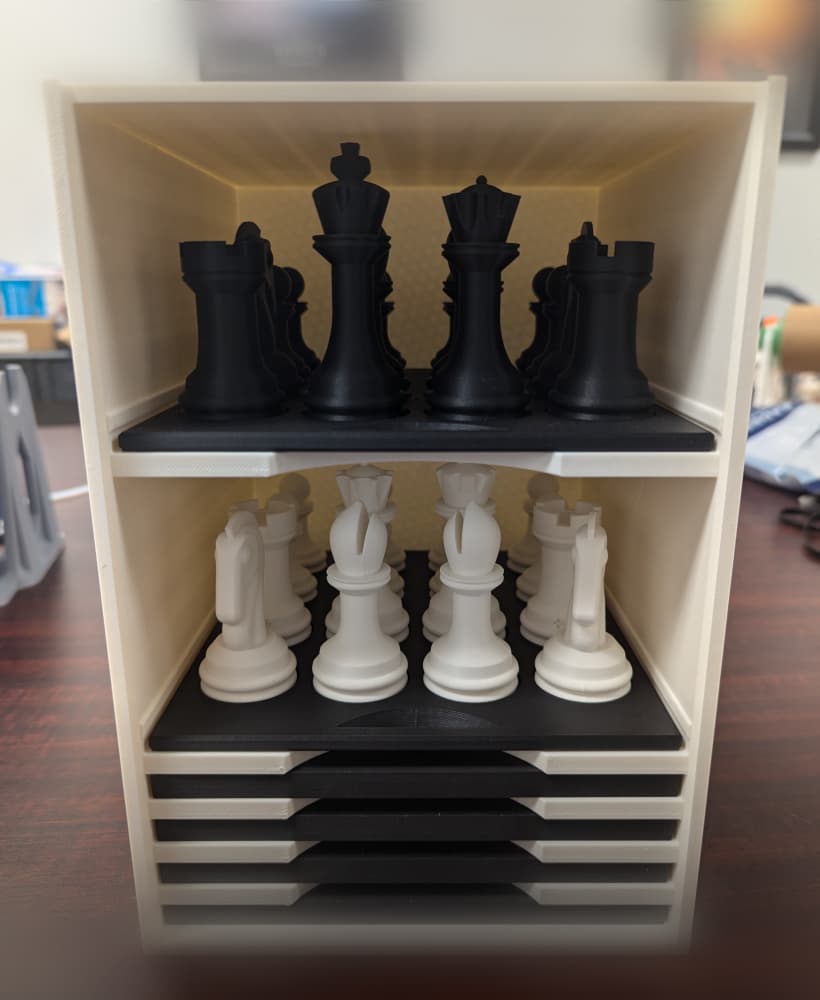
A foldable chess set, designed to store all your peices as well.
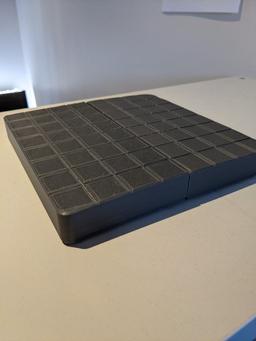
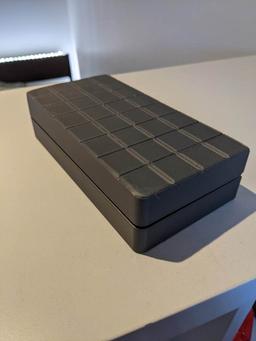
The tiles on the board are 25x25mm and each half of the board is 25mm heigh (26.5mm including clips/feet. The entire board measures 200x200 when folded out.
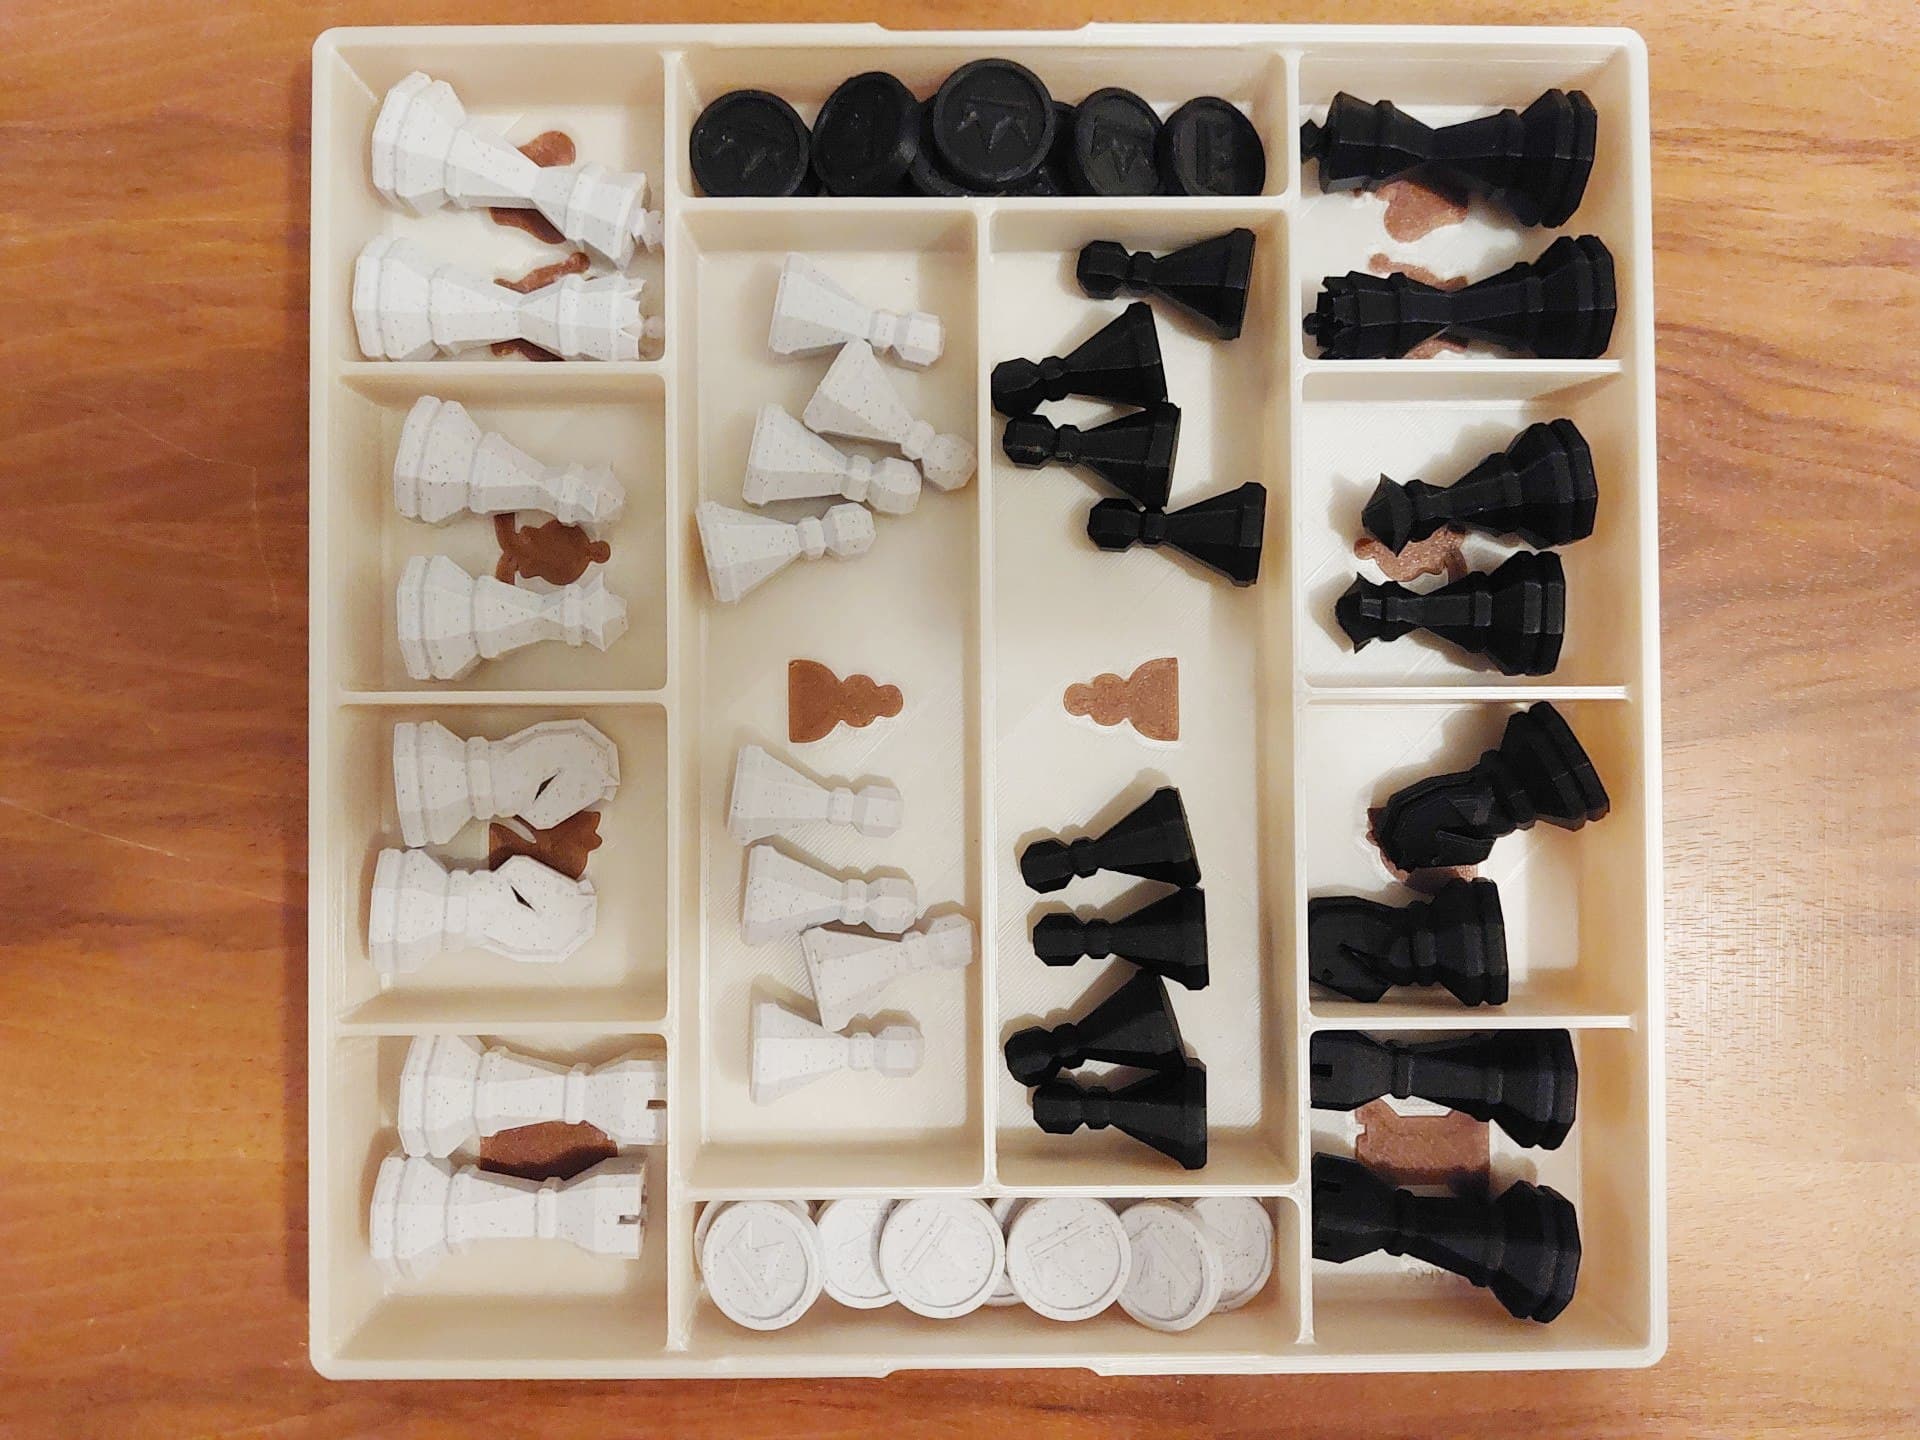
Peices are from https://www.thingiverse.com/thing:470700 but scaled down so the bases are about 20mm in diameter
PartsThere are 4 different parts to print, and you should have 6 parts total when all printed, they are:
- 1x Top Shell
- 1x Bottom Shell
- 2x Board Tile Halves
- 2x Hinges
You will also need:
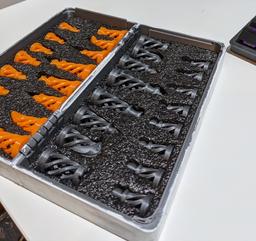
- Foam (To hold the peices in place) - I used https://www.bunnings.com.au/kincrome-custom-cut-foam_p0131564
- Two Part Epoxy
- Super glue
- Craft kinfe
Top & Bottom Shells: Print with their top face down on the bed of the printer. I printed with 2 bottom layers, 2 walls and 20% infil. Best to print these one at a time as they are quite large, you may need to disable skirts/brims/rafts depending on the size of your buildplate.
Board Tile Halves: This was split off as a seperate piece so the tiles could be printed facing up to prevent warping. Print with 100% infil as this is designed to be 1.4mm tall (7 layers at 0.2mm). Same as the shells, you should only print one at a time and may need to disable skirts/brims/rafts depending on your buildplate.
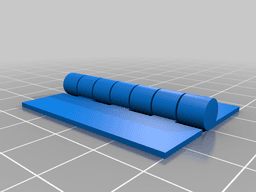
Hinge: Credit to https://www.thingiverse.com/thing:2187167. I modified this model to create the slim hinge for this box. Print flat side down with no supports and 20% infil. Clearence between moving parts is about 0.4mm which is more than enough to prevent the halves welding together. It might need a little force to get it moving initially so be carful not to snap the joints. if you are finding you cant move the hinge try printing at 80% speed, and with the part cooling fan at 100% (if you have one). Or try Cura's Enable Bridge Settings.
Assembly & FinishingGlue the tiles onto the shells using epoxy, I used 5min epoxy but its still best to let this dry for a few hours to a day before doing any of the finishing steps.
If you want to paint this, its easier to sand and paint the board before gluing the hinges on here is a good guide on painting 3D prints. https://all3dp.com/2/beginner-s-guide-to-painting-3d-prints-pla-abs/
Cut the foam to fit inside each half of the shells. Trace the outline of the peices onto the foam and cut them out. Once thats all done and the peices fit you can glue the foam into each half of the shell using epoxy.
Glue the hinges into the cutouts on one half using super glue, ensuring the barel of the hinge is facing outwards. Once that has dried glue the hinges to the other half of the board.
You should now be able to fold the board in half and it should just click together, if you find the fit is a bit tight you can sand down the tabs that fit the two halves together, or trim them off with side cutters.
Chess Board Hinged Box
Judeo-Christian Chess Board Game
Portable Chess Board with Pieces
#81 Hinged Print-in-place Battery Storage Box | Fusion | Pistacchio Graphic

Chess Board Storage Box (Magnetic)
Chess & Checkers & 9 Men's Morris Board (with Storage Box)
Forest Chess Set - Log and Mushroom Chess Board - Checkers

Open Chess - Smart Chess Board

Sunny Flower Hinged Box

Juicy Orange Hinged Box

Modular 3D Printed Chess Board – Designed for Small Printers

Love Hearts Hinged Box

Earth Hinged Box

Kawaii Candy Hinged Box

Cherry Blossom Hinged Box
Chess Box
Magnet Box with Tackle Box Style Hinge

Dragon Royal Crest Hinged Box

Decorative box hinged

Chess Box
