
This is a prototype!
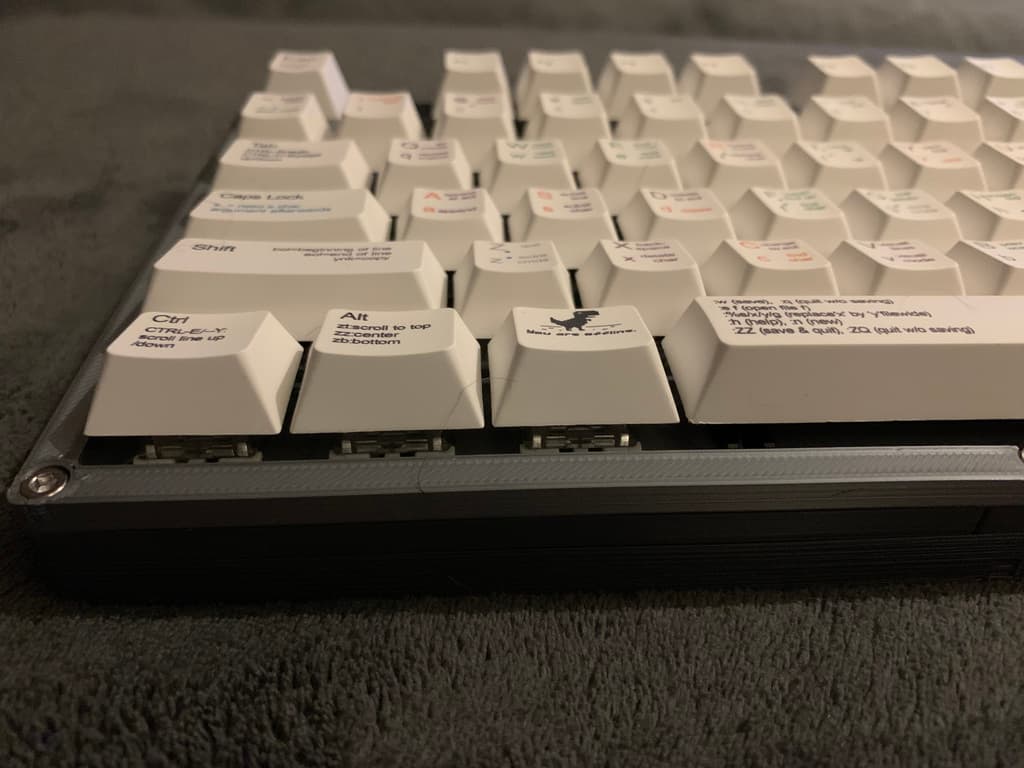
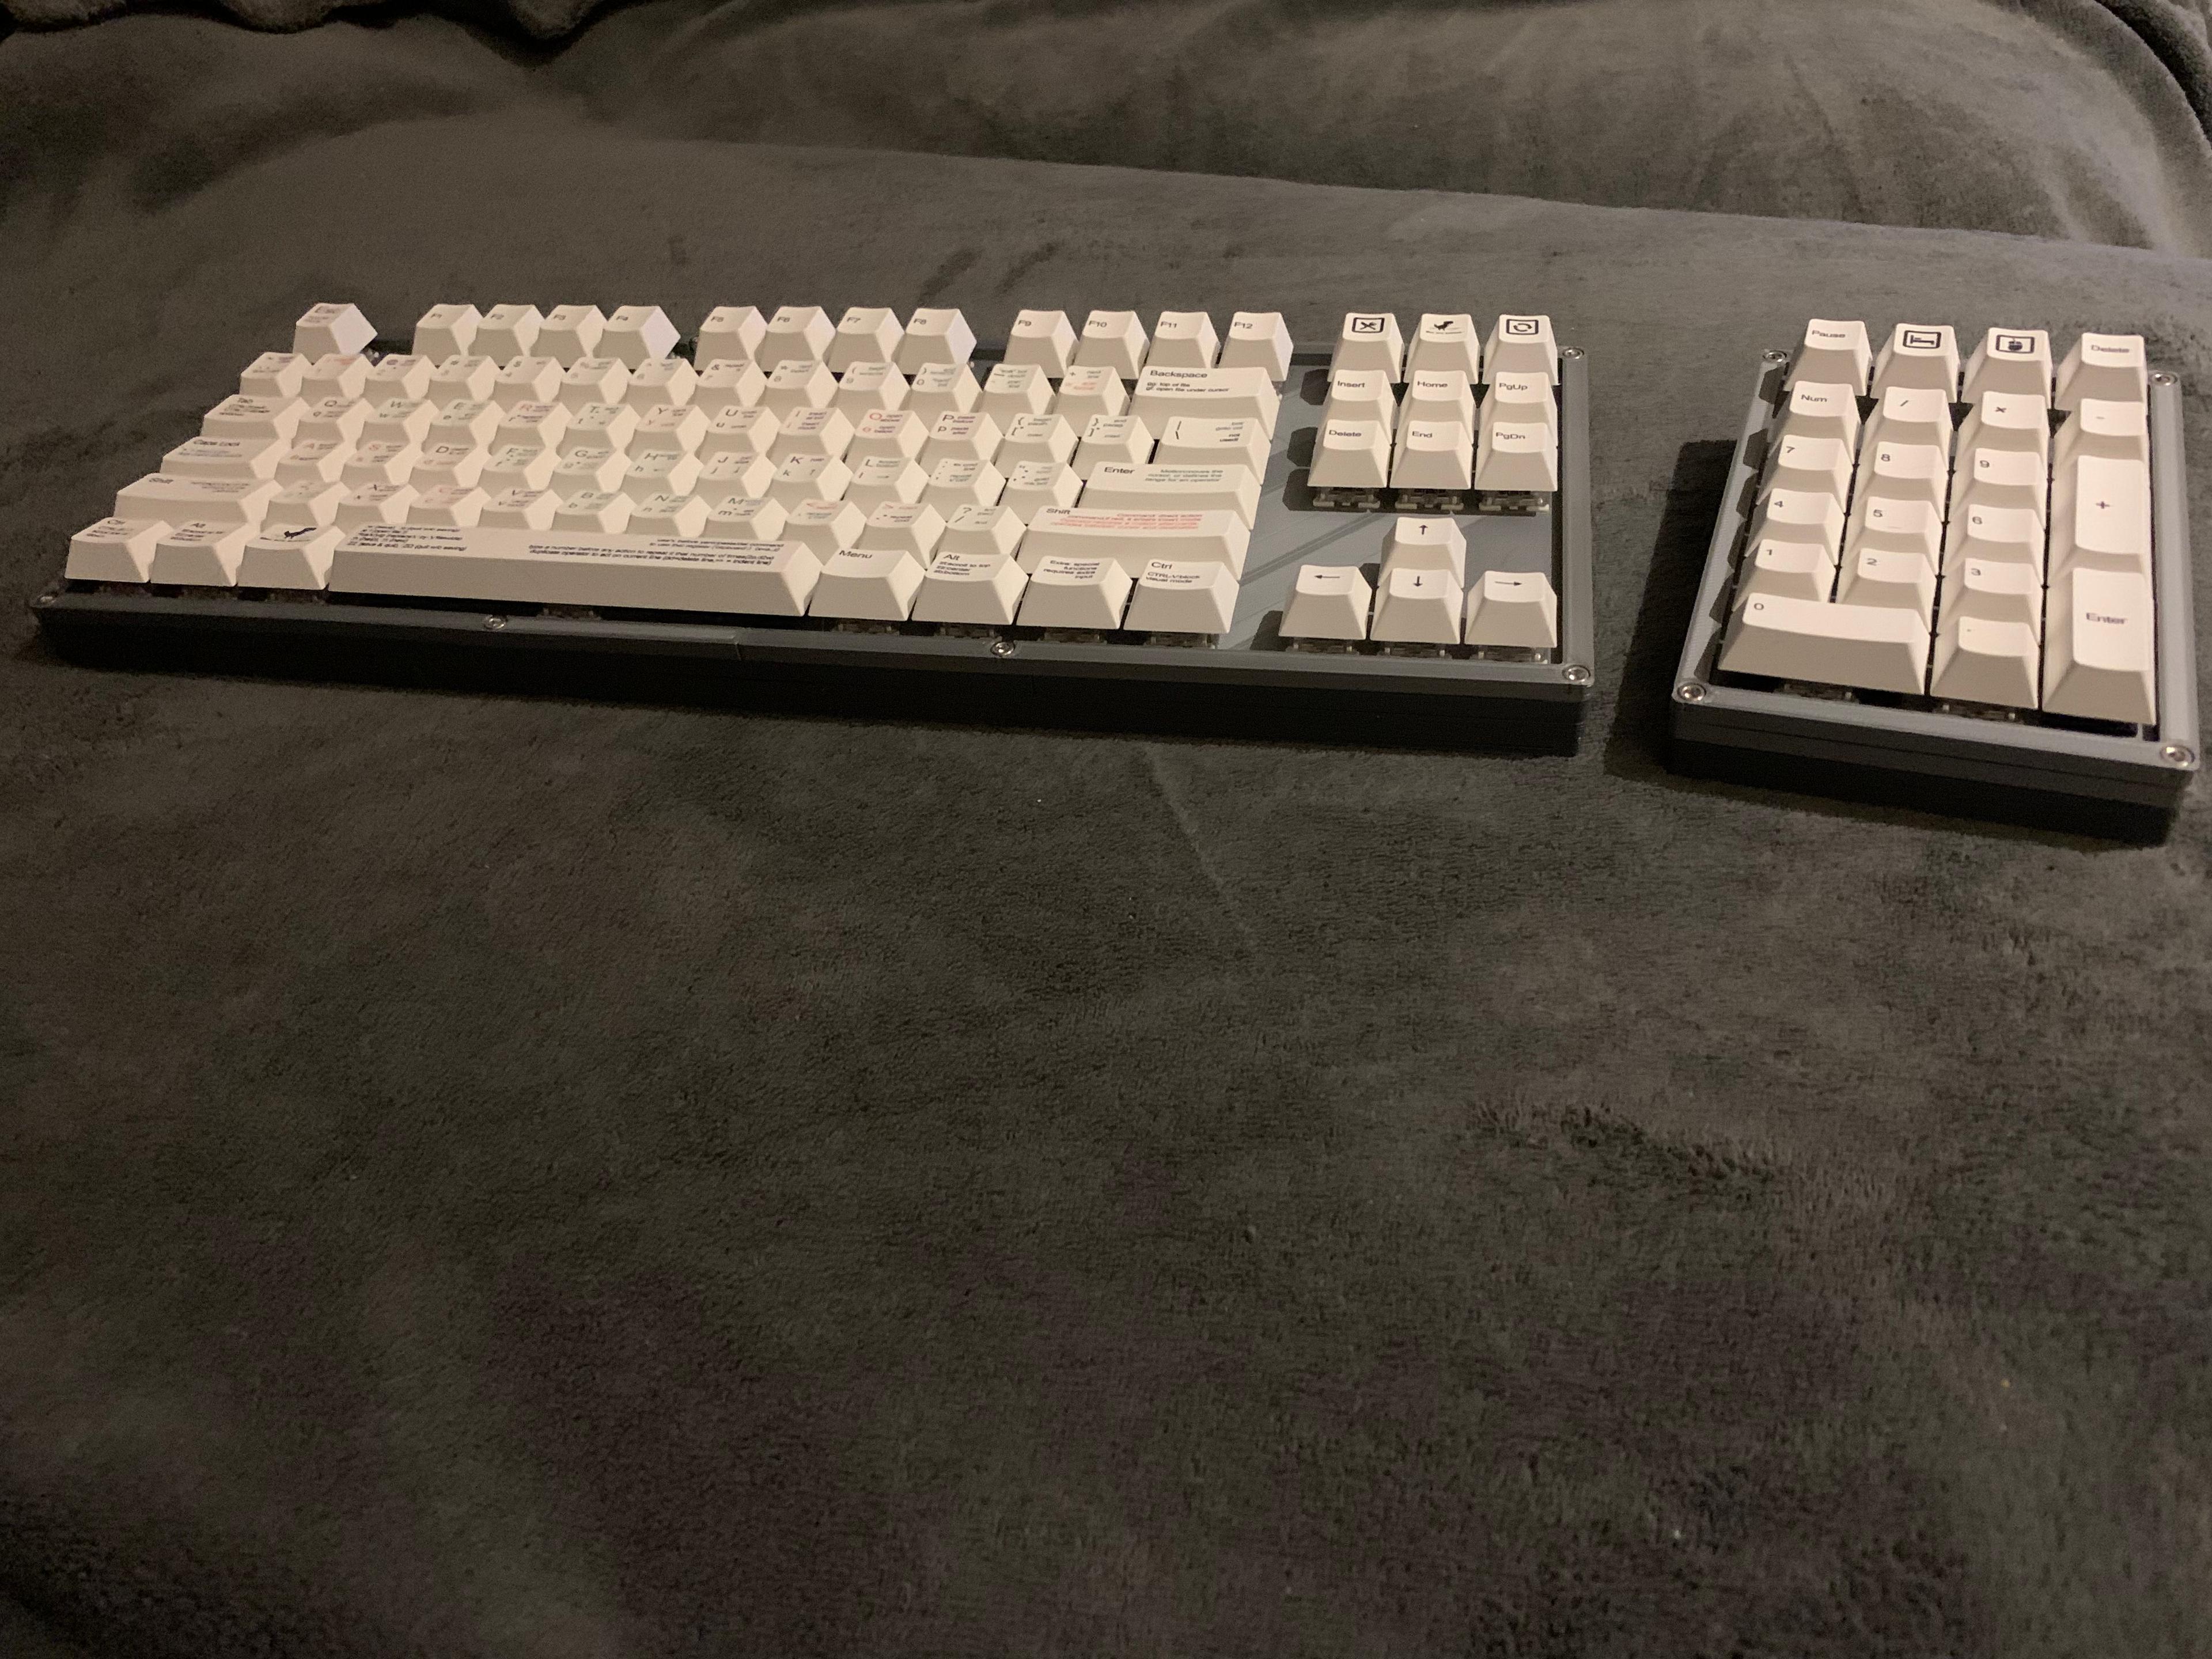
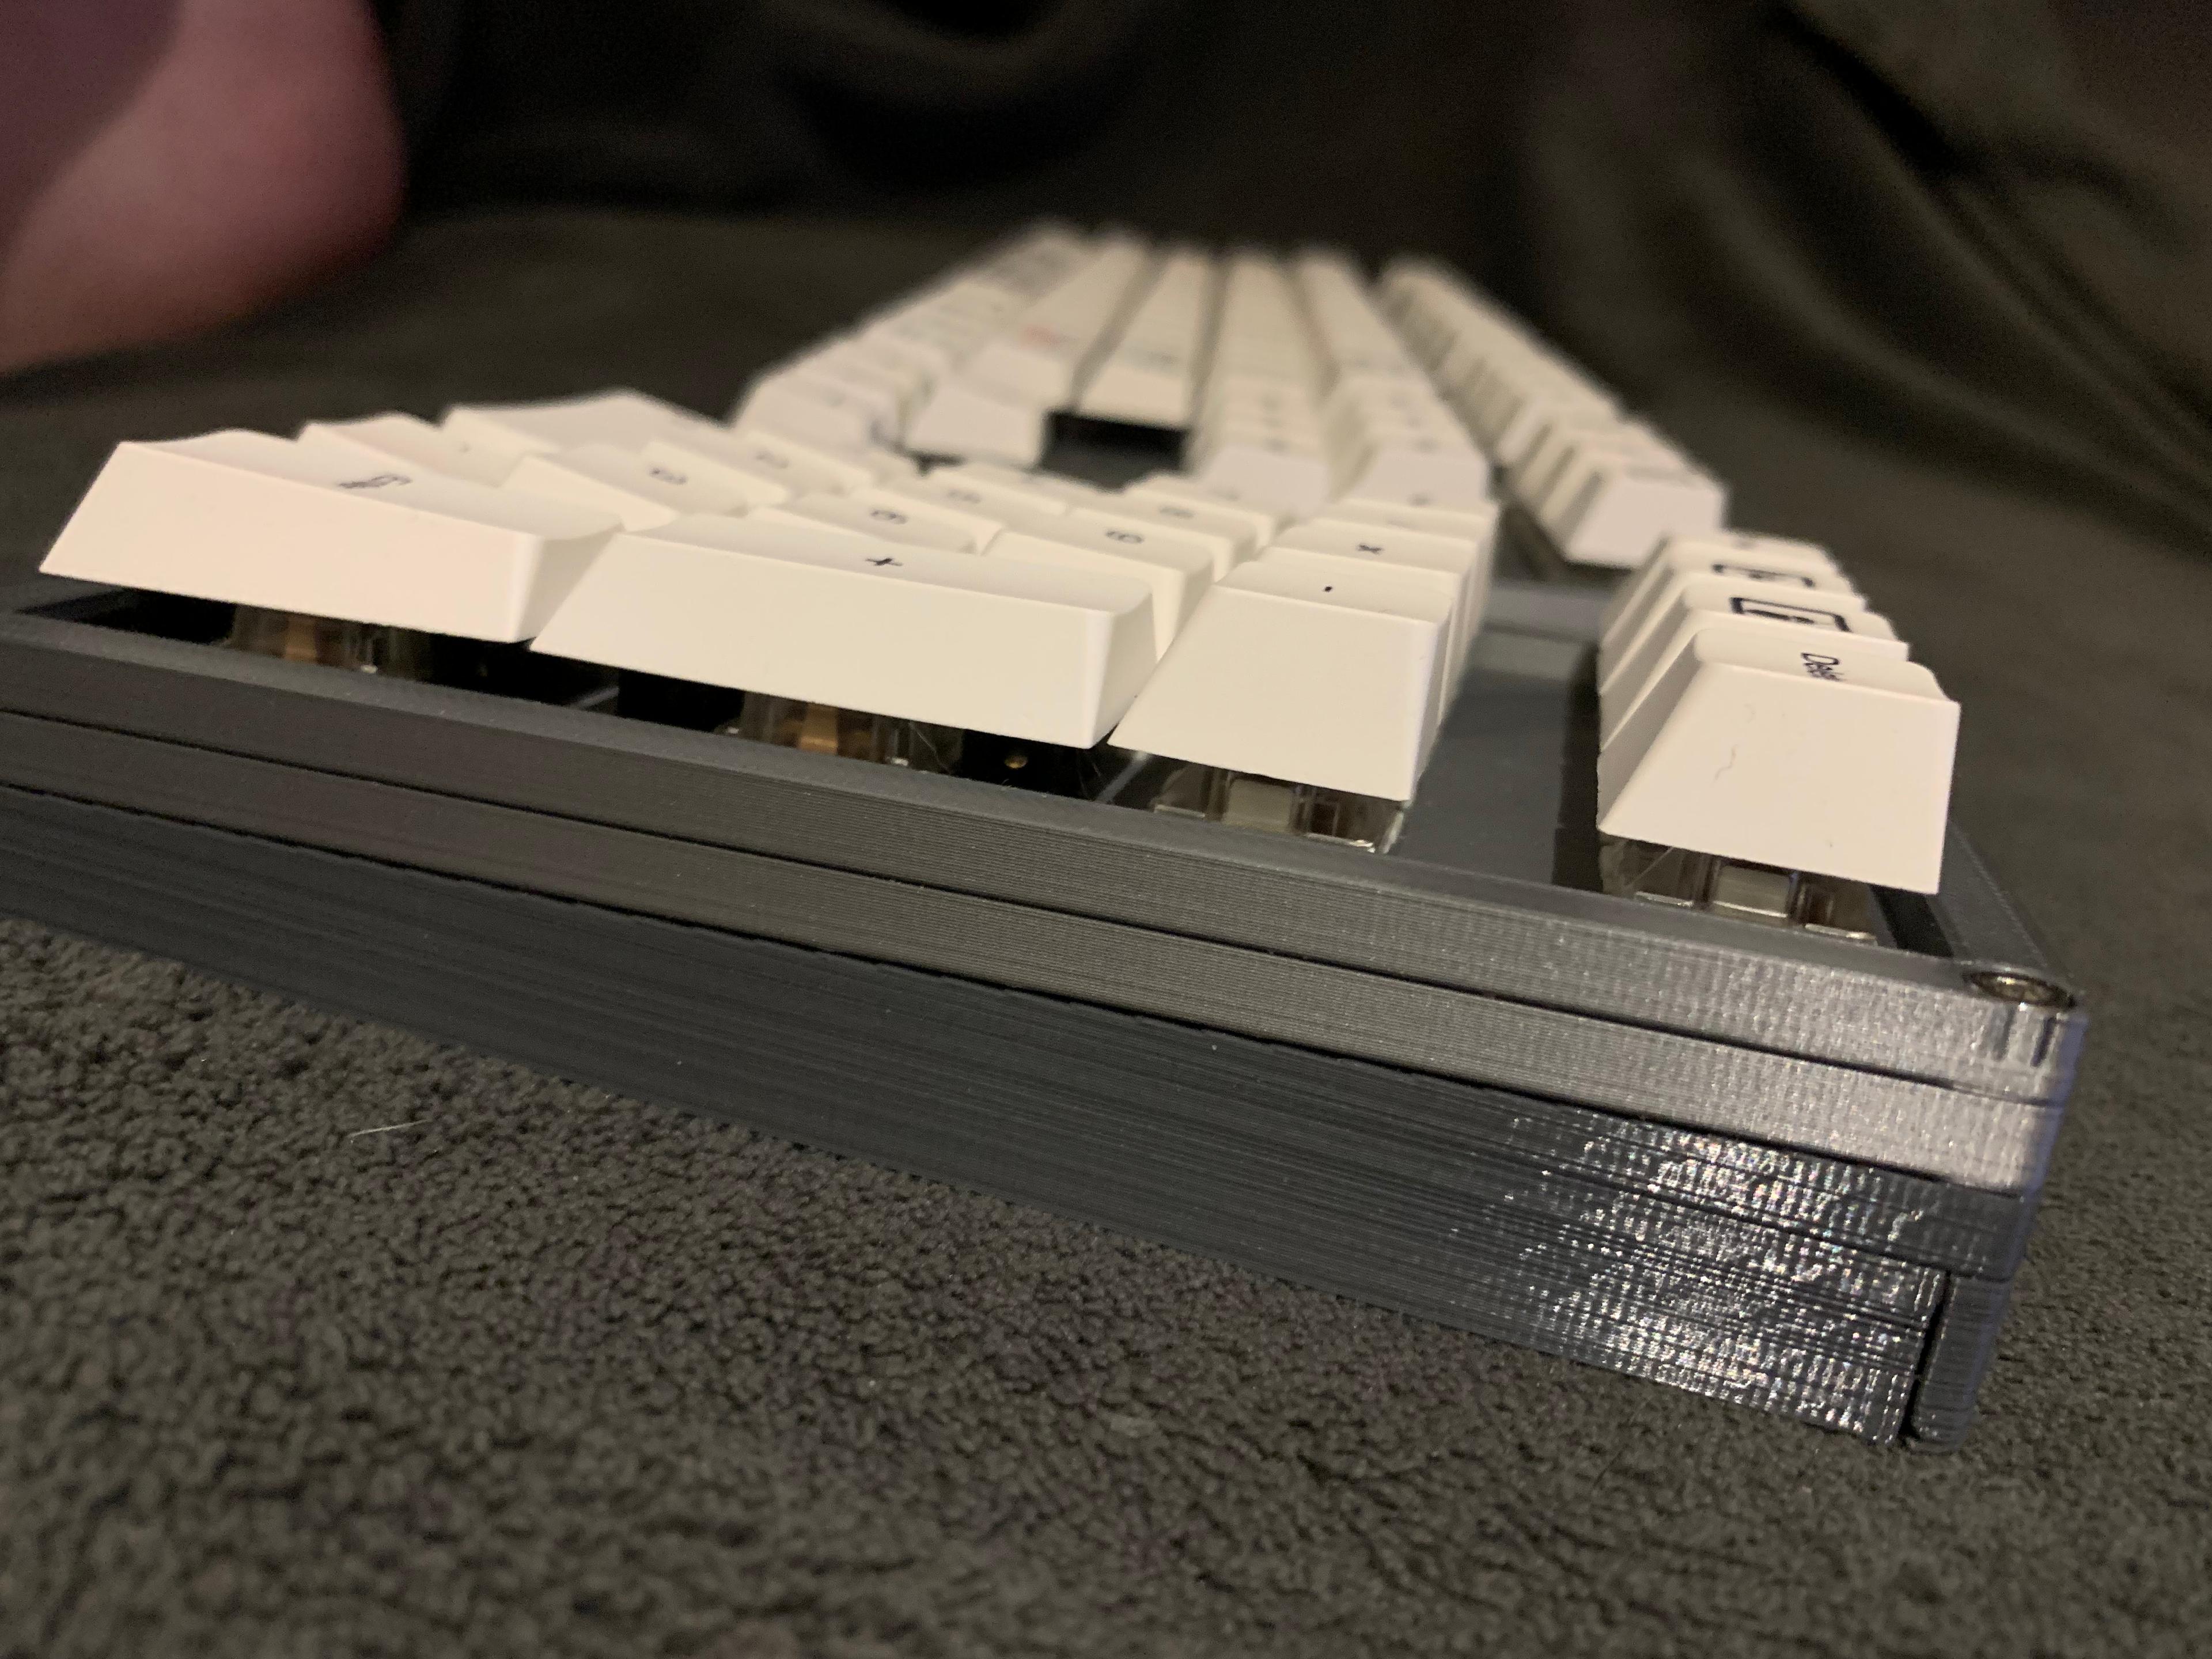
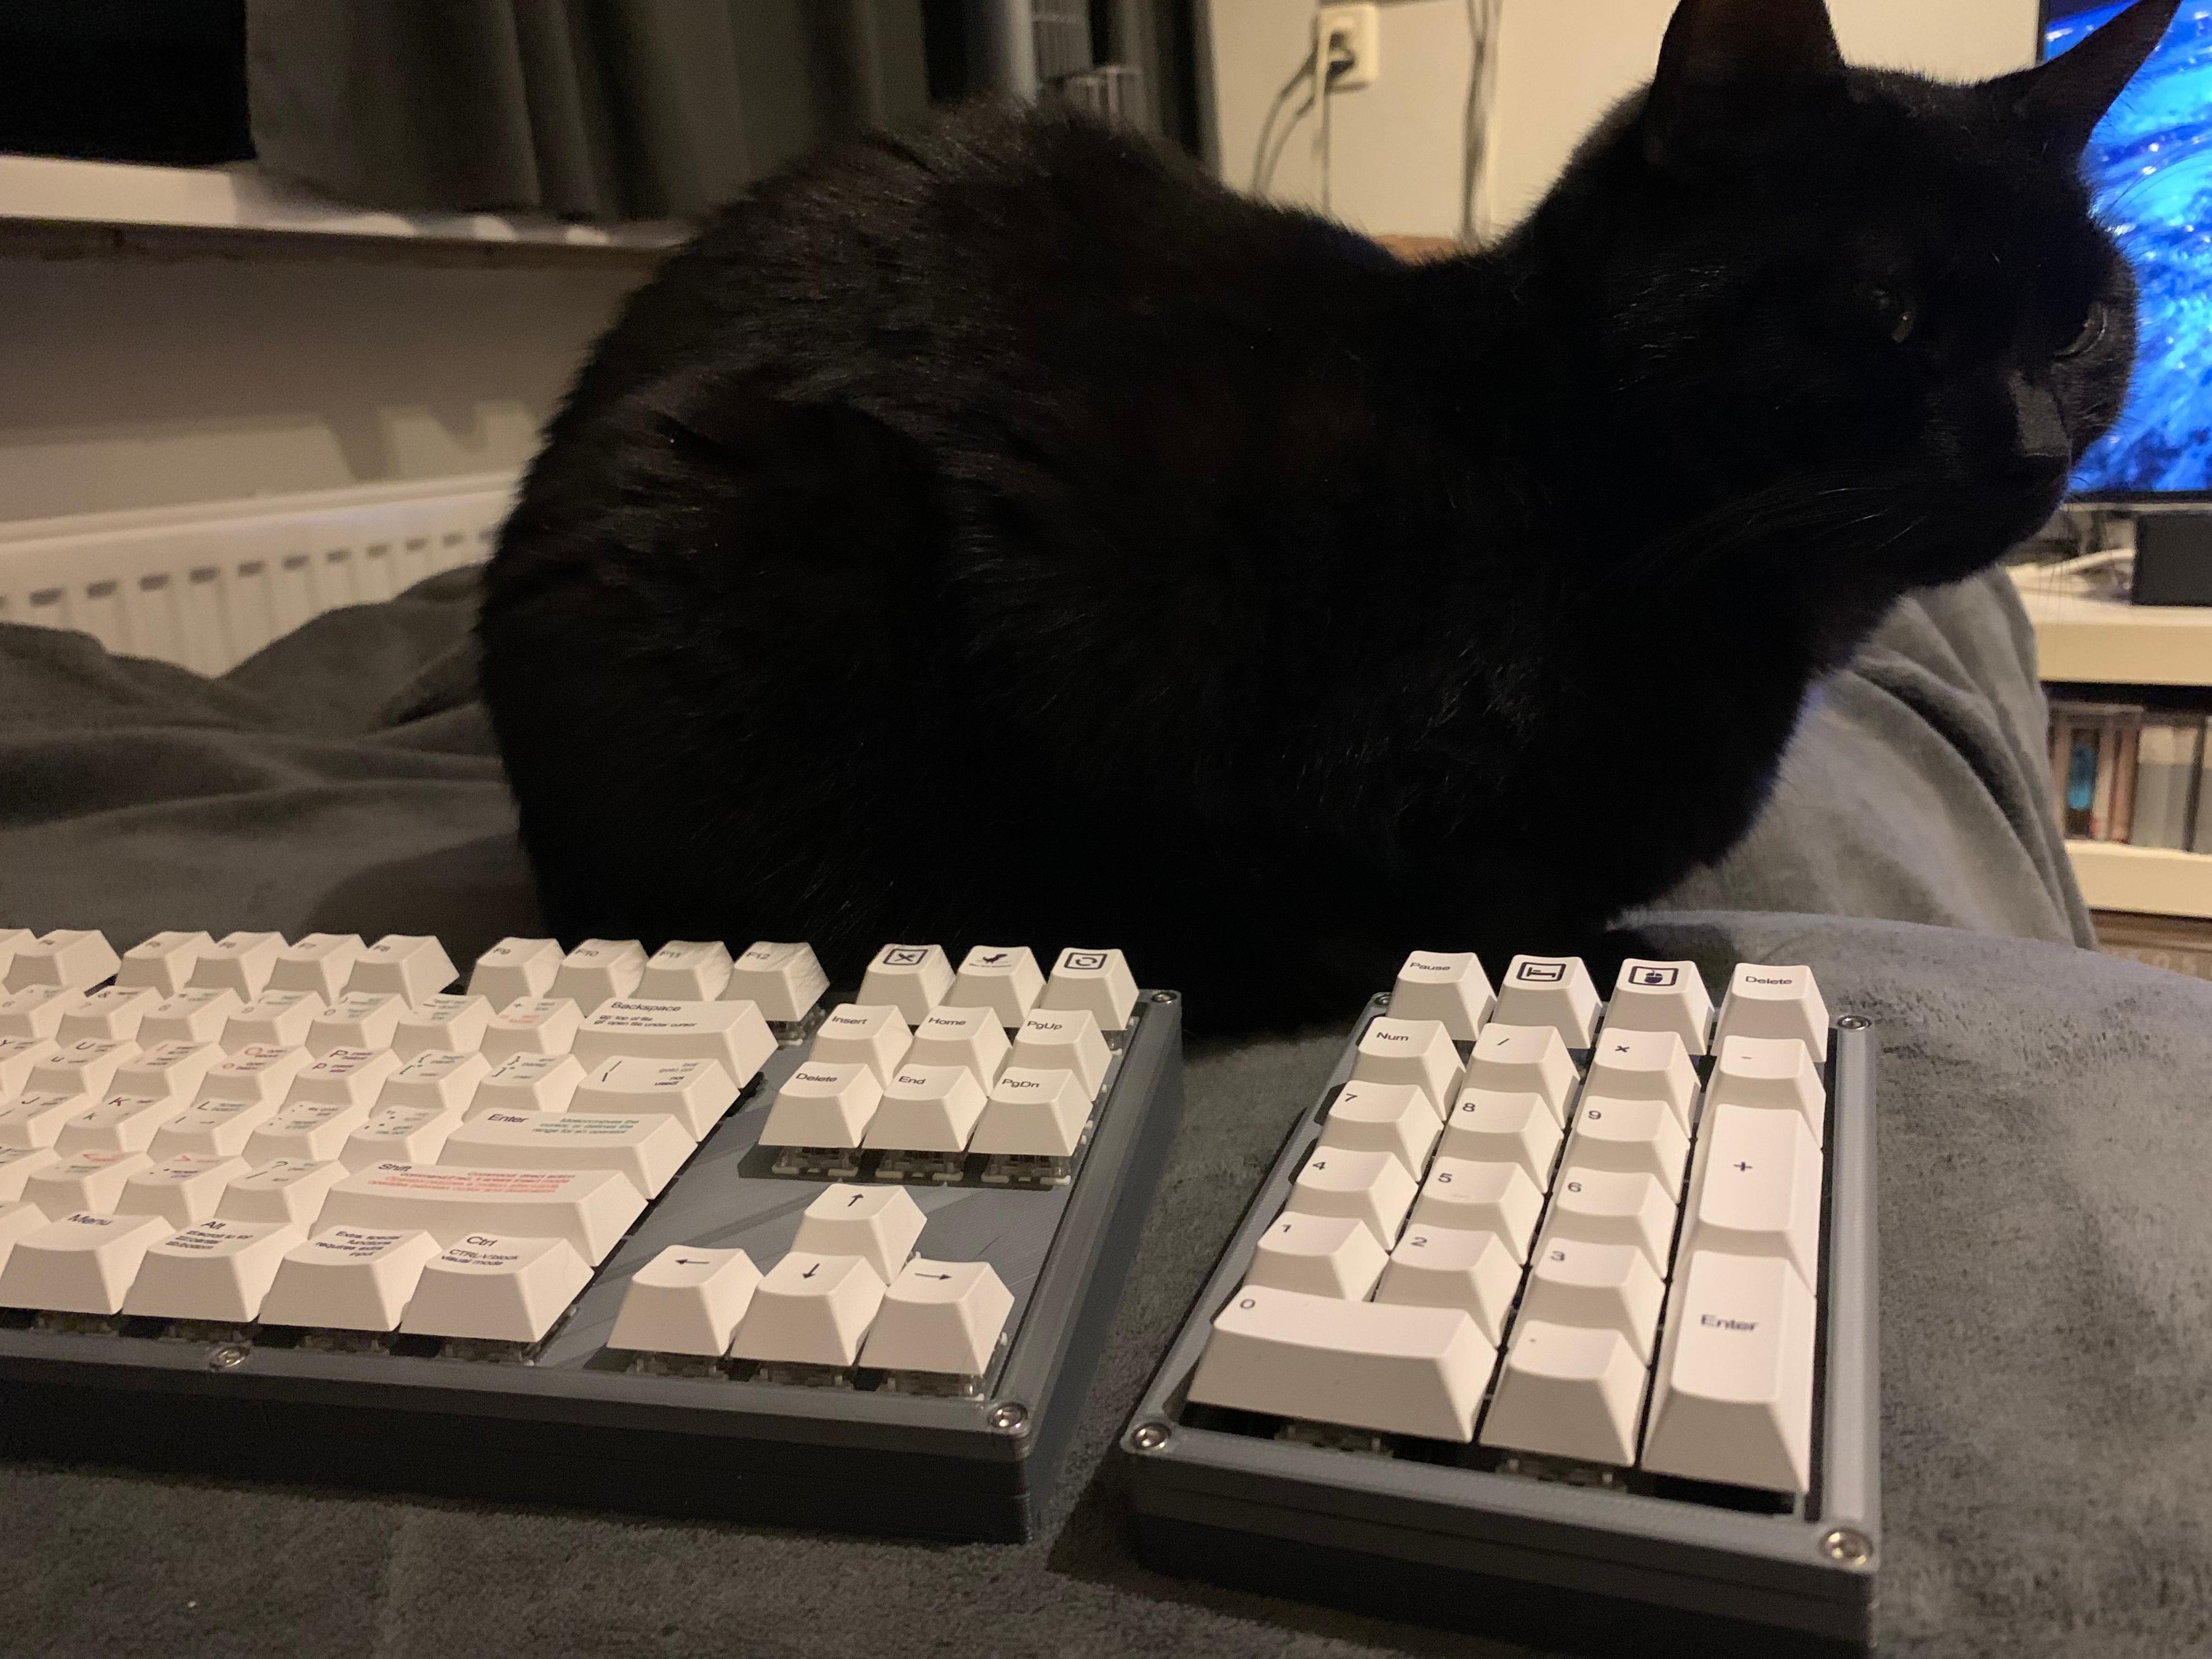
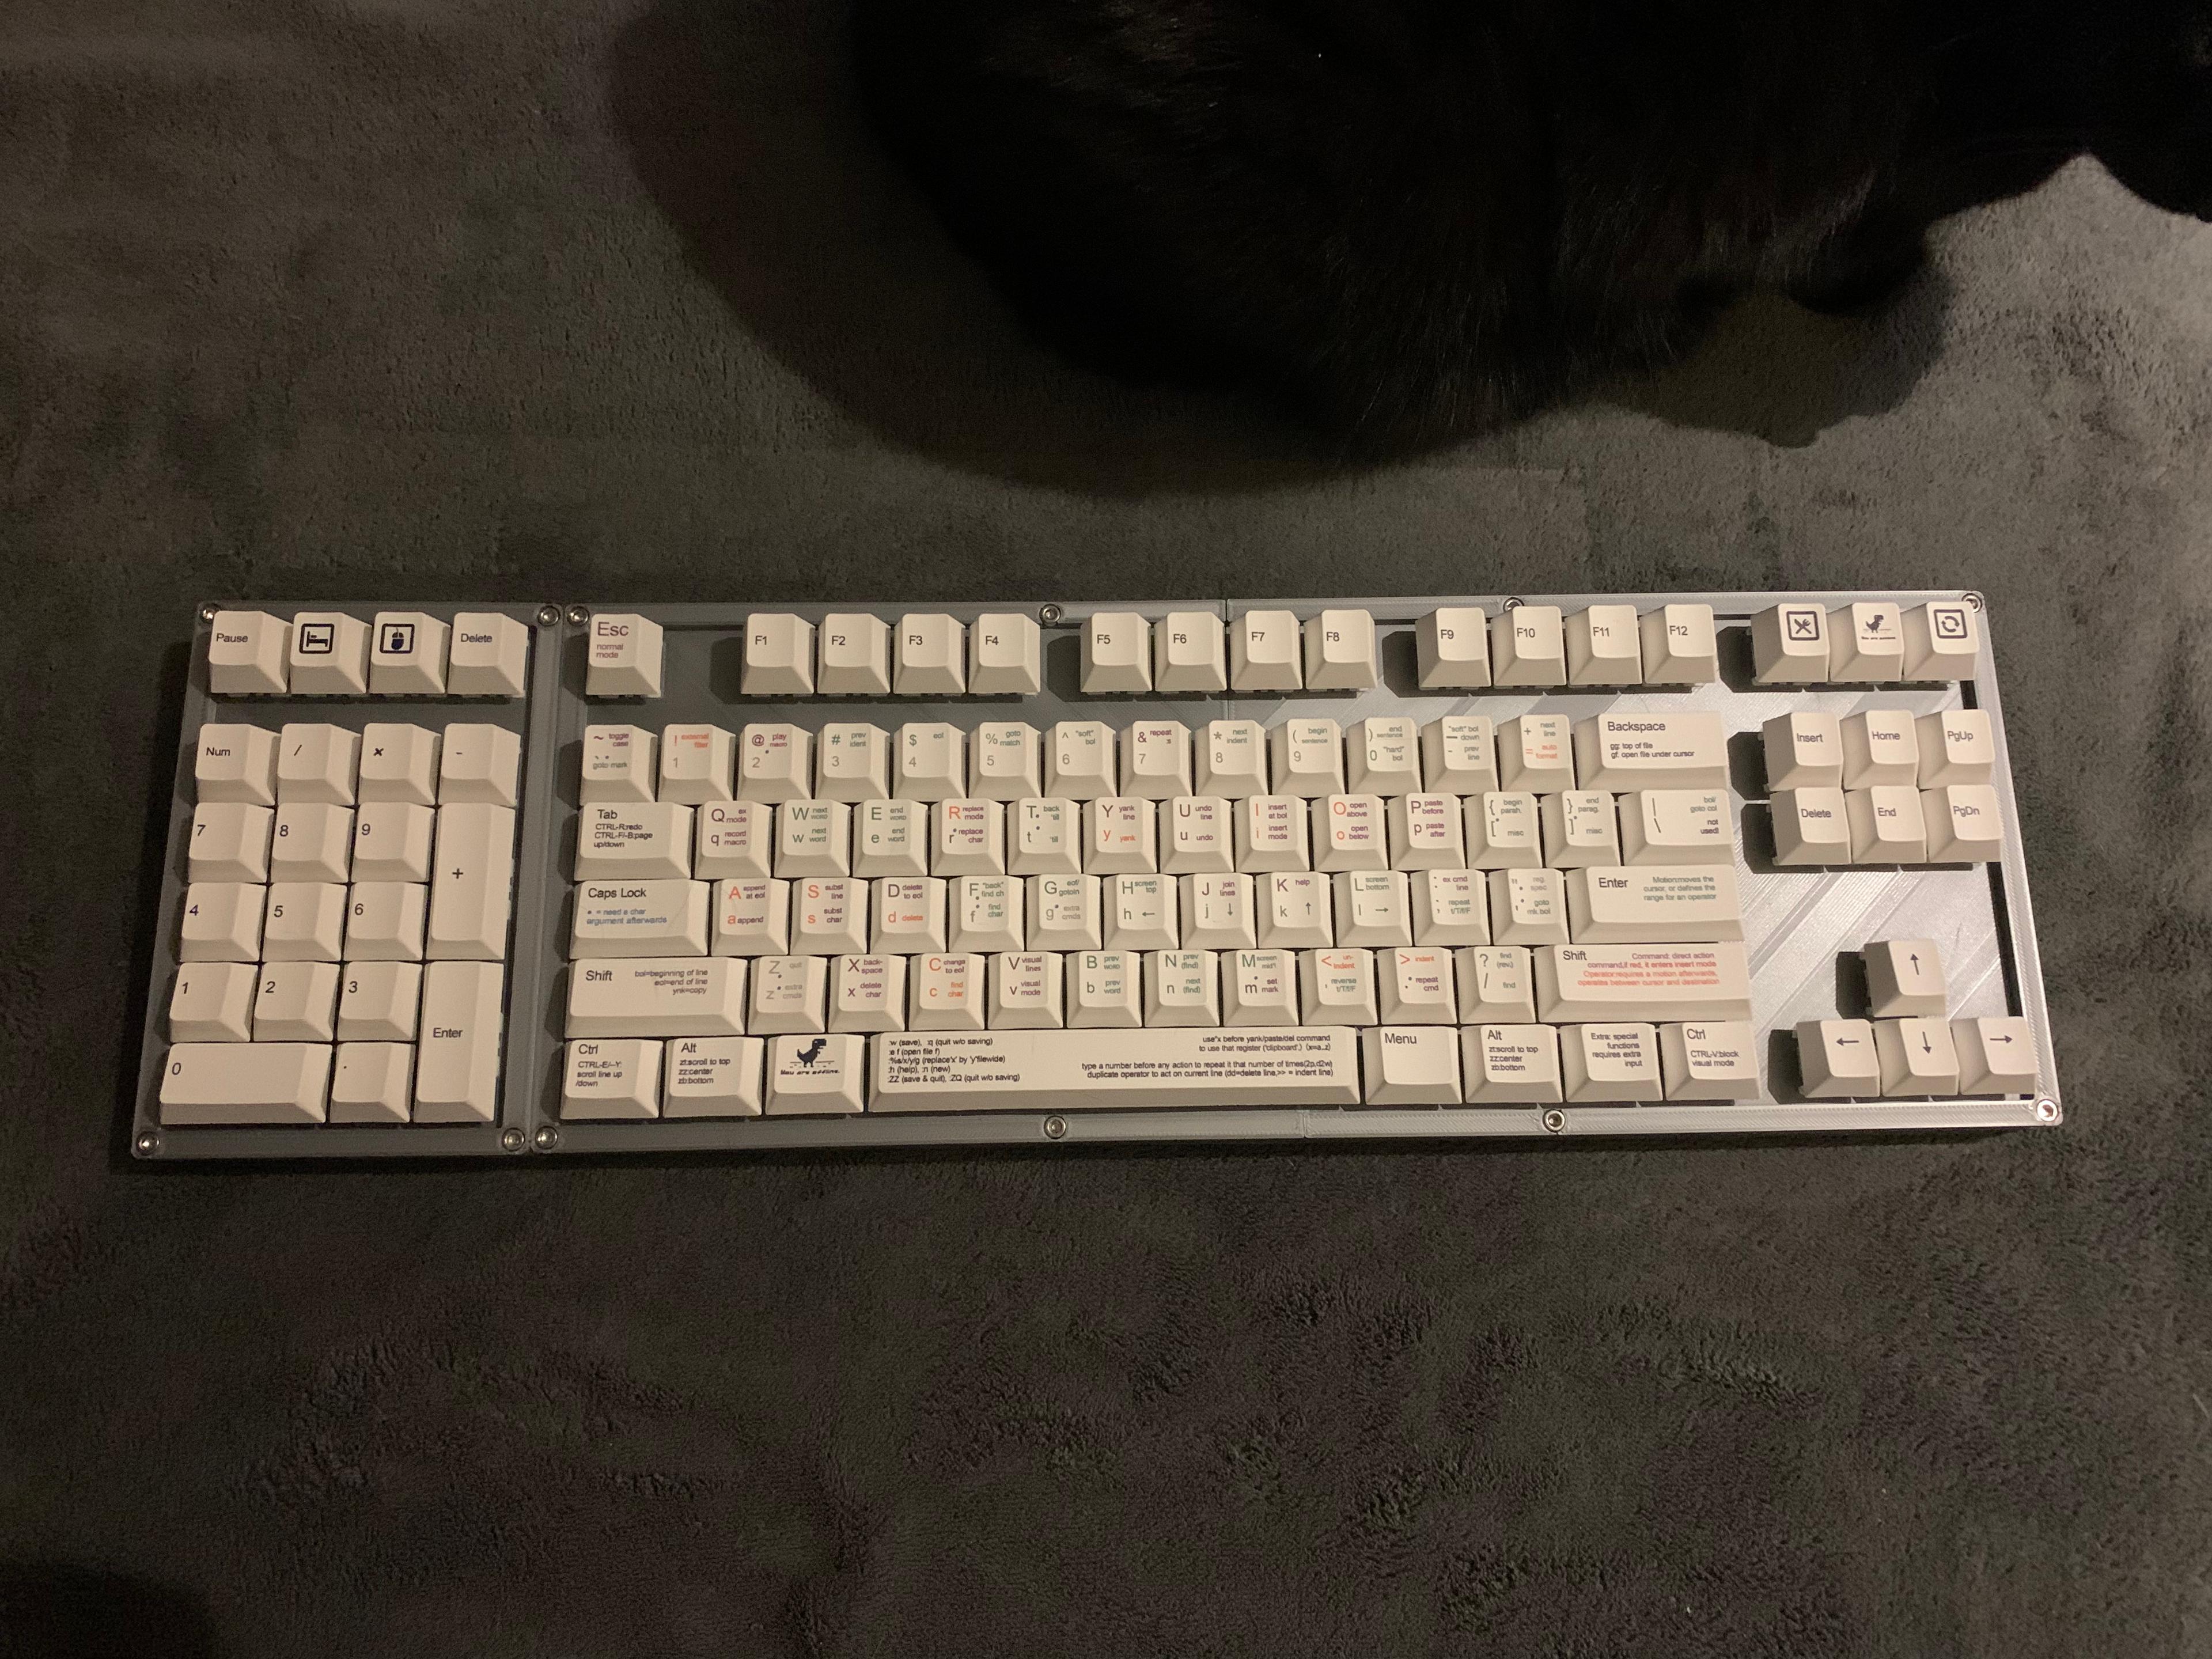
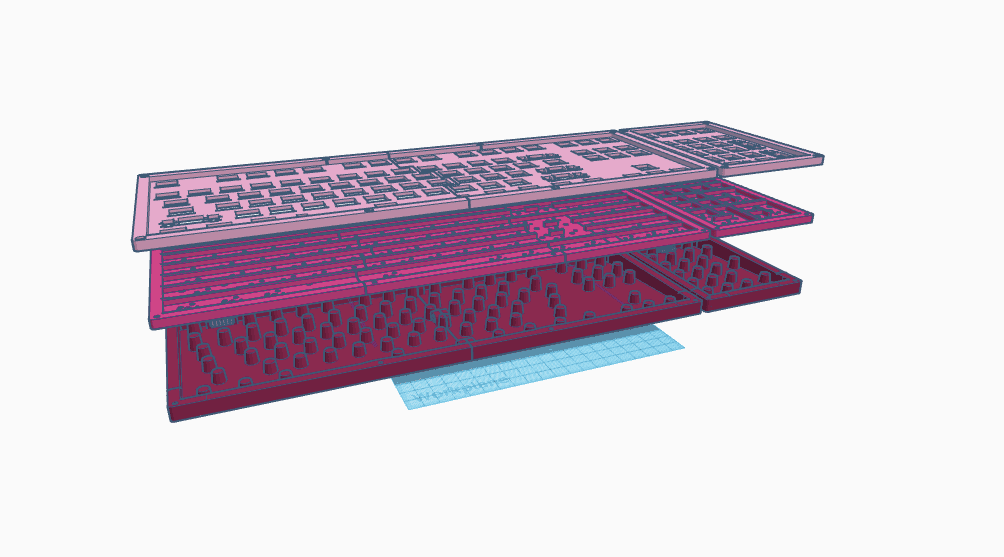
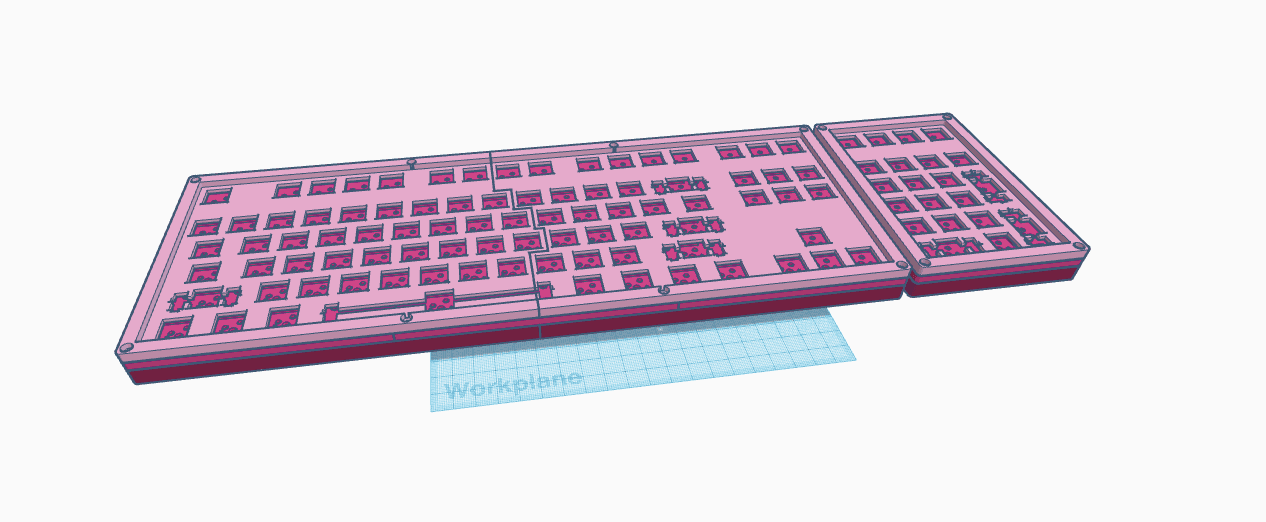
This is a set of a TKL (normal size, full height TKL 80%) and matching NumPad. Both consist of a plate, on which the switches are mounted, a "pcb" on which the hot swap sockets are placed and a base, in which the USB-C breakout board is screwed in, and wired to the controller.
Project completion notice;
The keyboard is done. I have no intentions of tinkering with the designs anymore, unless someone suggests a (valid and needed) improvement.
Update April 30th
- Added uncut plate, pcb and base for the TKL so you can make your own cut (.05 mm gap worked perfectly for me)
- Moved the m2 nut/bolt holes slightly for nicer print
Update April 29th
- I created a custom version of the base just for myself that includes a USB hub and Type A socket, demo on youtube.
- I updated the Base; I removed the two bolt holes on top and bottom; they didn't do much. Left the one in the middle, but not using it myself.
- I also noticed the socket pillars were mis aligned. It is a wonder I haven't pushed out socket ;) Moved the pillars to the correct position.
- Fixed 2 screw holes that got plugged in v3.
- Updated the Plate; it now has 2 slots for M2 nut and 2 tunnels for matching bolt (M2x8 should suffice, to make the plate solid. It should give a cleaner look, and easier assembly.
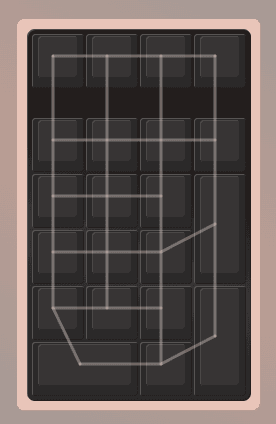
Update April 27th I noticed, while (finally) assembling my numpad, that the hotswap socket pillar under the zero (2u) key was missing and 2 regular 1u pillars were there. stupid. I used cutters and glue, but of course, I updated the design. -> Numpad base v3 Also, I updated the PCB to reduce the width of some plate supports as they interfered with the stabilizers. -> Numpad PCB v3
Update April 23rd This message is typed on the as-good-as-completed keyboard. It took a while, but I finally finished the soldering.
My final findings on this project as I will be taking an extended break from it;
The design is fundamentally flawed; To hold in the hot swap sockets, the pillars are required as I did not want to have to glue them in. But these pillars also cause major headaches assembling the keyboard. I will be thinking of a new method, but don't hold your breath.
New design for the bottom is added
Bottom housing has screws to make it one piece, however, I found that keeping the bottom as two separate pieces makes assembly a lot easier, though the keyboard now is less sturdy.
Added a picture of my soldering work.
As you can see, I'm not very good at it, but it works. Had to move a dataline last minute to a new pin (E0) as the pin i used (D6) is an LED pin, causing weirdness (auto repeating column)
Summary;
This was a fun project, but also a very stressful project. I will not be doing this again. My next project, if I start another, will be based on a hot-swap PCB, manufactured by PCBWay or JLCPCB.
Final note;
This is still very much a prototype. In the time it took me to create this, a lot of other projects popped up, some with nicer designs, some with better construction.
I wish you all happy 3D printing, happy Keeb-ing and see you in the next one.
--- end of update ---
Model originally uploaded to Thingiverse at https://www.thingiverse.com/thing:5887799.
What you will need:
For TKL: 87 pieces, for NumPad: 21 Pieces, Both = 108 (duh).
- Hot Swap Sockets (https://www.amazon.nl/gp/product/B09N7GQ8NG/ref=ppx_yo_dt_b_asin_title_o03_s00)
- Diodes 1N4148 (https://www.amazon.nl/gp/product/B08GY3RZKZ/ref=ppx_yo_dt_b_asin_title_o06_s01)
- Key switches of your choice.
- Keycaps
Also
-
- M3 hardware, assorted. (2 bolts/nuts M3x18 and 2 bolts/nuts M3x20 for the numpad, 4 pcs M3x18, 4pcs M3x20 and optionally 1 M3x12 and 2 M2x10 for the TKL.
- stabilizers (these fit well in the print; https://nl.aliexpress.com/item/1005002552011081.html, one set per build)
- USB-C Breakout board (https://www.aliexpress.com/item/1005005009783320.html, one per build)
- Microcontroller, one per build, I'm still searching to a good one, but aiming for the Teensy 2.0 ++
- Cable from USB-C breakout board to the microcontroller
- Assorted wire
- Soldering iron/solder
- Doublesided tape, kaptan tape, anything that can mount the controller on the backside of the PCB and isolate it from the rest.
Printing
Numpad
The numpad is small enough for any printer to print, just pick a filament, and print.
The 3d model for the base is currently rotated straight for design purposes. Most slicers (at least Cura) can auto-rotate the bottom flat to the print surface, or you can print the model on a nice scaffold of support material for a smoother top-layer.
Print the "plate" and "pcb" as is.
TKL
The TKL keyboard also consists of 3 parts, a plate, a "pcb" and a base.
The plate and base are to be printed in 2 pieces, the PCB in 3, but because I use TinkerCAD, which cannot split models easily, and I don't have the skills to switch to Fusion360, I use my slicer (again, Cura) to split the model and print the pieces individually.
A plugin is required for this; Mesh tools. It's free and can be installed from within the application itself.
Then load the model, right-click, choose Mesh Tools > Split model and then select the individual pieces. You can leave pieces outside the build volume, they will not interfere with slicing what is on the build plate.
The base of the TKL is also in the STL rotated straight for designing purposes, and again, needs to be printed flat, or printed on a nice scaffold of support material for a smoother top-layer
Currently known design flaws and weird issues
- The holes for the nuts are too close to the outer wall, they poke through. It will take a complete overhaul of the design, probably widen the "bezel" to 7 mm at least to fix this. But this model is a Prototype for a reason.
- I printed the base parts slanted (as described above by rotating) but that will leave the top layer staggered.
- The PCB renders fine in OpenSCAD, and after exporting as STL, the model is fine in quick view (macOS spacebar on file allows viewing of the 3D model), there is nothing wrong with it, but when importing in TinkerCAD, somehow a chunk goes missing. I had to do a lot of manual fixes to the model to get it to print properly. This makes changing physical layout a little harder to do.
Firmware
Begin with the vial-qmk fork of QMK, you can find it here: https://github.com/vial-kb/vial-qmk Follow the installation instructions of that branch, or those of QMK.
After installation, go to the keyboards directory and unpack the zip file I uploaded here.
Then you can build and flash the firmware with
qmk compile -kb handwired/rp_numpad_4x6 -km vial qmk compile -kb handwired/rp_tkl_ansi -km vial
(I cannot upload the zip file here, please get it on Thingiverse)
Please note
- this is not a support forum, I built mine for me, please don't ask me to build for you.
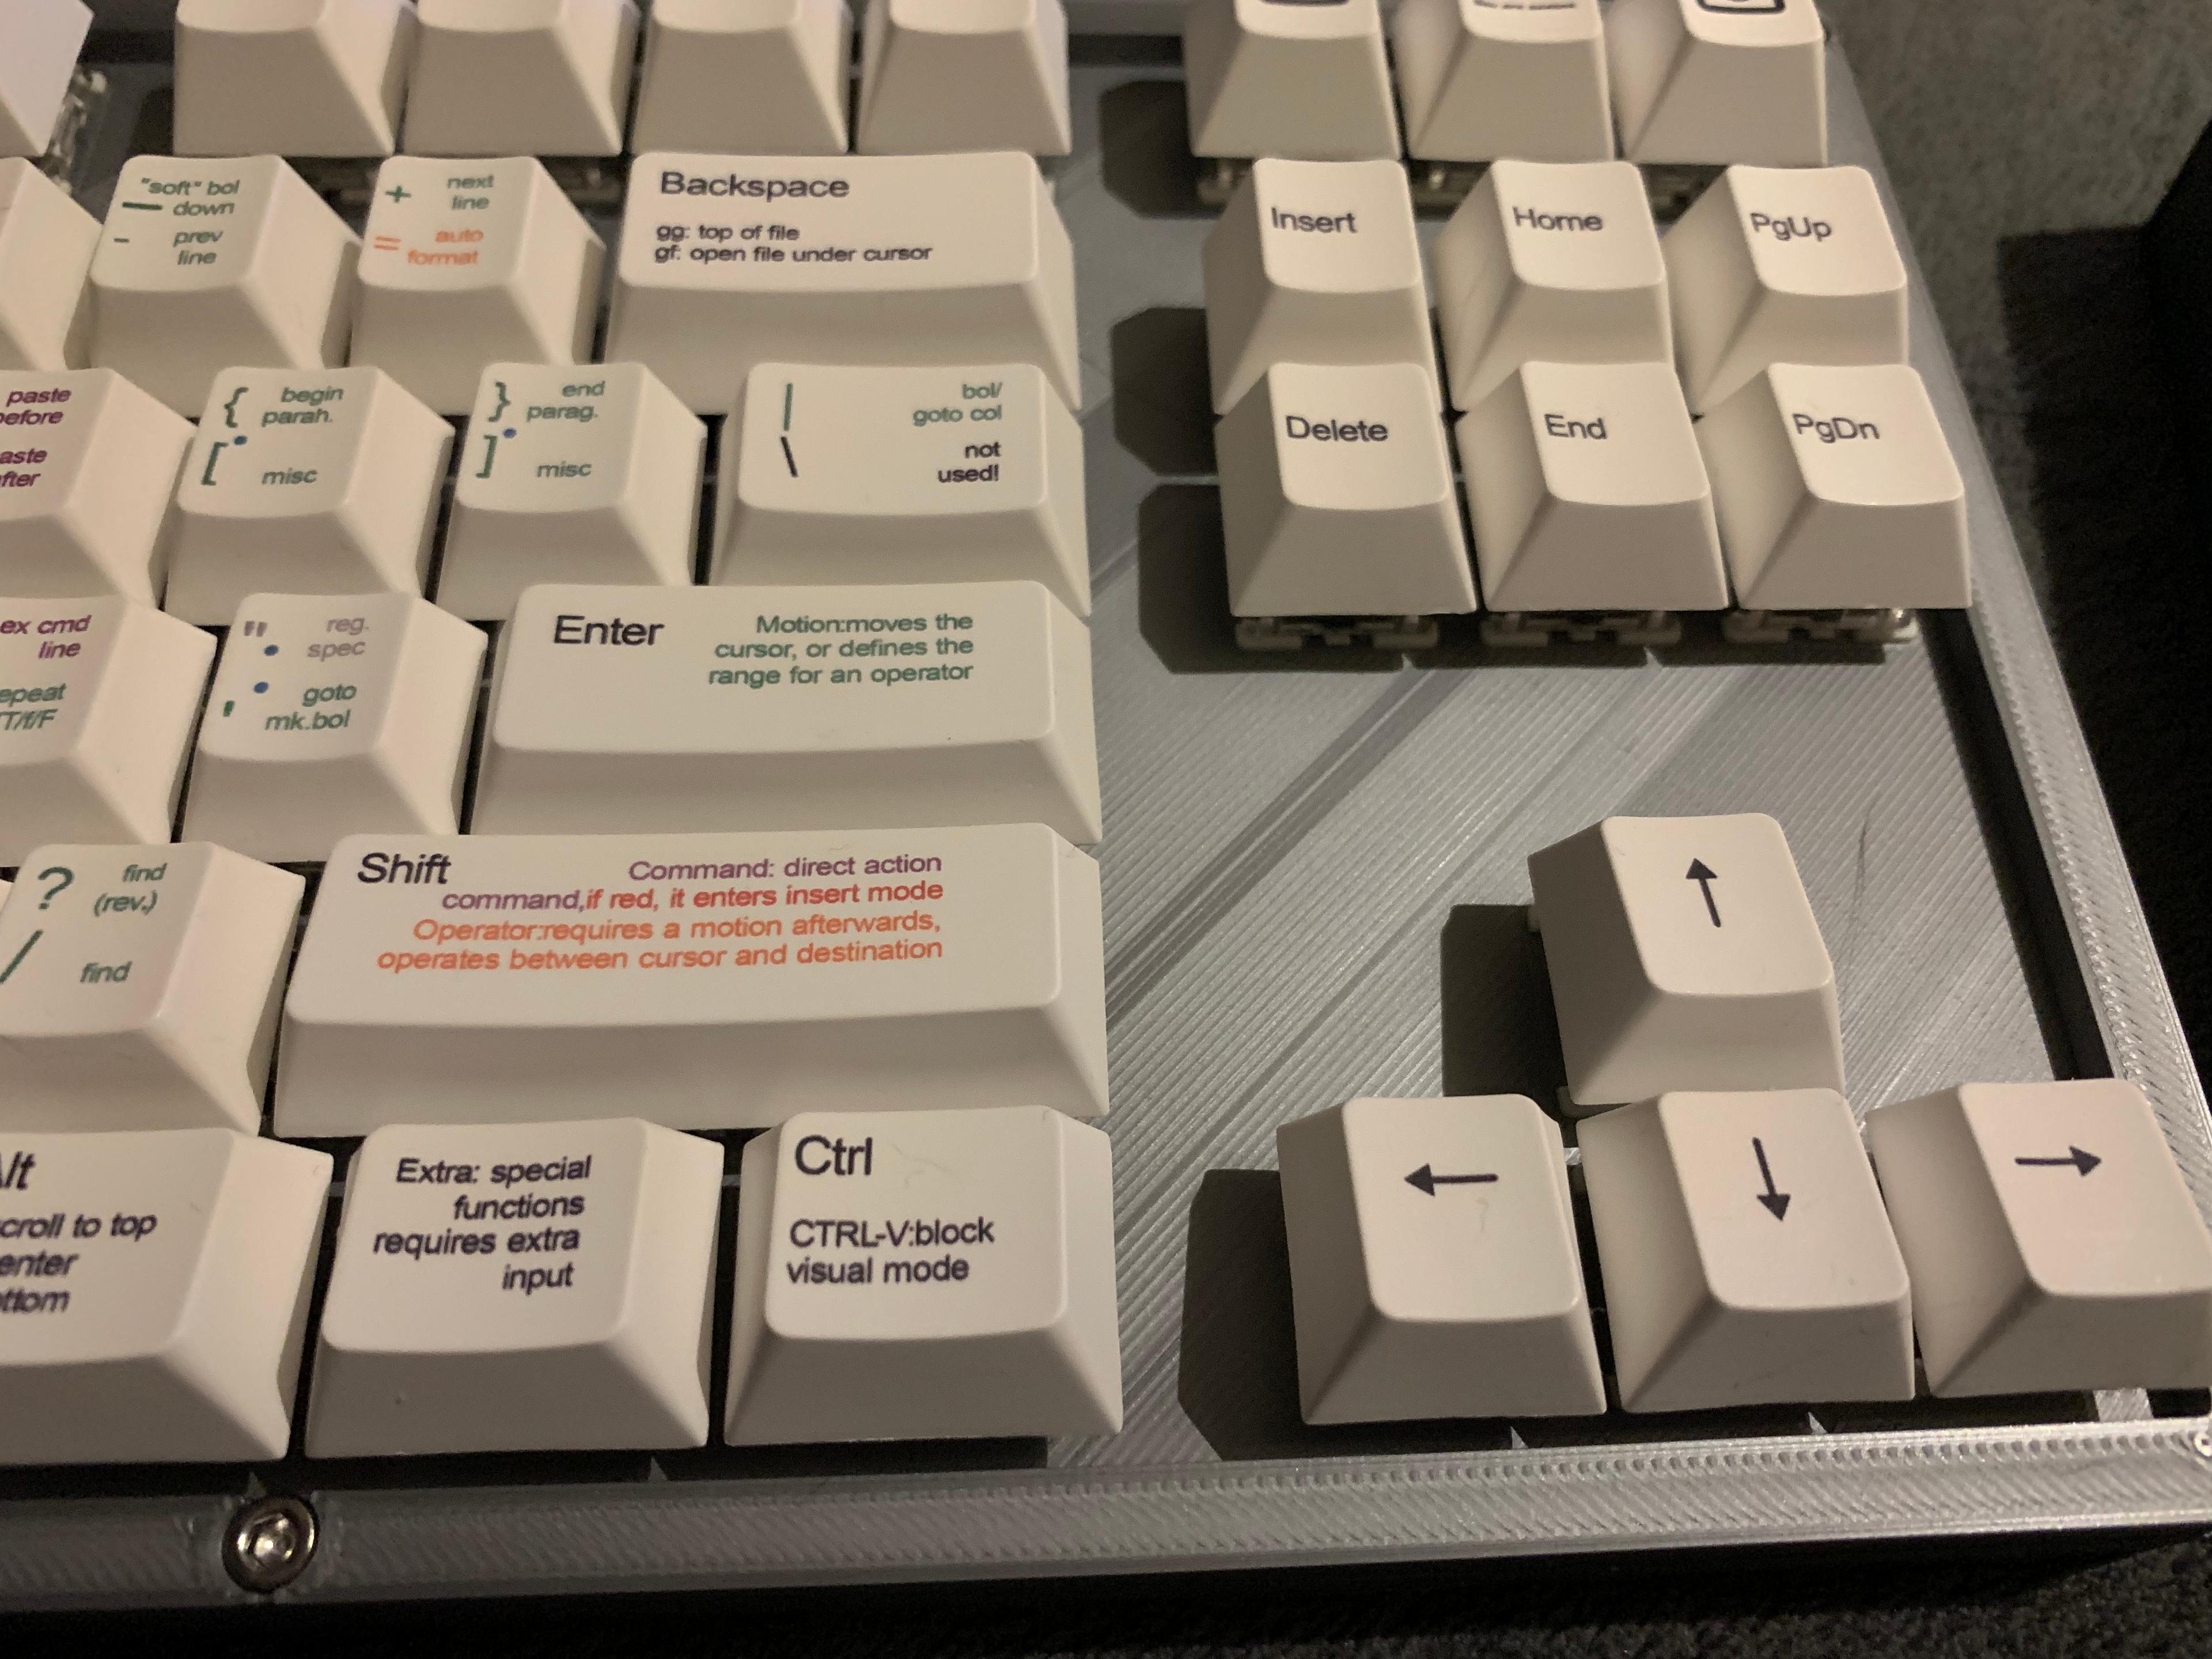
- the keymap for both is incomplete, you will need to do some configuring with VIAL. (that's what it's for)
On the TKL I had to undo the mac-specific keycodes (I took them from Keychron firmware, but they don't work) so replace CMD with GUI, CMD with ALT I implemented the mac-win switch using FN+TAB like this:
- Layer 1, TAB key = TG(2)
- Layer 2, TAB key = TAB
- Layer 3, TAB key = TG(2)
on Layer 2, only implement the changes between mac and windows;
- put ALT and GUI keys in the right spot
- set F1 through F12
on Layer3, set the proper media keys on the F keys
Finally, I disabled CAPS (or rather, moved it to layers 1 and 3)
- Layer 0, CAPS = <blank>
- Layer 1, CAPS = CAPS
- Layer 2, CAPS = <blank>
- Layer 3, CAPS = CAPS
The Numpad is pretty much good to go, but use VIAL to make the top row Macro keys and do stuff with them.
I know they are not perfect, but with a bit of work, the keyboards work fine and all is good :)
Still to do
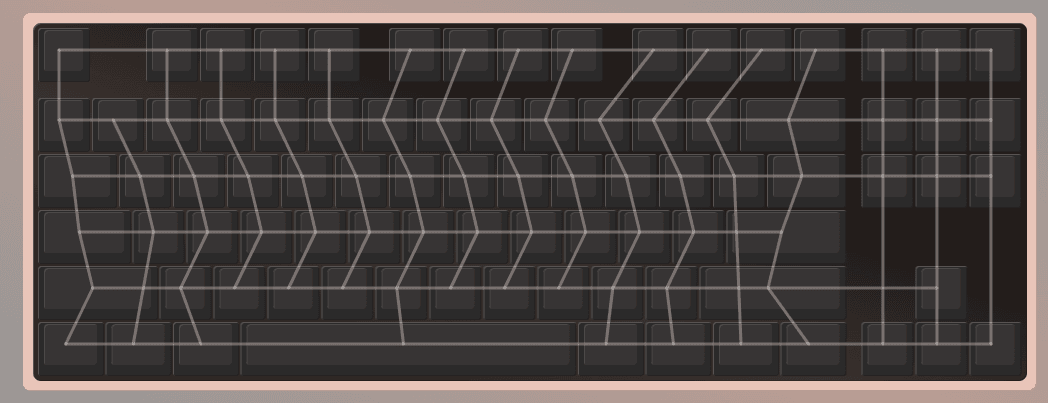
I currently have NOT wired all the hot swap sockets into a grid. It is a task I am not looking forward too (but even without the hot swap sockets, ergo, hardwiring, I would have the same issue) Reason is; I am still waiting for parts (USB-C Breakout and Teensy) and want to do all the soldering in one go. Soldering is done :)
I have not yet lubed the stabilisers. I don't want greasy fingers while soldering, so I am doing the lubing last. Lubed!
I have not yet built the firmware. With KBDFirmware and KeyboardLayoutEditor this should be easy, but have not yet tried it, mainly because; no controllers yet :) I built custom QMK firmware with VIAL support for the TKL and the Numpad.
Because of the USB-C breakout not being here yet, I might have to redesign the mounting for it, and reprint some parts. Redesign is done.
What I will not do
Currently NO LEDs, normal, or RGB, are in this build.
RGB.
I know the QMK firmware supports RGB, but I don't see the need. RGB is fun, but I have my Keychron K8 Pro for that. Also, I don't think the Teensy 2.0 has enough pins for both the key rows and columns AND RGB. If you want to, please remix for RGB support ;)
LEDs.
QMK supports LEDs for Capslock (and other locks not on the TKL) which is nice, but I disable CAPS on all of my keyboards anyway, I never ever use caps lock, but it is part of the keyboard and therefore, the key is there in the picture, but it does nothing. Num lock on the numpad is also for show. I only use windows for gaming, no numpad needed, and on my work computer, which is a Mac, the numpad is always a numpad, there is no num lock on a Mac.
Remix opportunities
It will be very easy to remix the "PCB" part to be lower and therefore support Low Profile switches. Just remember; Optical switches not supported, only Cherry MX style 3 of 5 pin electrical switches.
RGB, LED; it is possible, knock yourself out, just keep the license in mind.
Other keyboard layout designs
I created these models using a Keyboard generation library in OpenSCAD, but I had to hack so much of it to (a) make it work without creating faulty plate/pcb designs and (b) add the bigger holes for the hot-swap-sockets and (c) remove all the "pcb traces" which are only for show in the library, I cannot recommend doing that yourself.
At this time I don't know if I am allowed to redistribute the (altered) library, so I will not do that as of yet. Just know that any design is possible, less rows, ortholinear, 40% layouts, all possible. The OpenSCAD script is used only to generate the bare plate and pcb, and though the software can generate the entire keyboard, I found it too cumbersome to add all the other stuff in OpenSCAD (like the bolt/nut holes, the splits of the models etc) so I used TinkerCAD for that.
(Can make public upon request)
Affiliation and attribution
Yes, I used a library by someone else, but no, I did not copy anything from anyone. Any likeness is purely coincidental (because this is what keyboards look like...).
The links I posted to various shops are for your convenience only, I am not an Amazon or Aliexpress (or any other) affiliate, I do not get paid to link to anyone, nor do I get a kickback fee. Links are there to help YOU and nothing else.
The library is found here; https://gitlab.com/alexives/keyboard_lib But please note, this is the UNALTERED library, which does not work properly for me with 90 degree rotated switches (like the enter and + on the numpad)
Final notes:
License: I cannot select a license here on Thangs, instead I need to upload a text file?! I will try to find one, but for now, please respect the license I picked out; "Attribution, Share-Alike, Non-Commercial". I don't want to see my design on any webshop. I designed this because I wanted to, not because 3D printing your own keyboard is cheaper than buying one, just because it's fun. The keycaps in the photo's are NOT 3D printed. They are a keycap set from AliExpress; https://nl.aliexpress.com/item/1005004770575093.html Of course, the switches, unseen in the photos, but certainly there, because it's a keyboard; Gateron G Pro 2.0 brown. I will probably be switching them to Keychron K Pro Bananas or Mints, but let's finish the build first ;)
Please treat this model as was intended; A prototype, and -- as far as I can see -- the first(*) 3D Printed HOT SWAP keyboard.
ENJOY!
*) Spoiler alert; I was the first as far as I can see to start working on a hot swap project, but while I was busy, others have popped up with much cooler features. I have seen a wireless split tented keyboard with solar charging and an OLED panel, to mention one ;)