TheUltiPad MK2 - Now with OLED Display and RGB
Model originally uploaded to Thingiverse at https://www.thingiverse.com/thing:5580026.
I have loved using my UltiPad (https://www.thingiverse.com/thing:4248565), used it every day since i first designed and prototyped it ... but it started to feel a little dated. An since the UltiPad is one of my more popular projects..and since i'm a glutton for punishment... i present TheUltiPad Mark Two! (something, something, still not good at names...)
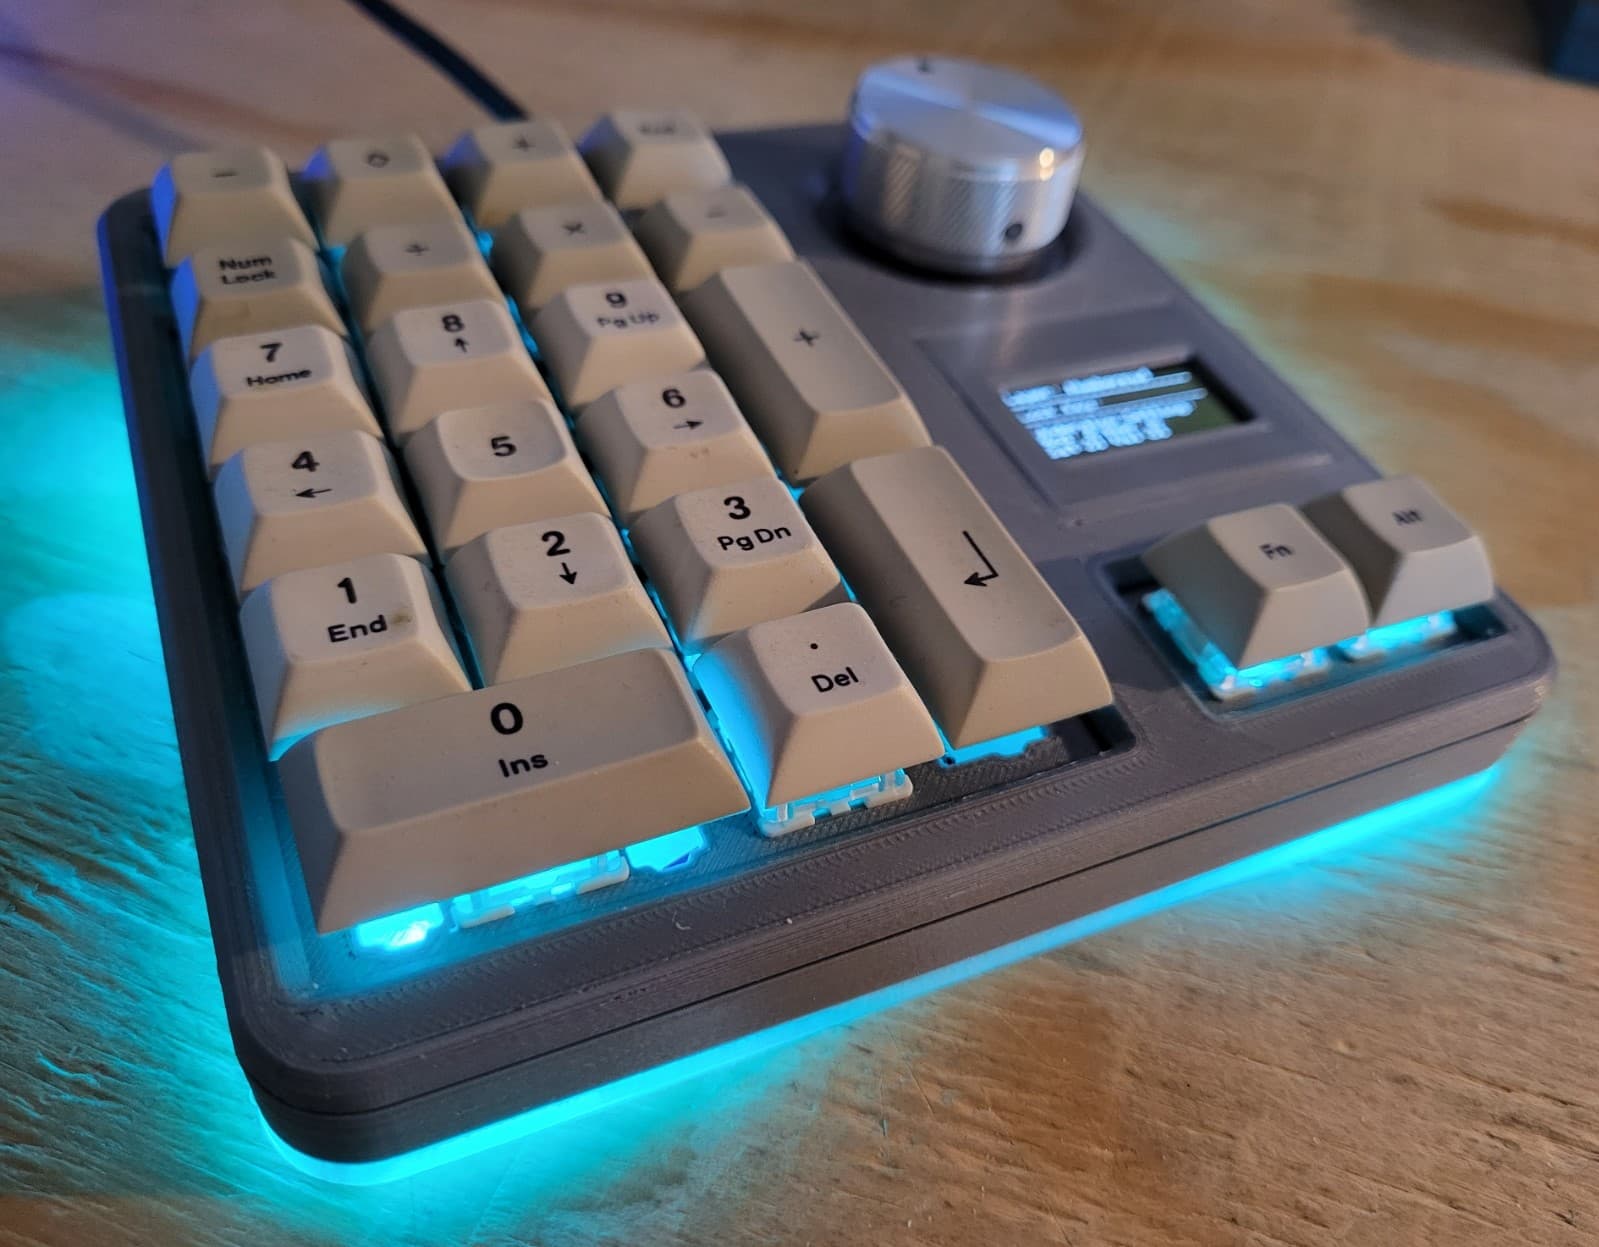
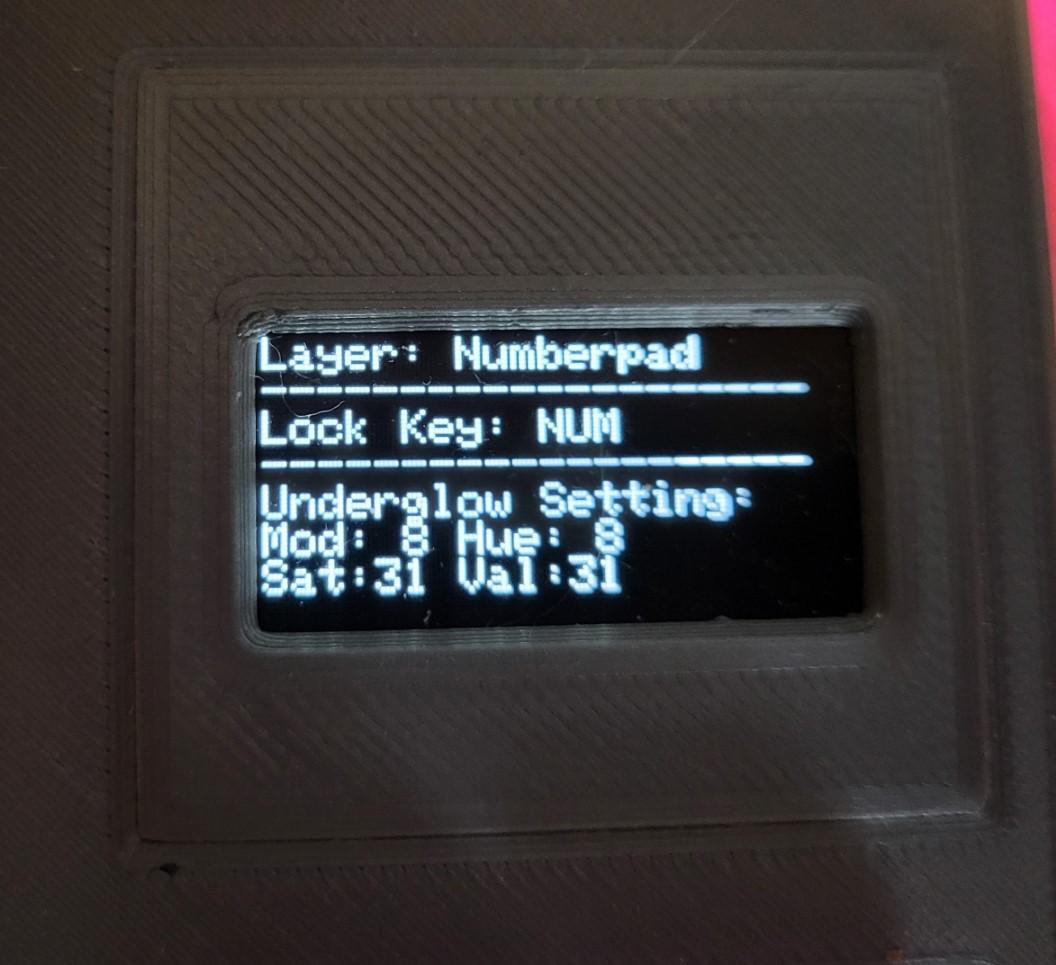
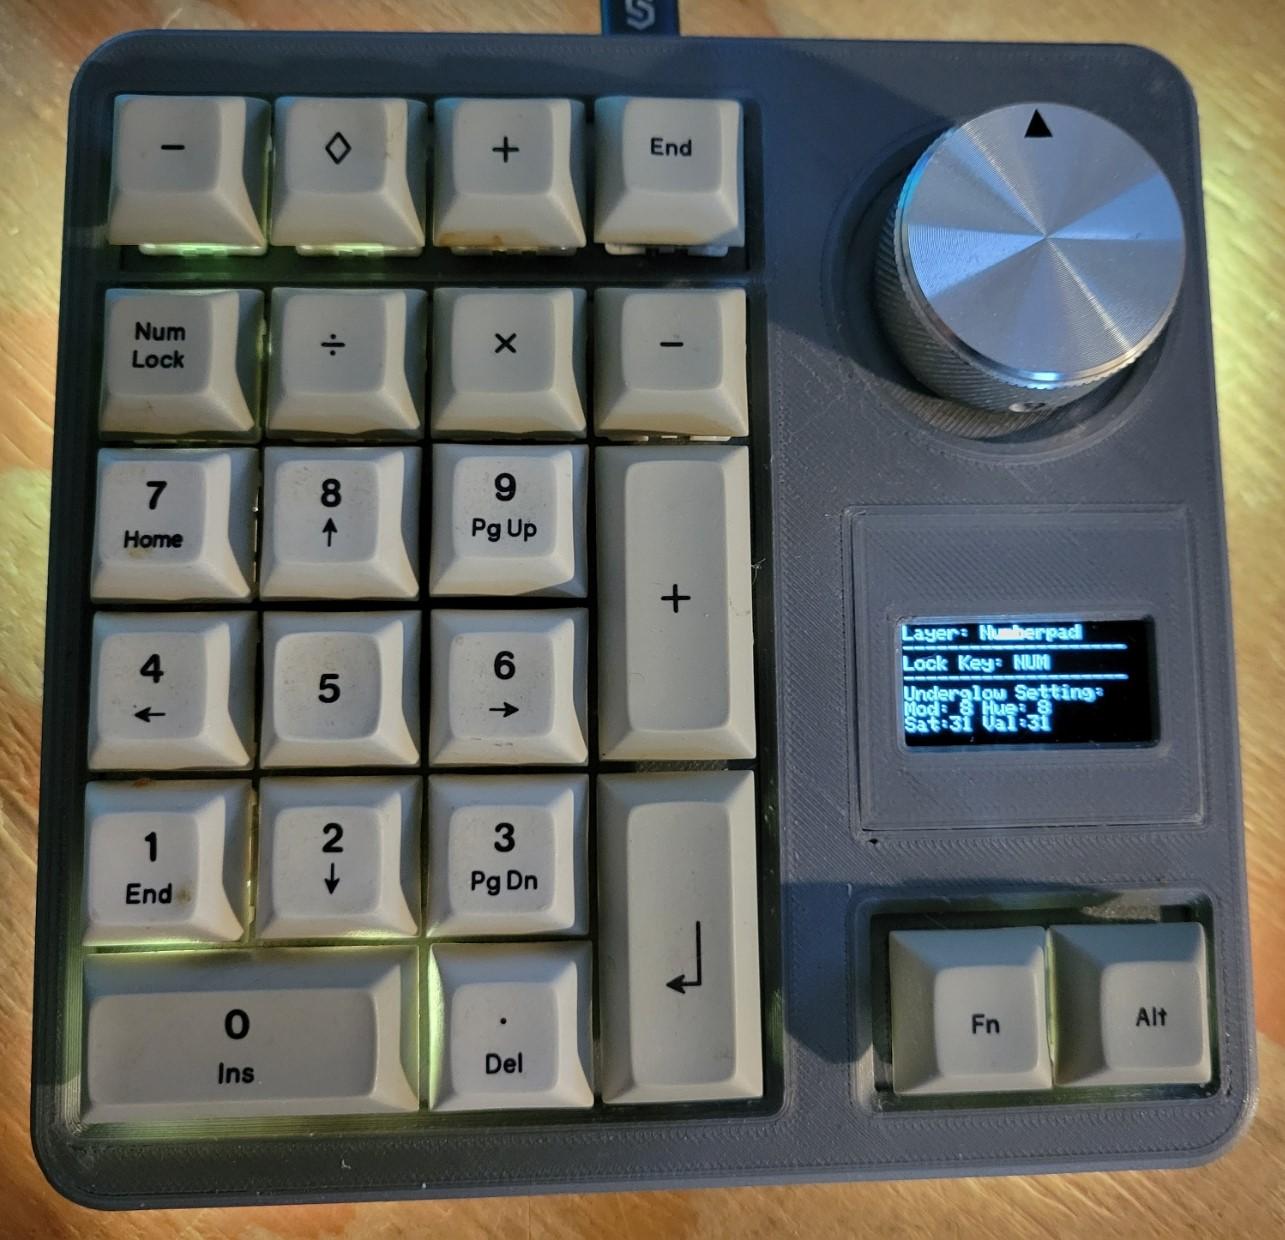
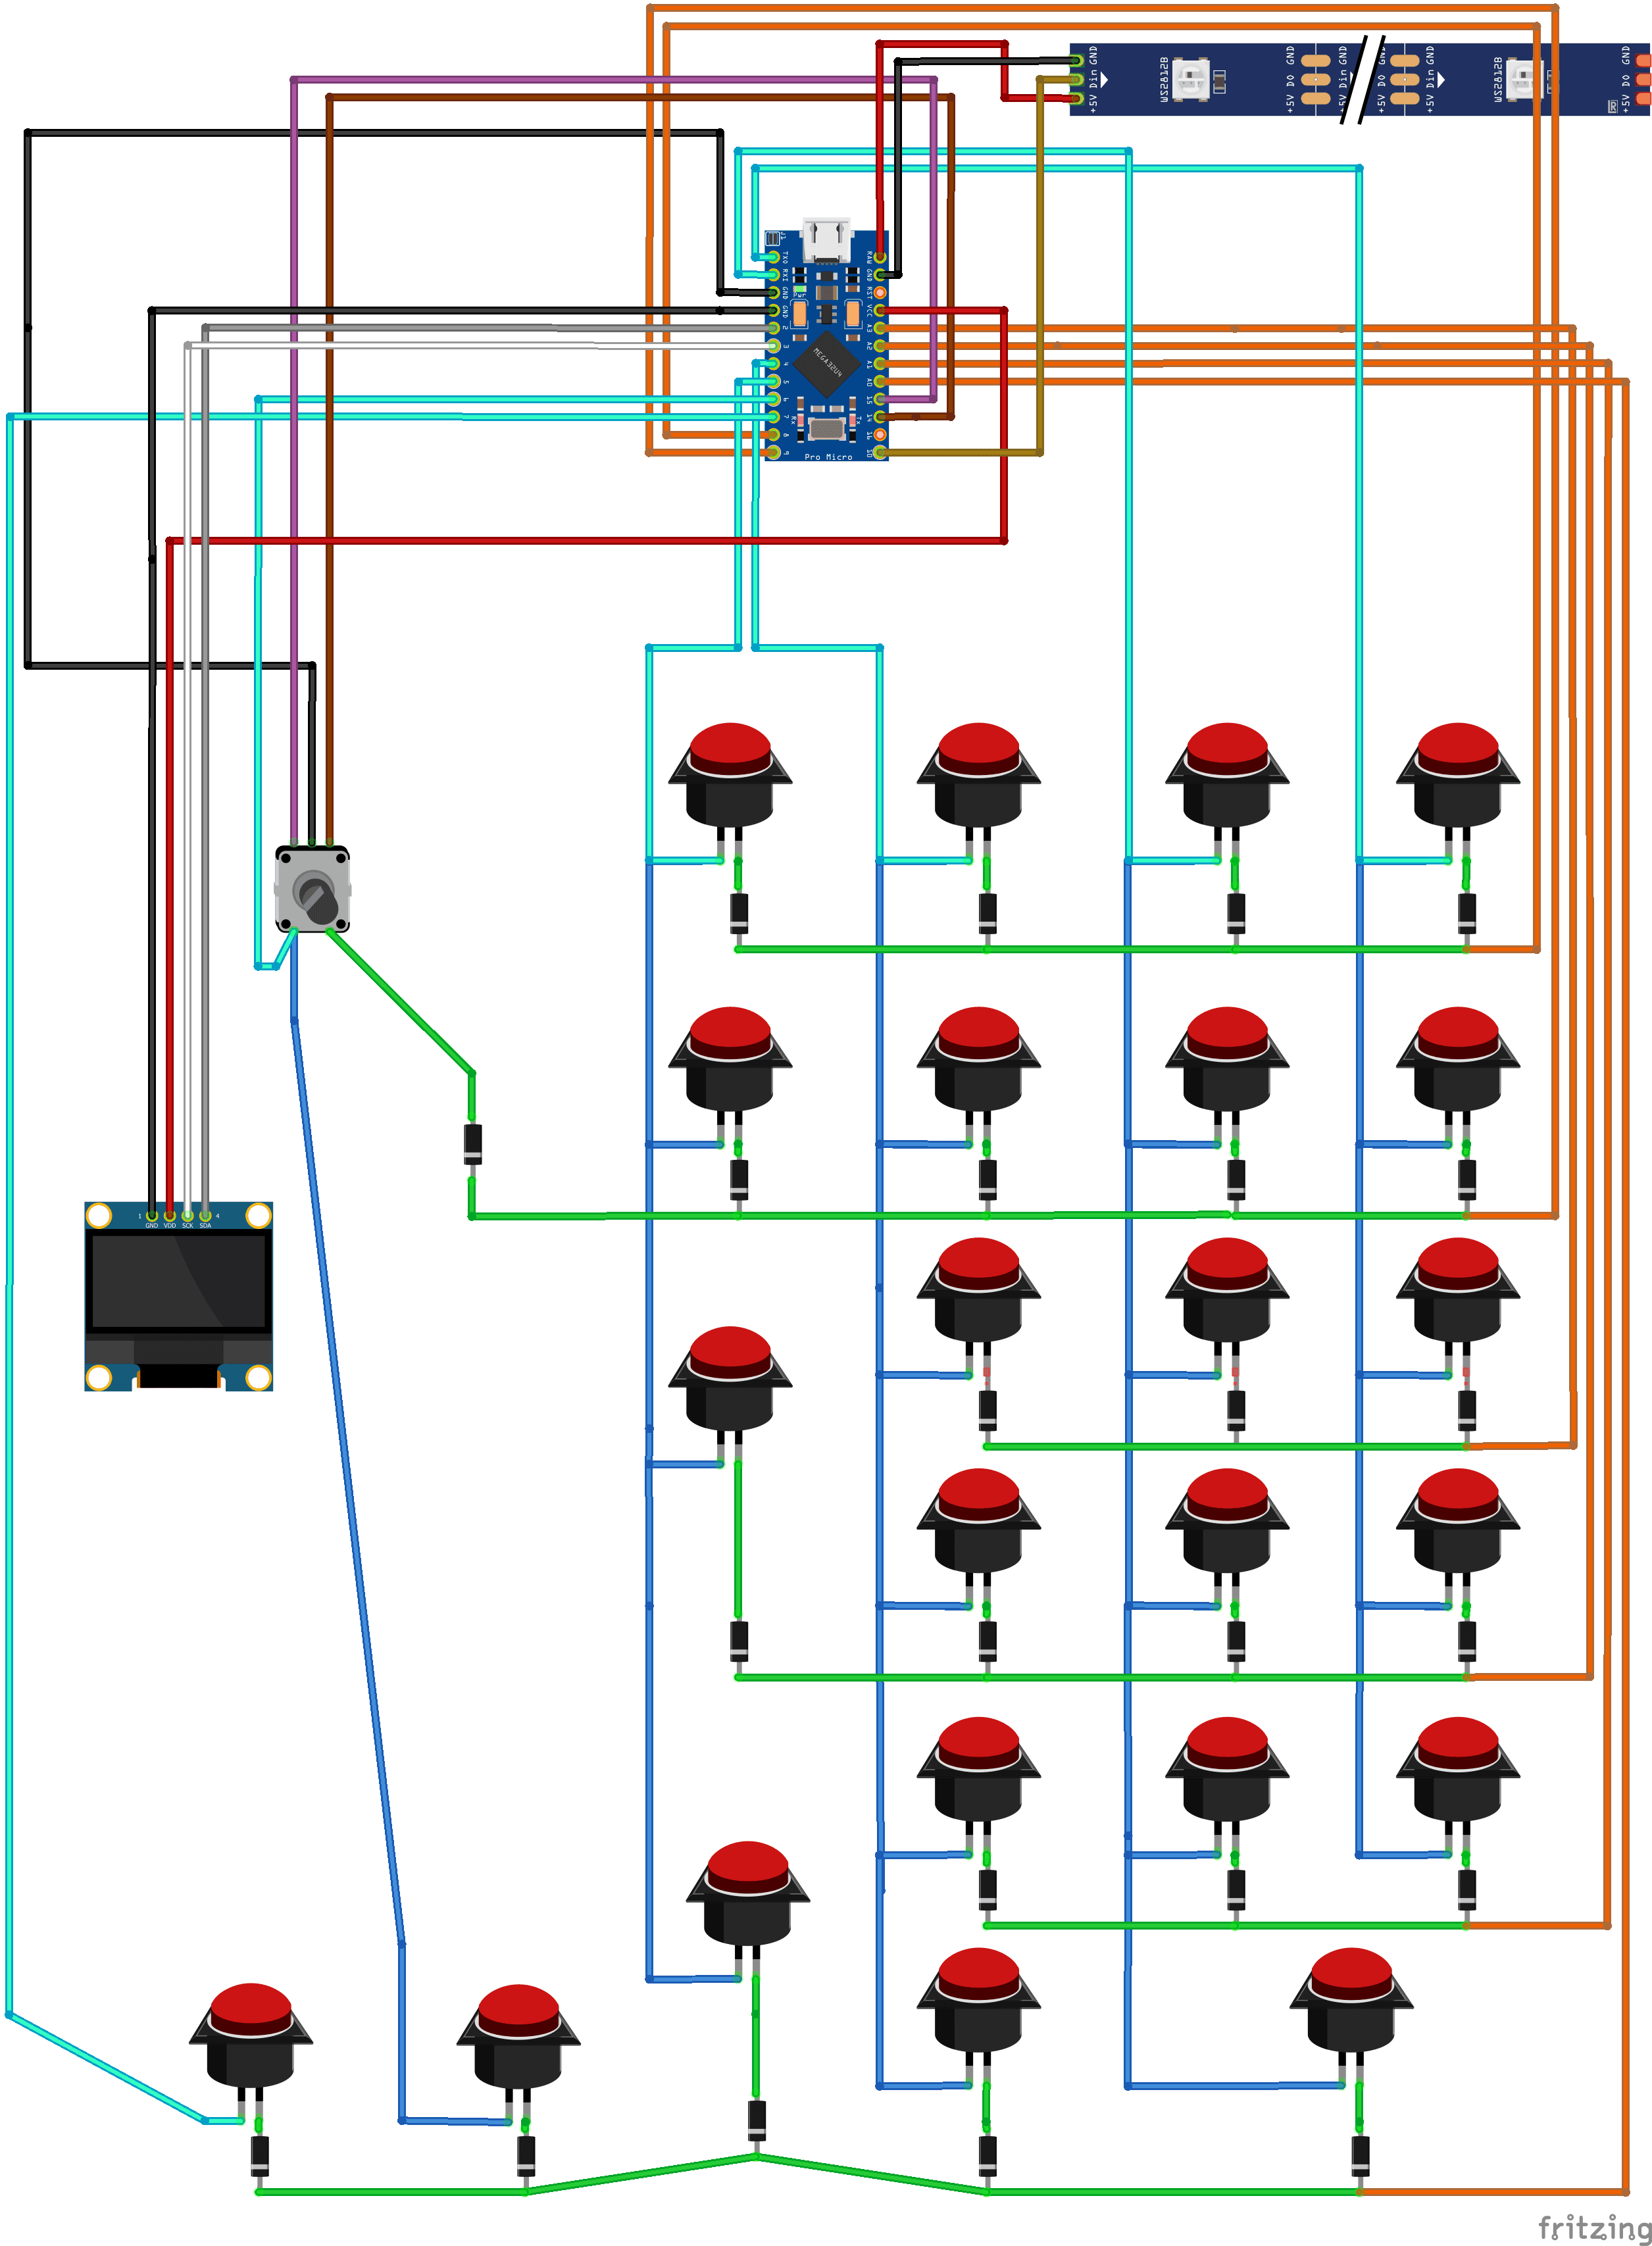
It still has the 23 key number pad with media controls (four extra buttons at the top), Two function keys for multiple layers, and the rotary encoder... but now it has under glow (as much as you want!) and a neat little OLED screen to describe the layer, lock keys (num, cap and scr) and the under glow RGB settings.
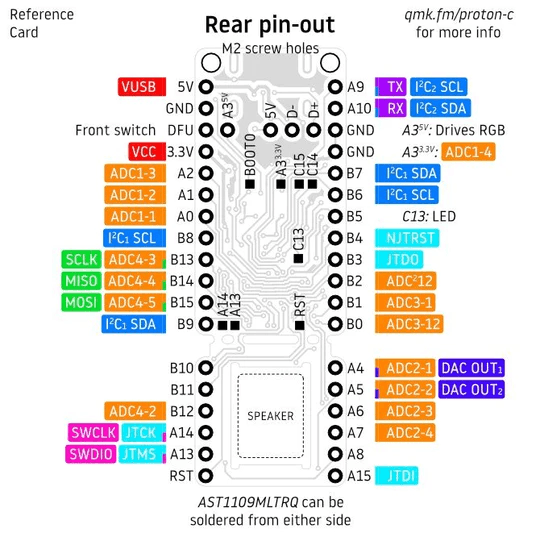
The only hitch here, is I had some QMK Proton-c controllers sitting around waiting to do something, and i didn't realize that they are getting hard to come by...so i designed and built my prototype with the proton-c.
So...I went back to the drawing board and redesigned the lower half to support the USB-C versions of the pro-micro.
So now you have both, or either. You get to pick, that's what i'm saying.
I uploaded the raw QMK firmware folder (just download revere521.zip.txt and rename it to revere521.zip) and place it in the keyboards folder of your local QMK build env. - then you can customize/change the firmware and recompile to your liking.
There is a compiled hex (pro-micro) and bin (proton-c) if you just want to use what I compiled. Both firmware works and has been tested, and its essentially exactly the setup for the original UltiPad - with updates and additions for the OLED and Neopixel LEDs.
the only differences between the two are the proton-c version is setup for four (4) LEDs and the pro-micro version is setup for five (5).
Otherwise:
- The Keypad is the number pad as labeled
- The 4 top keys as PREV, PLAY, NEXT, STOP.
- The rotary encoder is Volume Up and Down, with the button as MUTE.
- The two bottom keys are setup as TT(1) and TT(2) (both a momentary and a toggle with double tap) a. Layer 1 sets all the numbered keys (0-9) as LCAG(1), LCAG(2), etc. and i use autohotkey as an app launcher for LeftCtrl, Alt, Win + a number b. Layer 2 sets all the numbered keys (0-9) as LCAG(A), LCAG(B), etc. and i use autohotkey as an app launcher for LeftCtrl, Alt, Win + a letter (a through j) RGB Control:
- Fn + NumLock = changes the RGB Mode Forward (Alt + Numlock Reverse)
- Fn + Divide = changes the Hue forward (Alt + Divide Reverse)
- Fn + Multiply = changes the Saturation forward (Alt + Multiply Reverse)
- Fn + Minus = changes the Value forward (Alt + Minus Reverse)
Parts List:
- 23x Cherry MX switches of your choice
- There are recesses for Cherry MX Stabilizers but i am using it fine without stabilizers
- The really nice mxuteuk 35mm machined aluminum knob from Amazon
- Diodes: In4148 - (Amazon or Aliexpress, or wherever)
- EC11 Rotary Encoder - (Amazon or Aliexpress, or wherever)
- Proton-C - you can read about it and check stock at various suppliers here
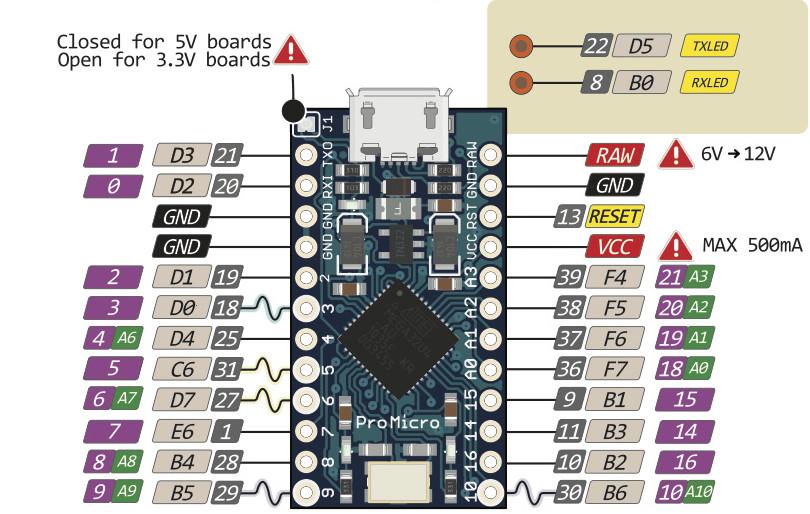
- Pro-Micro USB-C - you can get these from Amazon, or get the original from Sparkfun - i used these
- 1.3 inch OLED I2C Display i used this one
- WS2812B LED buttons - I used these
- Any USB C cable for the Pro Micro or Proton-C
- 4x M3x14mm pan head machine screws (to assemble the case)
- 2x M3x6mm pan head machine screws (to attach the feet)
- 2x M2x4mm machine screws to attach the Proton-C only (pro-micro must be affixed with glue or double-sided tape)
- 4x M3x4x5 Brass threaded inserts (to insert into the TOP PLATE screw holes)
- Clear or White filament for the bottom of the case i used this
- Various wire, soldier, etc. etc.
My other stuff (mostly Keyboards) https://www.thingiverse.com/revere521/designs
