
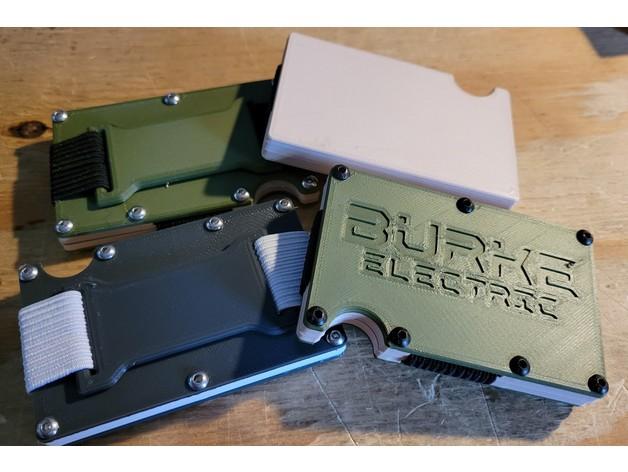

TheSummit - A slim minimalist wallet - card holder/money clip
Model originally uploaded to Thingiverse at https://www.thingiverse.com/thing:5867497.
A friend of mine recently challenged me to design and print a minimalist wallet based on a popular, yet pricey, one he saw online. Even though there are plenty of these available to print already, i took the challenge to see if i could follow these strange little items down into the depths their respective rabbit holes.
Questions about the difference between a wallet and a card holder ... what kind of things do you really need to carry with you? ... is it just about forms of money? ... what do you want in your pocket? ... why not just use your pocket? ... does everyone have pockets? ... is a wallet just a portable pocket? ... no i have to stop ...
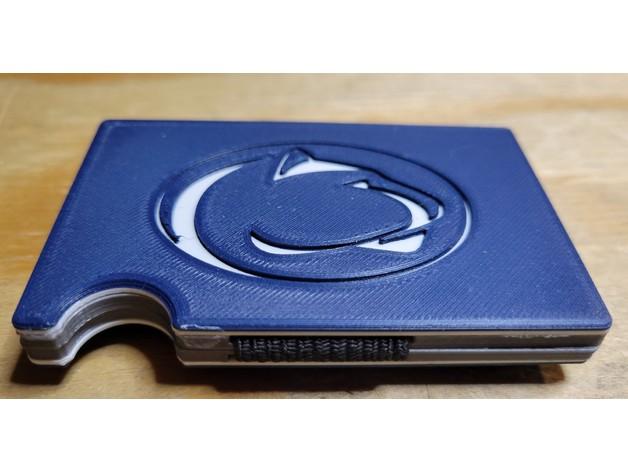
I did that, probably a little too much. So I present to you 'TheSummit.' A minimalist wallet that's definitely not borrowing design elements heavily form said popular minimalist wallet (mine rises higher anyway and avoids silly relationships to the word "fold".)
This design did present some challenges that needed to be accounted for, and from examples I've seen, some pitfalls to at least explain.
-
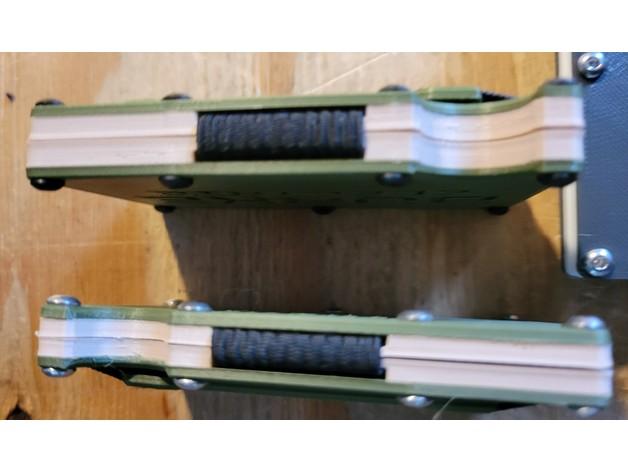
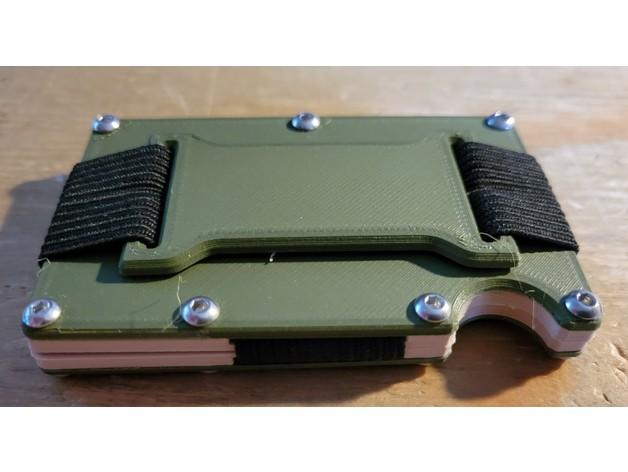
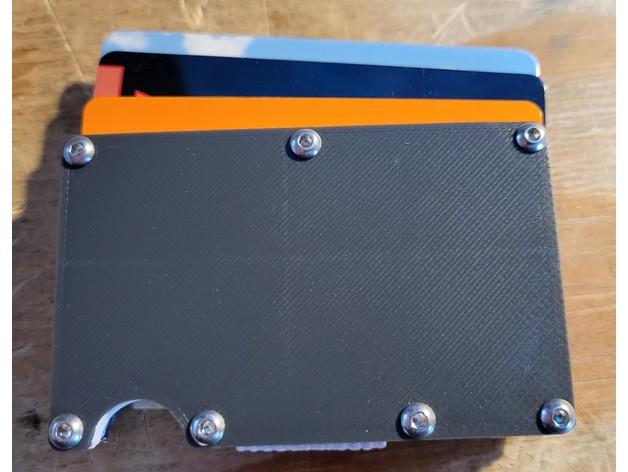
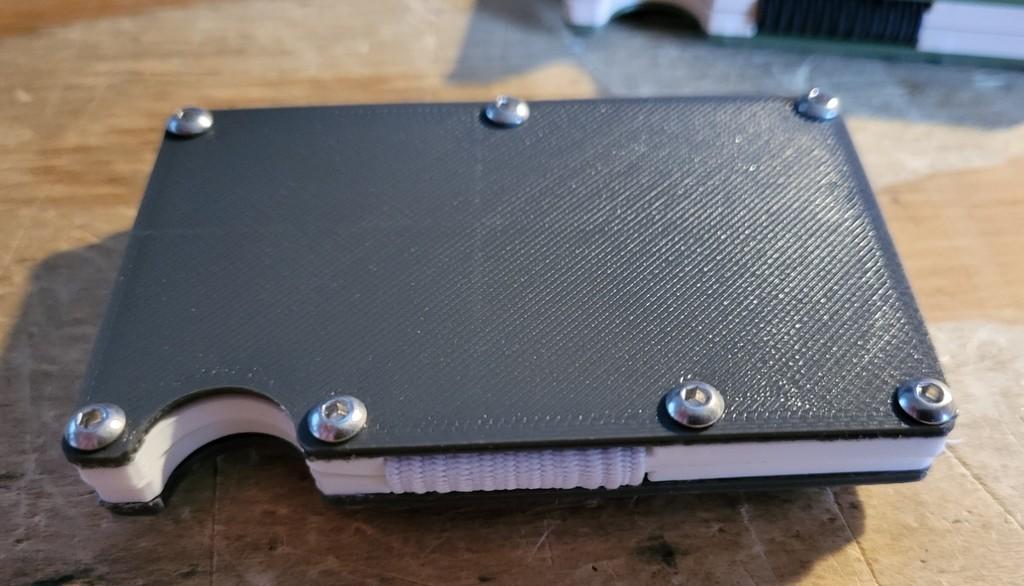
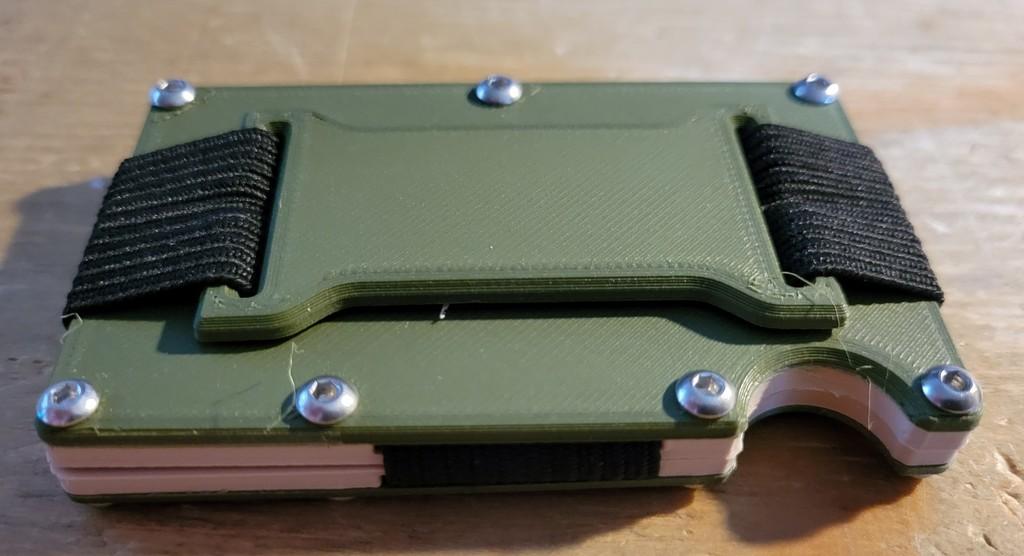
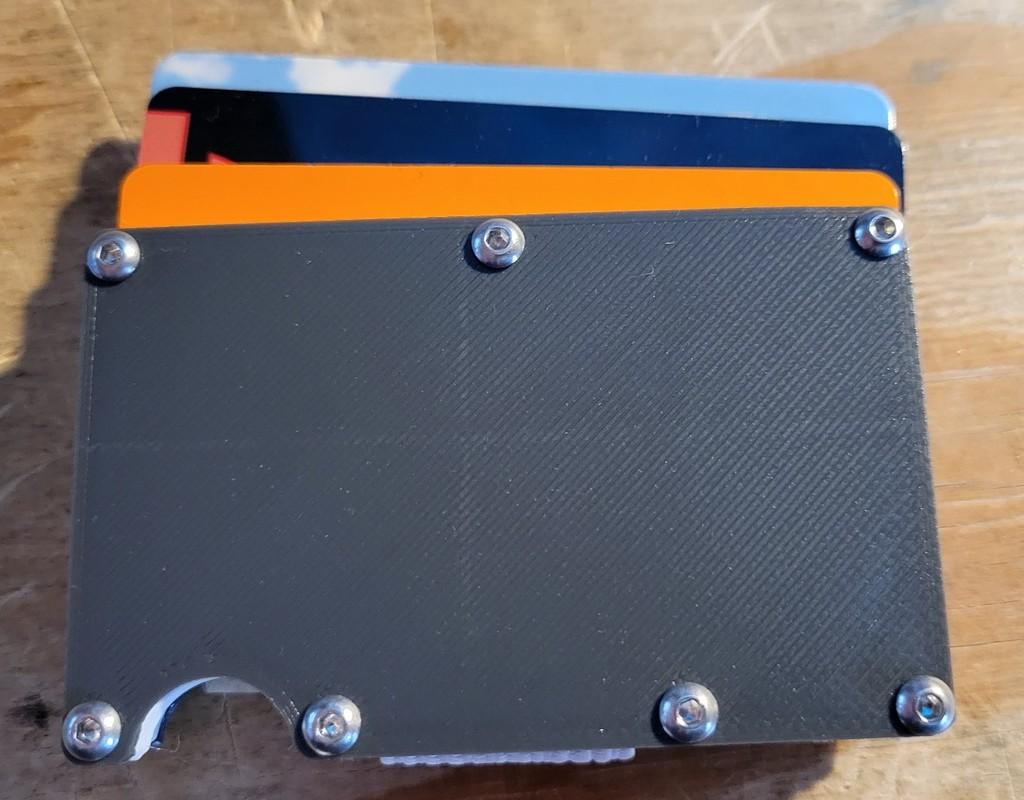
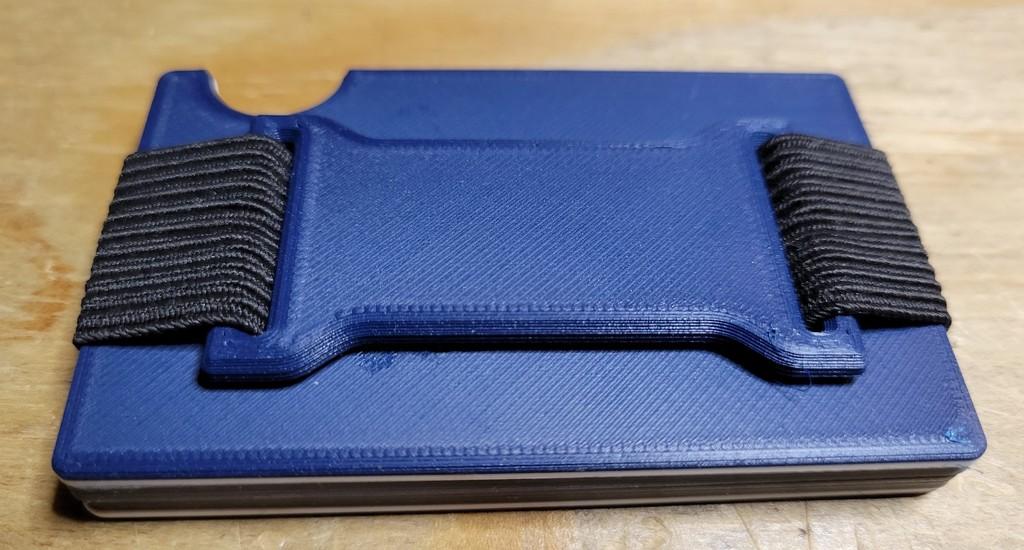
Yes there are screws, and yes they are not counter sunk. The original screw version uses 14x M3 4mm machine screws. You have to sandwich the elastic in between the two plates somehow. It is doubled in places - and with sewing that can create some thickness - you want some strength to hold it all together. Pan head screws keep the screw holes small, and the area around the screw holes remains thick. The pan head screws also give it a unique design element of my own.
-
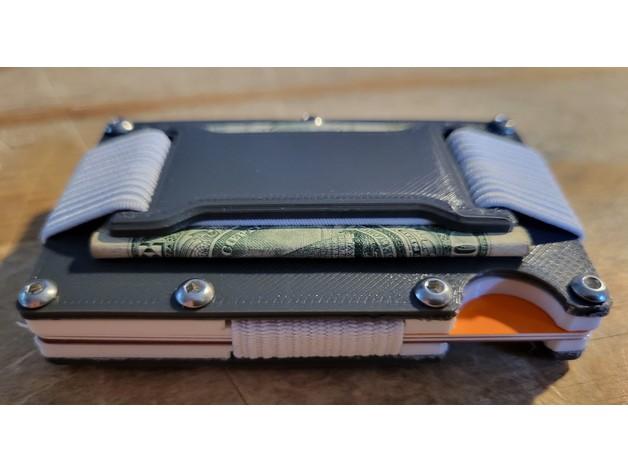
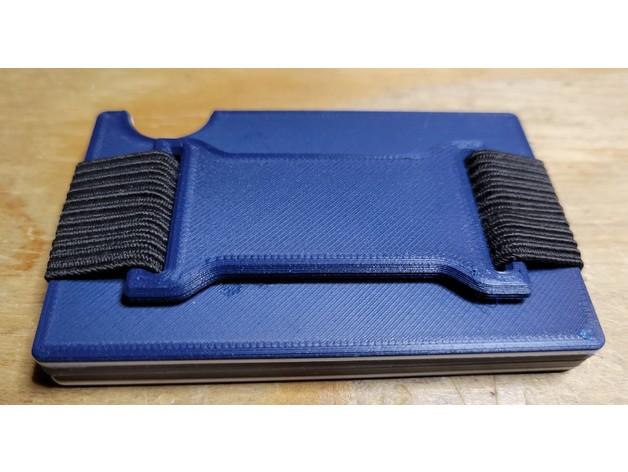
Sewing things can be tough for those who have not, or do not, sew. I tried to make it easy-ish and also strong (your cards and money are theoretically in there). The elastic is easy to source and really not that bad to put together - BUT - if you want, you can get replacement elastics made for that popular wallet (which are surprisingly cheap) - and they should work on this one just fine.
-
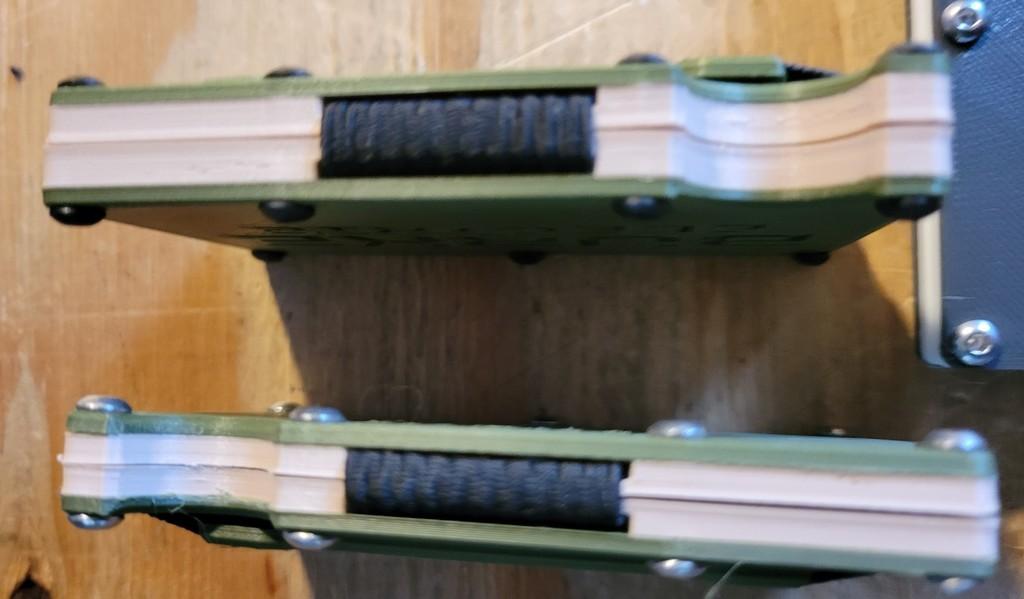
The wallet needed to be thin, and daily-use strong. That's two things when added together that can be difficult to accomplish with printed objects. I went through several iterations of thicknesses, and landed on what we have. If printed with 50% infill, there should be no worry with the regular version being a front pocket wallet. I might choose the "Thick" version (which has a 1mm thicker base) if you want to put it in your back pocket or are active. I made both for my friend, who is an electrician, so he can choose.
So here is the materials list:
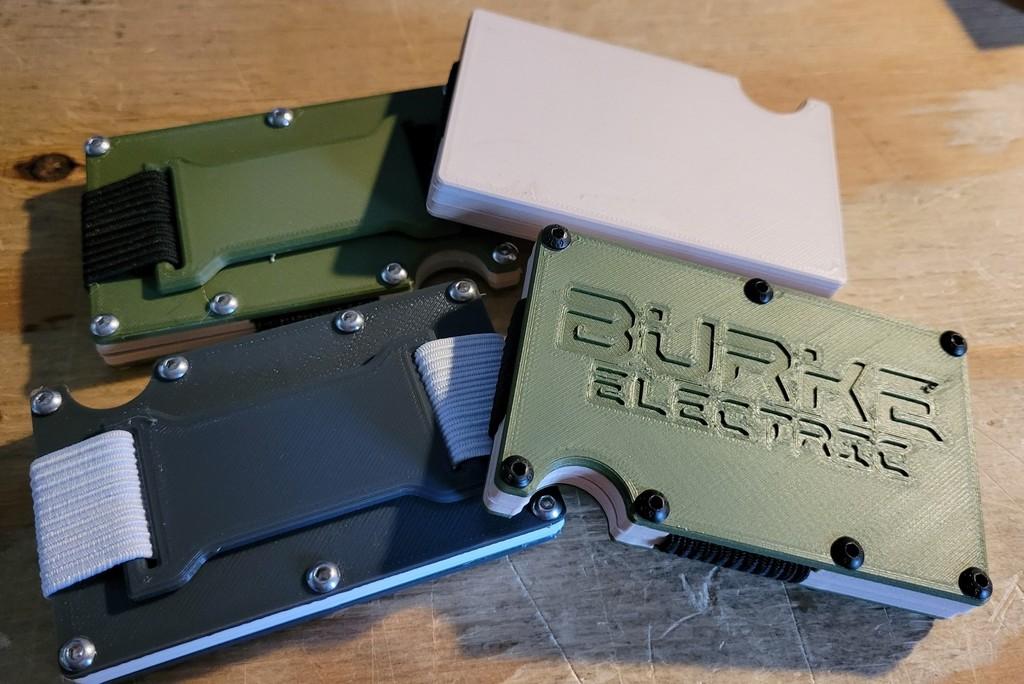
- At least 400mm of 1inch or 25mm Elastic band - i used this - which is also available at many stores in the US. I was able to find both Black and White to open up more color variations.
- 14 M3 4mm pan head machine screws (7 for each side)
- Strong CA glue if you decide to use the no-screw version.
- Needle and Thread to sew the elastic
To Make TheSummit:
-
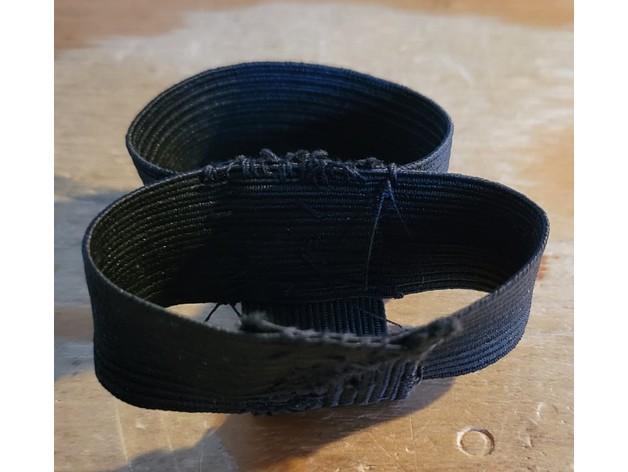
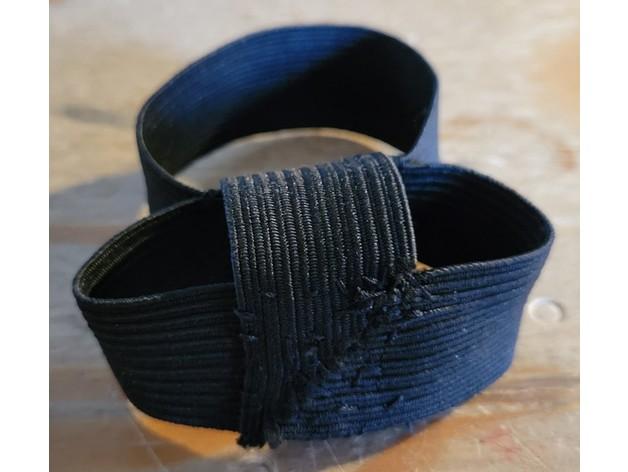
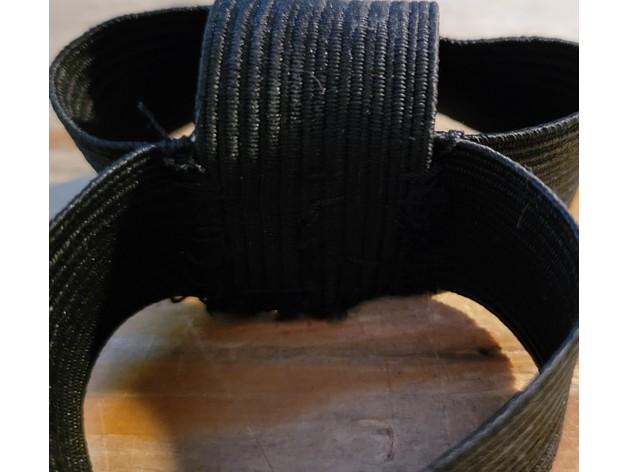
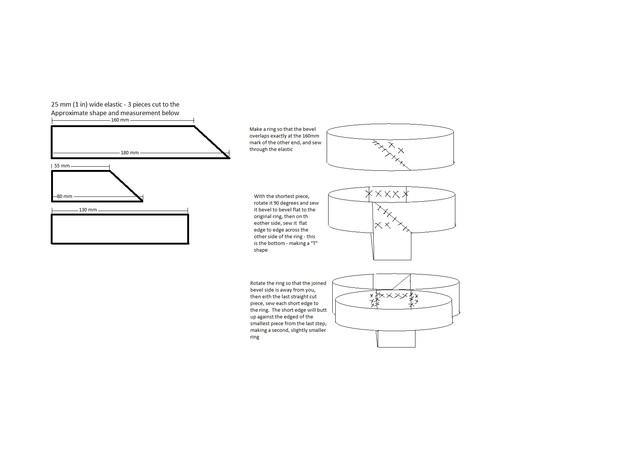
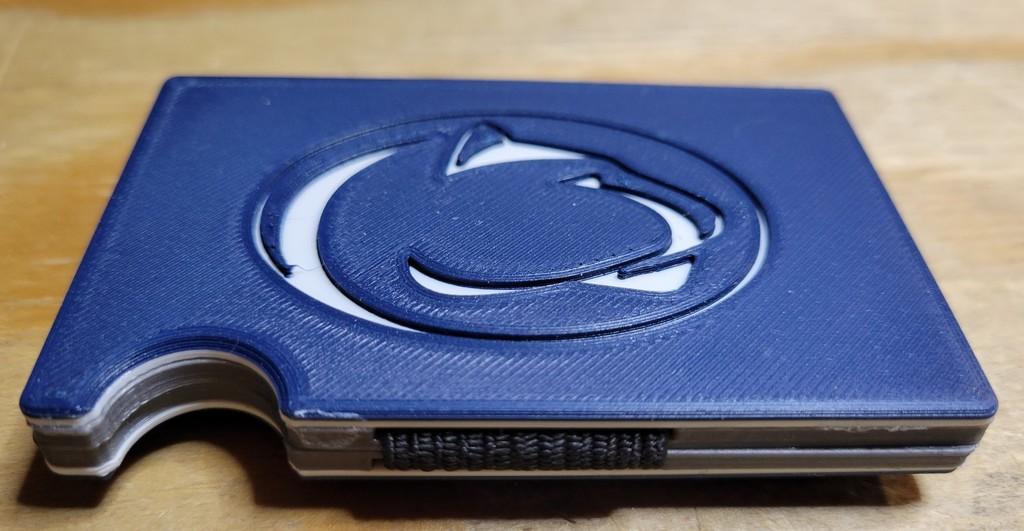
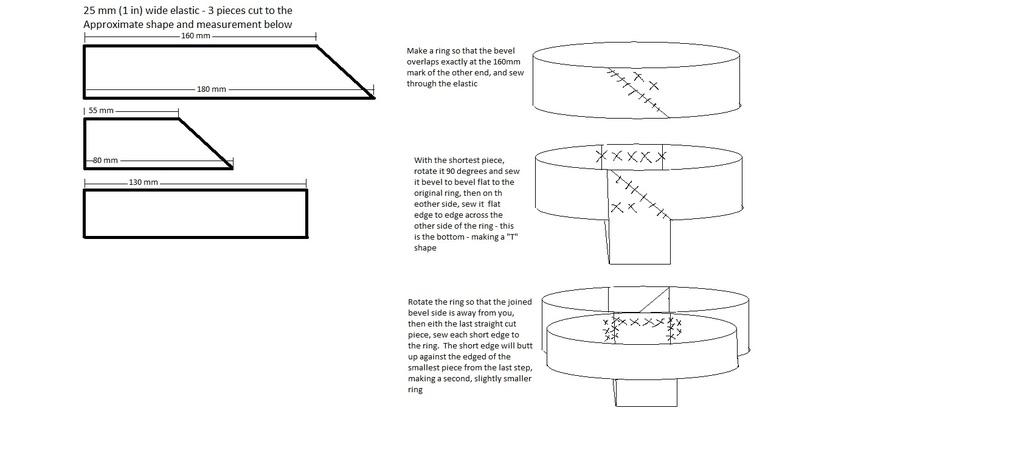
Sew the elastic bands. one of the images above is a terrible MS Paint drawing that explains the method i found to work well, if not the best. Refer to the drawing and the photos for reference. Essentially - you can do this any way you want, but it should be a band that wraps around the two bases, with a perpendicular portion that acts to prevent cards from being pushed out the bottom. The extra band around the outside is for the "money clip" and is really optional if you don't want it. The trick here is to take care to sew as neatly as possible (maybe more neatly than the example in my images) to keep the profile of the elastic as thin as possible. If you want, you can purchase replacement bands for wallets of this type that will work, as the overall measurements of this wallet match...
-
Decide Thick or Thin, and Screws or no Screws - and print the corresponding parts in colors you choose. I included the WALLET_STEPS.stp file, that is all the parts in one file. You can use that to do customization or remix to your hearts delight.
-
Once all parts are printed, slip the Base pieces inside the "T" shaped part of the elastic. IT should fit in the channels, and look like...well like the wallet bases just put on some tiny underpants.
-
For the screw version - you may want to clear the screw holes with a 2.5mm bit for the bases and a 3mm bit for the covers - then attach the covers over the elastic onto the bases with the 14 M3 4mm screws.
-
For the no screw version - Use good strong CA glue or epoxy - then assemble the Base and Cover for one side and clamp it when its aligned. Here is where your sew-job is measured, as the cover will bow a little then settle under clamped pressure as the elastic seats. Once one side is cured, do the other. This eliminates having multiple pieces slipping around.
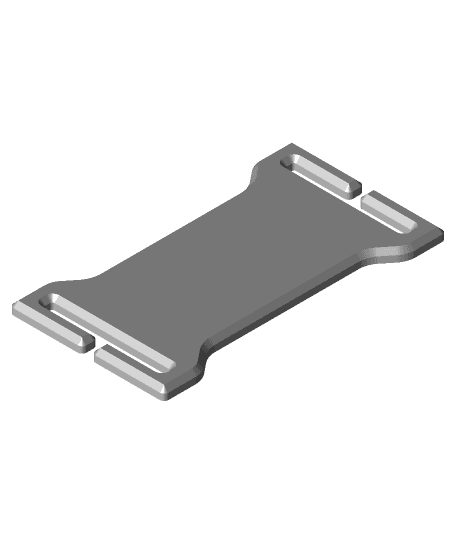
6 Lastly, slip the money clip over the band using the slots in the center of each end. See the photos for reference.
If i missed anything - hit me up int he comments - Good luck!