Cake Lamp - Kitsch, Vintage, Compatible with IKEA Strala Lamp
bypixelandpapier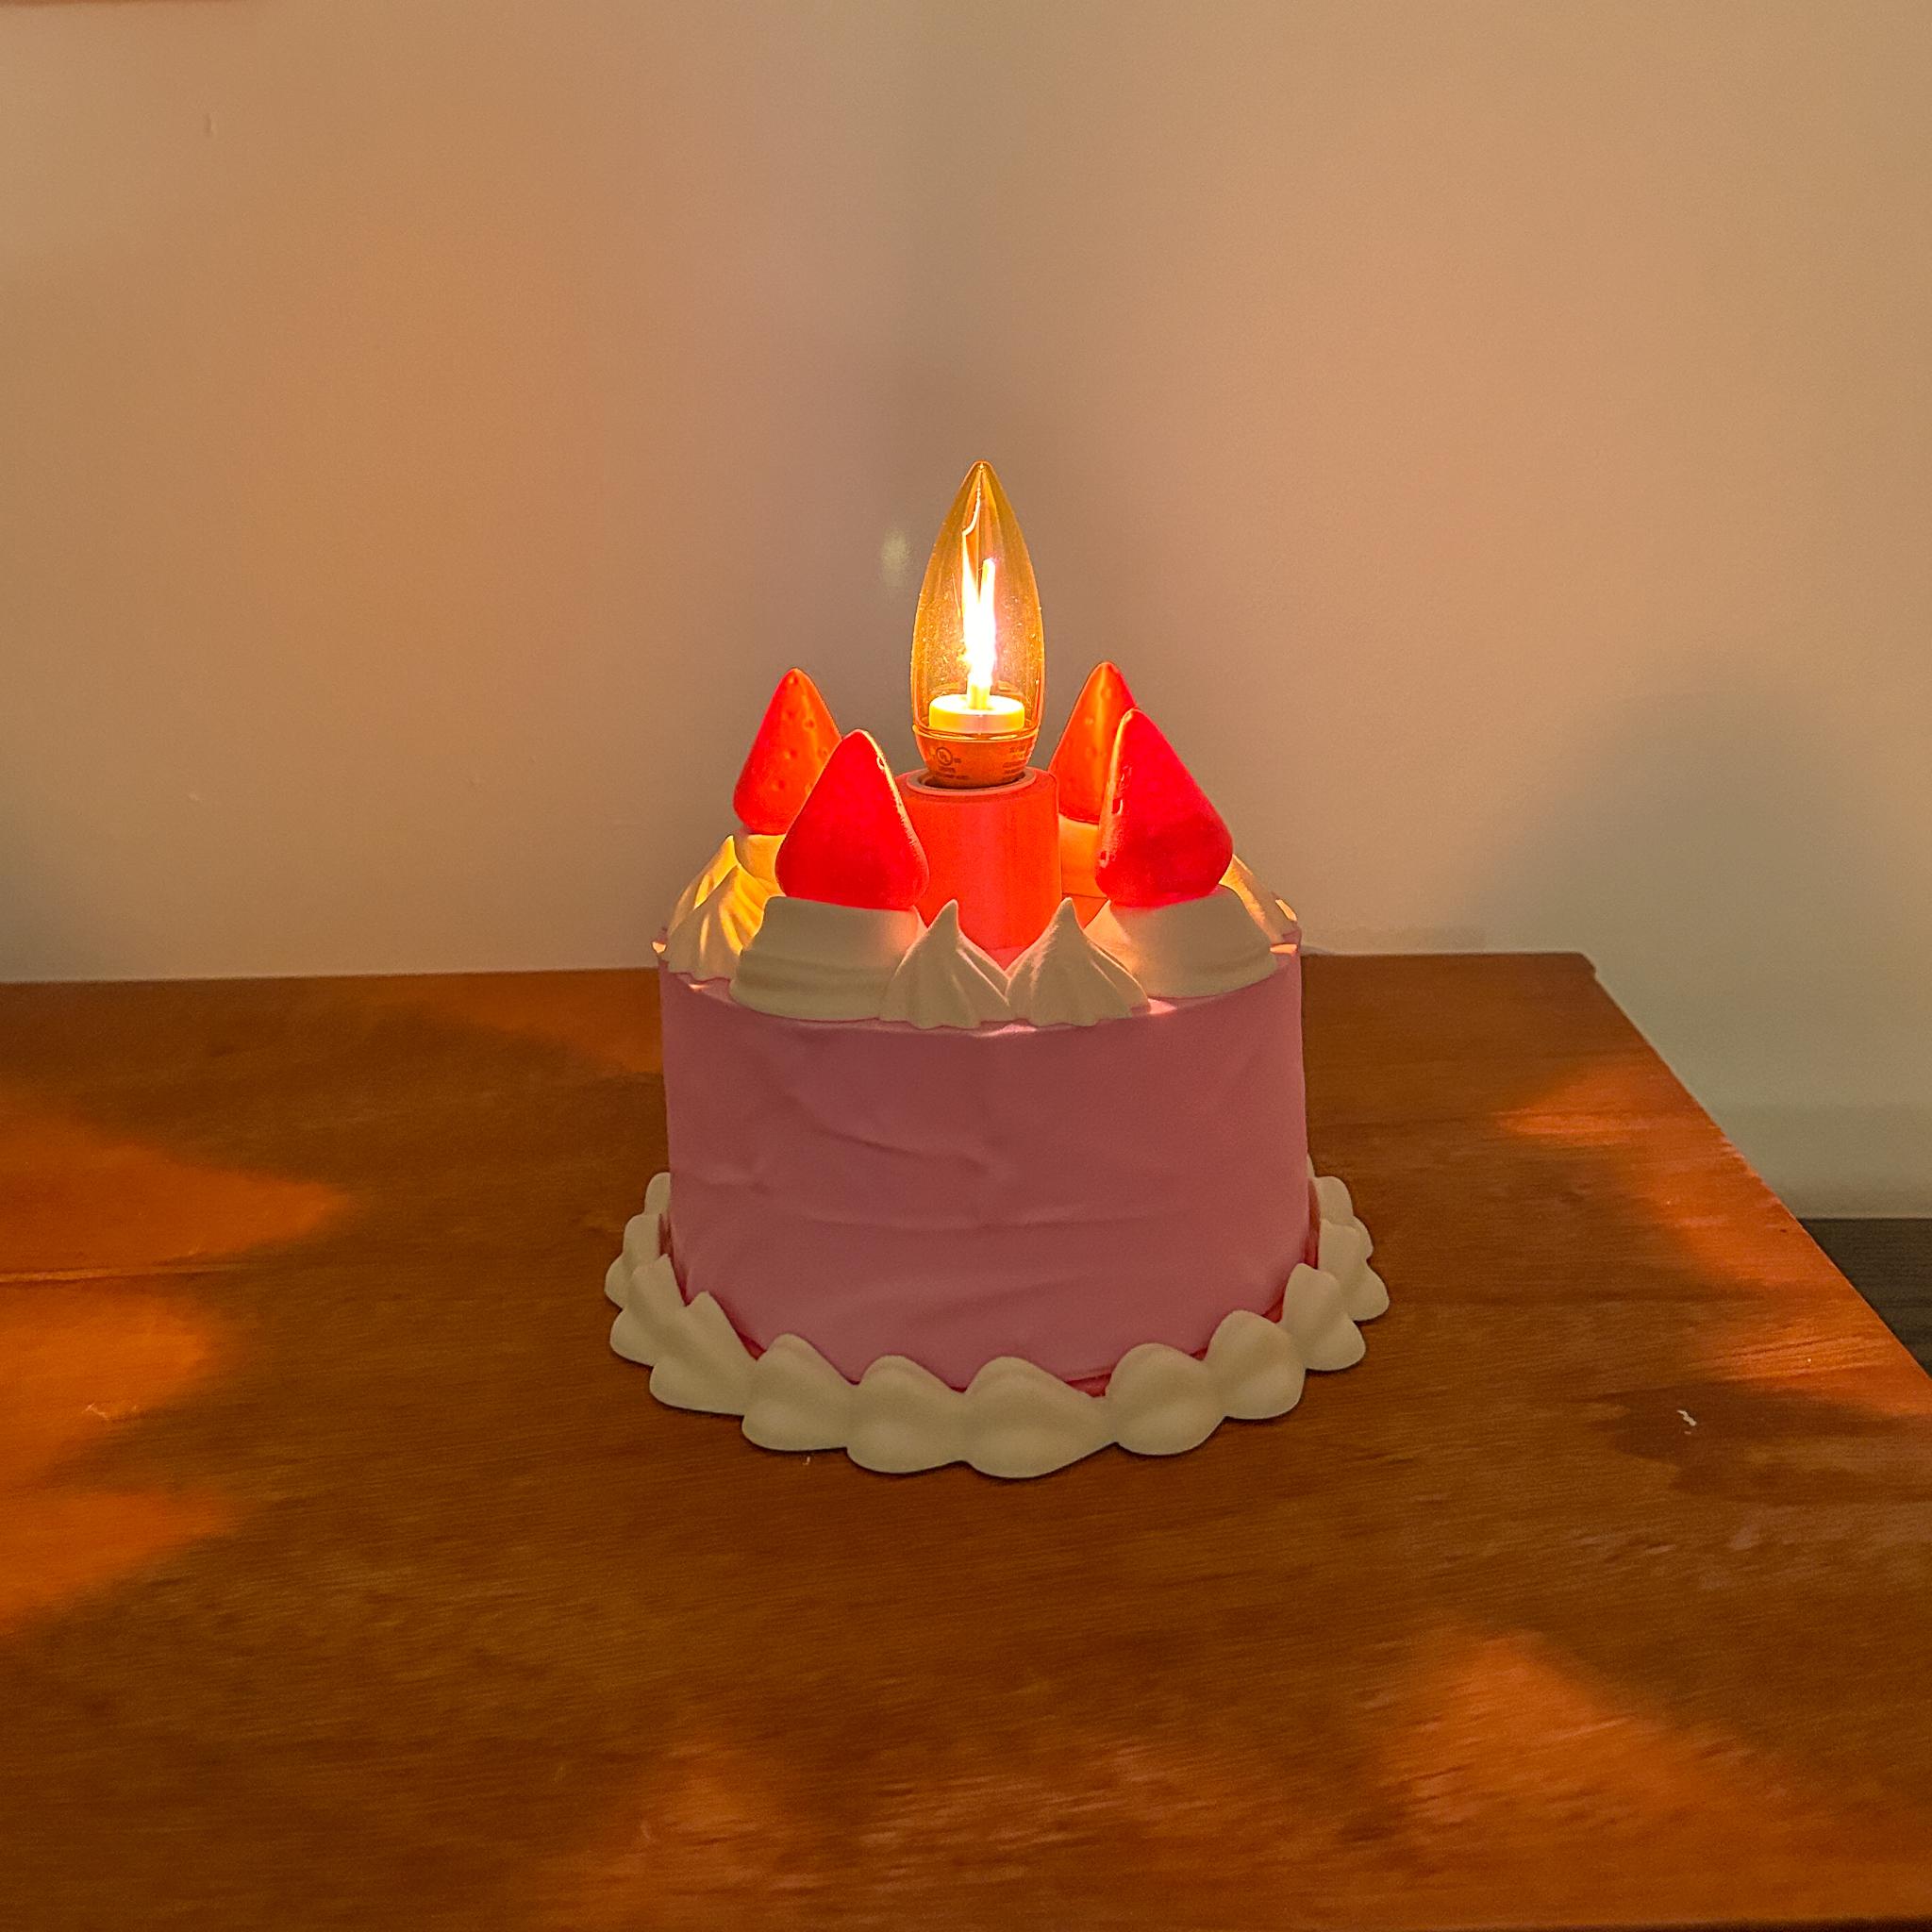


Discover how simple it is to create your own Kitsch Vintage Cake Lamp using the Ikea Strala light with this detailed tutorial. This lamp is perfect for adding a touch of retro mood lighting to any space or serving as a unique gift for friends or family who are far away, especially when sending an actual cake isn't feasible.
Print Settings:
- Requires a brim for the strawberry. The rest of the model will not need a brim.
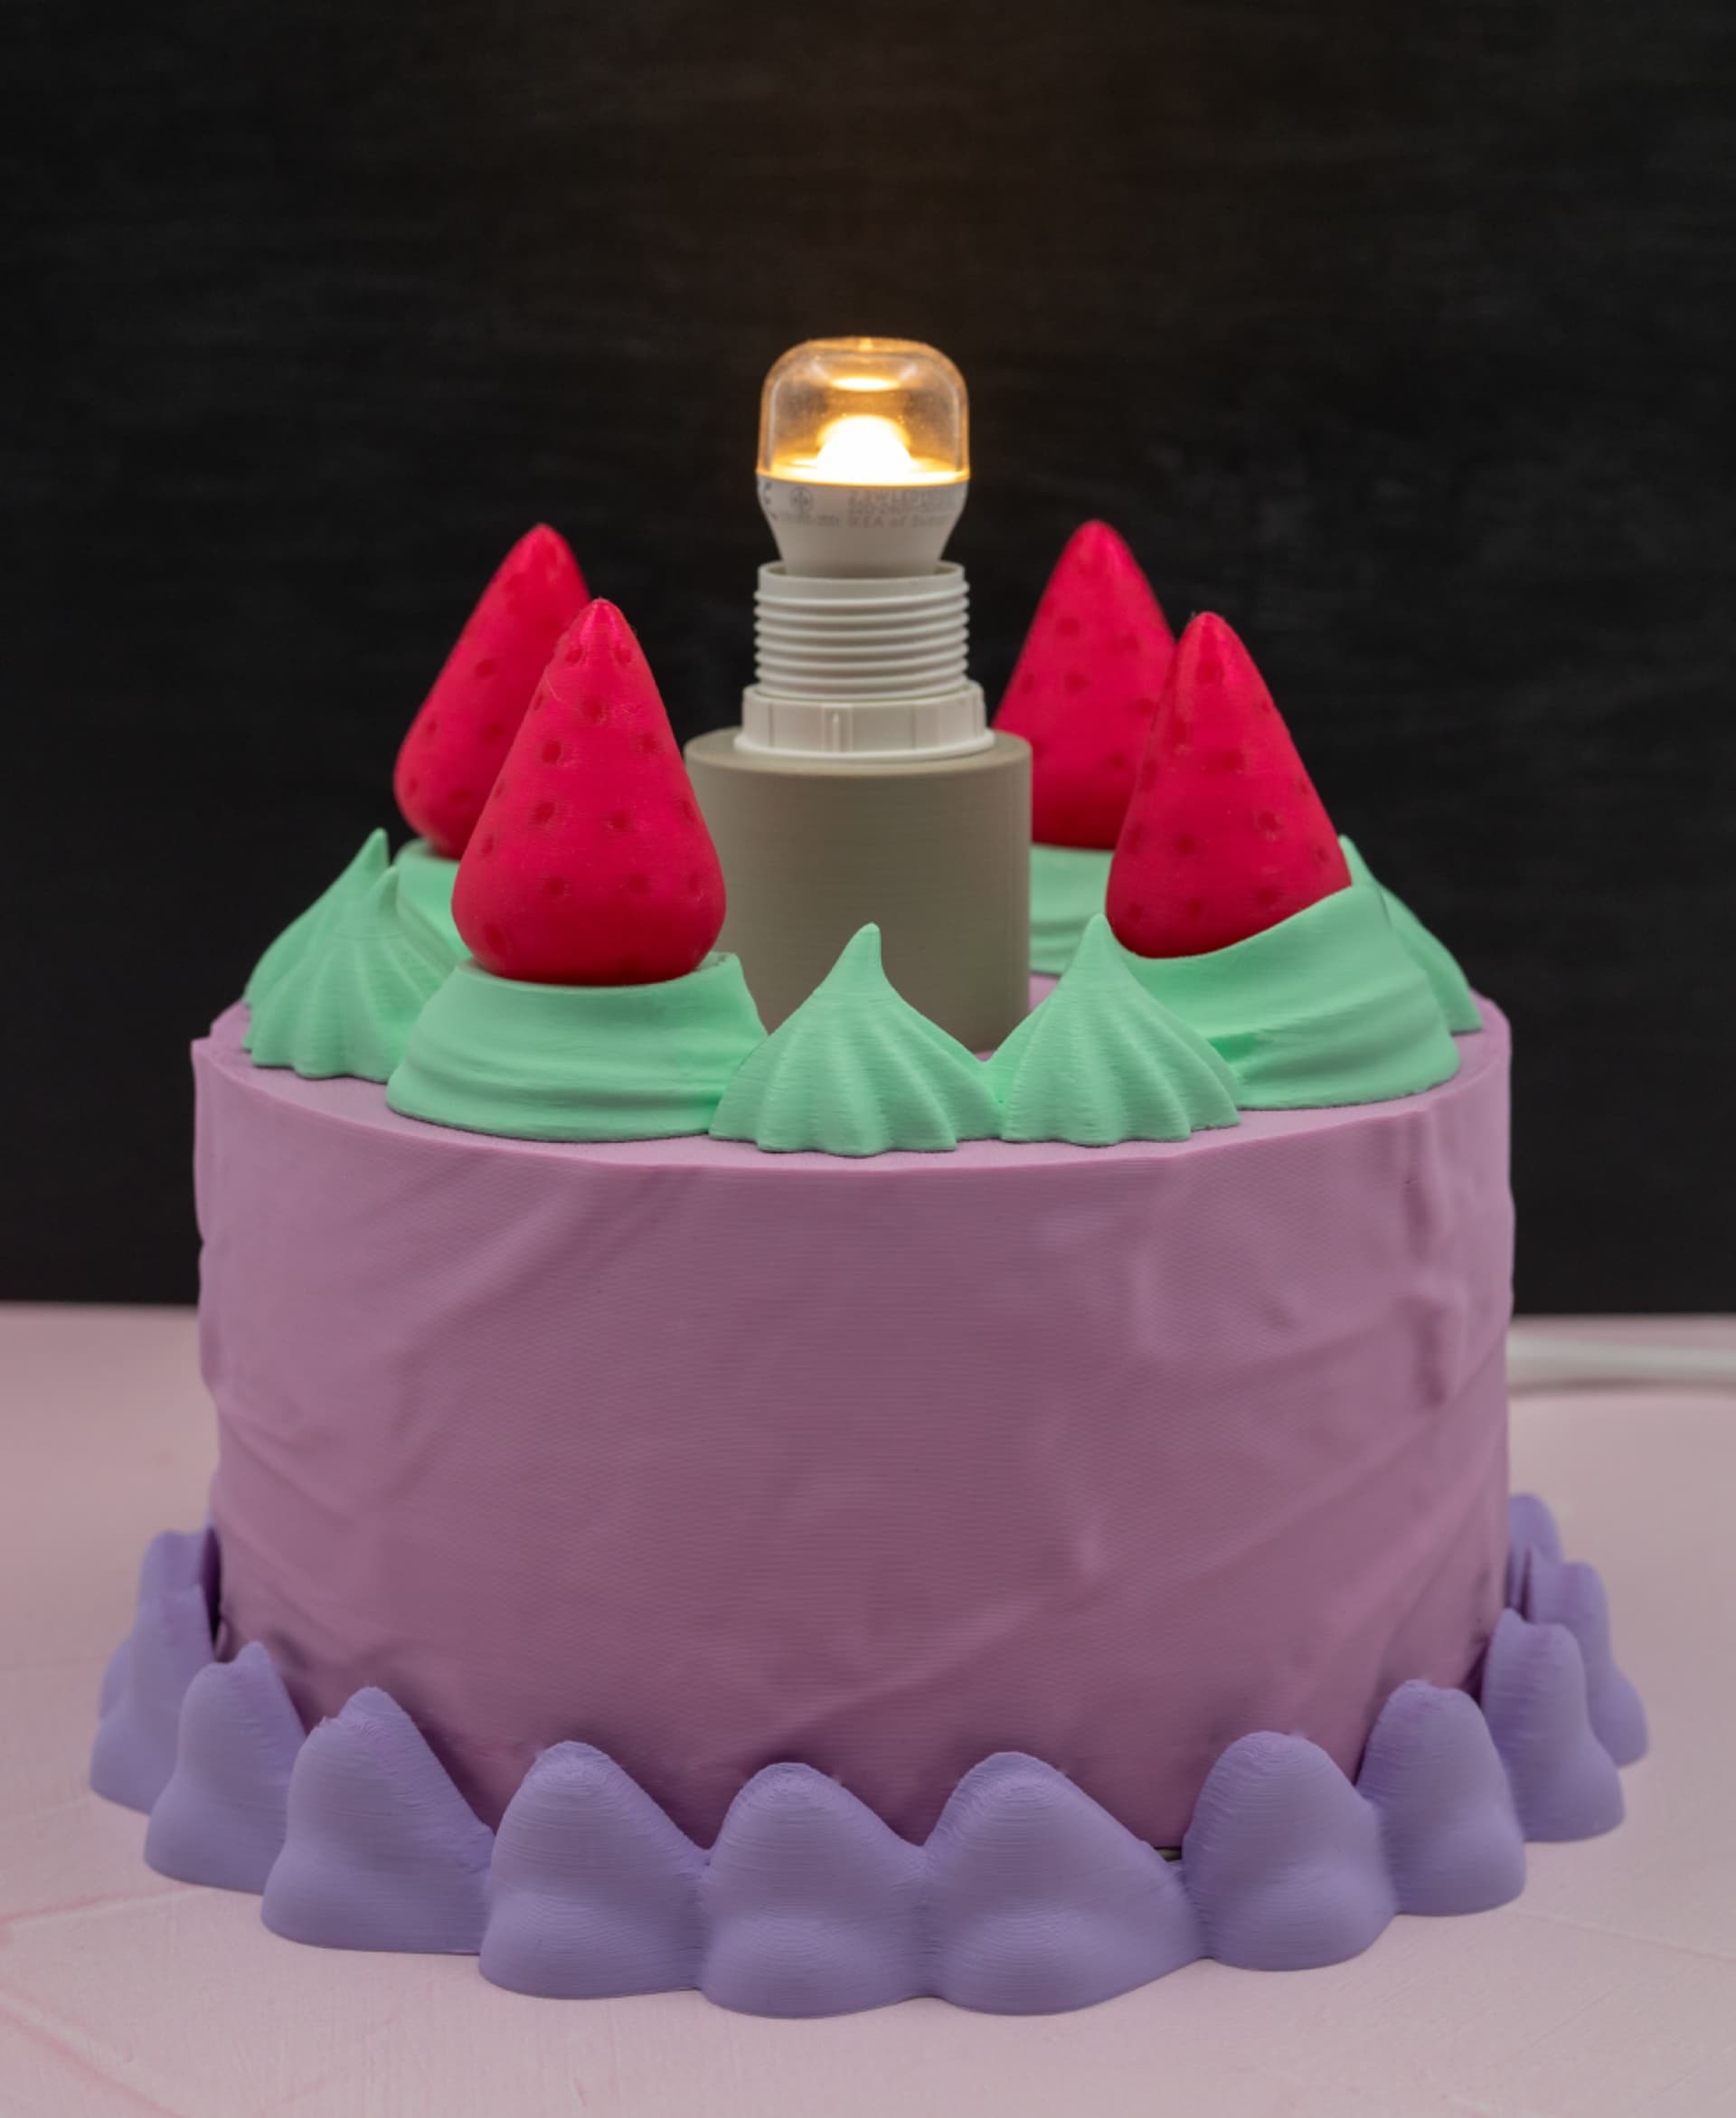
- Support is necessary for the IKEA Strala holder and the cake unless the cake is printed top side down. If the cake's top side faces the build plate during printing, it does not require support. The rest of the model can be printed without any support.
- For the cake itself, I recommend using a 6-8% infill. This allows the PLA to flex better, which is especially helpful when locking it into the cake holder. For all other parts, a 10% infill works well.
- 2-3 walls
- 0.4mm nozzle -0.12mm to 0.2mm layer height.
Assembly I used a different color of PLA for the cream and pudding. I then adhered the cream to the base of the pudding.
Materials Used for This Project: SUNLU PLA in Cream White: https://amzn.to/3QczFim TTYT3D PLA in Pink: https://amzn.to/49PjPkm Elegoo PLA in Red: https://amzn.to/3Usepr9 IKEA Strala LED Cord: https://www.ikea.com/us/en/p/strala-cord-set-with-led-bulb-white-50371512/ GE Flicker Flame LED Light: https://www.target.com/p/ge-flicker-flame-led-light-bulb-1w-medium-base-flickers-light-a-flame/-/A-82246867
Important Note Please use a low-temperature LED to avoid damaging the PLA, which can melt at high temperatures. The creator assumes that users will conduct their own research to verify the suitability of the LED used and accepts no liability for any potential damages or issues.
Watch assembly here: https://youtu.be/ZsvgSWY9eZk