VESA 100mm Offset Mount - Monitor Arm Relocation
byMandicReally100mm for 100mm...
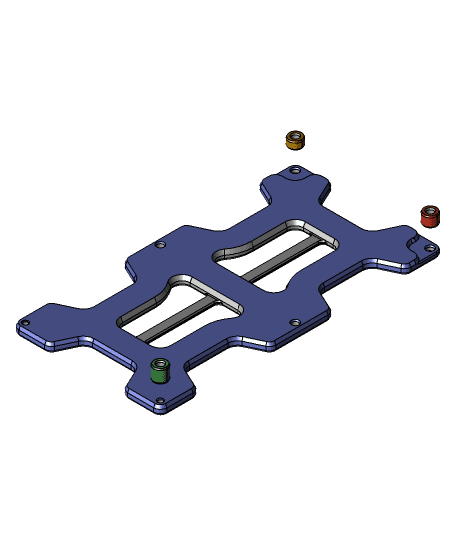
An Offset Bracket for a 100mm VESA Mount that moves monitor a 100mm offset.
My Portrait orientation Monitor was too low on it's VESA mount and hit my desk. This has a 100mm Offset to relocate the VESA mount of a Monitor (100mm VESA). Files for a Screw Spacers are included. These are for if your VESA Mount is recessed or your screws too long. (6/8/10mm spacers for various depths/lengths.)
Attach the top 2 holes to your top 2 VESA mount holes. Then mount your VESA plate, screwing through the top plate holes into the VESA screws of the monitor. The bottom 2 screws just thread into the mount's plastic.
If you don't need so much offset, check out my previous 60mm Version: https://social.thangs.com/m/17289
- FILES INCLUDED:
- CAD STEP to learn how I design. (Please credit any Remixes: MandicReally)
- 100mm VESA 100mm Offset Bracket
- 6mm Screw Spacer
- 8mm Screw Spacer
- 10mm Screw Spacer
- PRINT PARAMETERS:
- Recommend a minimum of 4 Perimeters (Personally I printed at 6 for additional support around screw holes.)
- Minimum 25% Infill Recommended (100% is overkill.)
- PLA+ held up well on my first version surprisingly.
- No Supports Required
- If you need a Taller or Shorter Spacer just Scale on Z-axis Only in your slicer or modify in the STEP file.
Want to Support what I do? Check out my social medias please!
Link Tree: http://www.HotRodHippie.com/links
- DISCLAIMER:
- USE AT YOUR OWN RISK. I can't validate that a really heavy monitor will be happy on this mount.
All of my Designs are covered by a Creative Commons Non-Commercial License. Sale of prints using my designs are the sole right of myself, the designer, and those I license to do so. Please understand every design is hours of work and multiple prototype prints to ensure quality. Unauthorized sales will result in new designs not being made public.

