Gazzaladra
Gazzaladra18K followers
Follow
Gazzaladra
Gazzaladra
|
Image 1 of 25
Infinite Notebook 3d model
Gazzaladra
Gazzaladra
|
Image 1 of 25
Infinite Notebook 3d model
Infinite Notebook video thumbnail
Infinite Notebook 3d model

Infinite Notebook

This model is restricted by licensing terms. 

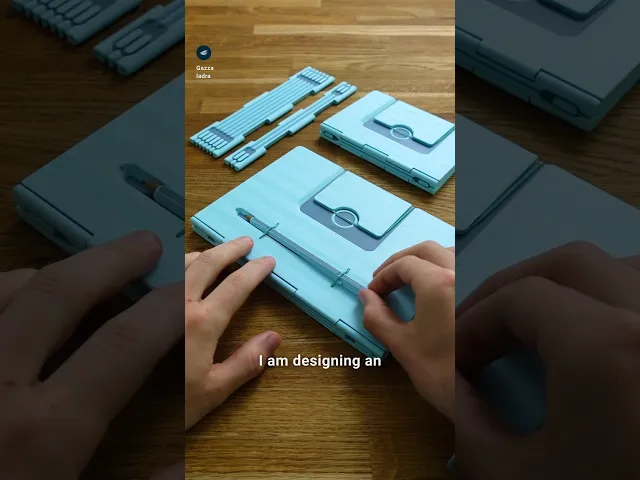
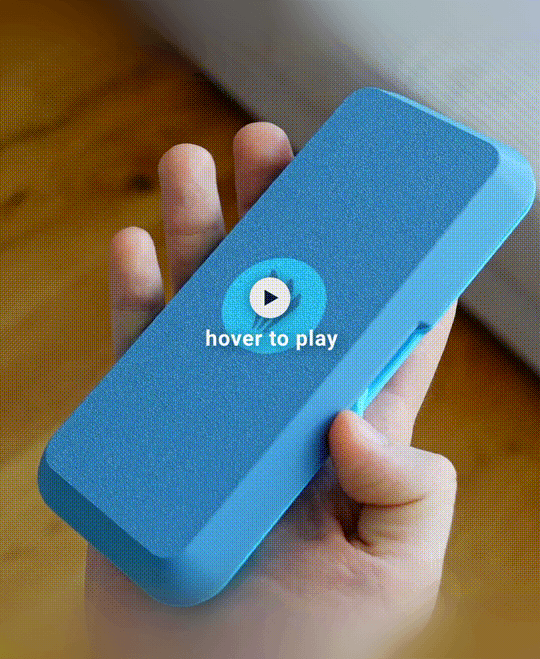
The infinite Notebook. Expandable with different spines, robust and reusable. Comes with a pen compartment.

Once you run out of blank pages you can just switch the paper out and keep the used ones stored within a bigger archive. Single and multi-color printing models are included as STL and 3MF! They work with all current and usual multi color setups. With normal 80g Copy paper one spine segment holds up to 20 papers which results in 80 Pages. A printed pen is included but you can also use your own preferred choice. For the default pen you will need a BIC Crystal fine.

Versions included

  • For DIN A4 Paper – DIN A5 folded in Size
  • For DIN A5 Paper – DIN A6 folded in size
  • For US Letter Paper
  • For US Haf Letter Paper

What you need

  • The printed parts
  • Household rubber bandsdifferent sizes work, too.
  • Regular copy paper

Rubber Bands All sizes listed below work with all versions. Slightly different ones will work, too. I optimized the design for the most common ones around. So, changes are very high that the ones you already have at home will do the job just fine.

  • 60 mm diameter and 1.4 x 1.4 mm strength. Those are the most common ones you can get in most supermarkets.
  • 50 mm diameter and 1.4 x 1.4 mm strength.
  • US Size 33
  • US Size 32

Assembly (Go along with the images)

  • Choose your version and spine size
  • Print all parts
  • Insert one rubber band into the front from the inside, use a scraper or other thin object to push it inside
  • Place another rubber band in the insert, by pulling it slightly, it will go in easily
  • Push the insert into the back, starting with one of the rounded corners
  • Apply a bit of pressure to fully push it inside
  • Insert pieces of filament as hinge to connect the front, back and spine
  • Pull it back a bit and cut it slightly shorter than the total length of the spine
  • Push it back in, so no ends stick out on either side
  • Fold up to 20 pieces of copy paper in half per spine segment (Tip: by folding them one by one the result will be slower but more precise in alignment)
  • Bind the notebook. Either by wrapping the rubber band around the pages and cover - or by doubling it and using the little knobs inside of the back.

Maintenance

  • To change spines, use a piece of filament to push out the existing filament hinges and reuse them on the new assembly
  • In order to switch spines, it makes sense to remove the covers first for easier handling
  • If the rubber band inside of the insert breaks, use a thin object as lever to remove it and place a new one.
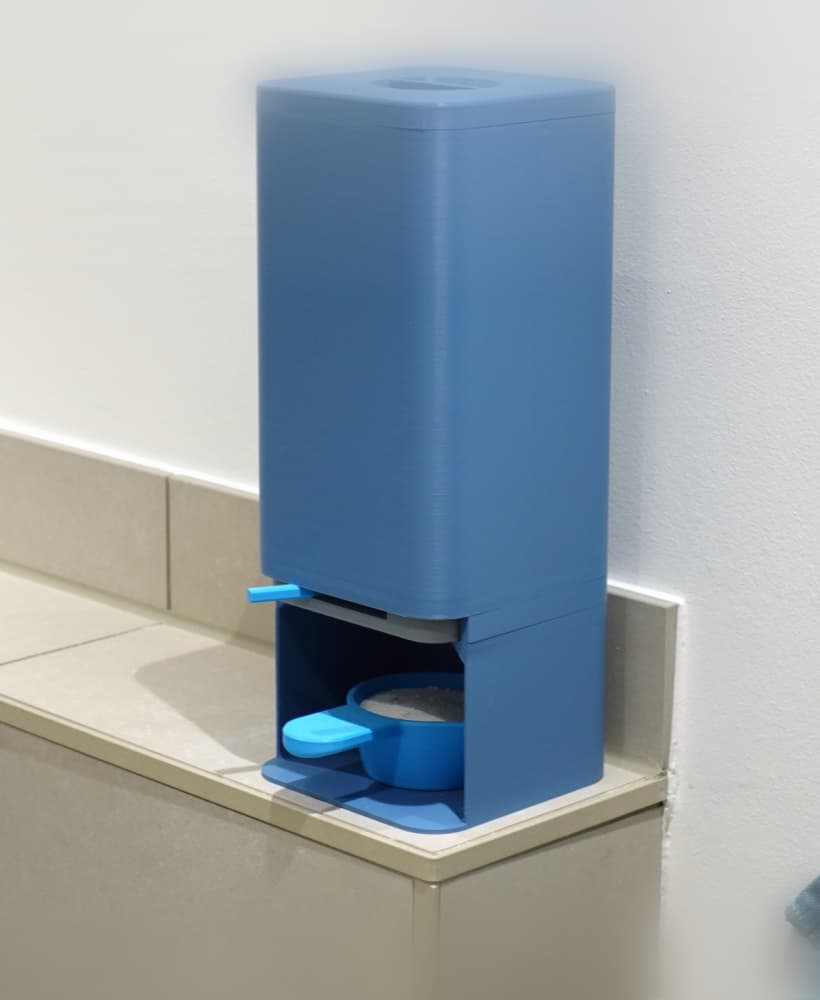
  • I recommend printing one of the bigger spines as archive, this way you can take a small version with you and once full, archive your notes in chronological order.

Print settings Required print bed size in mm: 230 x 230 for US Letter, 220 x 220 for Din A4, 160 x 160 for Din A5 and 150 x 150 for US half letter Material usage: 200g for Din A4 and US Letter, 100g for Din A5 and US half letter

Material: PLA Print direction: files are rotated correctly Support: none Nozzle size: 0,4 mm Line width: 0,4 mm Layer height 0,2 mm Infill: 15% Build plate adhesion type: none

Community Makes (5)
Looks fantastic in rainbow silk PLA, although for consistency it is better if you print both the front and back cover on one bed.

The back bar with the rubber band is a very tight fit. After a few minutes of almost breaking it, I discovered that if you flex the outside part of the back cover just slightly away/down (without breaking it!) and then push the bar in, it works a treat. Do this for all 3 sides and it pops in without an issue.

Any chance for those with a big enough bed for an A3 size one of these i.e. A4 when folder. Can you just size the design up to make it work?
Printed on my Anycubic Kobra S1 Max with variable layer height enabled. PLA-CF looks great in it!
Perfect Design!
Printed in Sunlu matte green PLA and beige PLA+. Enabling top layer ironing in Cura worked exeptionally well with the front and back parts, as the top side of the print ends up being the front of the folder.
Make by user

Discussions
David
dabrend3141
Printed on my Anycubic Kobra S1 Max with variable layer height enabled. PLA-CF looks great in it!
Printed on my Anycubic Kobra S1 Max with variable layer height enabled. PLA-CF looks great in it! 3d model
PrinterAnycubic Kobra S1
Print bed sizeX: 350 mm; Y: 350 mm; Z: 350 mm
MaterialPLA-CF
Layer height0.2 mm
Infill density15 %
Devin S
devin.schreck

What size/number are the rubber bands supposed to be?

J.D. C
jd.cain.jr

I also need this. Maybe it's a US thing but all the rubber bands I have around the house are much wider than the ones used in in the phones and they don't work well.

James W
LANPartyCEO

Std American Rubber bands seem to be ~65mm diameter @ 1mm x 2.75mm VS the 60mm diameter bands which are 1.4mm x 1.5mm in comparison. Std American can work with some effort, but for the pen hold down i had to snip of fa bit so it is not connected. so far is fine as it is pinched very tight due to the size difference and the cut is in the middle of the long strait section and not moving.

S
sully3592

I tried a #33 rubber band. I was able to get it into the pen holder, but I've snapped two trying to get it into the back cover. It's very frustrating.

S
sully3592

I Took my snips and made a small cut and tore off the back half. It worked like a champ. The sides still have the full channels, so it's quite snug. I'll post a photo in the discord.

Gazzaladra
Gazzaladra

Yes definitely post a photo! Need to know more about these US rubber band sizes

Gazzaladra
Gazzaladra

Ohhhhh that is interesting! I did not know that there is this other type of rubber band, if you happen to have the time, please join the discord with maybe some photos and more measurements so I can see what's going on there!

James W
LANPartyCEO

The back cover bar was a fight to get it to work and was only doable with soft jawed clamps to hold the band in place while the rest was worked in, additional clamping to hold as needed till done. And the back bar had to be set in place with the same/bigger camp (for more pressure) but it did get in eventually.

Gazzaladra
Gazzaladra

That depends a little on your preference and several sizes work, but 60 mm seem to work best in my opinion!

Gazzaladra
Gazzaladra

Update: I am currently looking into making an additional version for these rubber band, will post a changelog once it's done and tested

Gazzaladra
Gazzaladra

Version 4.1 is out! Please check the changelog for a detailed update

Teitzel V
boffinbear
Looks fantastic in rainbow silk PLA, although for consistency it is better if you print both the front and back cover on one bed. The back bar with the rubber band is a very tight fit. After a few minutes of almost breaking it, I discovered that if you flex the outside part of the back cover just slightly away/down (without breaking it!) and then push the bar in, it works a treat. Do this for all 3 sides and it pops in without an issue. Any chance for those with a big enough bed for an A3 size one of these i.e. A4 when folder. Can you just size the design up to make it work?
Looks fantastic in rainbow silk PLA, although for consistency it is better if you print both the front and back cover on one bed.

The back bar with the rubber band is a very tight fit. After a few minutes of almost breaking it, I discovered that if you flex the outside part of the back cover just slightly away/down (without breaking it!) and then push the bar in, it works a treat. Do this for all 3 sides and it pops in without an issue.

Any chance for those with a big enough bed for an A3 size one of these i.e. A4 when folder. Can you just size the design up to make it work? 3d model
 3d model
MaterialPLA
Gazzaladra
Gazzaladra

A3 paper sizes is high up on the improvement list, A7 too. I have a couple of more part ideas that I will start working on soon! Love the shiny bright colors 😍

SR
Perfect Design!
Perfect Design!
 3d model
 3d model
 3d model
 3d model
 3d model
PrinterAnycubic Kobra S1
MaterialPLA
SupportsNone
BrimNo
Gazzaladra
Gazzaladra

Love the colors!!

SR
 3d model
 3d model
PrinterAnycubic Kobra S1
MaterialPLA
Gazzaladra
Gazzaladra

Love the sparkle 💖

John B
johnbaumbachjr
Printed in Sunlu matte green PLA and beige PLA+. Enabling top layer ironing in Cura worked exeptionally well with the front and back parts, as the top side of the print ends up being the front of the folder.
Printed in Sunlu matte green PLA and beige PLA+. Enabling top layer ironing in Cura worked exeptionally well with the front and back parts, as the top side of the print ends up being the front of the folder. 3d model
 3d model
 3d model
 3d model
PrinterCreality Ender 3 V3 SE
Print bed sizeX: 220 mm; Y: 220 mm; Z: 250 mm
MaterialPLA+
Layer height0.16 mm
Infill density15 %
Alex L
kahhenglee2000

Can you please make a connector between spines? The connector should somehow looks like the hinge of the cover, but two sided to connect both spines together. Trying to have a huge notebook with two spines and connect them through hinge and filament.

Gazzaladra
Gazzaladra

I have this on my improvement list! But every hinge adds a gap that might mess with the writing flow - I am on it though

Alex L
kahhenglee2000

how about a new set of spine where one side is just normal 3 hinge, and another side design to have 2 hinge (like the cover). This might reduce the added distance. But i am sure you have thought of this. Looking forward to it! Thanks

Jannah S

How can I print the other spine sizes also in 2 different colours like the one that comes with the .3mf file? The .stl files provided are all just one colour...

Gazzaladra
Gazzaladra

Select the fill tool in your slicers painting setting and simply click on the surface :) turn the edge detection really low

Ted H
tedhayesii

Love the design, but struggling really hard to fit the inserts in for both US sizes. I checked the updated version just to be sure and its the same size I have. I even tried the bending method mentioned in one of the comments and its still not going all the way.

I'd also suggest throwing up some links to Amazon rubber bands that are the right size and thickness for reference. Hard to find ones in the US that are thin and the right size.

Gazzaladra
Gazzaladra

The updated version has a different insert design, have you printed it already? It specifically addresses the issues with US rubber band. It works with size 33 and 32 - the most common ones

D
DB1937

Subscribed just for this as versions using EU paper sizes are hard to come by.

Gazzaladra
Gazzaladra

Thank you! Yes I made the US sizes knowing this might be hard for our maker friends oversees!

View all 17 discussions

Infinite Notebook

1.1K downloads · 12 days ago in  and 
Gazzaladra
Gazzaladra18K followers
Follow
This model is restricted by licensing terms. 

Projects

Changelog

22.05.2026: Release 4.0 01.06.2026: Update 4.1 Now works with 50 and 60 x 1.4 x 1.4 mm and US type 32 and 33 rubber bands Better back and insert that is easiert to push in and remove. Can now accomodate different sized rubber bands increased front hole diameter for the pen rubber band Ergonomic cut out for easier pen removal New images added and description changed to display the updated assembly