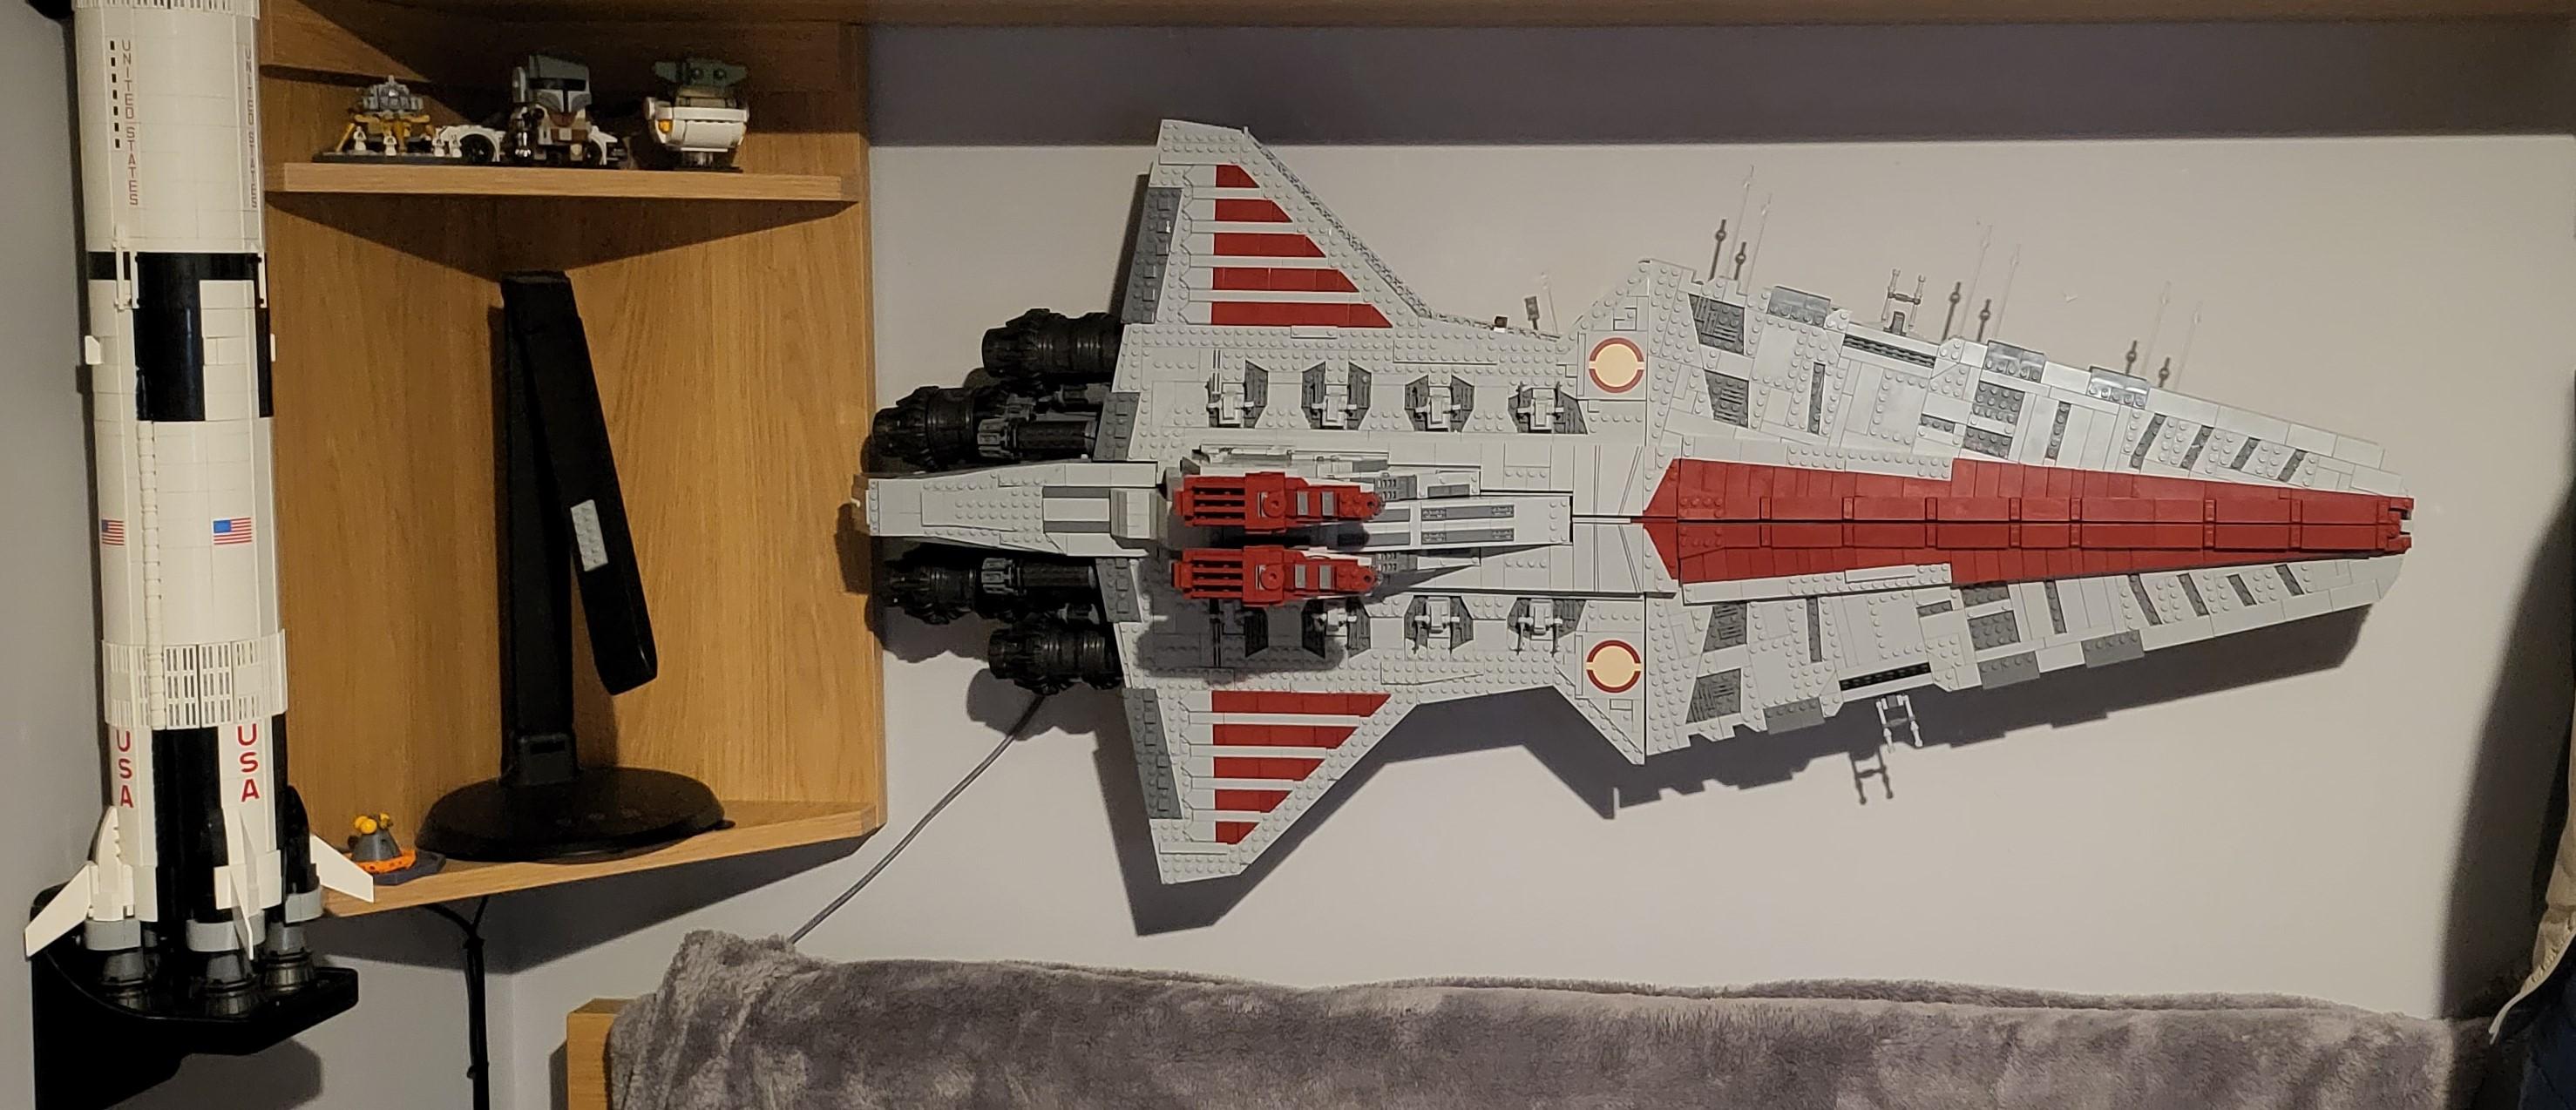
Made up a wall mount for the 75367 UCS Venator, display the ship at 90 degrees rather then usual 45 degrees. (Due to available mounting space restrictions)
Makes use of some of the technic pieces from the sets included stand, I also suggest some additional bolts or cable ties to add additonal support to be sure.
Not for the faint hearted, make sure all the pieces are FIRMLY attached before mounting.
The wall pieces are mounted on the wall with the protruding section sticking out to allow the winged section of the stand to slot down into the gap. (Reference Model picture shows Rear stand in Blue with the Wing section in Yellow, the Wall Piece is in Red)
With the Front and Rear Stand pieces attached to the Set, and the wall pieces mounted, the set can be slid down into place between the wall and the wall pieces.
Print four of the Wall Pieces and one each of the Front Stand and the Rear Stand pieces. Wall pieces have integrated screw holes for mounting. Stands have slots that fit some of the Technic (holed) pieces (I think 12 studs in length is the best option, I had to use some shorter ones for the front stand and bolted them together)
Printed in PETG, Wall pieces were printed on their side with the narrow edge on the print bed. Stand pieces were printed with the flat side on the print bed. Used a 0.6 nozzle and 0.3mm layer height, 25% Infill and 6 shells all around. Recommend printing with a brim if you have any adhesion or warping issues.
The Stand is holding the set firmly but I do suggest some additonal supports to be sure (eg Bolt throught Technic pieces or similiar) I also suggest using some small lego parts as fixing to hold any loose or rising hull sections together to make a cleaner display.


