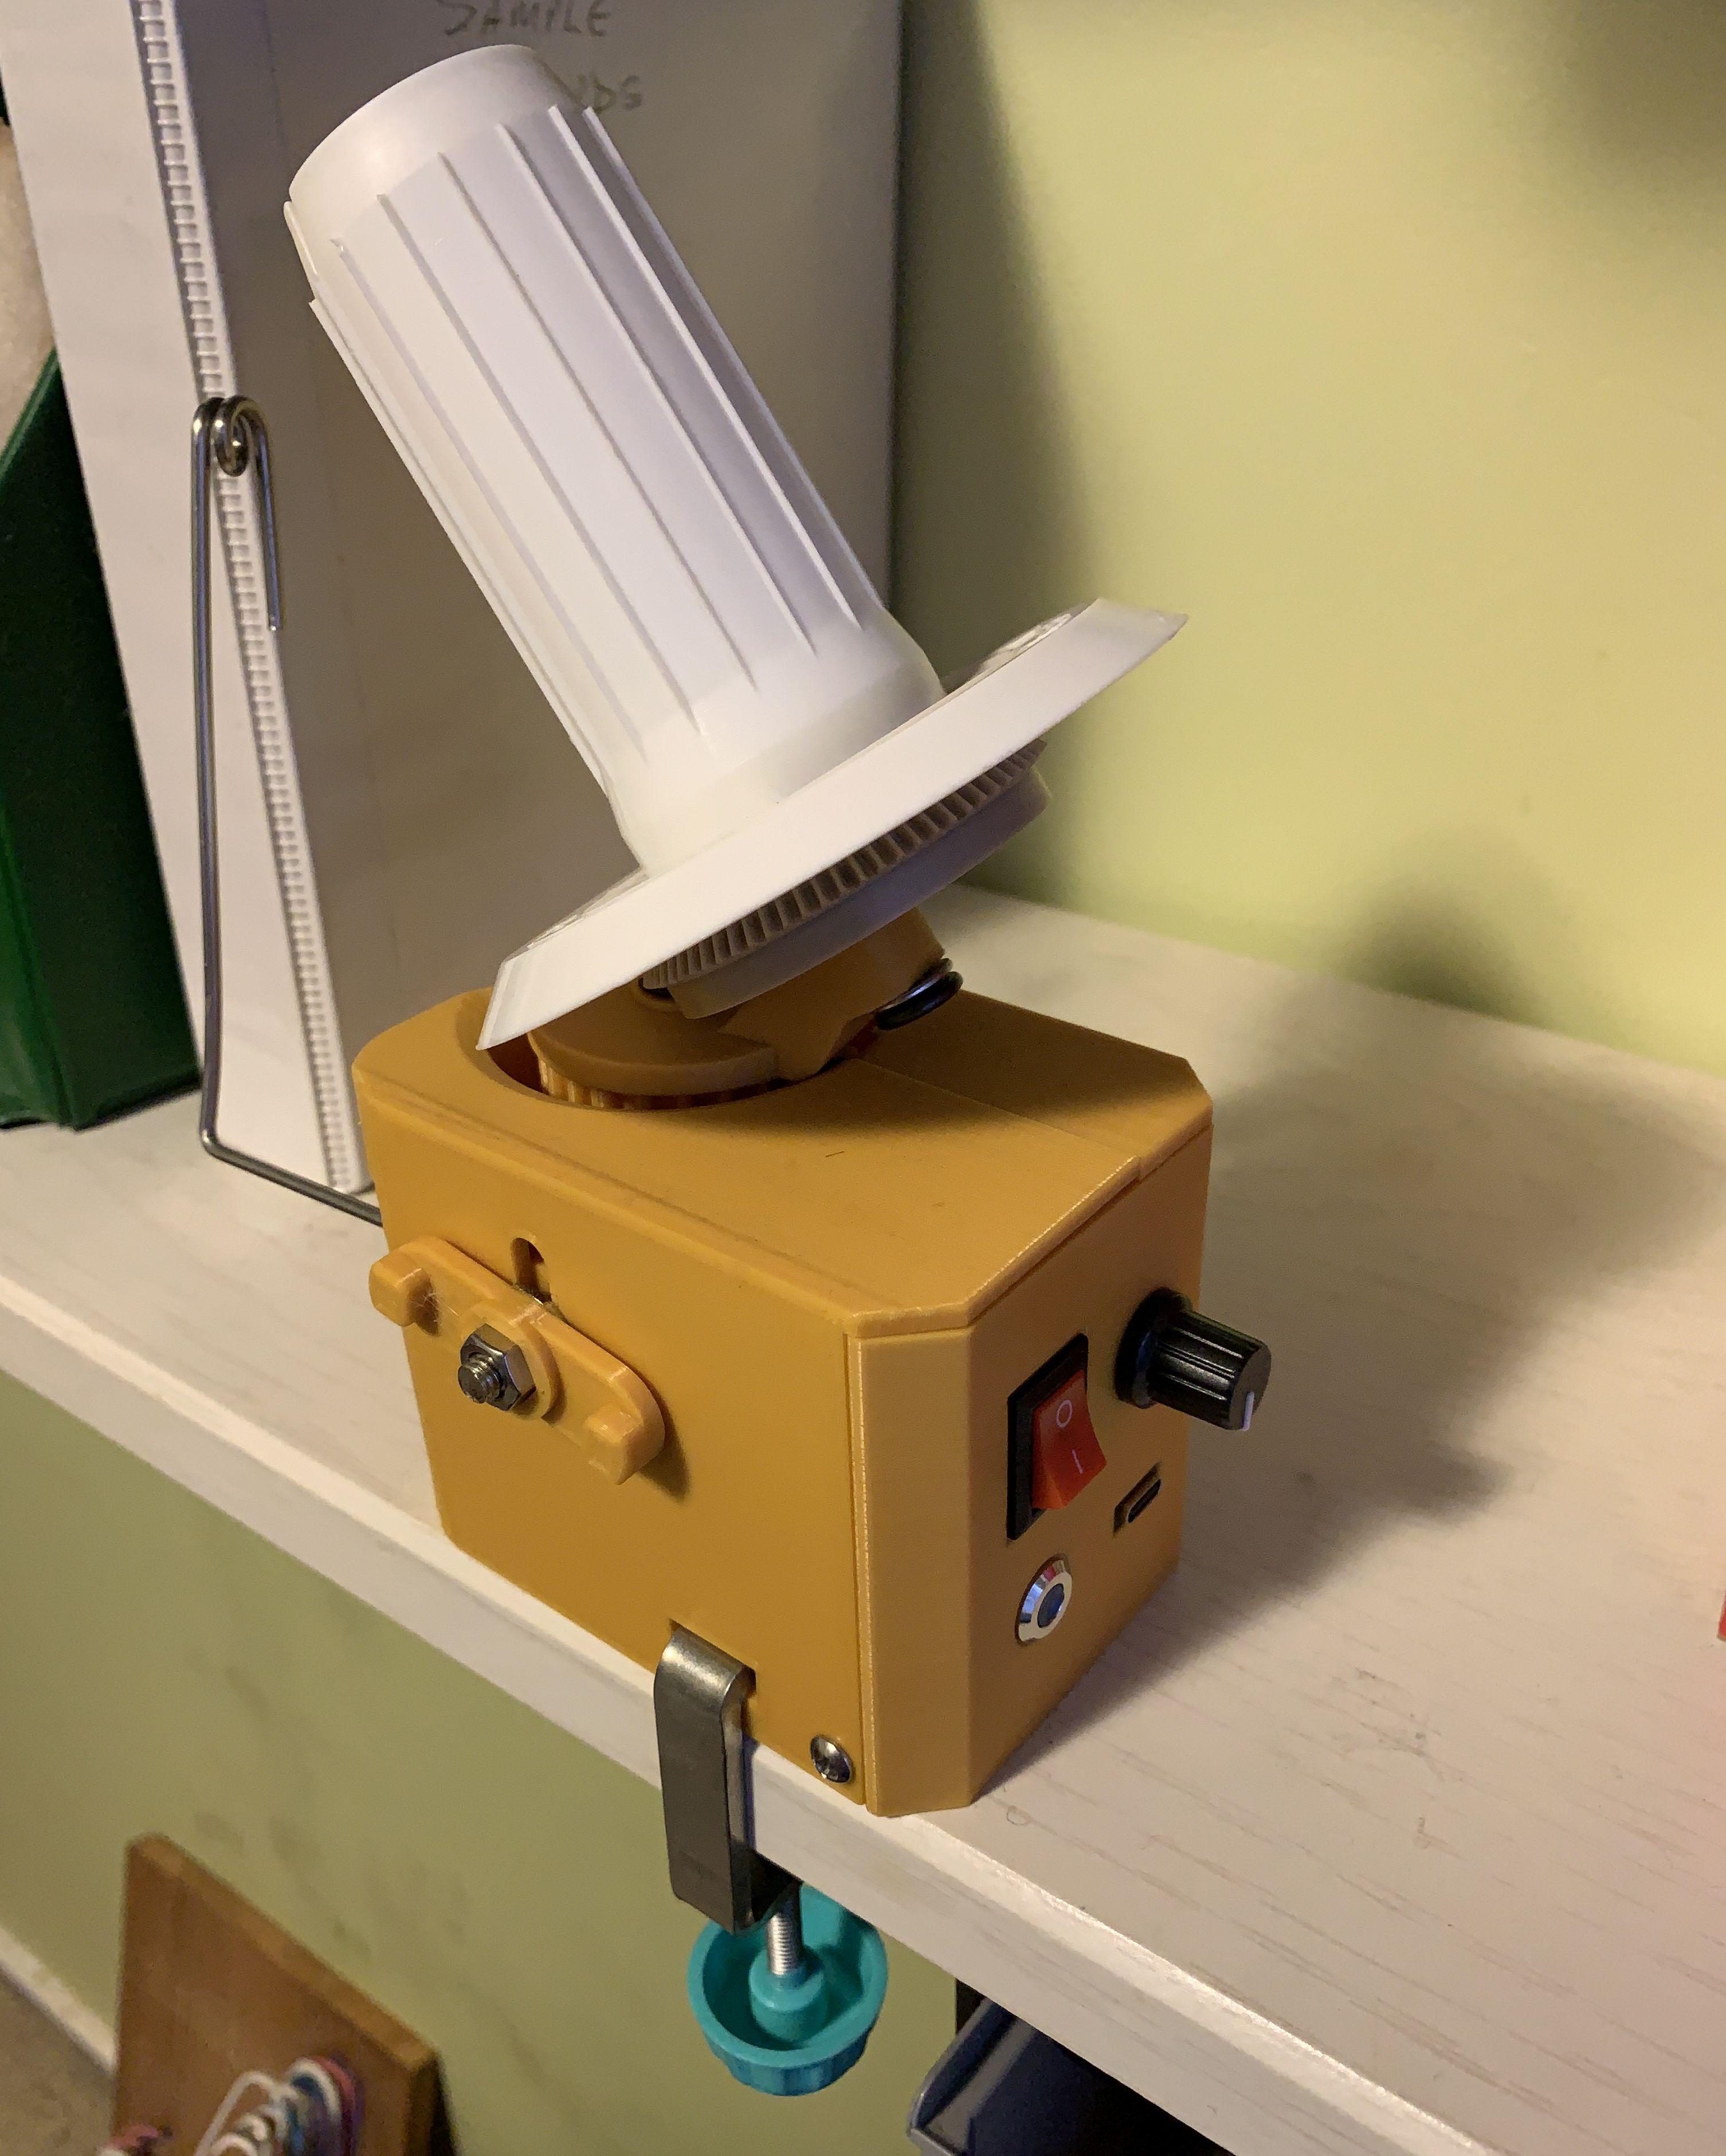
Powered Yarn Spinner
This project is for those that have a need to spin yarn into a tightly meshed ball so that the yarn can be neatly stored or used. There are inexpensive manual yarn winders for this spinning purpose. These winders typically have a handle for the user to rotate to spin the yarn and cost typically US$20-30. Powered winders are also available, but at a much higher price of US$300-600.
My project creates an electrically powered yarn winder. The electric winder sources some parts from a manual winder, adds an electric motor, all combined with custom designed 3D printed parts and power by USB-C.
I welcome those wishing to reproduce my yarn spinner as I built it. I do warn, this project is for an experienced builder. The following skills will be required:
- Ability to cut steel
- Ability to source like components.
- Ability to 3D print my designed parts.
- Ability to solder electrical wires.
Parts List:
- Yarn spinner (for parts)
- 3D printed parts.
- RS445-ST/18140/DV DC motor with 14 pins fitted gear.
- MT3608 DC-DC inverter module.
- 5mm 40mm bolt, washers and 2 nuts.
- 6mm 20mm bolt, washers and 2 nuts.
- Toggle switch SPST
- USB-C panel mount socket.
- Potentiometer 20KOhm, panel mount.
- Resistor 10 Ohm, 0.25W
- 5V LED indicator
- 6mm knob
- Electrical wire, typically 22awg.
To get sufficient torque from the electric motor, gears are used. The two motor drive gears provide a ratio of about 3:1, transforming surplus speed into extra torque.
The DC motor I used is a salvaged RS445-ST/18140/DV motor with a metal gear with 14 teeth. Ø=34mm x 52mm and weighs about 90g. These motors can be purchased new or used for around US$10. eg. https://www.ebay.com/itm/295128355202
The electric motor is a nominal 12V DC. I control the motor speed by starting with 5V from a USB source and via a buck inverter (MT3608), vary the voltage from 5 to around 12V. The motor typical is running at 3-4W of power, hence a simple 5W USB plug pack can comfortably power the unit.
My print is made with eSUN PLA+ 1.75mm red filament, with 0.2mm layer height and 15% infill on a Bambu X1 Carbon printer. See 3MF for brim advice. Supports are not required, but can improve the finish of some parts.
I hope you can find this print useful, too.
Remember to leave me some feedback or even a tip to keep me enthused to make more of these drawings.
For more of my models, see my main uploads site: https://makerworld.com/en/u/3687936443


