Model originally uploaded to Thingiverse at https://www.thingiverse.com/thing:4667026.
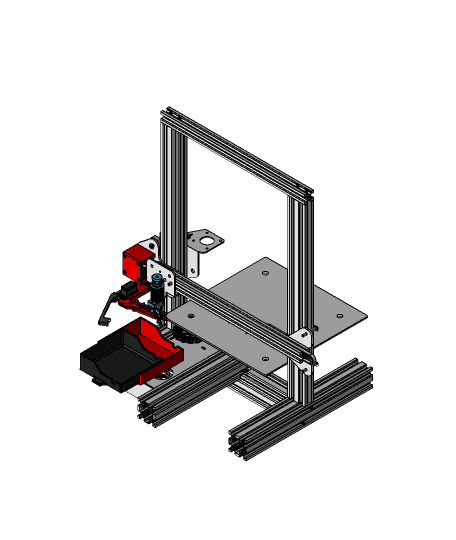
Another contribution to the SMuFF projectThis thingy is a combination of an Filament-Wiper and a Purge-Bin for the Ender-3-Pro. This is an alternative method for multimaterial / multicolor printing, if you don't want to use a purge tower (which mostly is waste of filament).
How does it work?Before a tool change the servo moves the arm into its position and the (tool change) GCode moves the hotend into the purge position (nozzle is sitting right over the tack). Then the tool change takes place and purges out a given amount of filament right onto the tack. When finished, the servo moves a few times back and forth to get rid of the purged chunk, which - hopefully - lands in the purge bin/tray. The GCode then moves the hotend into the wipe position and the wiper cleans remains from the nozzle before the print continues.
Not using the SMuFF?The SMuFF has an dedicated servo for this (wiper) tool and supports it through its firmware. In case you'd like to use this tool without the SMuFF, you have to control it through your printer controller (i.e. Marlin) and add the code needed yourself.
#BOM Beside the printed parts you'll need the following:
- a Micro servo (i.e. MG90S) with a servo horn disc (24 mm)
- one brushing disc (Dremel, Proxxon), either brass or metal with an OD of 22 mm and a bore of about 2 - 2.5 mm
- one dovel pin 2 x 20 mm (cut to size as needed)
- one tack (bare brass)
- one M3 x 25 mm bolt
- one M3 x 16 flat-head bolt
- two M3 locknuts
- two M4/M5 x 10 flat-head bolts (tray)
- two M4/M5 T-Nuts
- two M5 washers (about 1 mm thickness for tray)
- two disc magnets 10 x 2 mm (neodymium; optional for tray)
- a couple of self tapping screws 2.2 x 6.5/9 mm
- a couple of M3 washers (optional)
The two neodymium magnets are used to hold the tray in place. Those are optional but recommended because they ensure that the tray doesn't come loose while printing.
AssemblyIs pretty straight forward. Nothing really complicated here, just look at the pictures and you'll get the gist. Hint: Put some Kapton tape over the part where the tack sits so the purged out material won't stick to the printed part. I'll maybe create a video on this topic sometime in the future.
MountingThe "P1" part is meant to replace the X-Stepper / endstop cover that ships with the Ender-3. Remove the original cover, unscrew the endstop from it and screw it into the "P1" part at the very same position. Then use the original bolts to fasten the "P1" in place.
As usualAll files for printing are contained in the ZIP file (the STL is just a dummy to satisfy the uploader). STEP files is included as well, just in case you want to mod it for your (not Ender3-Pro) printer.
VideoHere's a short video of it in action (for demonstration purposes only).
HotendJust in case you're wondering. On the Ender-3 I'm using an E3D V6 hotend which is mounted using the solution of maker wingforce. So if you're planning to equip your Ender-3 with an V6 as well, head over to this thingy and have a look.