.jpg&w=3840&q=85)
.jpg&w=256&q=75)
.jpg&w=256&q=75)


.png&w=256&q=75)
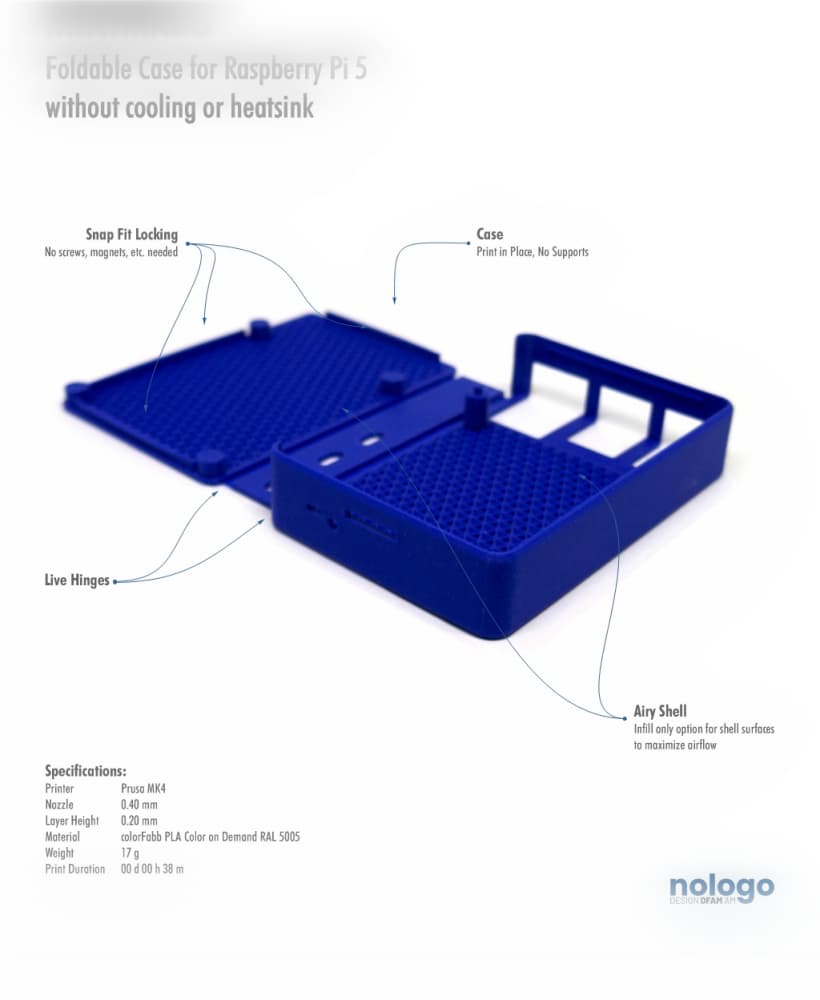
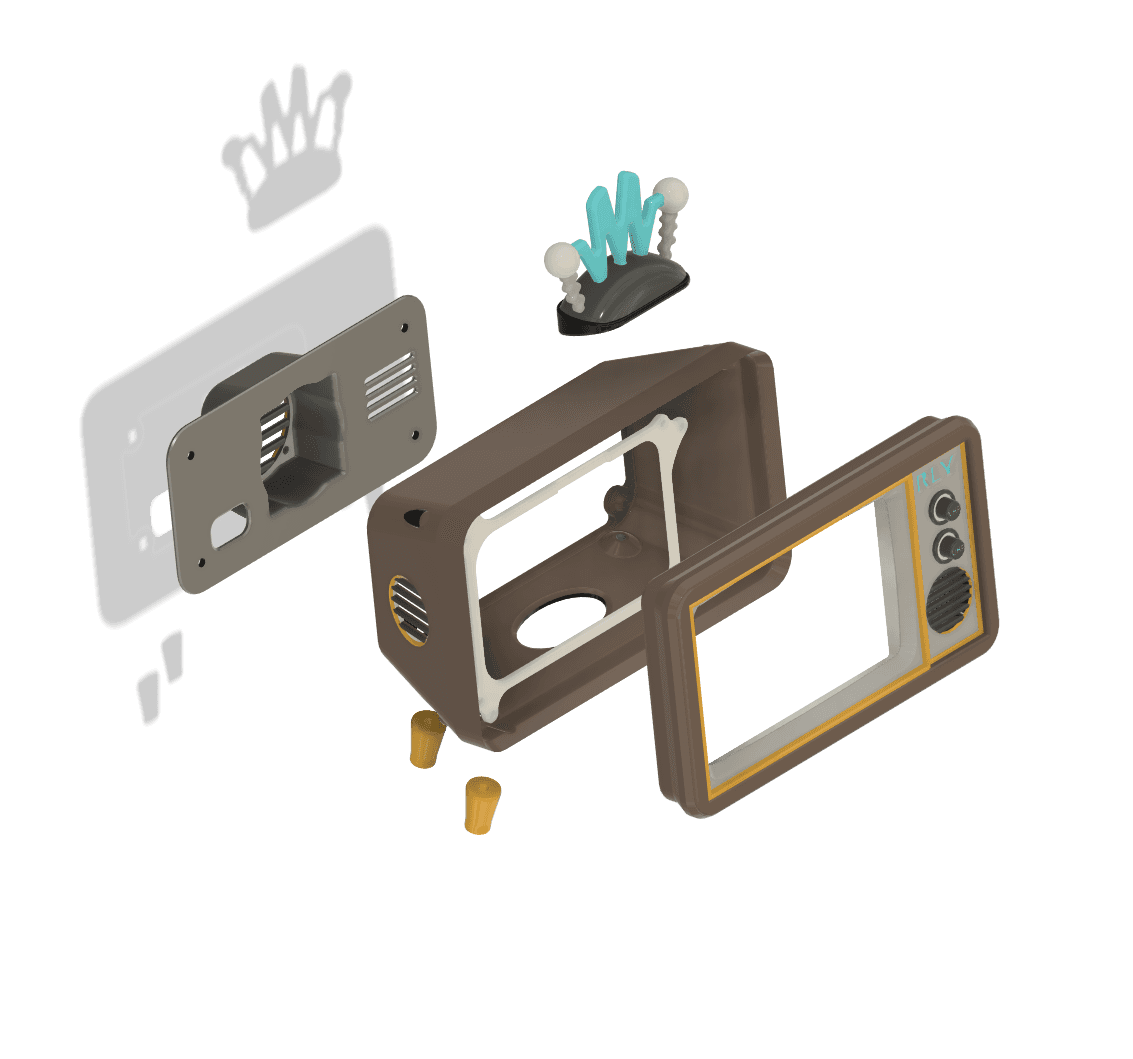
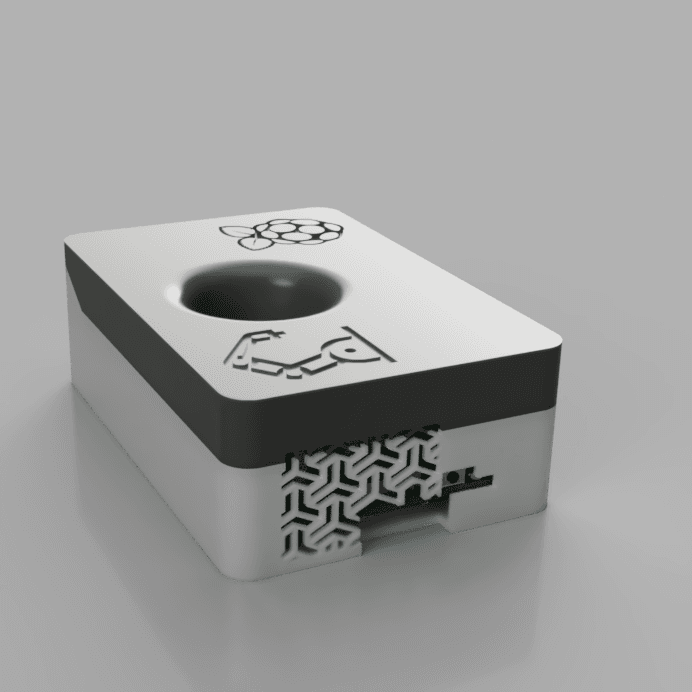
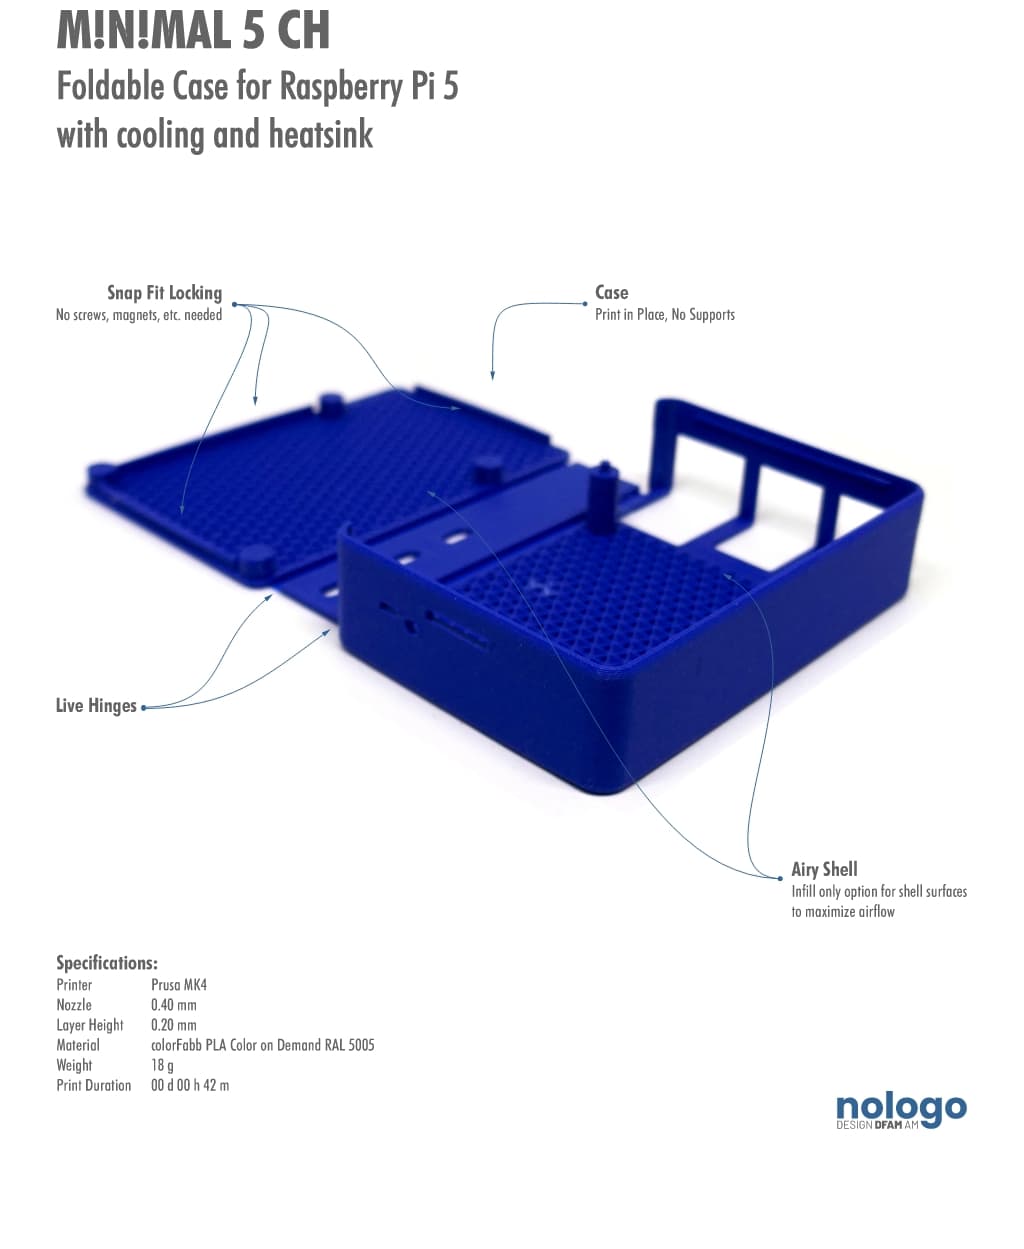
Retro Raspberry Pi 5 Case (Snap Fit)
A retro case that's simple and functional. Designed for use with pi's active cooler.
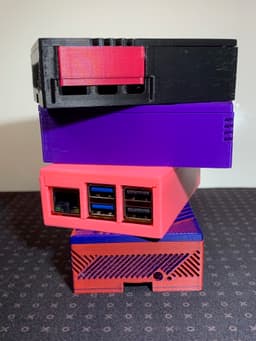
I was aiming for a retro, Art Deco vibe, and also tried to capture the classic look of an RTX or Radeon reference GPU.
Please see my most up-date-date page on Printables, as I am most active there.
Print Instructions:
Settings:
- ~38g of filament which takes my slow SOVOL SV06 four hours to print with:
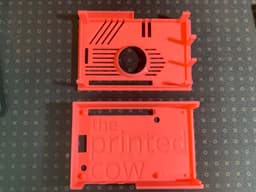
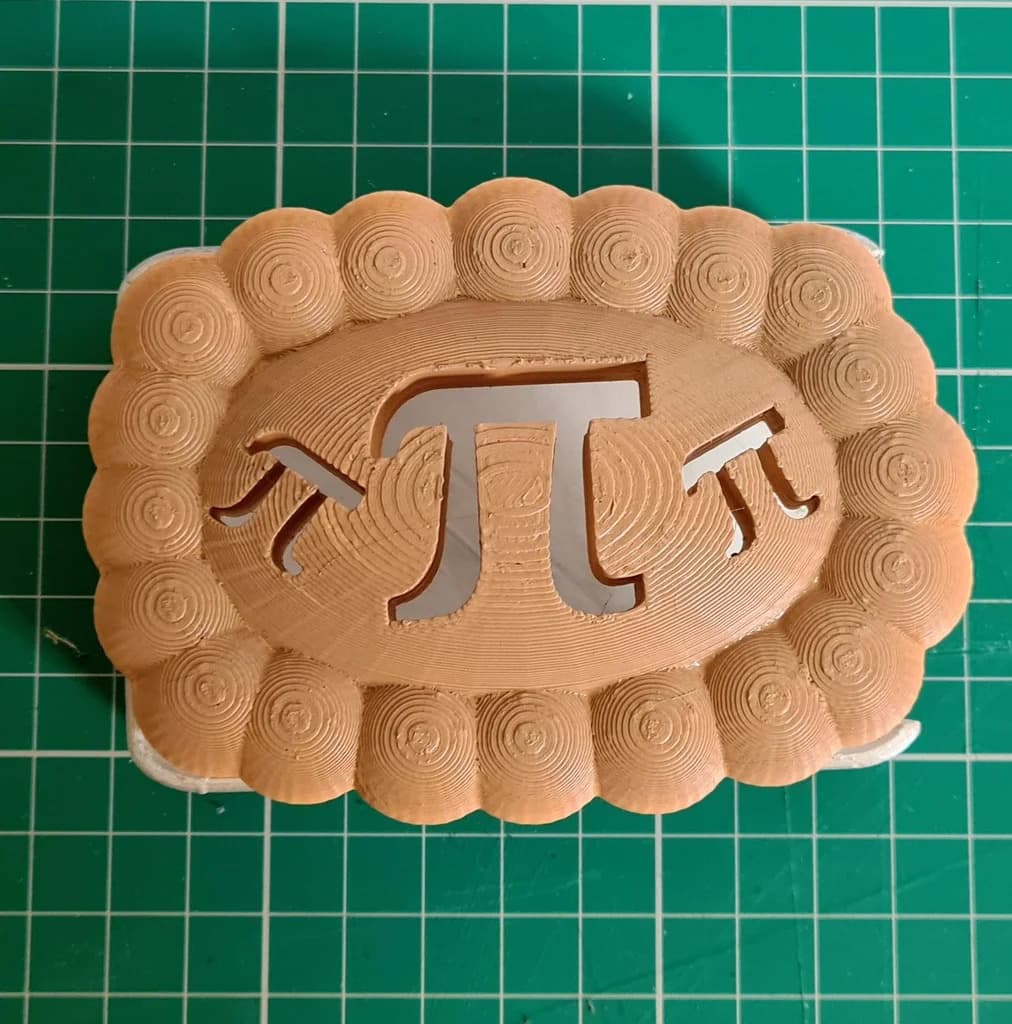
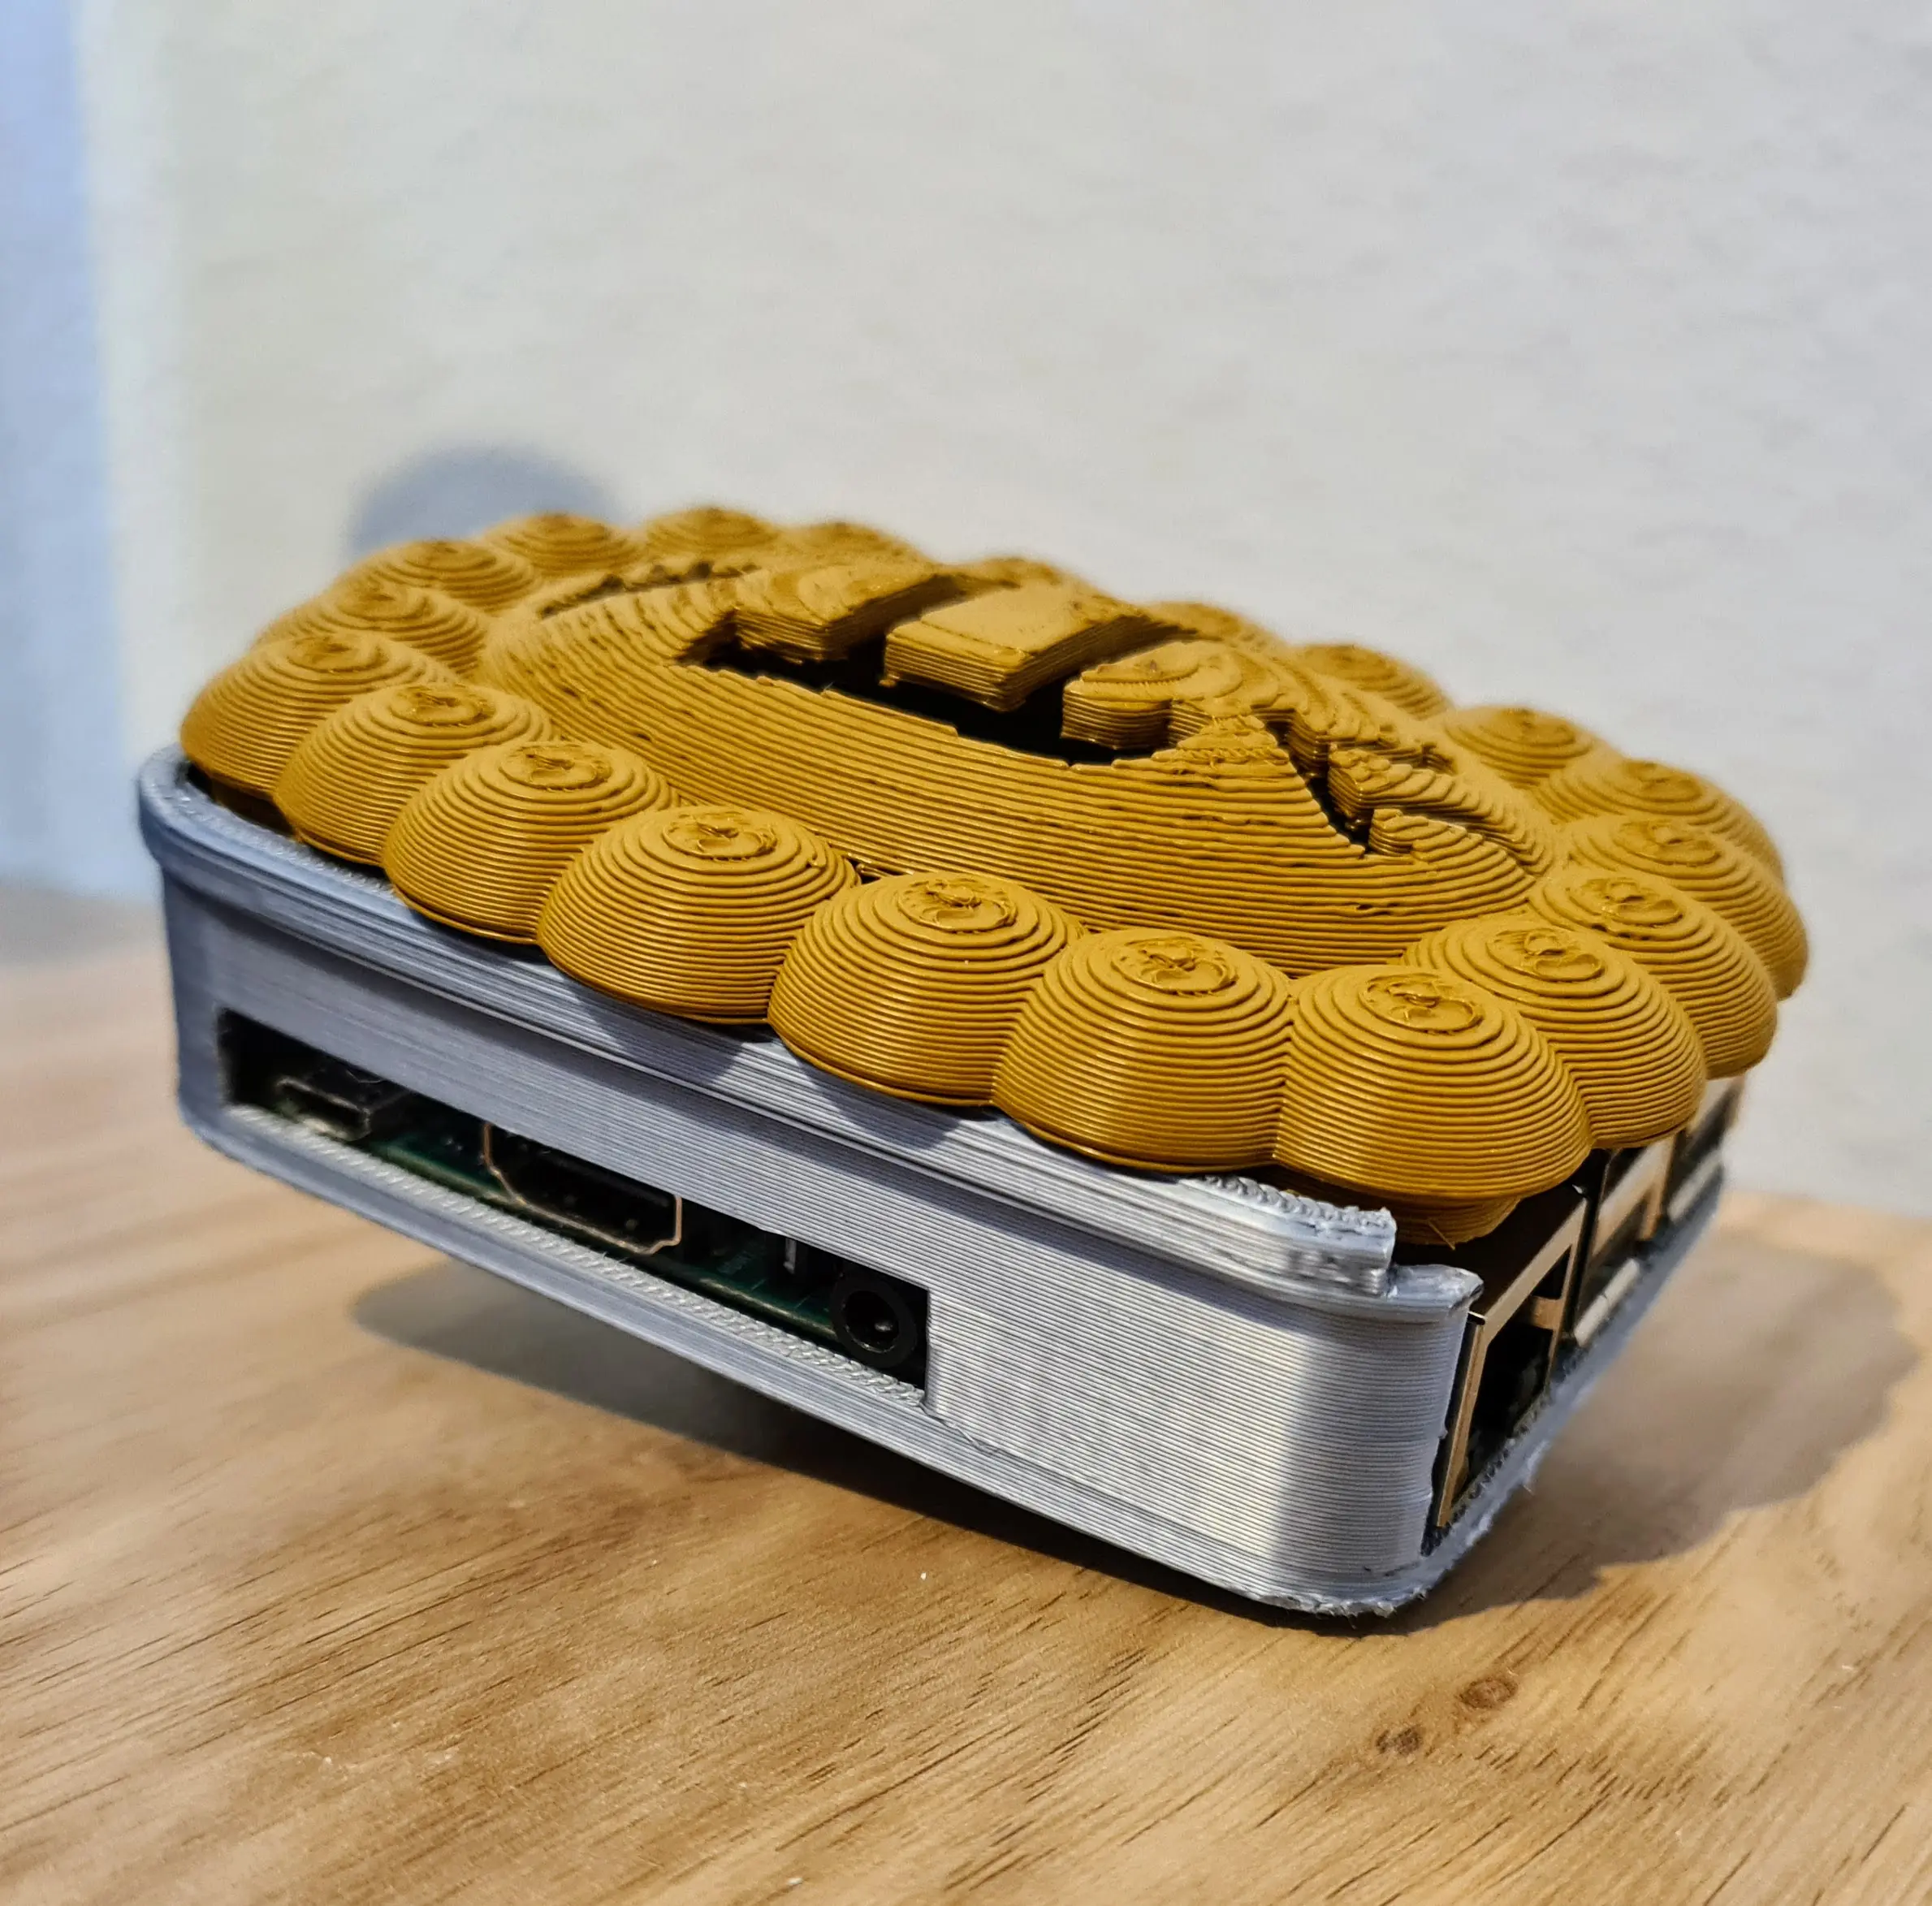
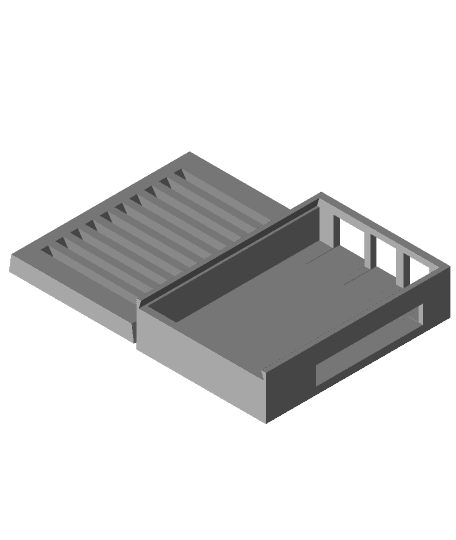
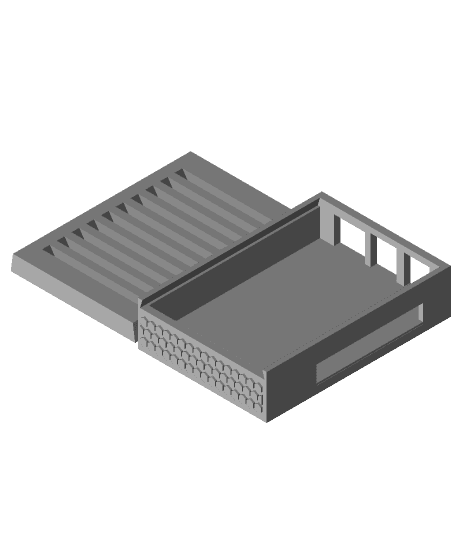
- .4 nozzle .2mm layer height Setup and Orientation: I used various PLA filaments, but I don't see why you can't use something else that makes sense. Print the models oriented with the most surface area facing down on the bed. No supports are necessary. I use print bed glue to prevent any of the corners from warping, which happens to my machine sometimes. Slicer Added Effects (optional): Try printing the top separately and set a filament color change at layer ~16 (check your slicer's preview) for that accent color effect! (see pictures) Try using a shell pattern for some cool effects! (e.g. concentric lines / increasing the ‘Extra Skin Wall Count’ parameter, Hilbert Curve, etc.)
Features:
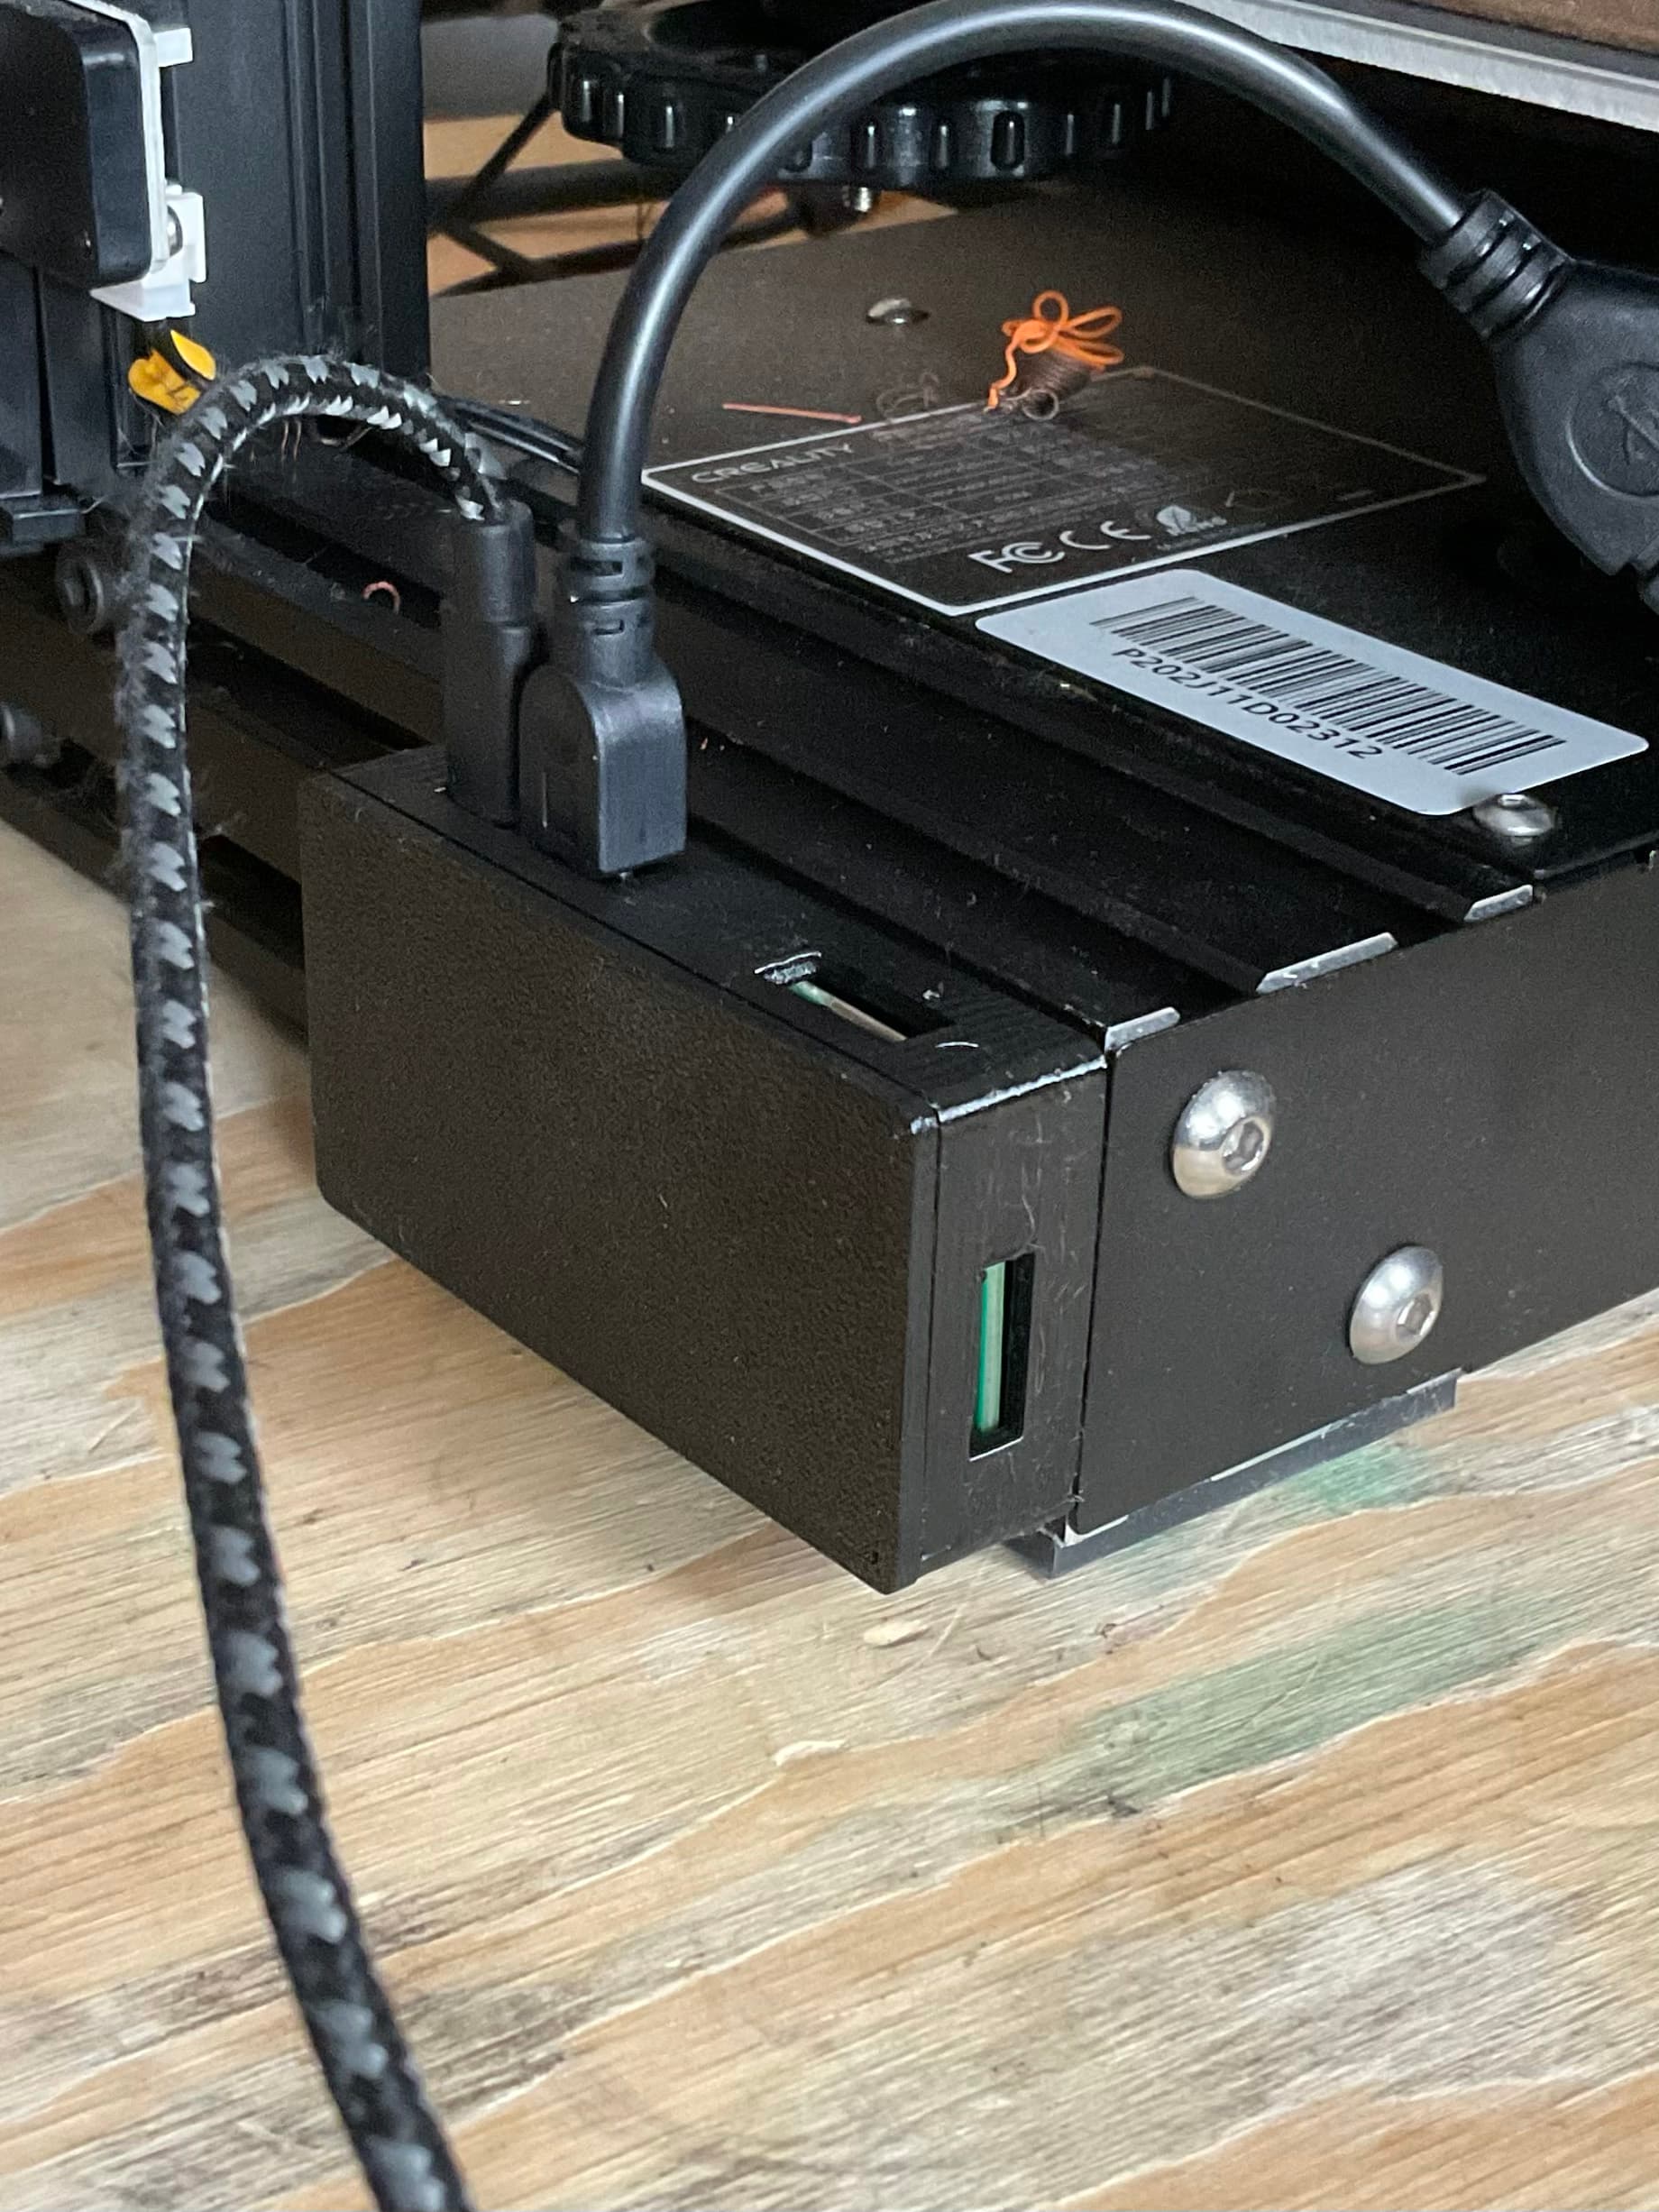
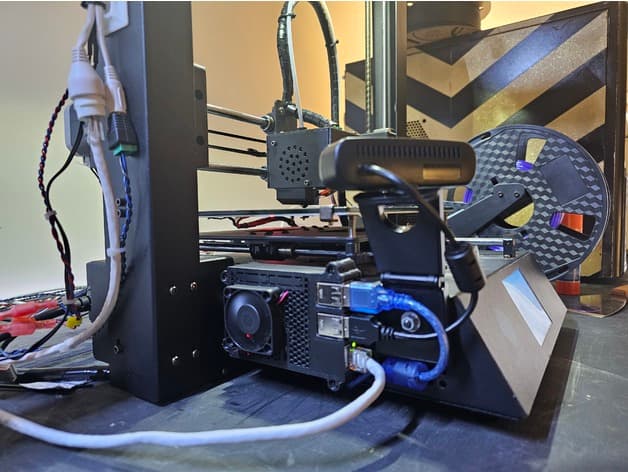
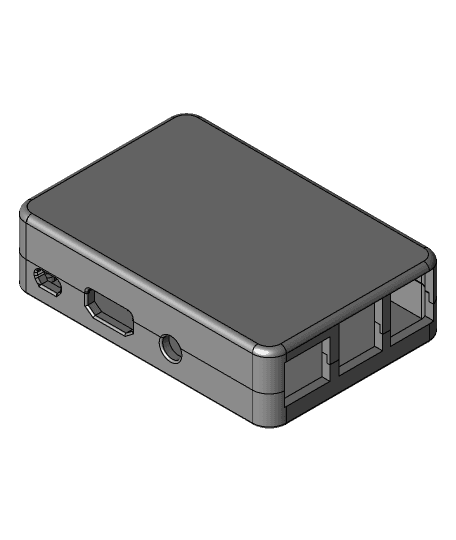
Simple: The case is two pieces that snap together, with an optional power button. No supports, additional parts, or screws are needed. Very minimal clean-up, if any. Secure: The pi should seat in nicely on the four pegs, but you may need to press gently on the pi around them to “snap” it in the first time. There are two smaller pegs which provide an even base to prevent the pi from tipping toward its USB. The lid holds the pi firmly in place on its pegs and minimizes rattling. Minimalistic: Lid is flush with bottom and the case has a clean, understated look with no unnecessary contours. My “logo” will be concealed by the pi once it is seated. Functional: Case allows for access to the IO pins from both sides, ribbon connections, SD card, as well as the power button and LED. There is enough headroom to tape the RTC battery on top of the ethernet port (the best place I found for it so far). Intended to be used with the official active cooler, and appears to be 10°C cooler than the pi's official case. Many thanks to phattmatt for providing the results of his thermal test! IO Versions: There are versions with and without access to IO pins/ribbons. You can mix and match any top and bottom.
Known/Potential Issues and Additional Remarks:
- Lid: The lid can be partially opened more easily than I would like on the USB side (but it will not open on its own). This is actually a benefit you when you want to remove the lid…
- USB Ports: There is the potential for the case's protruding lip on the USB side to interfere with wider plugs (like USB sticks and dongles), but I don't think this is likely.
- Missing Layers in Fan Funnel Port: No matter what nozzle you use, the slicer appears to be missing layers in the fan's funnel port. I don't think this effects the print, but please report any issues. No idea why. Using Screws:
- You can also (theoretically) cut off the top of the pegs and use screws/bolts instead - I purposefully allowed for this but have not tested it. You may need to use self-tapping screws and I did not test the size/depth of the underside's bolt recesses.
I am continuing to make adjustments to the model, but I feel like its in a good place right now overall. If anything doesn't fit right, please let me know and I can see about adjusting the model. I am also open to other suggestions, if you have any.
If you'd like, please support my work by purchasing a physical print from me on Etsy!
Retro Raspberry Pi 5 Case (Snap Fit)
Raspberry Pi Zero 2 W Case (Snap fit with optional 2050 mounting)
Pi TFT50 TV - Vintage Tube TV Raspberry Pi case!

Raspberry Pi 5 case - Retro tower desktop

Raspberry Pi Pico snap-together case with slot for 6-wire ribbon cable
Raspberry Pi 3 B+ Case for Pi & Buck Converter LM2596 - For 2040 Extrusion and Prusa i3 Bear Upgrade
Pi Pie Raspberry Pi Case (Easy Print Version)
Pi Pie Raspberry Pi Case
Raspberry pi case 1
raspberry pi case 2
40mm Fan Top case for "Raspberry Pi 3B+ Case" by mkellsy

Dandy 2000 RGB Retro Raspberry Pi 4/5 Case

M!N!MAL 0 CH - Raspberry Pi Zero 2 / Banana Pi M2 Case / Housing / Sleeve with Heatsink & Cooling
RASPBERRY PI 5 CUSTOM CASE
M!N!MAL 5 CH - Raspberry Pi 5 Case

TerraPi SSD Case / Stand for Raspberry Pi (all models)
.png&w=3840&q=75)
Stay Put Case (For Raspberry Pi 4).stl

Raspberry Pi 4-Node Cluster Case

Raspberry Pi 5 Case
Customizable Raspberry Pi 3B+ case (screwless)