Utility Tags
This set of utility tags identifies your shut-off valves to help anyone find them in the event of an emergency. The “Water Main” tag is probably the most important, but one for hot water and one for the gas line (if you have one) are not a bad idea either.
Ideally, you can just hang the tag on the valve or the corresponding pipe but if that is not practical I have included slots for zip ties allowing you to attach it on a vertical pipe, horizontal pipe or just about however you need to.
These tags are one-sided and have a substrate to ensure strength and flexibility. The tag is 1.0mm thick with the graphics occupying the top 0.6mm and the remaining 0.4mm being the homogeneous substrate.
You can scale the tags up or down in size but that should always be done as a non-uniform scaling. Leave the height (Z) as is (do not scale the height). Please see my notes about scaling and printing below.
SCALING NOTES
When scaling the sign be sure to do a non-uniform scale of just x and y. Do not scale the Z-axis. If you want to scale z, only scale it bigger and in multiples of your print layer height (which should be 0.2mm).
HOW TO PRINT
-
Import the model into your slicer. The tag is oriented face down.
-
Without disturbing the model, change the colour of each model object or component to your desired colour.
-
Group or merge the objects so that they do not shift or become misaligned.
-
Now you can move, scale, flip, and rotate the tag as desired.
GENERAL NOTES
-
The tag is designed for a 0.2mm layer height.
-
The height/thickness of the sign is 1.0mm.
-
You can scale all the models as desired but be sure to group or merge the components of each model first before scaling, and only use non-uniform scaling; only scale x and y, do not scale z.
-
The sign has only 1 object or component for each colour allowing you to set the colors in your slicer very easily. However, this will cause some slicer messages you should be aware of. See the “Slicer Error” notes below.
-
Print the sign face down for a smoother finish on the front.
IMPORTING TO YOUR SLICER
When Importing the file to your slicer, answer as indicated if you are asked any of the following questions…
Anycubic —————
“This file contains several objects positioned at multiple heights Instead of considering them as multiple objects, should the file be loaded as a single object having multiple parts?” = NO (this keeps the parts located together)
“The dimensions of some objects from the file _____ seem to be defined in inches. The internal unit of the program is a millimetre. Do you want to recalculate the dimensions of these objects?” = NO
OrcaSlicer —————
“The object from file ______ is too small and may be in meters or inches. Do you want to scale to millimetres?” = NO
Bambu —————
“The object from file ______ is too small and may be in meters or inches. Do you want to scale to millimetres?” = NO
SLICER ERRORS
I have used a design technique that allows all the objects of each colour in the sign to be grouped and laid on a substrate for strength. This grouping allows you to easily set and change the model’s component’s colours. However, this design approach will result in some slicer warnings and errors. You can safely ignore the following warnings and errors when slicing this flag model:
tool path conflict
shared path
unsupported runs
Below are specific errors for a few different slicers are shown here, you can ignore these errors when printing this sign.
Anycubic —————
“Error: Conflicts in G-code paths have been detected…” = IGNORE “Warning: Empty layer between…” = IGNORE “Warning: Detected print stability issues” = INGORE
OrcaSlicer —————
“The object has empty layers between…” = IGNORE “____ is too close to others; there may be a collision when printing.” = IGNORE
Bambu —————
“Warning: Objects can’t be printed for empty layer between…” = IGNORE “Warning: It seems object ____ has floating regions…” = IGNORE
I am working on more signs and plan to eventually post them, but if you are interested in a specific sign not already posted, please send me a message and I will prioritize it.
This model is 100% printed - no hardware, fasteners, or adhesives required. No support is required.
Printing
Thin graphics designs such as this one generally will work well with your default slicer settings.
This product was designed for a 0.4mm nozzle, a 0.2mm layer height and the following settings:
Wall Line Count (minimum) = 2 ( 2 x 0.4mm = 0.8mm walls ) Top & Bottom Layer Count (minimum) = 3 ( 3 x 0.2mm = 0.6mm top & bottom ) Infill = Not applicable Ironing = Optional (not needed) Support = None required Brim = NO MATERIAL: PLA (or ASA for outdoor use and increased life expectancy) PRINT ORIENTATION: Face down
Commercial Licensing is available through my logicalplanet Memberships here on Thangs. I will customize and provide commercial support to members upon request.
See my blog for more details and other product info… https://www.logicalplanet.com/
Utility Tags
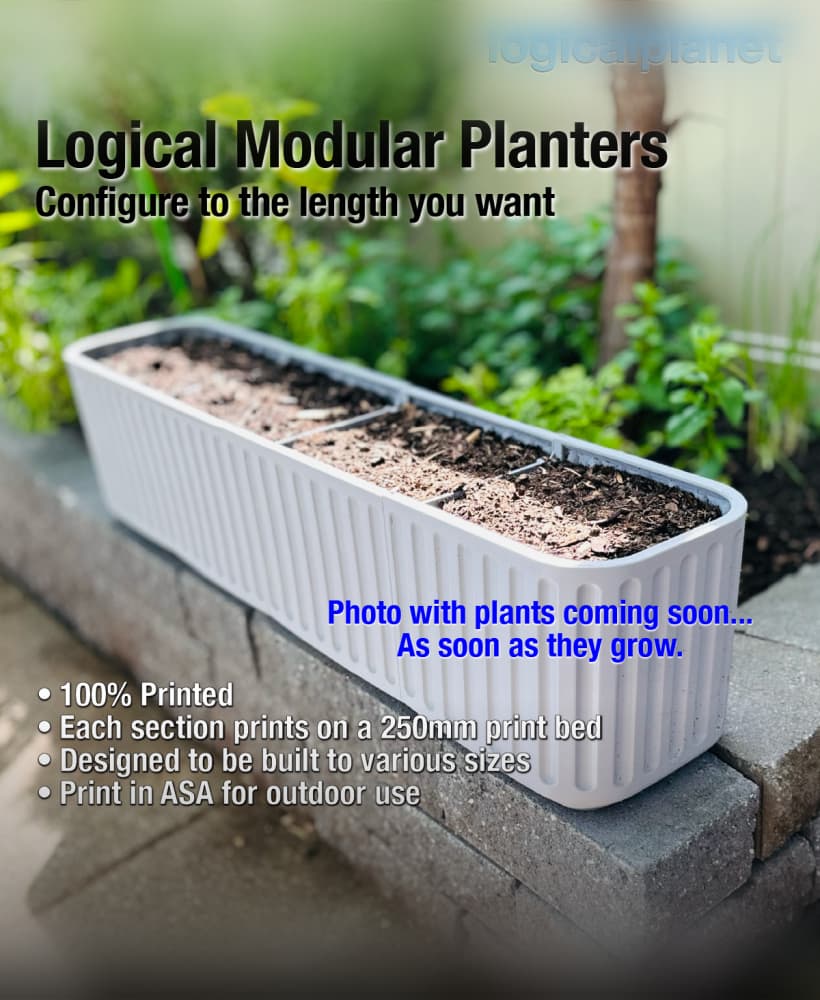
Logical Modular Planters
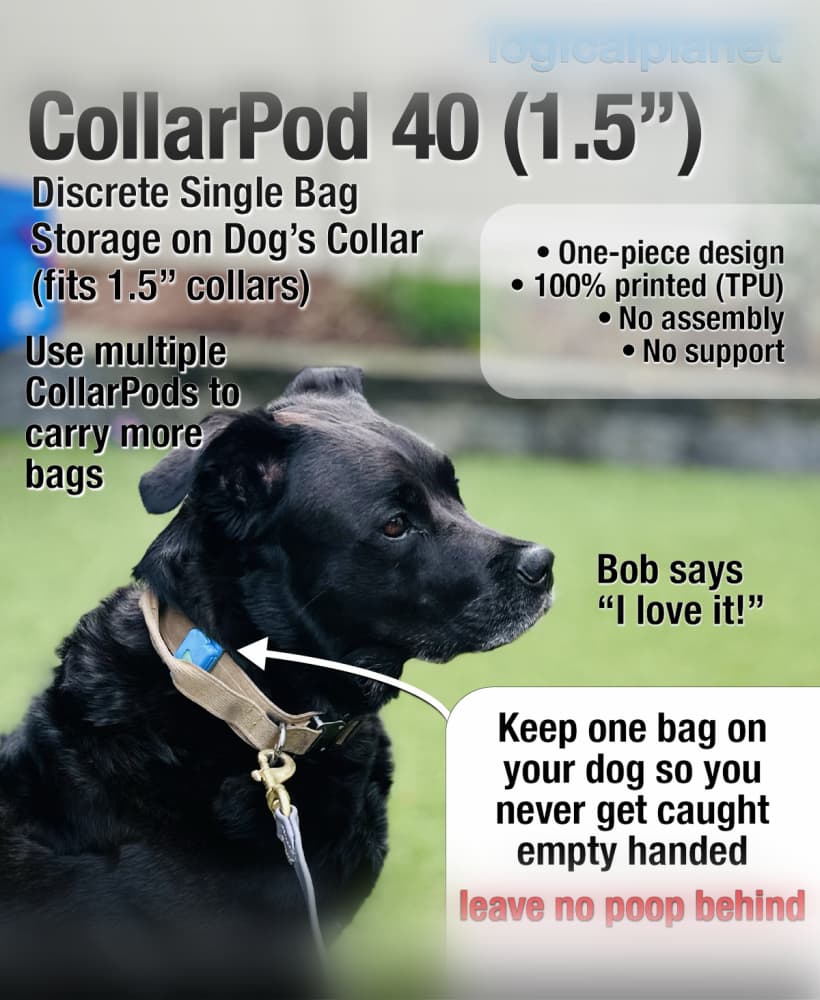
CollarPod 40 - Poop Bag Holder for Dog Collars - 1.5 Inch Collar - Single Piece TPU - No Assembly
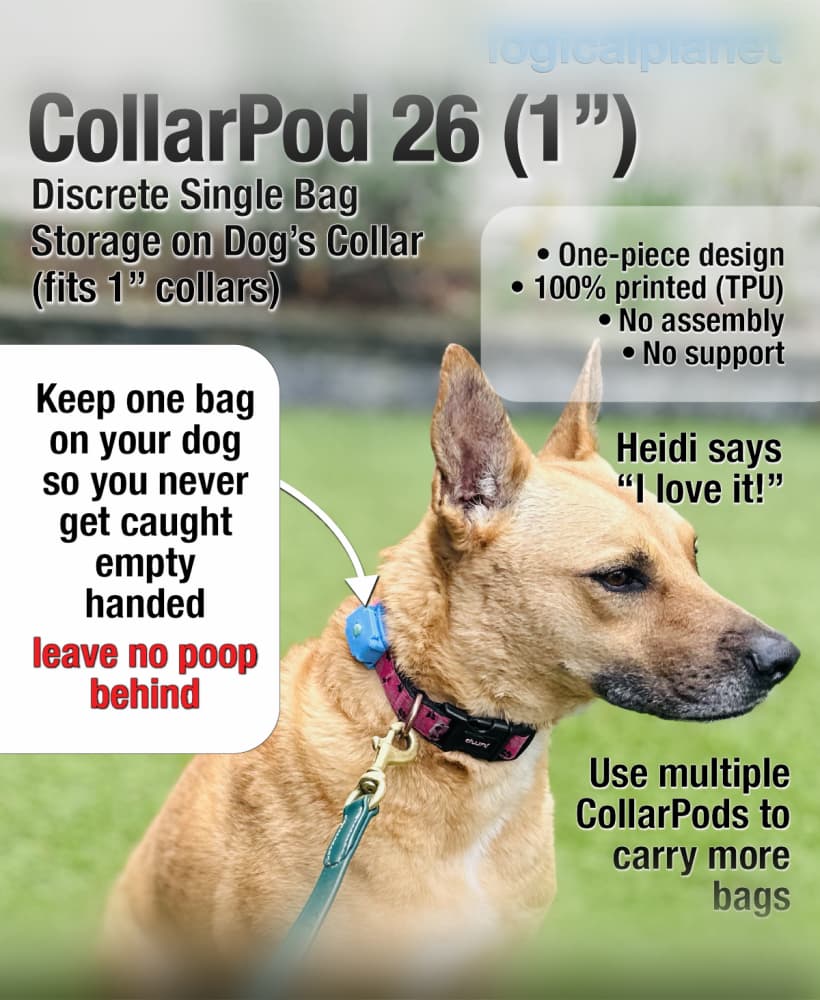
CollarPod 26 - Poop Bag Holder for Dog Collars - 1 Inch Collar - Single Piece TPU - No Assembly
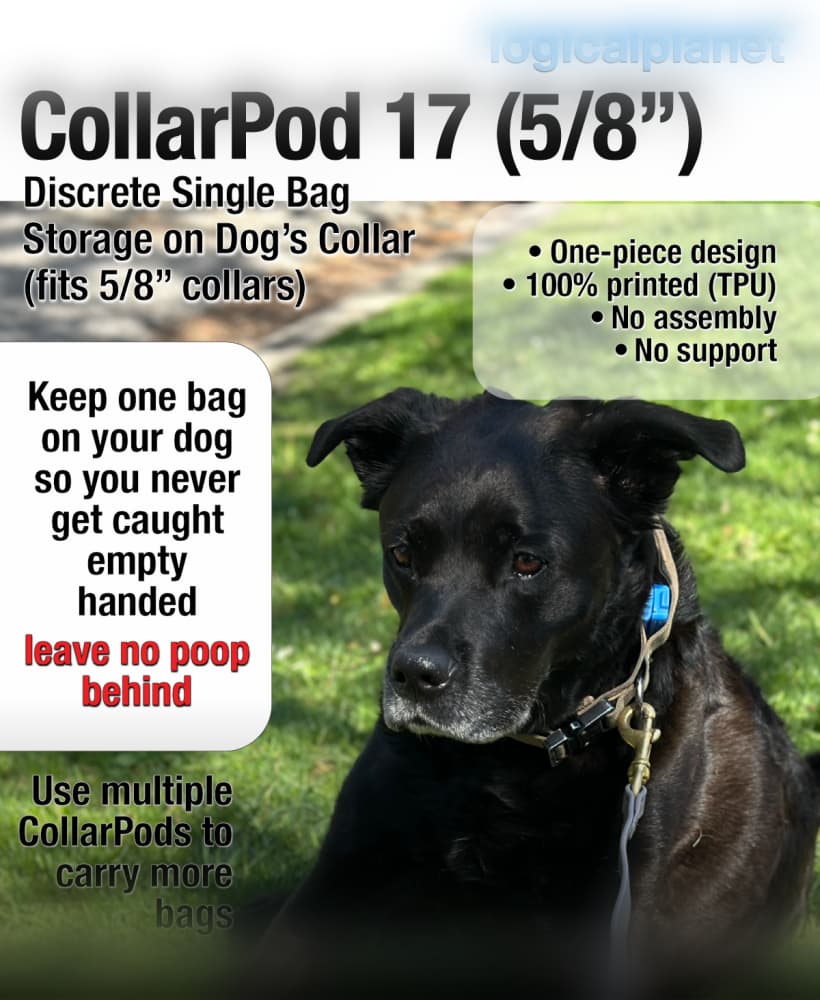
CollarPod 17 - Poop Bag Holder for Dog Collars - 5/8 Inch Collar - Single Piece TPU - No Assembly
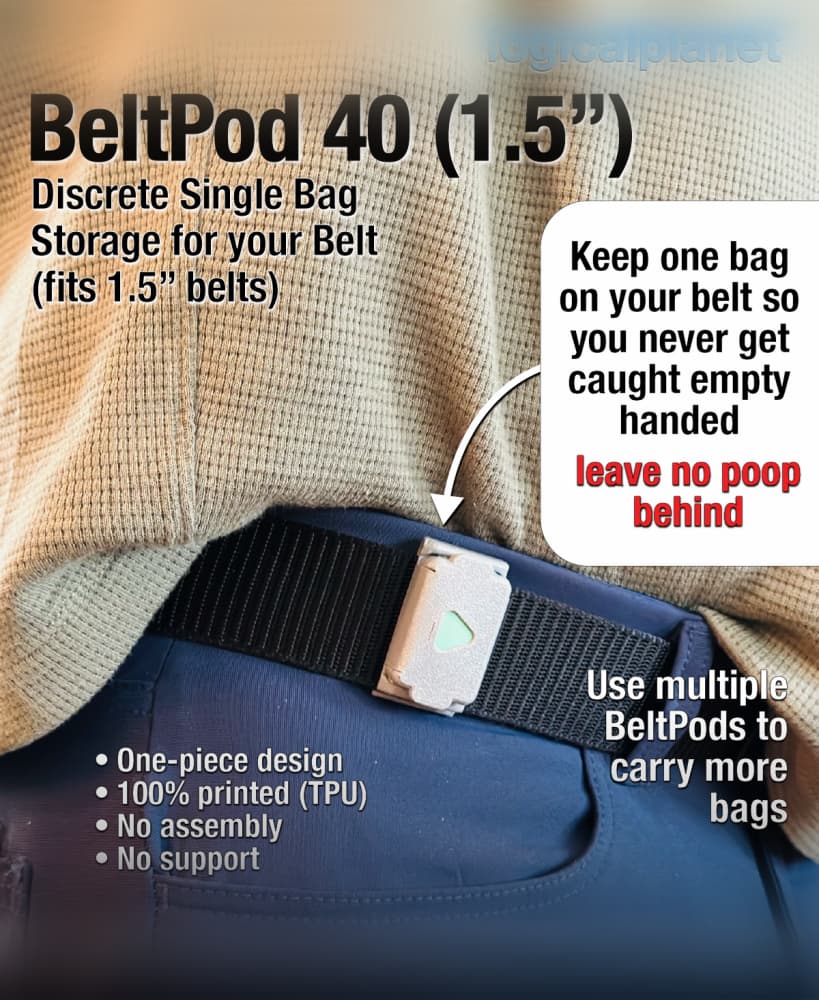
BeltPod 40 - Poop Bag Holder for Your Belt - Single Piece TPU - No Assembly
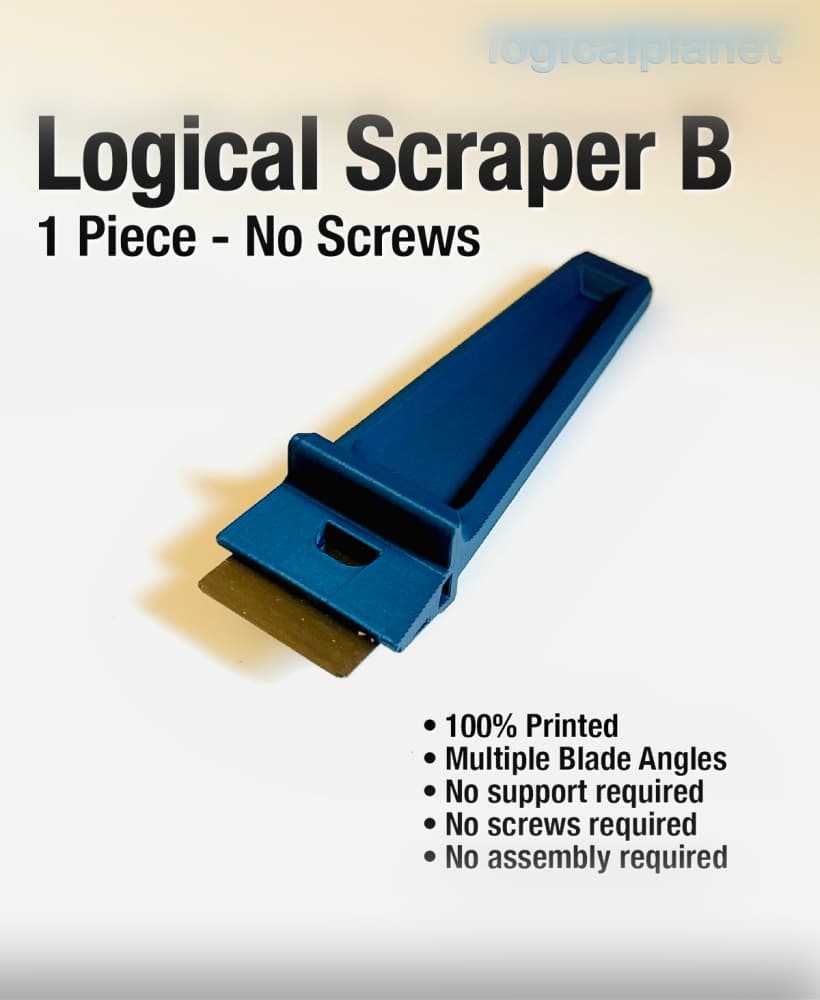
Logical Scraper B - 1 Piece No Screws No Assembly

Logical Scraper A — 2 Piece, No Screws

LGP Self-Watering Tray — Modular Bottom Watering Reservoir for the Logical Grow Platform
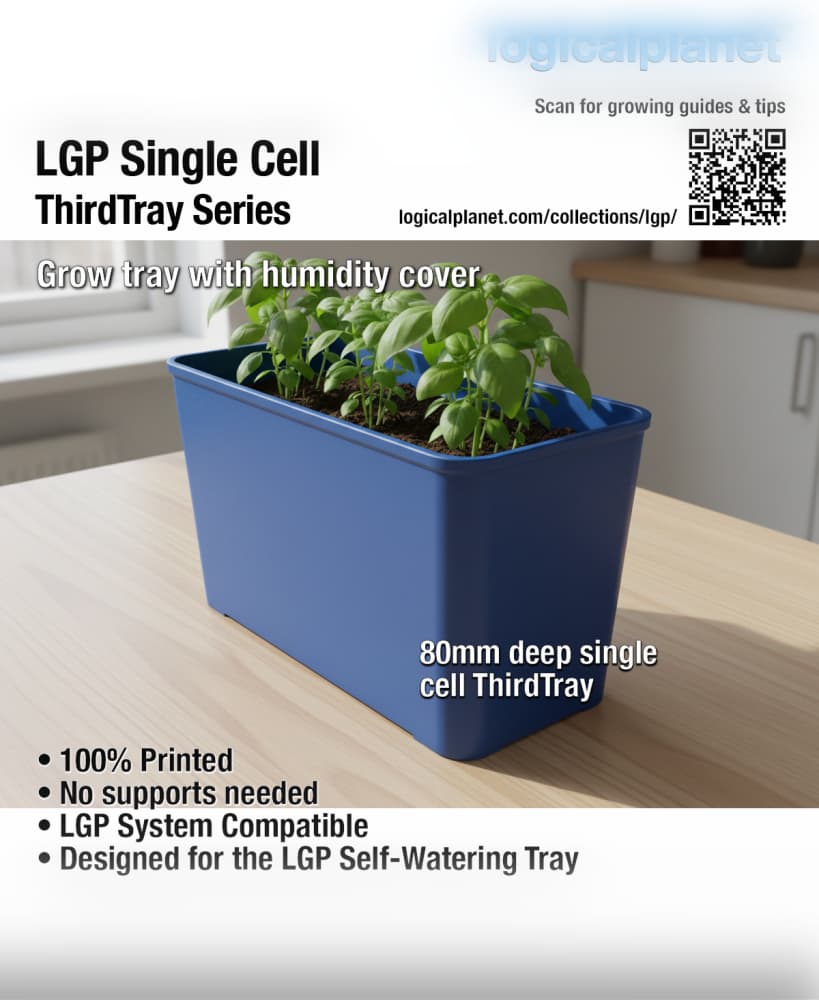
LGP Single Cell ThirdTray — Modular Grow Cell for the Logical Grow Platform
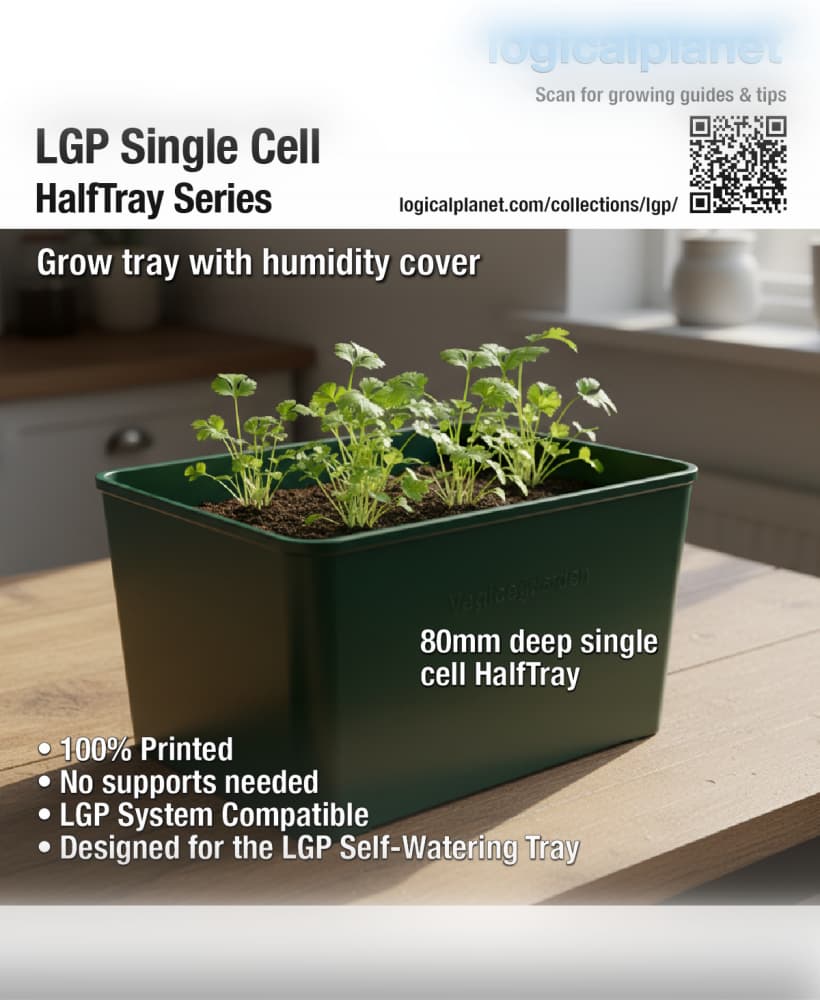
LGP Single Cell HalfTray — Modular Grow Cell for the Logical Grow Platform
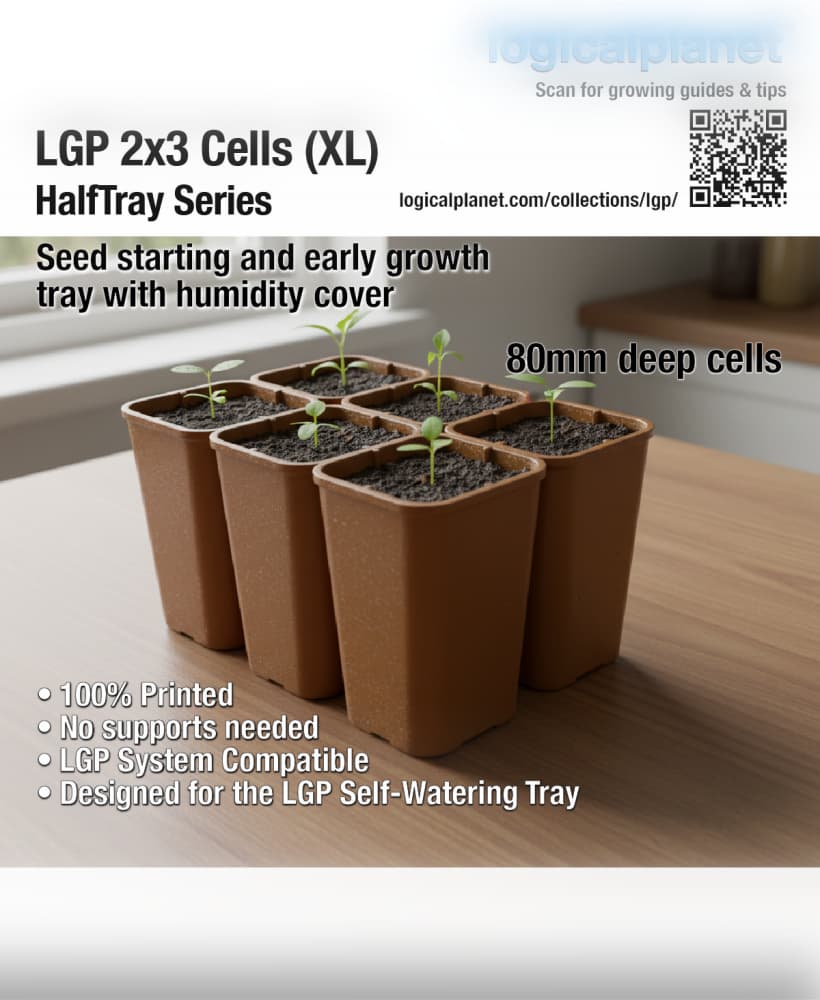
LGP 2×3 Cells XL HalfTray — Modular Seed Starting Tray for the Logical Grow Platform

LPE25 Clampless Quick Connect
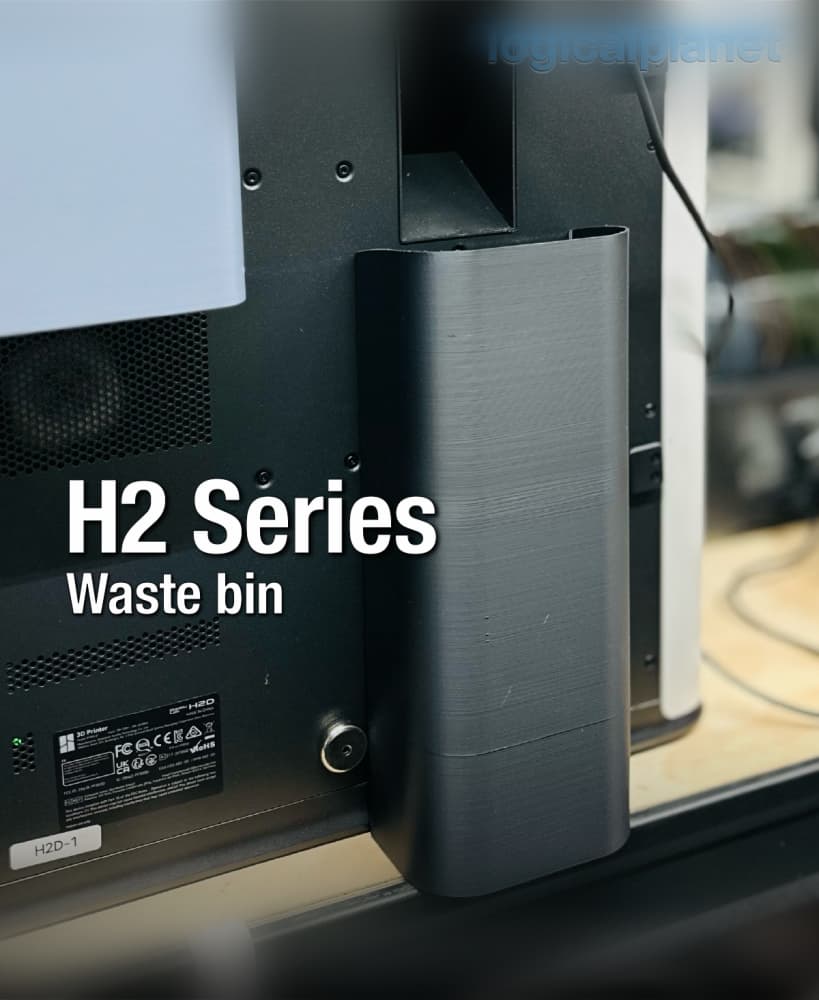
H2 Series Waste Bin
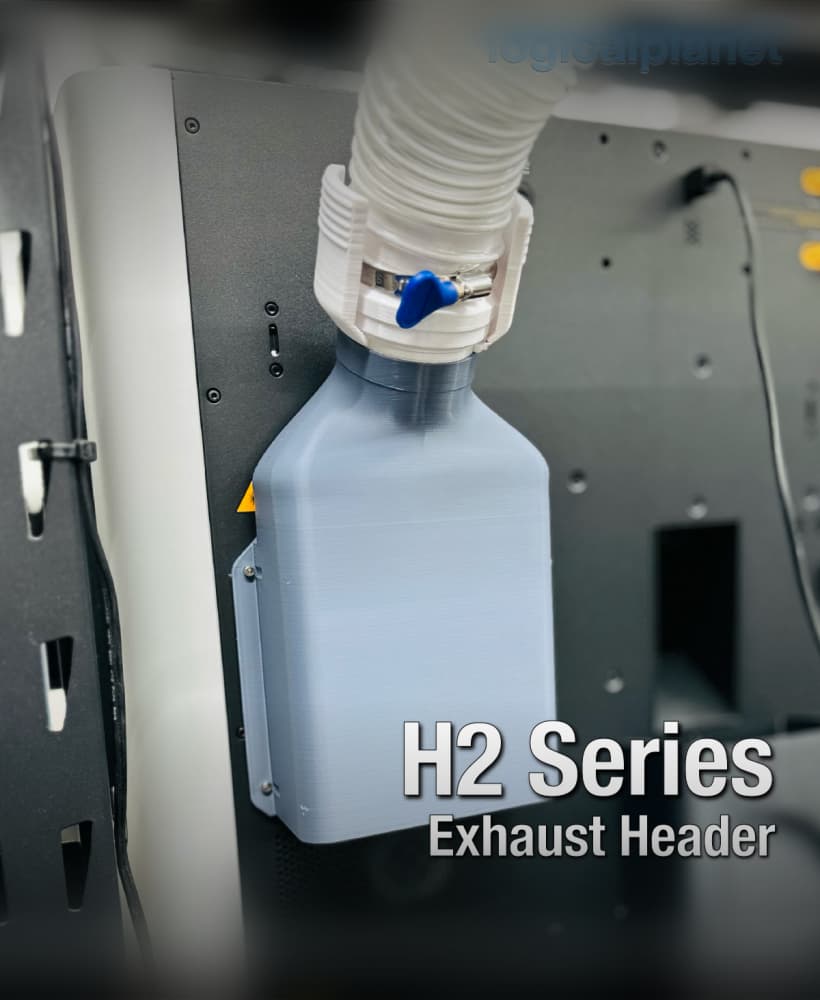
Exhaust Header for Bambu Lab H2 Series Printers

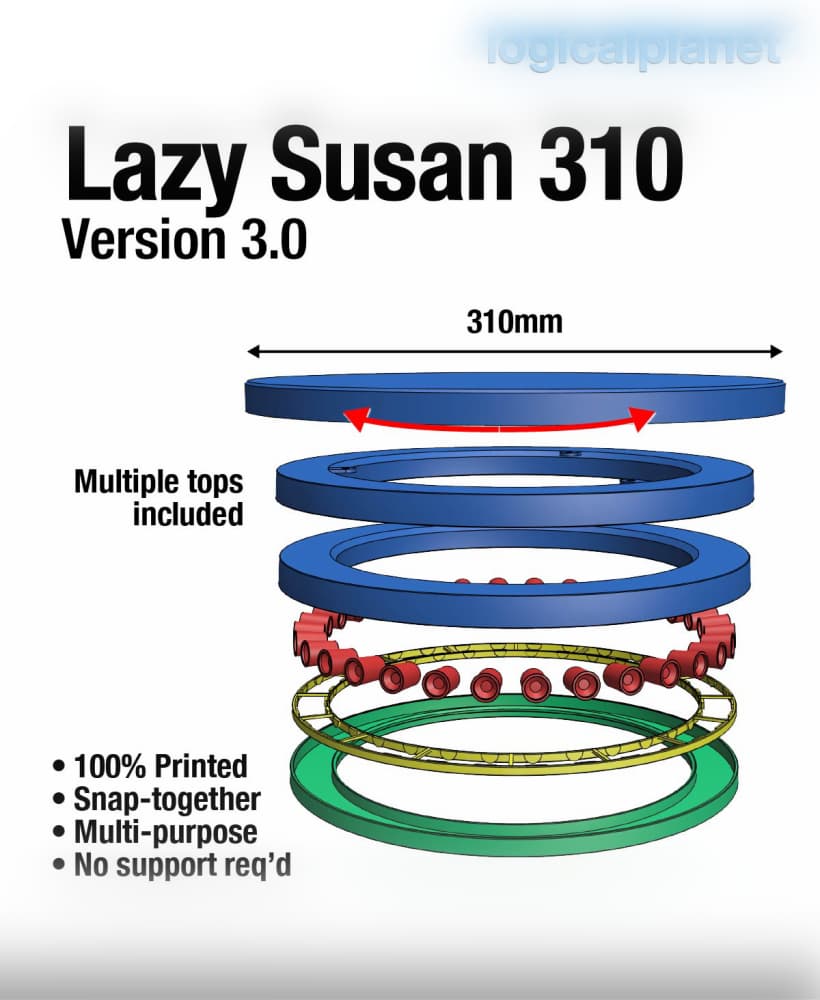
Lazy Susan 120 v3.0
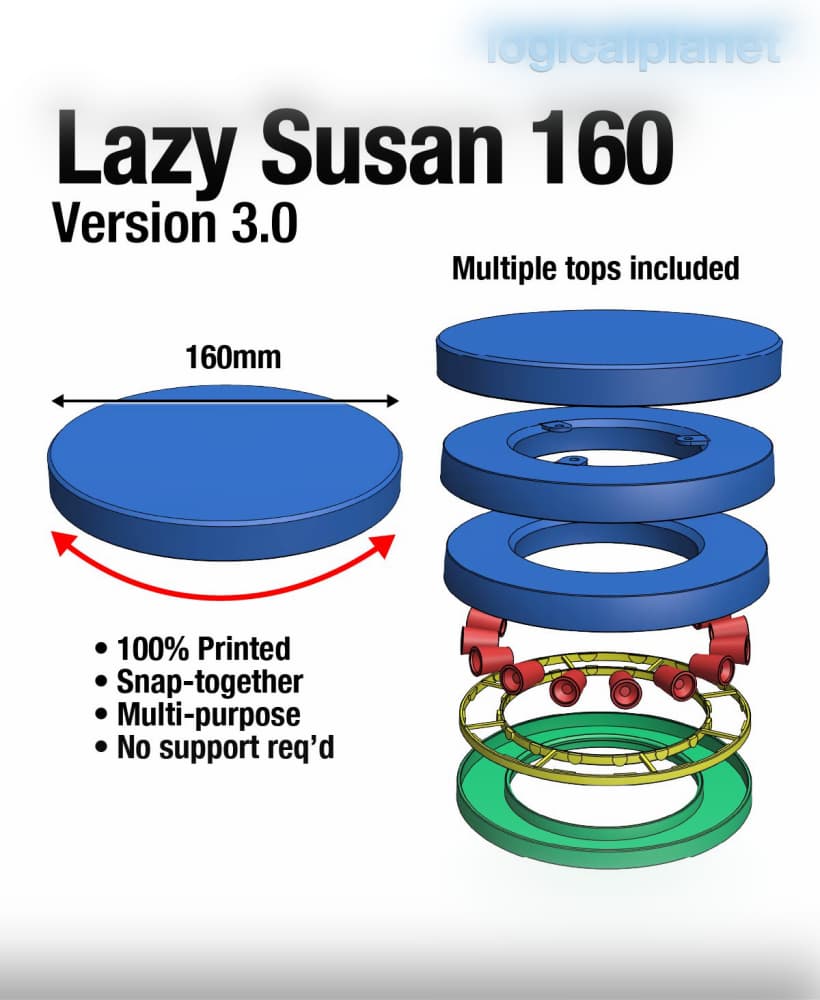
Lazy Susan 160 v3.0
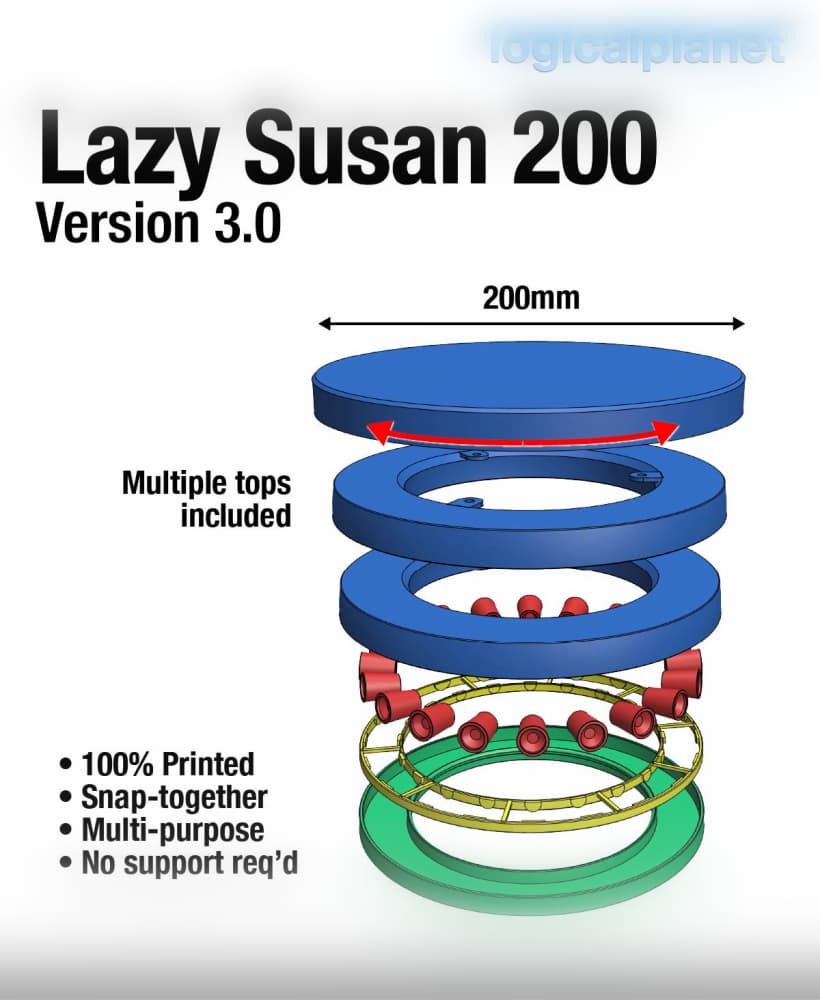
Lazy Susan 200 v3.0

Lazy Susan 240 v3.0
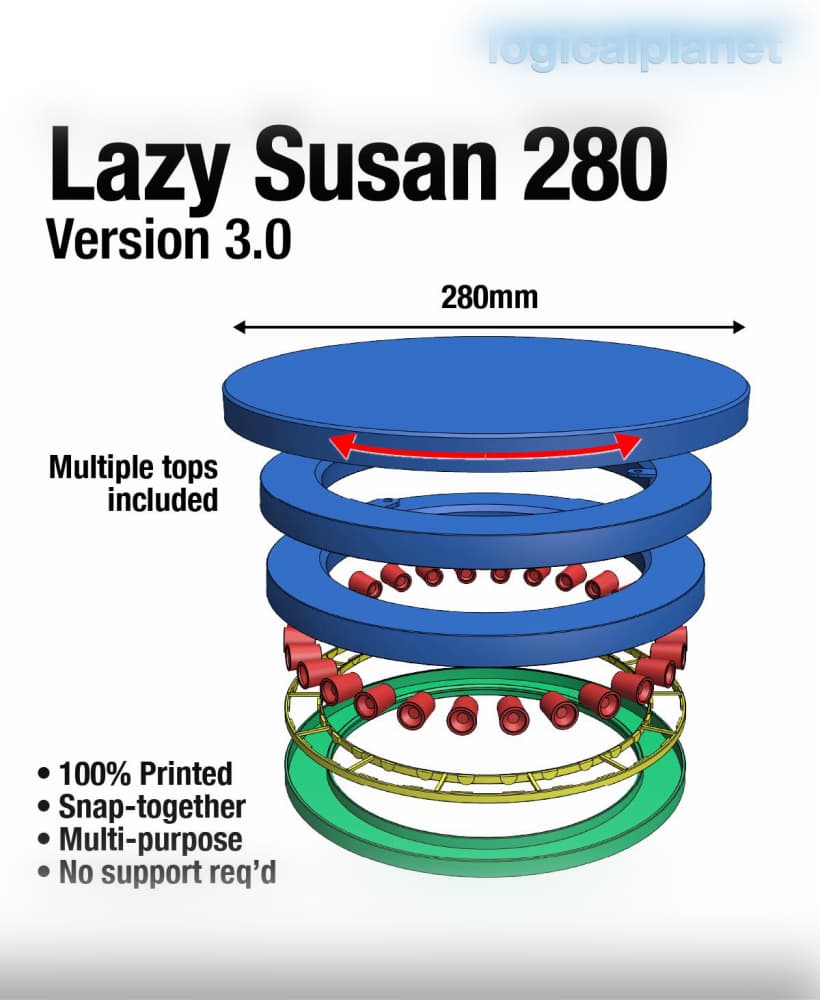
Lazy Susan 280 v3.0