

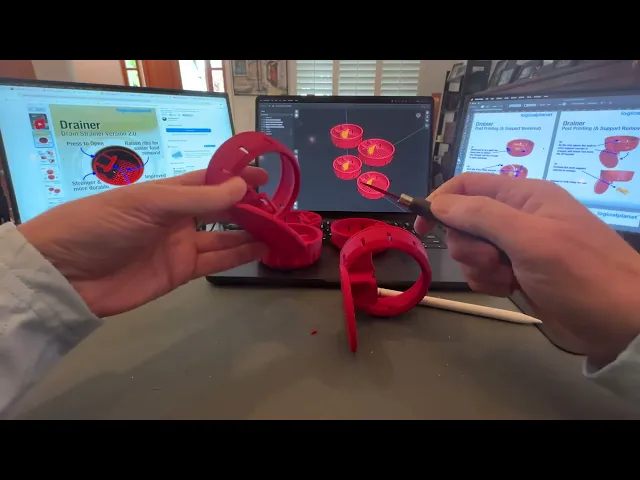


Drainer – Pop-Open Drain Strainer Version 2.0
Lift. Pop. Dump. Repeat.
The original Pop Open Drain Strainer was a game changer — and now it's even better. Introducing Drainer – Version 2.0, the upgraded print-in-place sink strainer designed for durability, improved performance, and one-handed ease. Trap food scraps while keeping your hands clean, and empty it with a single press.
I have included two versions. The two have different strainer designs in the floor (bottom) of the Drainer. Please see the included image. A few people have indicated that the original hex bottom design works better for some foods.
Key Features:
- One-press pop-open trap door for mess-free emptying
- New integrated lift handle keeps the strainer securely closed during lifting
- Raised interior ribs help food scraps release more easily
- Improved drainage grid lets water flow while catching the mess
- Thicker wall sections for extra strength and longer life
- Print-in-place hinge + support system – no assembly required
This version is optimized for ABS, which resists hot sink water better than PLA or PETG. It includes built-in support for the trap mechanism that break free during post-print setup.
Post-Printing Setup: After printing: Gently defuse the built-in hinge supports by prying apart the marked faces. Press and rotate the Drainer to release the trap. Remove the temporary print support (shown in orange in diagrams). You're ready to strain and dump like a pro.
Dimensions Outer Diameter: 3-1/4" (83mm) Height: 1-1/4" (31 mm) Designed to fit most standard kitchen sink drains
Notes: This is a single-piece, support-integrated model – no hardware, no adhesives. For best results and heat resistance, print in ABS. Designed for strength and long-term daily use in the kitchen. Compatible with common sink openings; check fit before use if your drain is non-standard.
Related Links
Drainer LP - Low Profile (25mm) https://than.gs/m/1402886
Visit my blog for more details and other designs https://www.logicalplanet.com/
Revisions and Updates I occasionally update and revise my designs. When I do, I’ll document the changes here. Check back periodically for the latest revision notes or if you’re experiencing any issues with a model. Please email me at logicalplanet3d@gmail.com if you would like me to make a revision or have comments about this design.
20250815: I have added a second version to this download, which includes the original hex bottom design.
20250907: I have uploaded a new version of the hex bottom design which corrects two issues with it.
20251004: I have uploaded new versions of both models. The new versions have improved geometry that will make them print better with less overhang. And, I have removed some of the print support to help them open up after printing more easily. I have added an instructional video as well on how to open them after printing.


Drainer – Pop-Open Drain Strainer Version 2.0
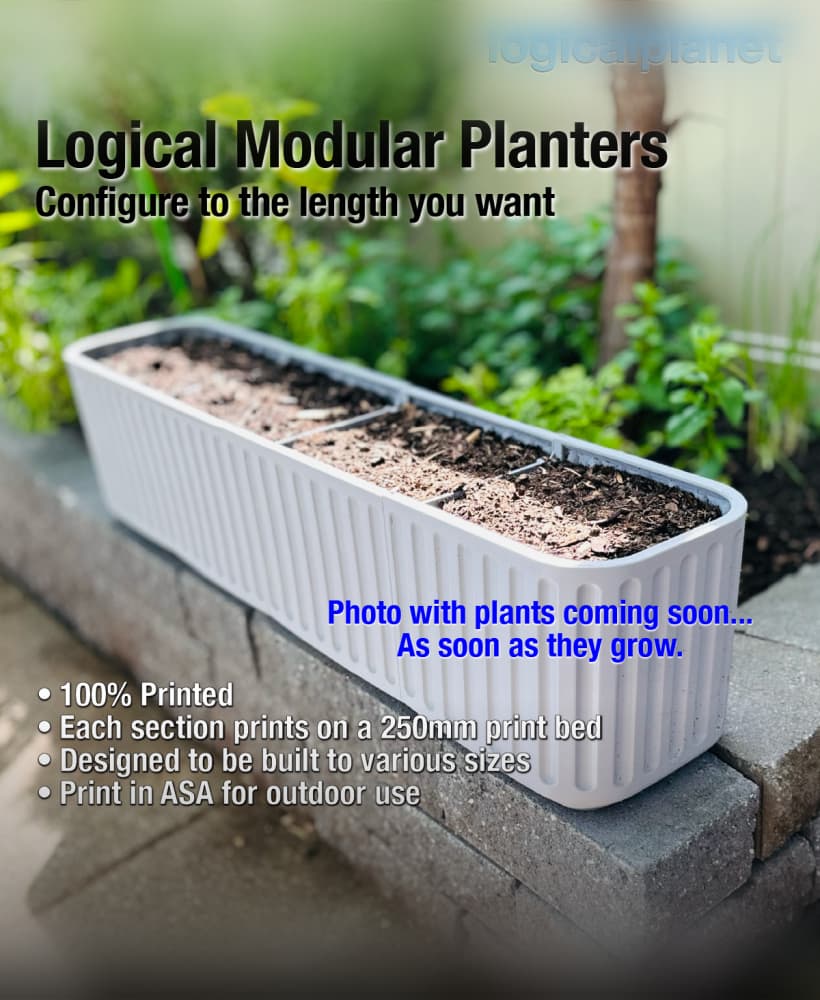
Logical Modular Planters
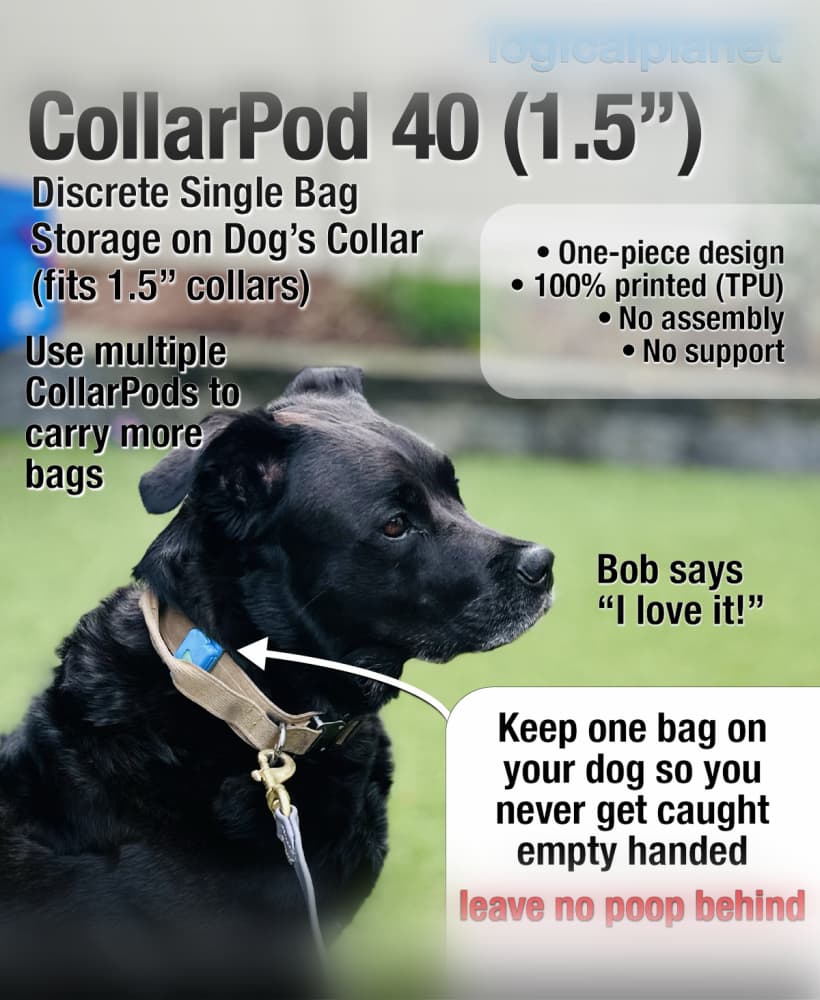
CollarPod 40 - Poop Bag Holder for Dog Collars - 1.5 Inch Collar - Single Piece TPU - No Assembly
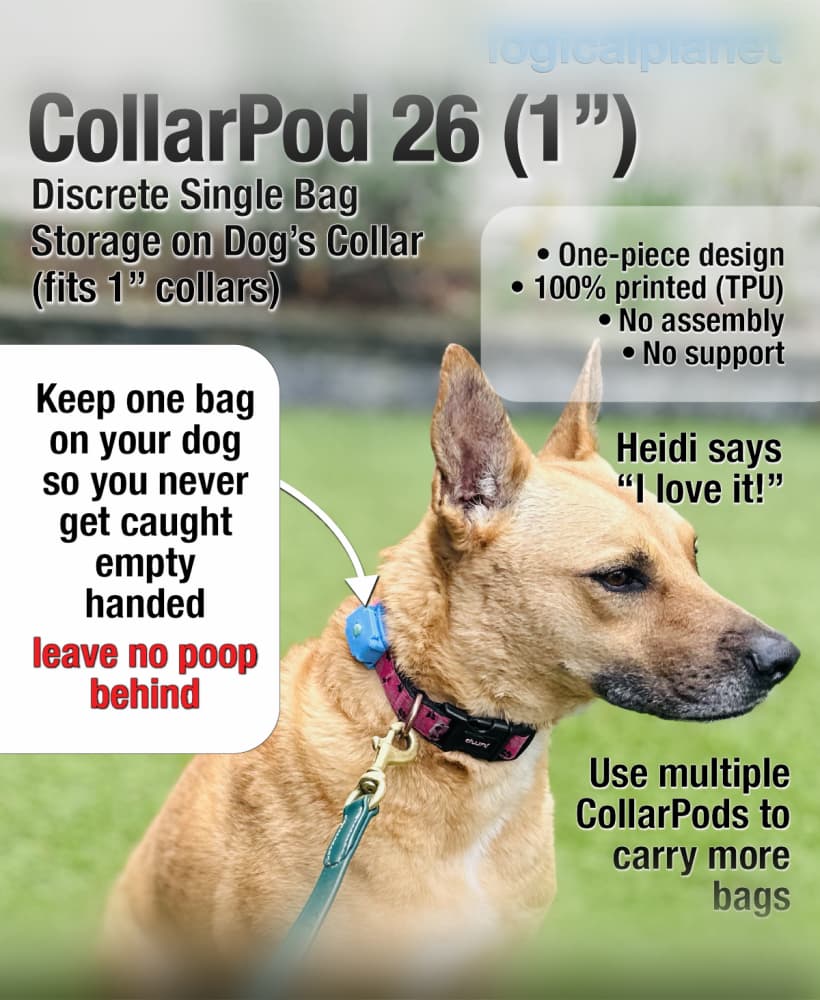
CollarPod 26 - Poop Bag Holder for Dog Collars - 1 Inch Collar - Single Piece TPU - No Assembly
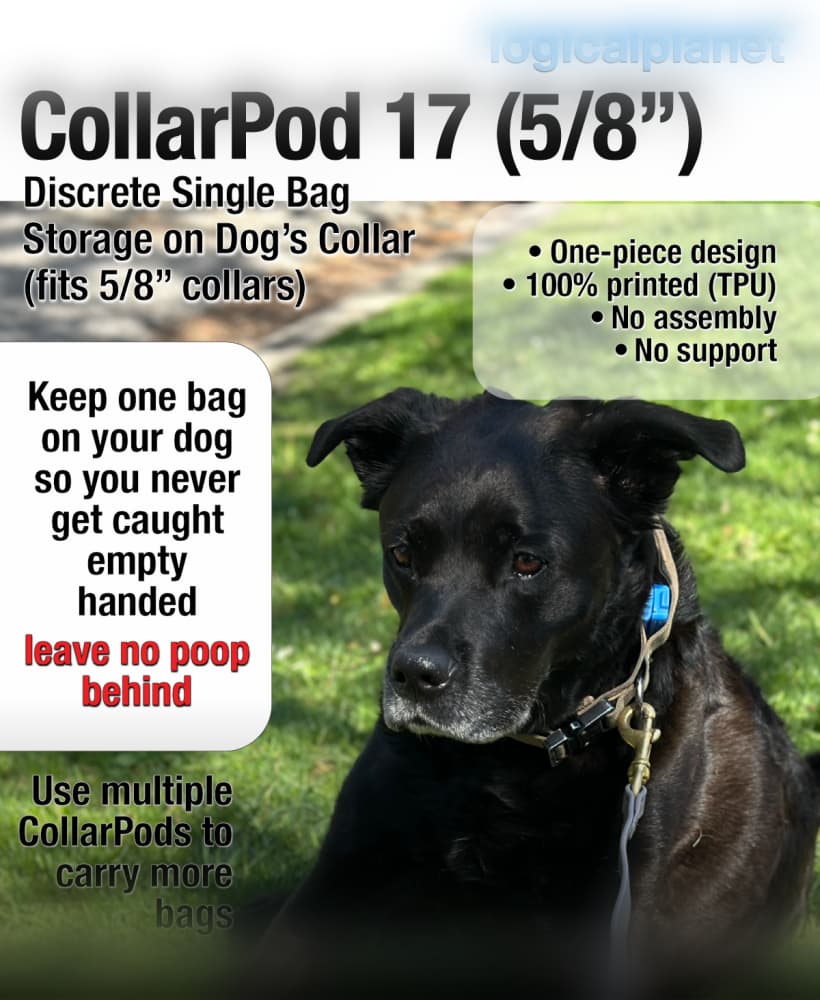
CollarPod 17 - Poop Bag Holder for Dog Collars - 5/8 Inch Collar - Single Piece TPU - No Assembly
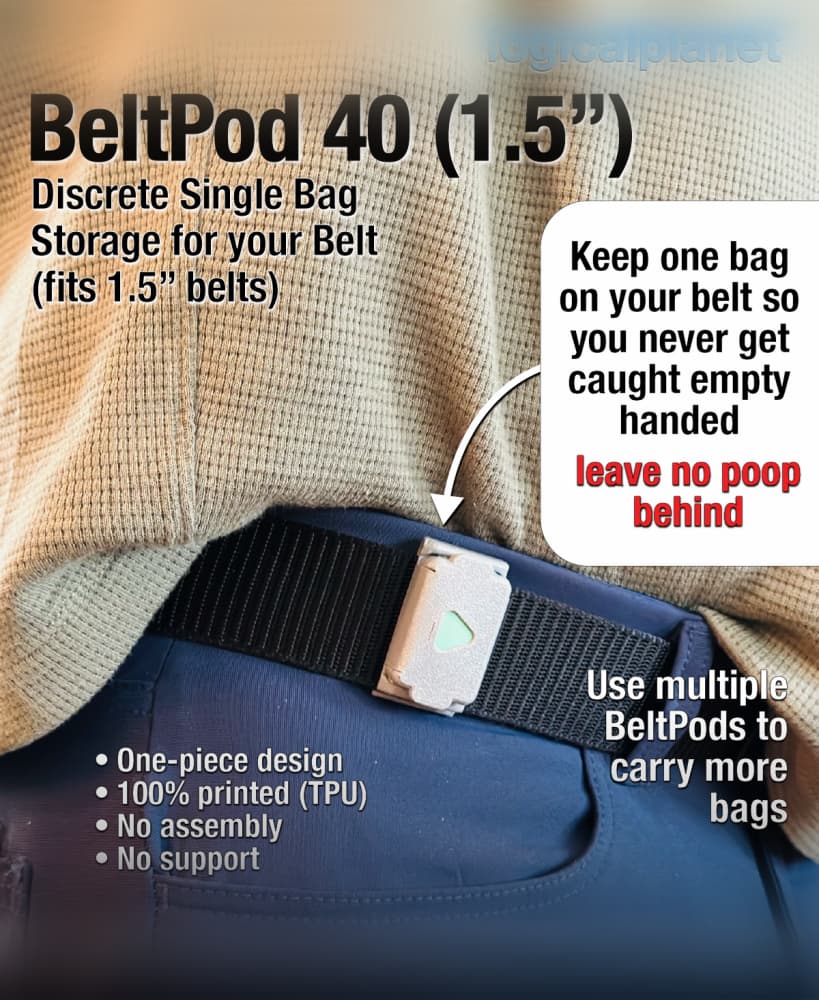
BeltPod 40 - Poop Bag Holder for Your Belt - Single Piece TPU - No Assembly
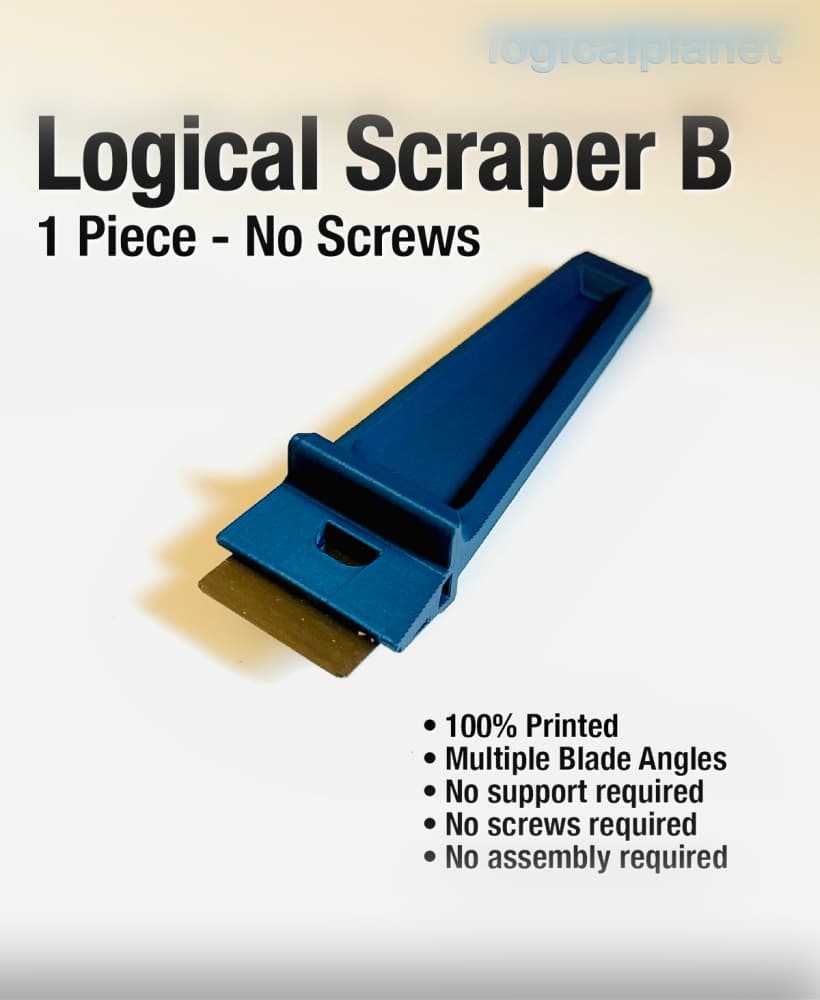
Logical Scraper B - 1 Piece No Screws No Assembly
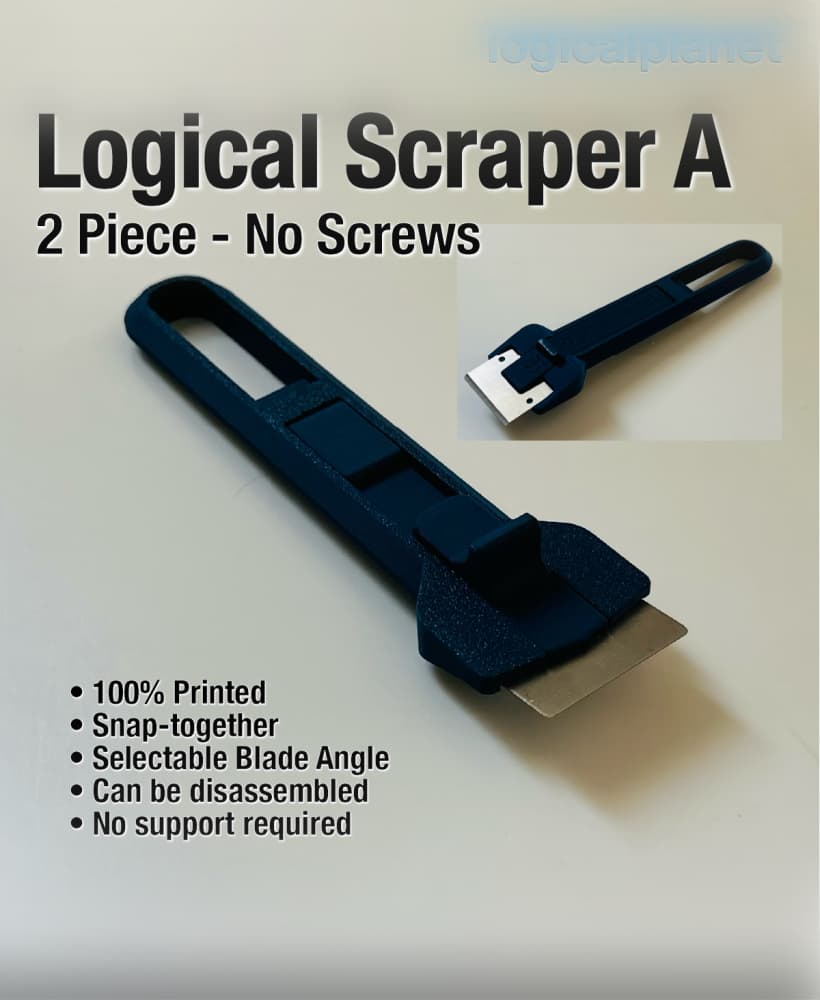
Logical Scraper A — 2 Piece, No Screws
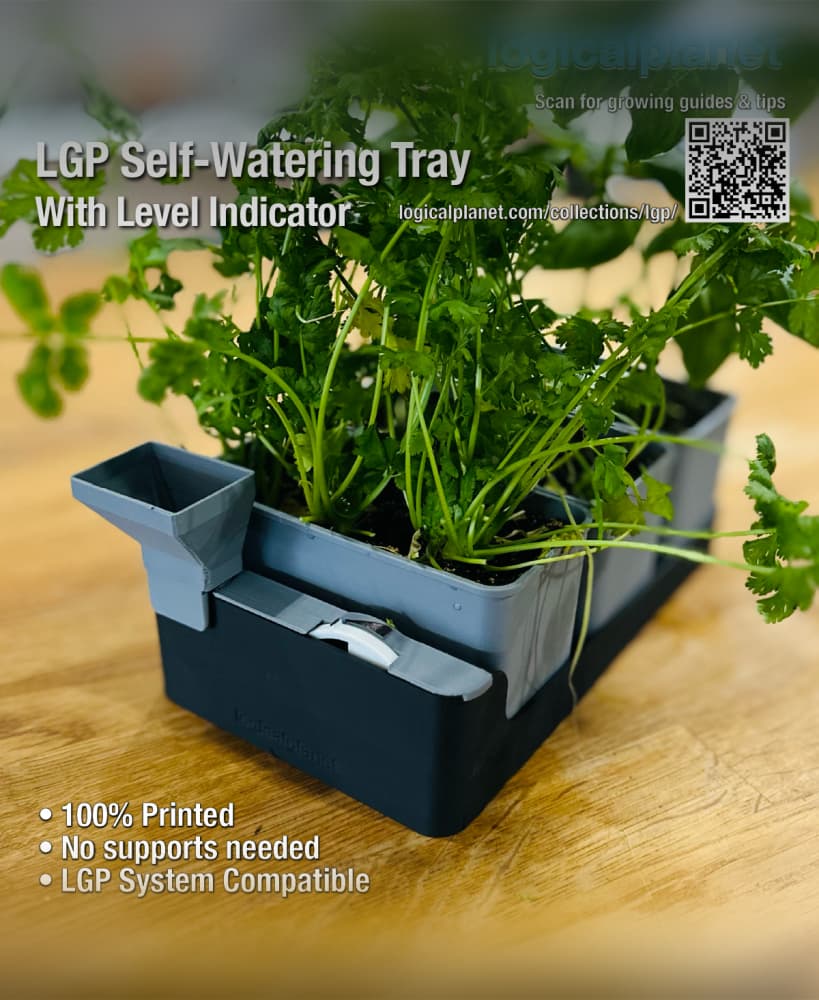
LGP Self-Watering Tray — Modular Bottom Watering Reservoir for the Logical Grow Platform
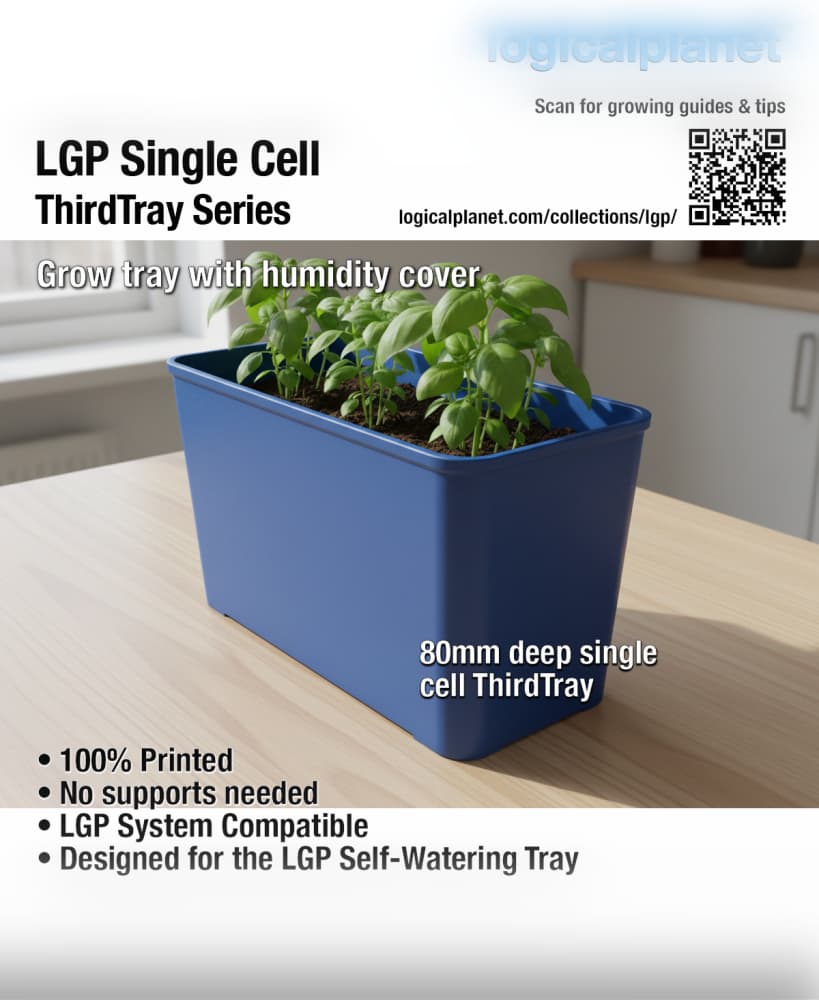
LGP Single Cell ThirdTray — Modular Grow Cell for the Logical Grow Platform
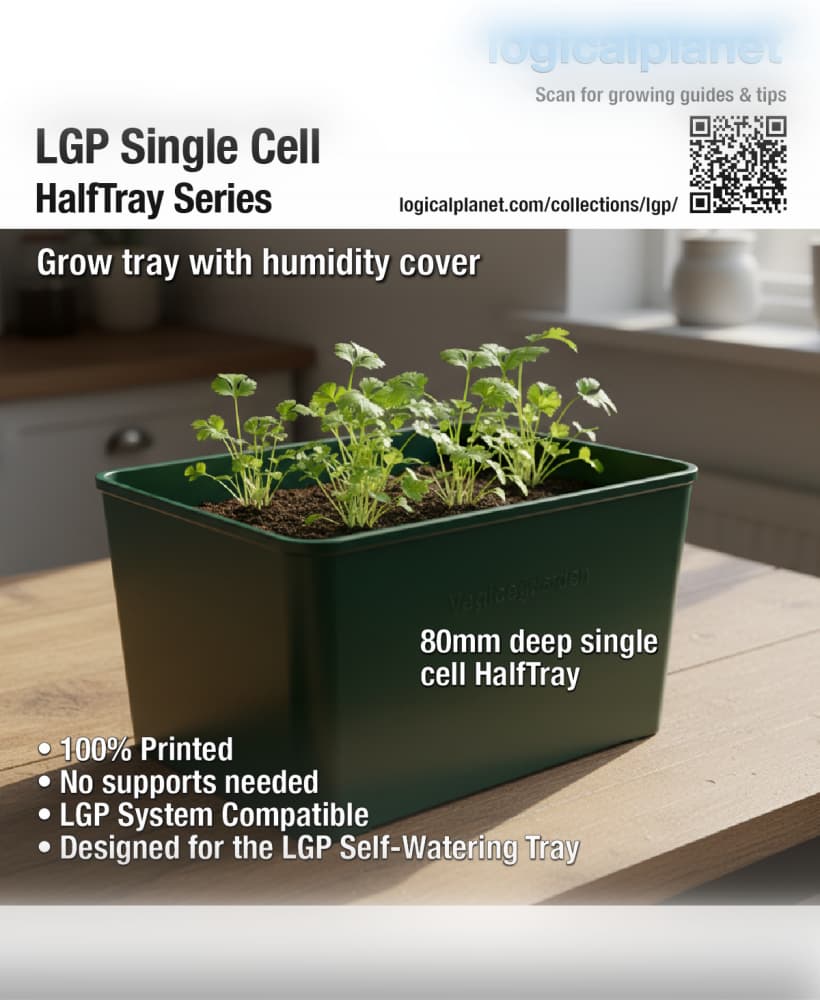
LGP Single Cell HalfTray — Modular Grow Cell for the Logical Grow Platform
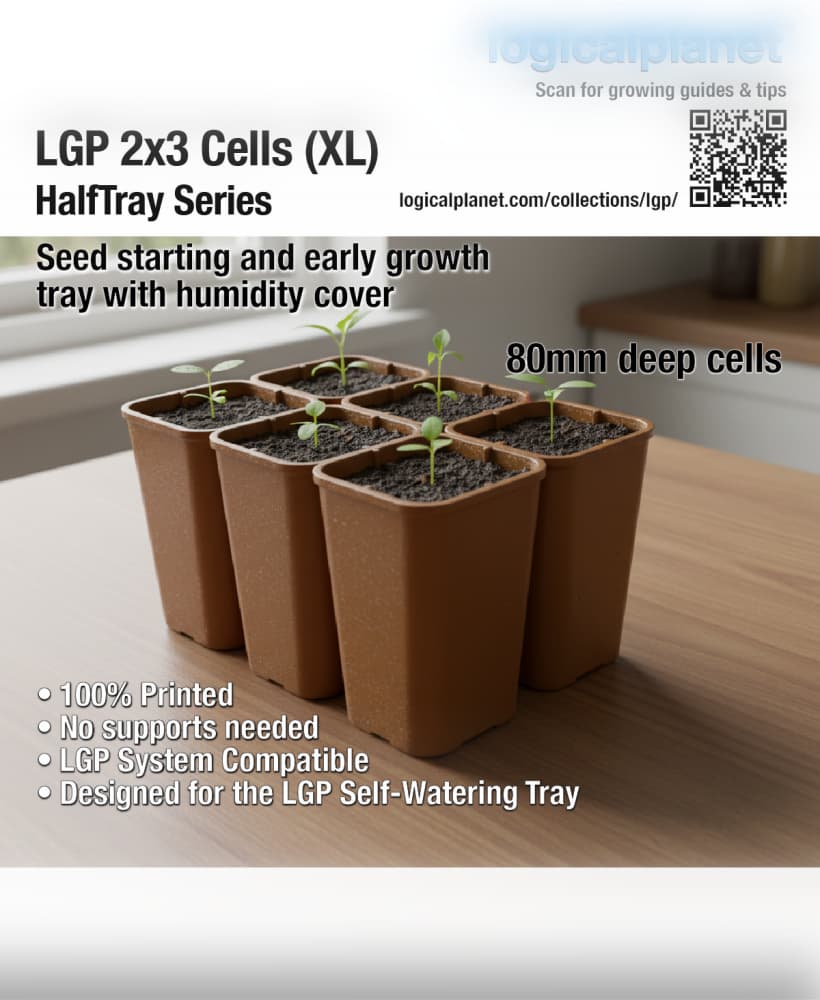
LGP 2×3 Cells XL HalfTray — Modular Seed Starting Tray for the Logical Grow Platform
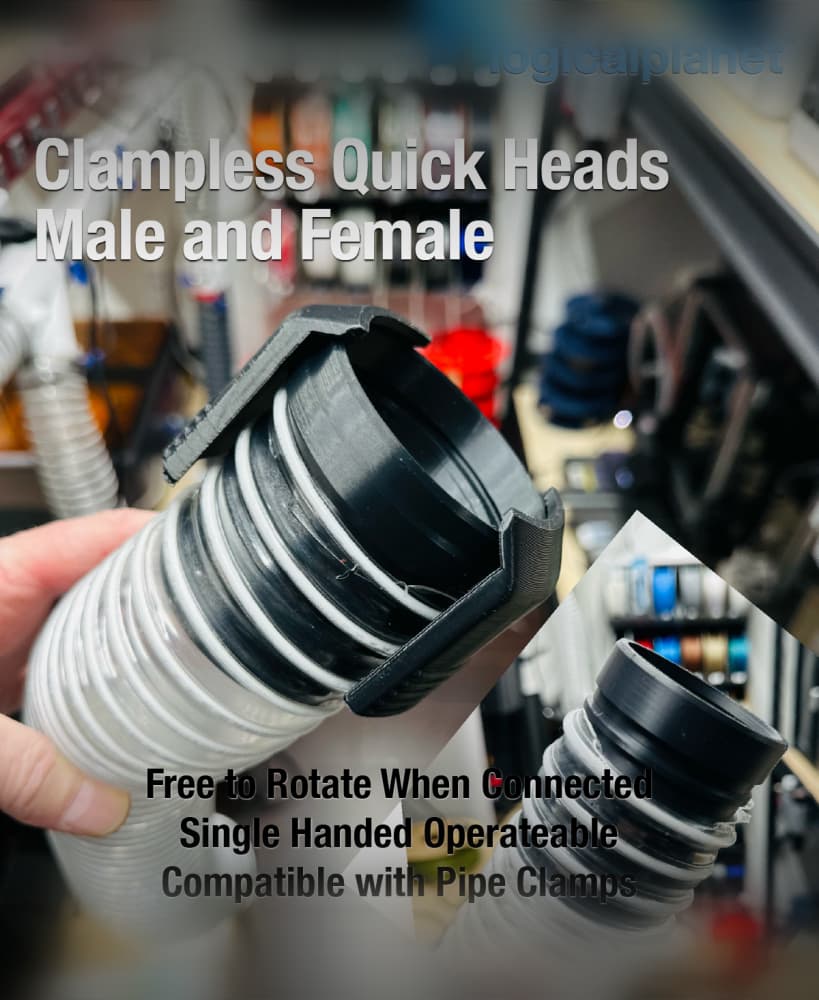
LPE25 Clampless Quick Connect
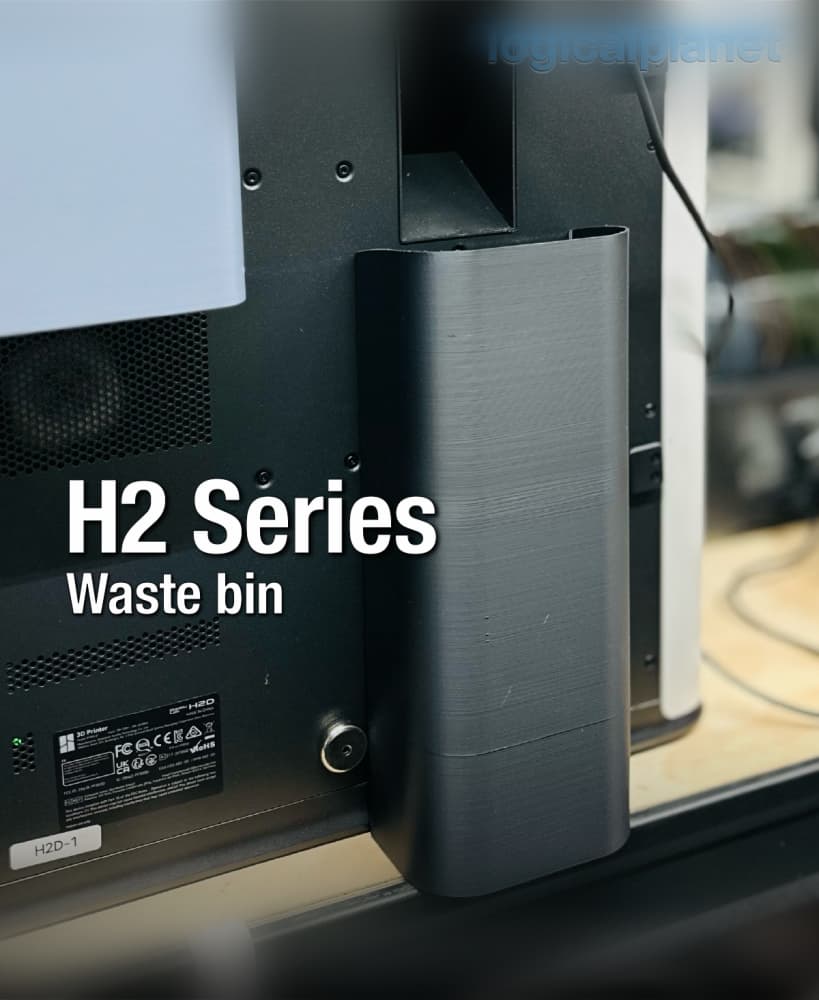
H2 Series Waste Bin
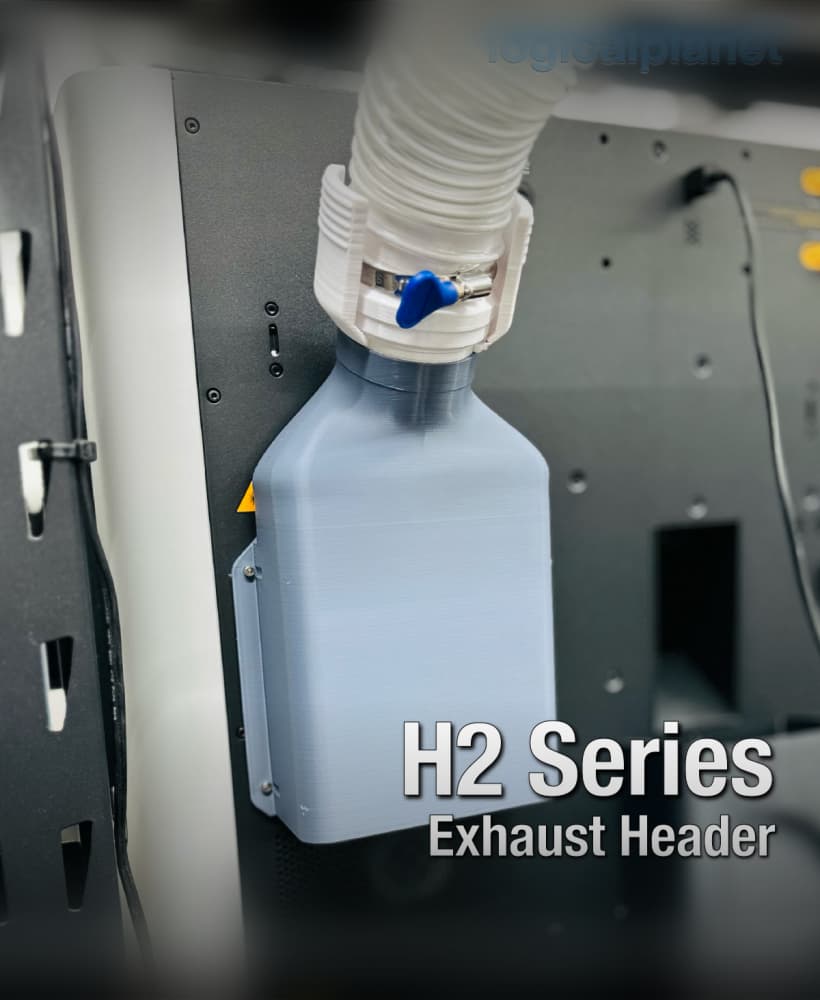
Exhaust Header for Bambu Lab H2 Series Printers

Lazy Susan 120 v3.0
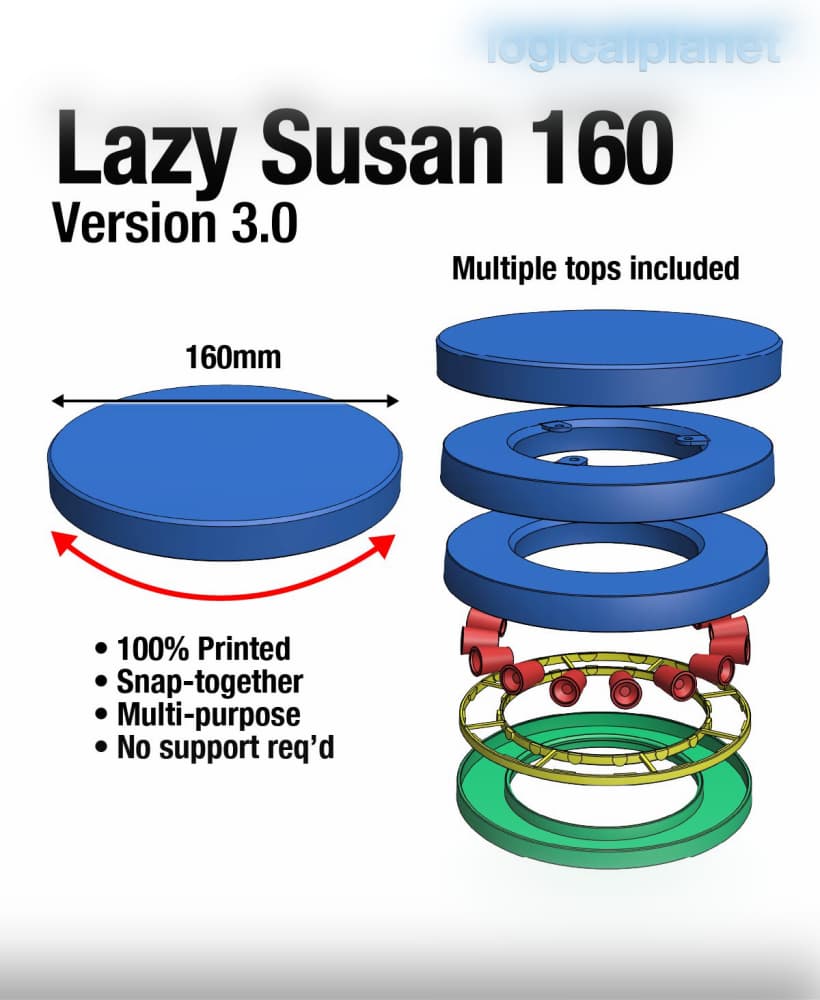
Lazy Susan 160 v3.0
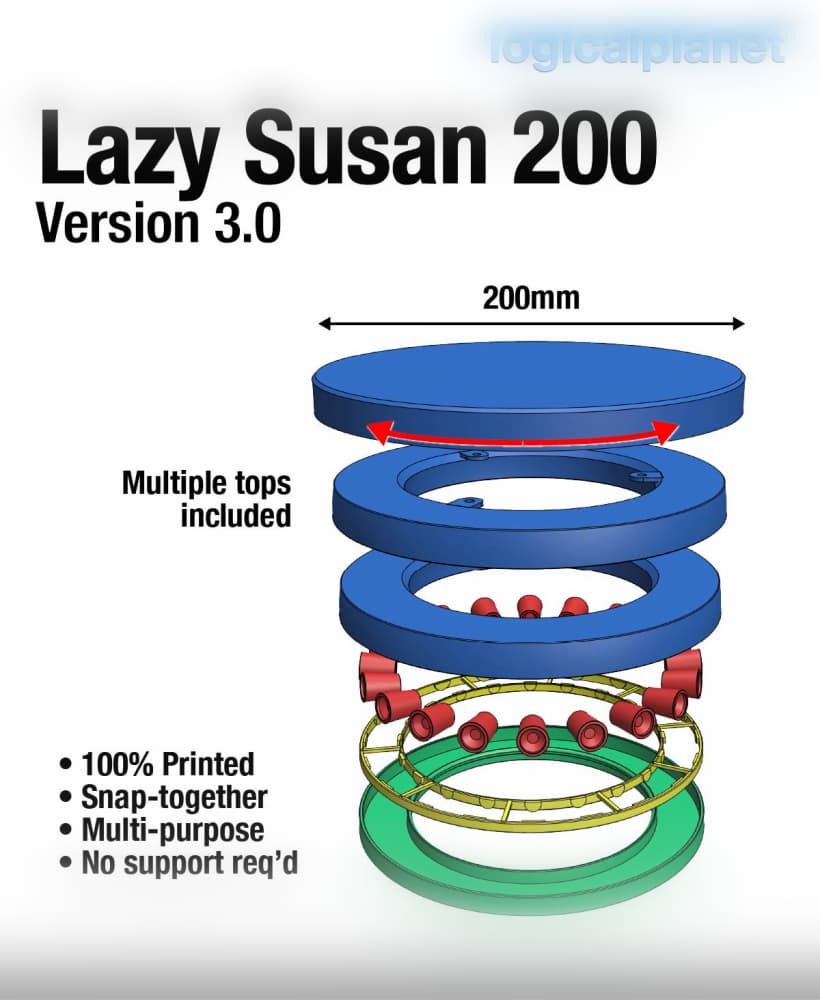
Lazy Susan 200 v3.0

Lazy Susan 240 v3.0
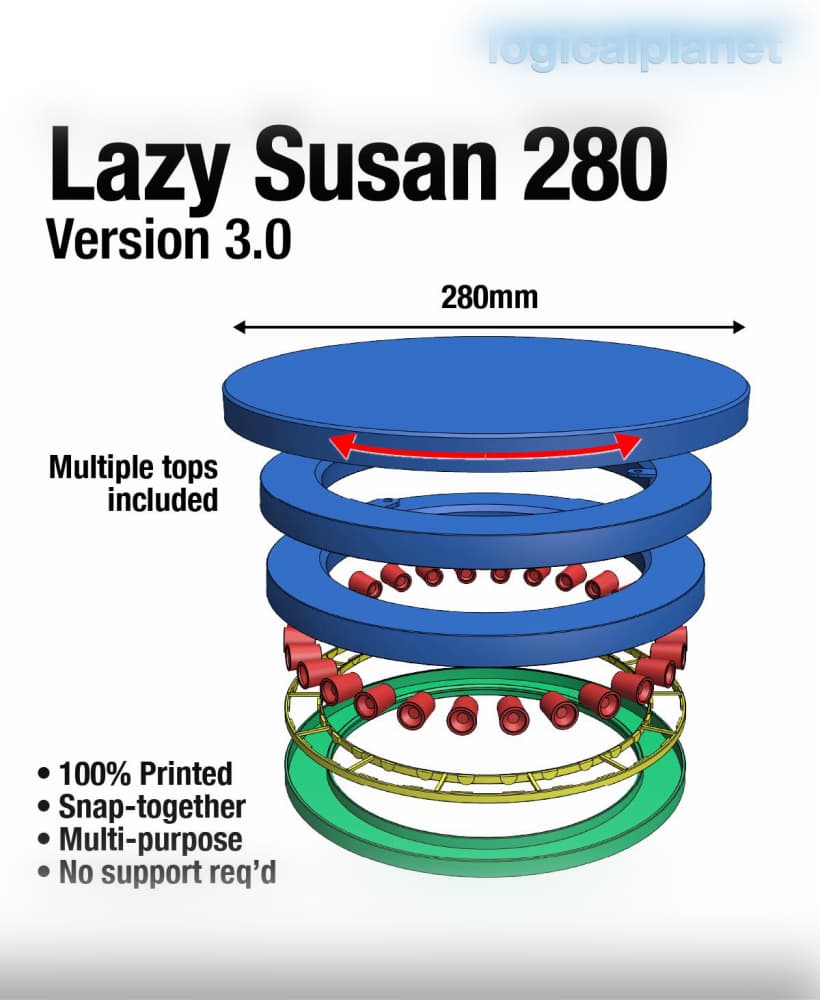
Lazy Susan 280 v3.0
You are welcome. Thank you for posting the make. And, yes, it is a precision print for sure, but once you get working, it is pretty gratifying, right?
Beautiful mechanism! You made a shallow version of V1. Any plans to do the same for V2? This one is about 4mm taller than my (surprisingly non-standard) drain.
Haha, I knew someone would ask me... I think I can do 4mm shorter but I don't know if I can go much shorter than that. Can you email me at logicalplanet3d gmail.com and I will send you one for testing.
Printed in ABS. The bottom was stuck closed so tight that the shell cracked in several places while trying to get it open. The bottom never did separate.
Zach, I have posted a video to help show how to defuse it easily AND I posted an improved version today too. Download the new version and it should open much more easily.
Yes, you must first careful defuse all the walls by gently prying between all the surfaces before trying to open it. I will make a video and send you the link here later today.
Is there a posibility to print using PLA and if so, what could be your recommendation ?
For sure, PLA works and works well, but it is so easily deformed with hot water. So you just need to be careful not to use boiling water over it. Otherwise, I would use all the same recommended settings, including 100% infill.
Great design, looking forward to printing. However when I downloaded the files, they were both the hex pattern bottom and not your updated bottom. Just thought you should know.
So sorry. I think I have corrected that now. Please download it again and you should see both versions.
Not sure what's up, but when I download I get a zip file that has two STLs which both have hex bottoms. The LP version has a hex bottom and the linear bottom. I imagine there was just a small mixup in upload. :)
Oh. Thanks for letting me know. I will look into it.
So sorry. I believe I have fixed that now.