
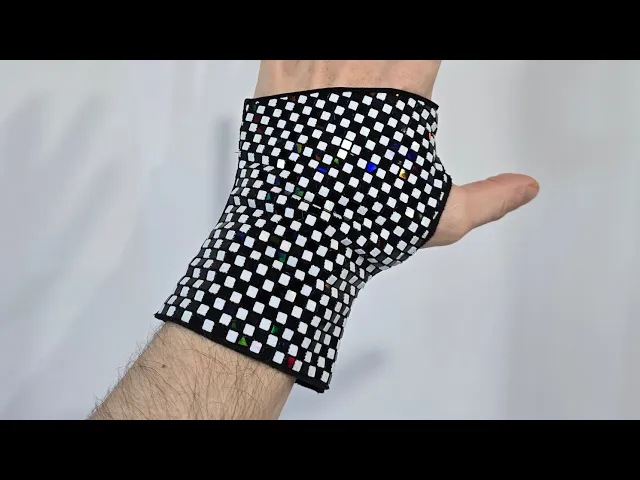


Short fingerless gloves
This pattern is for a pair of short fingerless gloves. This 3D printed model will require some basic sewing skills. There are three sizes - Small (13cm at wrist), medium (18cm at wrist), and large (21cm at wrist). There will also be some variation depending on what mesh fabric you print on, in addition to what fabric you use as the lining. I prefer using this superfine 4 way powermesh found on amazon - https://a.co/d/dTW0w4M
The 3mf file contains settings and all three sizes. If you'd like to download a single size, make sure to get both side 1 and side 2. This model is .72mm tall. Print this at .24mm layer height with a .4mm nozzle. I print at 35mm/s for the first layer, and 50mm/s per second on the other two layers. If you are using a thicker mesh fabric, use a larger layer height to avoid the snagging of fabric.
I use a magnetic PFLAT sheet found at www.kaizen3dprints.com but you can also use a textured build plate if you'd like, or other sticker print plate variations.
The pause command is entered at layer two, where your fabric and magnets are placed and a little tension on the fabric is applied. The print resumes and will finish after layer 3. Remove side 1 of your size, and reprint side 2. These are simply mirror copies of each other.
Once both prints are finished, find a base fabric of your choosing (velvet, satin, stretch denim, velour etc) and cut a matching piece leaving around 1/2" of seam allowance. Pin the 3d printed mesh on top. Sew a straight stitch with a zipper foot all the way around side 1, fully attaching the lining and 3d printed mesh together. Sew as close to the 3d printed material as you can. Repeat for side 2. Line up both sides, right sides together (3d printed sides facing each other) and pin both sides together, preparing for a zig zag stitch. Using a zig zag stitch to increase the gloves flexibility, sew the sides and the small portion between your thumb and fingers. Trim away the excess fabric outside of the zig zag stitch. Leave the top, bottom, and thumb holes. You can either create a small hem for these three areas, or trim them off directly adjacent to your straight stitch. Fold the glove right side out, and enjoy your hard work! If you'd like a set of gloves, simply repeat this process!
If you have any questions please send an email to Kaizen3DPrints@gmail.com
Short fingerless gloves

Abstract art #2

Hand sewn vertical wallet

256x256 PFLAT sheet holder

Massage Roller

Spinning gear fidget ring
Flat band fidget ring

Large TPU foldover bag

Adjustable Strap (48"/122cm max length)

Small Foldover Bag
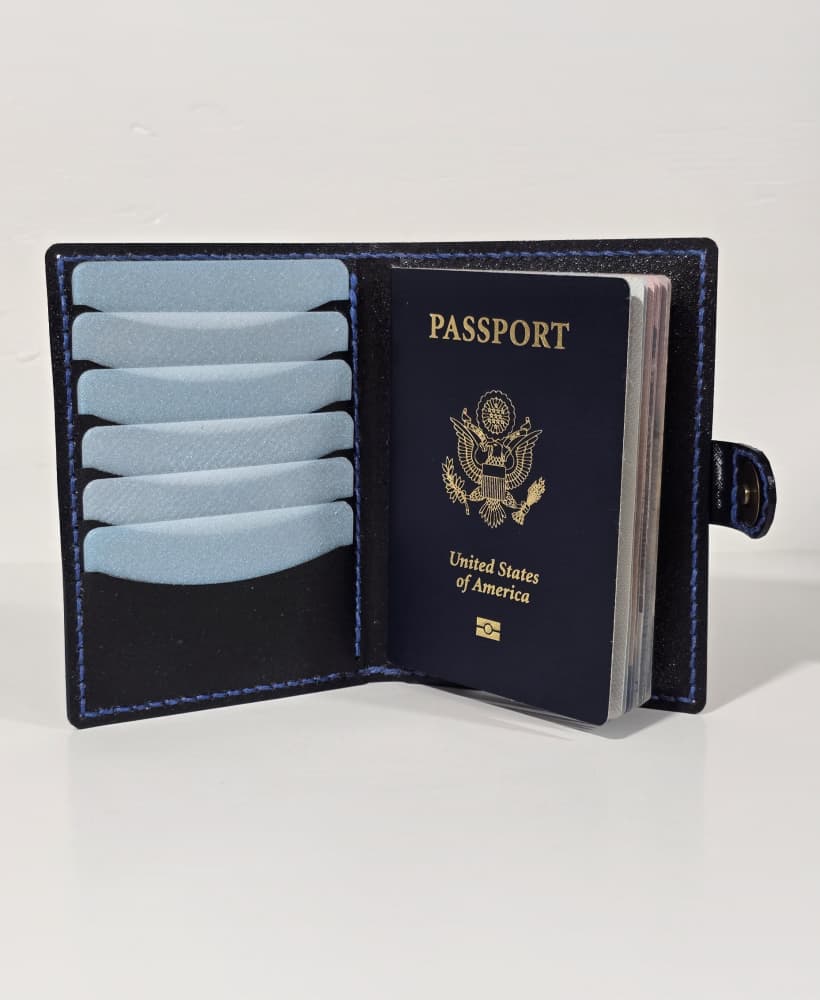
Customizable Passport Wallet

Tall TPU Bifold Wallet for sewing

Vertical Wallet for Chicago Screws

Square Grid Negative Modifier

Hex Grid Fabric Modifier

Heart Pixel Pattern Textile and Modifiers

Vertical TPU wallet with rivets and grommets

Flippy heart textile and modifiers

Foldable TPU bag sized for Snapmaker U1

Crossed Basket Weave Textile / Modifier

Hi.
I showed your gloves to my wife and she wants me to make her some. Only problem is, she has very small hands, she would need an x-small I think.
I made her a small glove and there is about 1.5 cm too wide on each side. I am not very good with 3D modeling tools so I was wondering if you could share an x-small version?
Thank you very much and have a nive day !
I am so sorry that I am just seeing this! I have added an XS pattern to my to do list!