


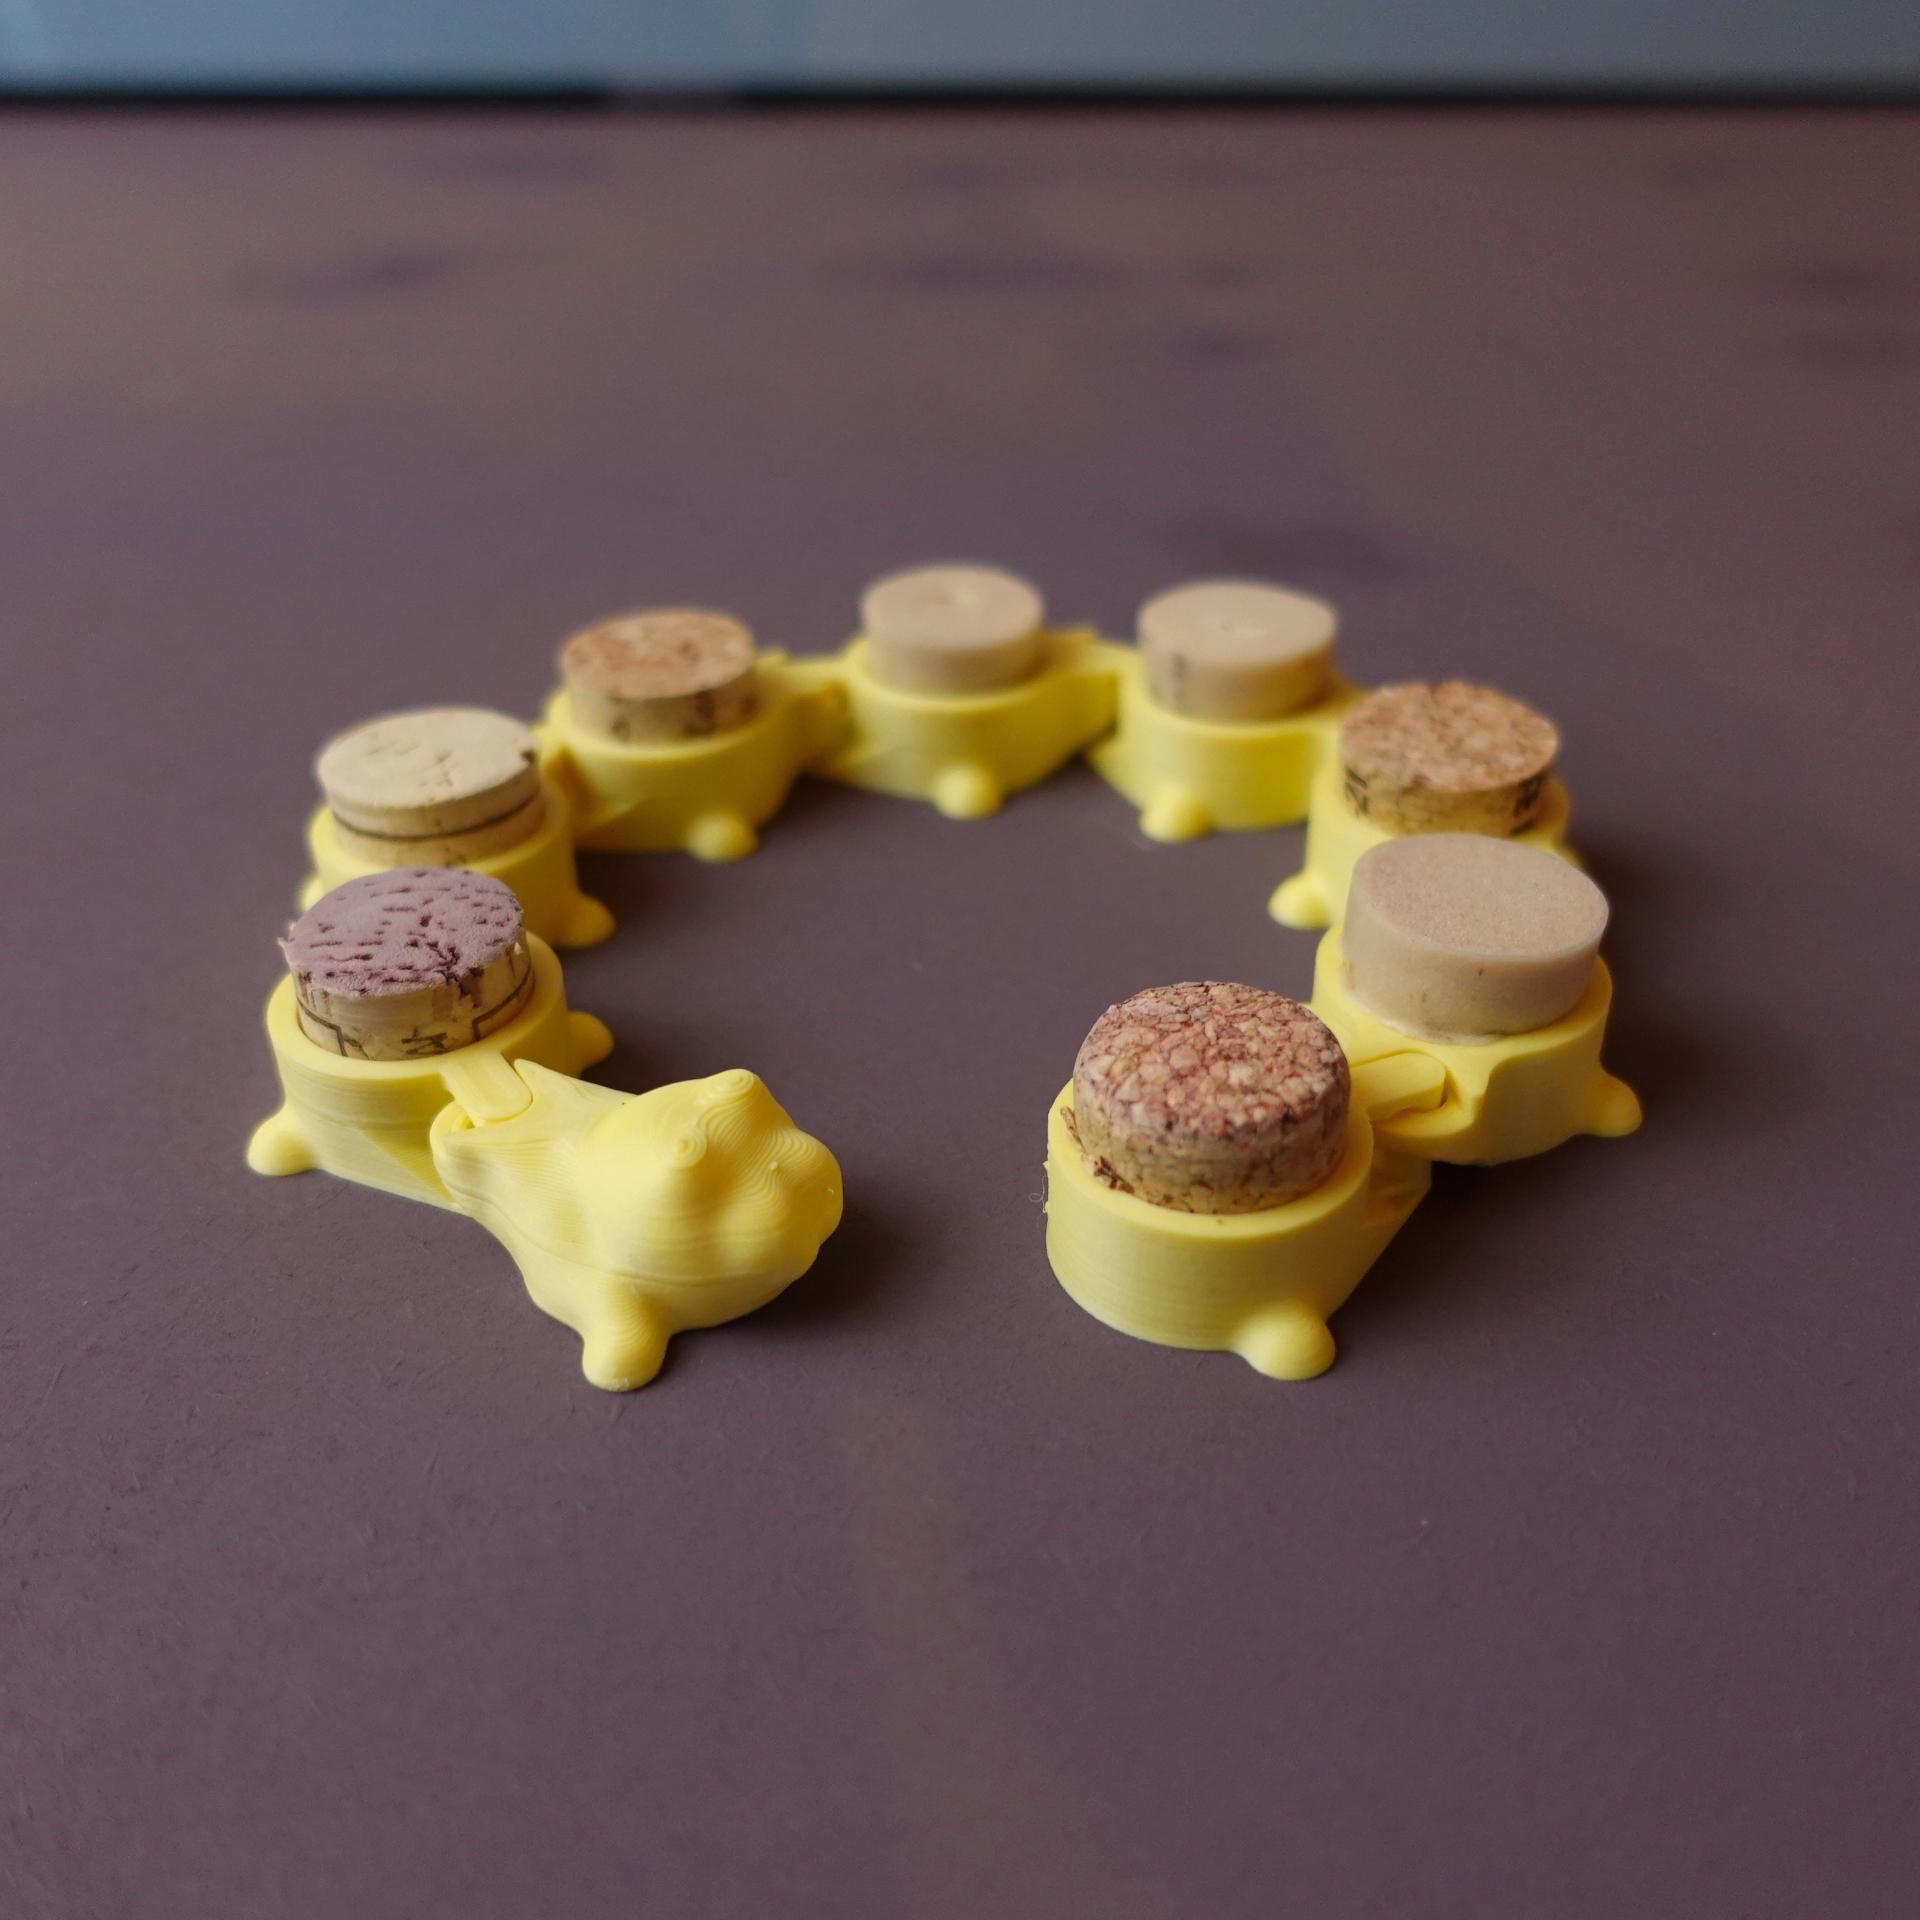
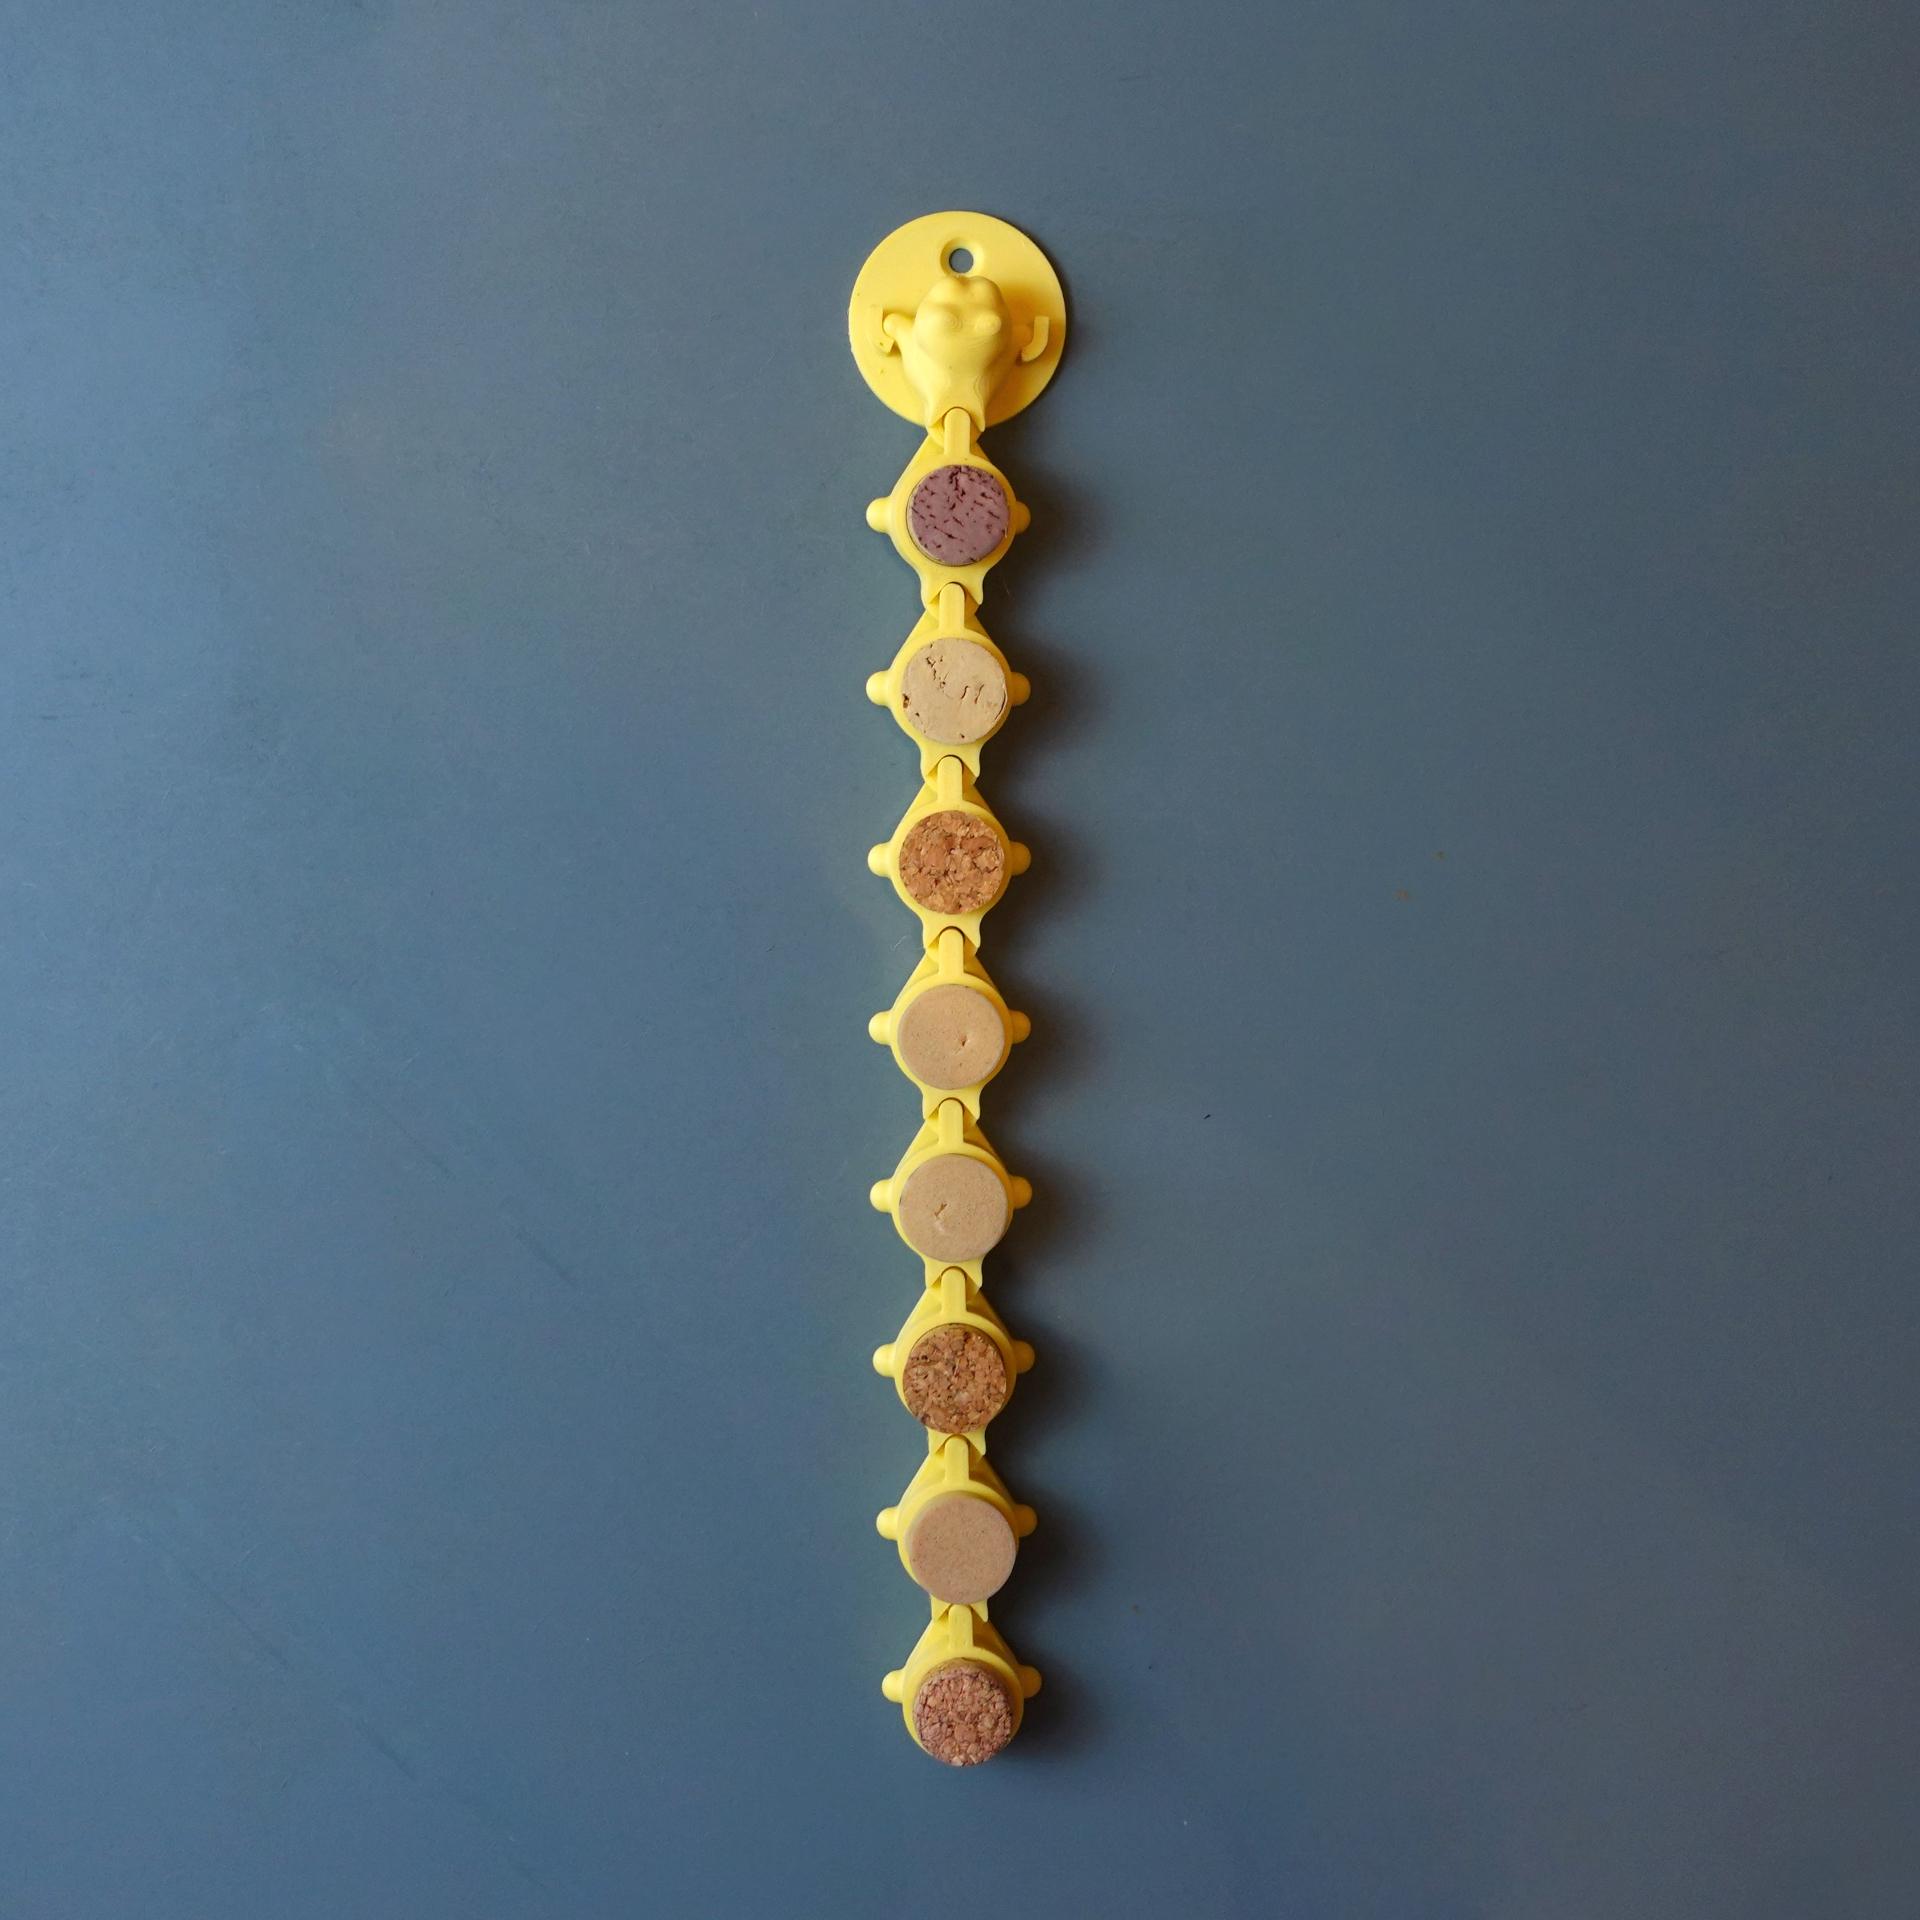
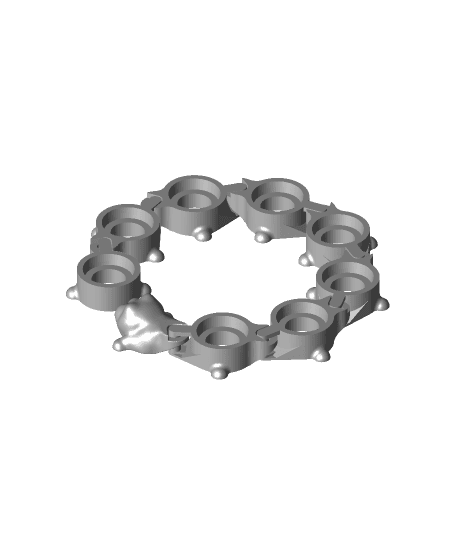
Coaster “Corkerpillar” print-in-place
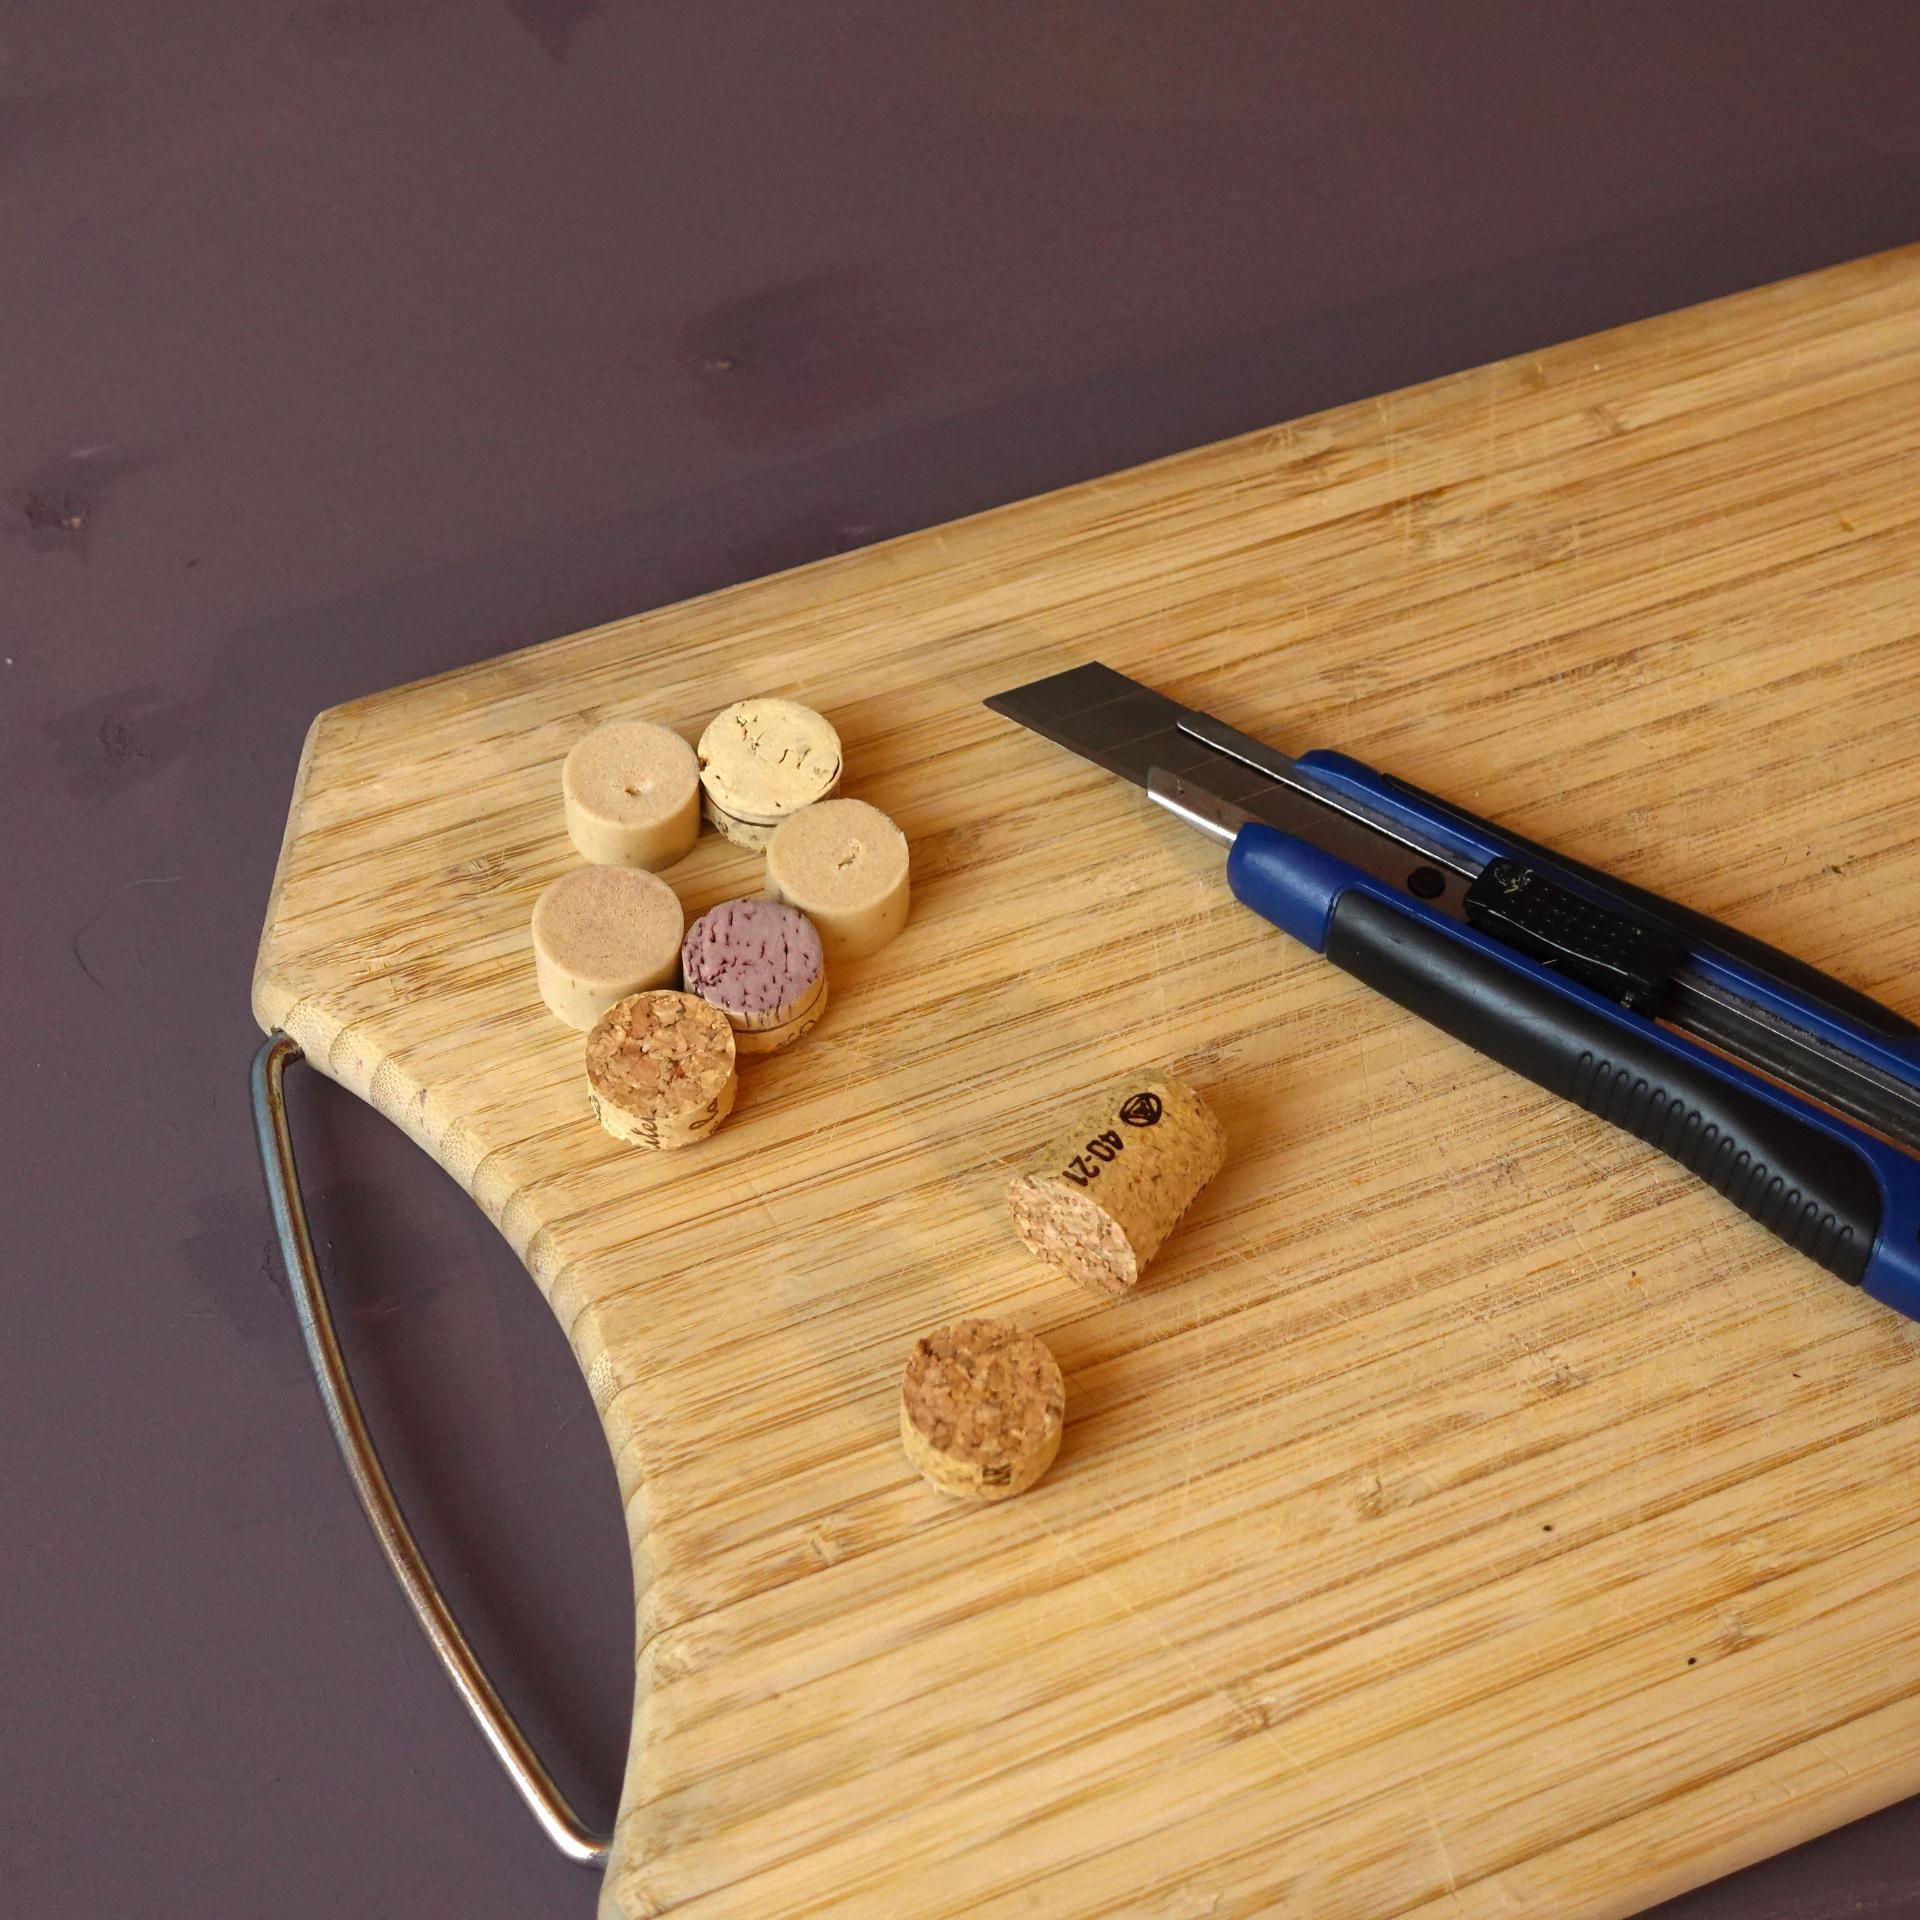
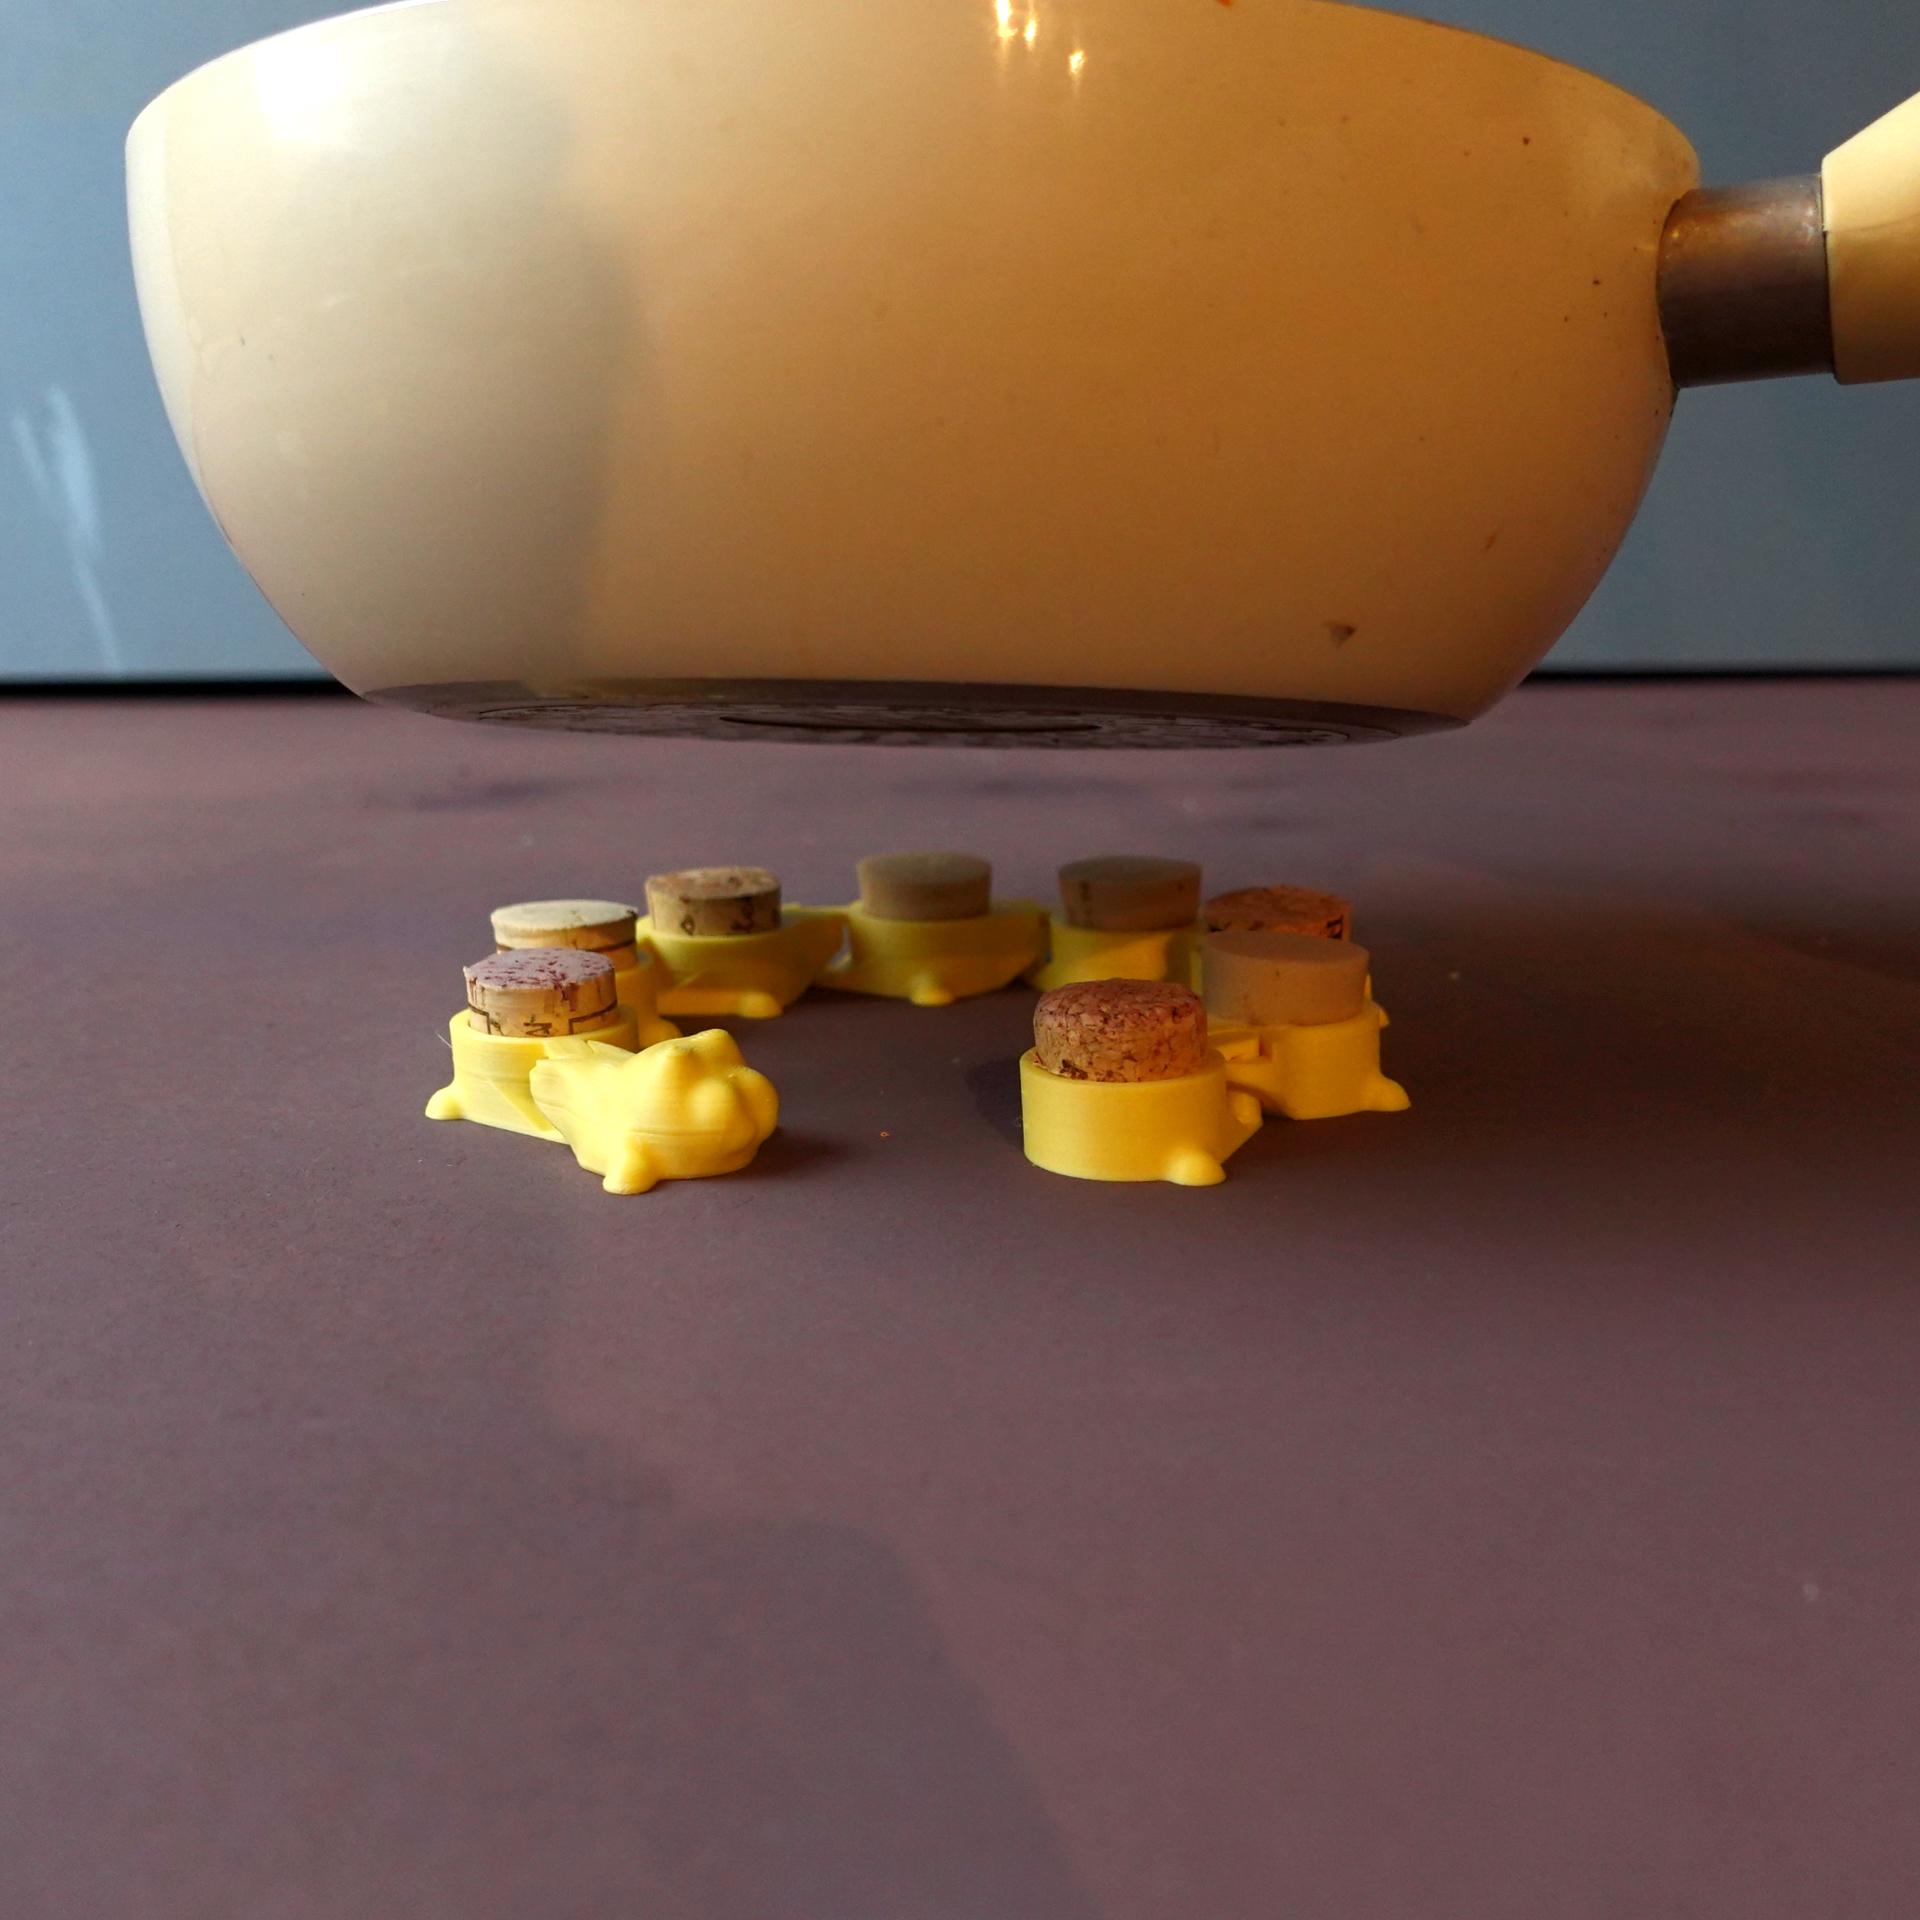
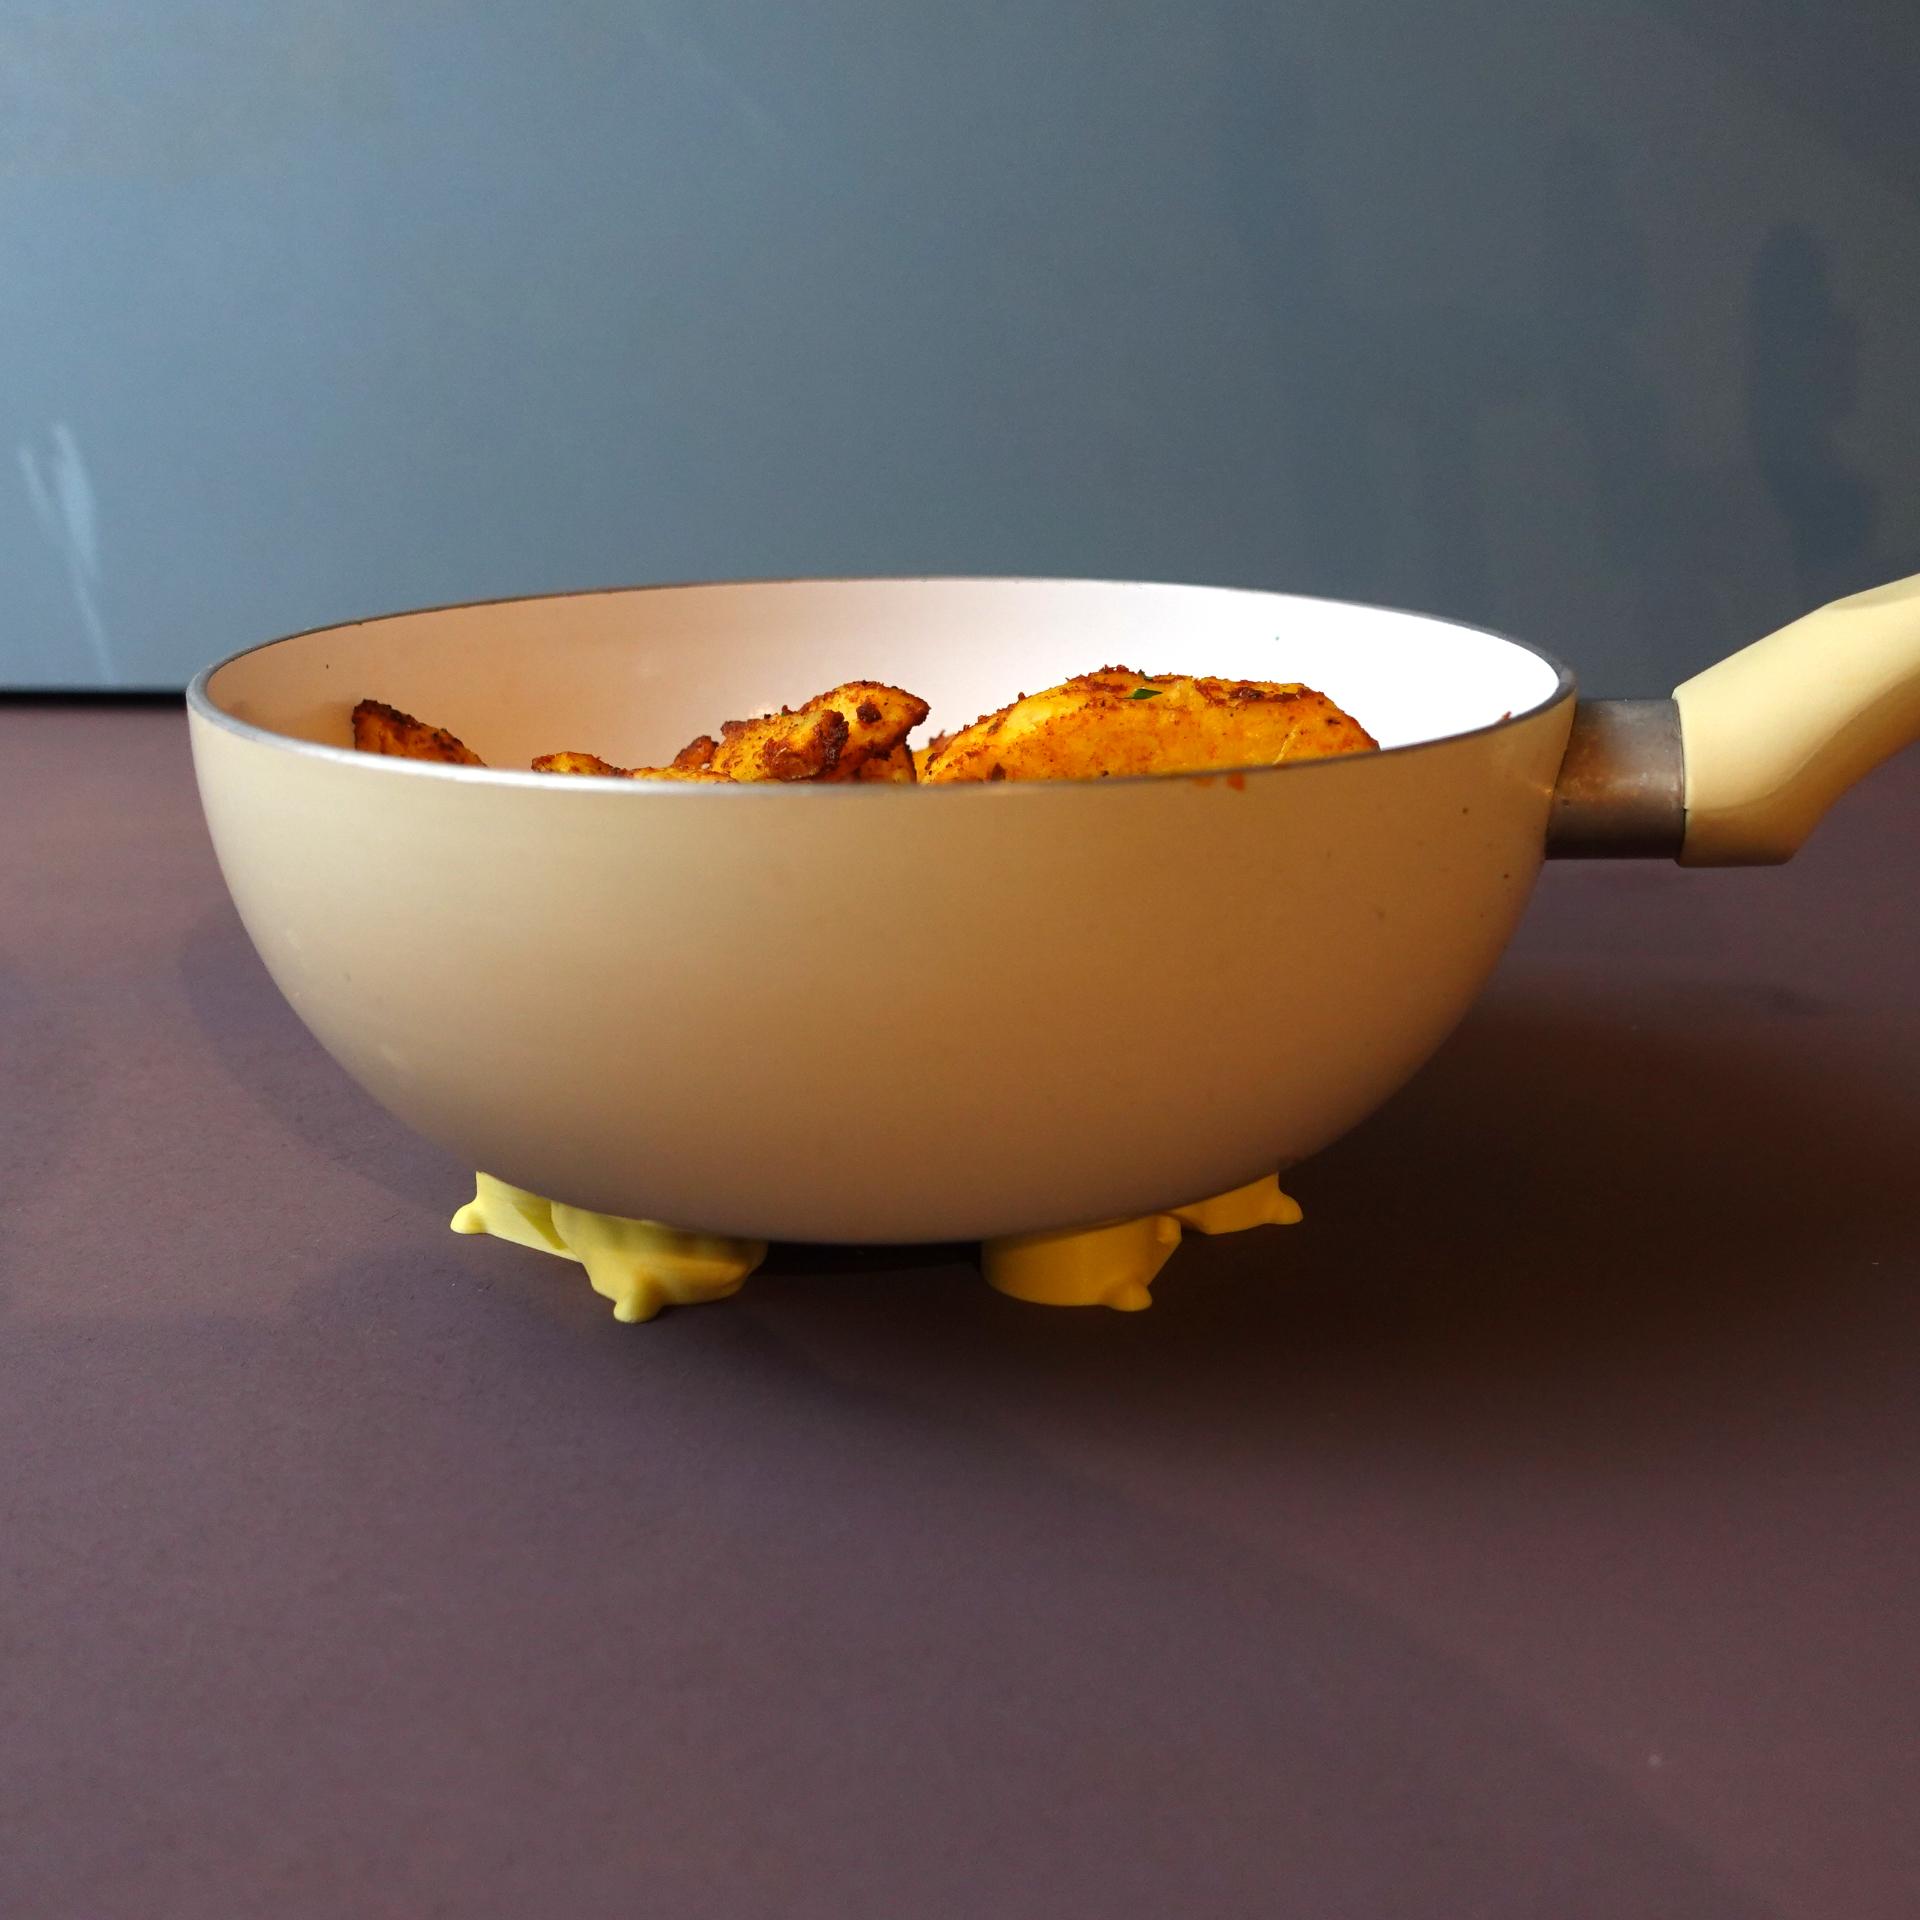
A useful little DIY idea for wine corks. The Coaster is print-in-place and comes in two sizes with a holder to store in on your wall or cabinet. Due to the flexible nature, it can be used for hot kitchen equipment of various size and shape. The design uses standard sizes corks with the pre-press diameter of 24mm (after pulling the from the bottle the diameter is about 20mm) The cork needs to be real cork; the plastic alternatives may deform.
Heat resistance I used the following configuration to test the product that worked without any deformation: Polymaker Polyterra (standard) PLA and 13mm long pieces of cork - tested with a 210 degree Celsius hot baking dish. It stood there for 30 minutes until the dish cooled down. I measured up to 50 degree Celsius on the PLA parts. To further improve heat resistance, printing with PETG or ABS increase the heat deflection temperature. A nice table to check: https://help.prusa3d.com/materials Increasing the size of the cork pieces will expose the printed part to less heat.
Instructions
- Print one of the designs and the holder – if you need it.
- Cut your corks into pieces with a sharp knife or cutter.
- Push the pieces into the coaster – the inside is slanted so a varying diameter can fit. If the cork is still too big you can cut the corners from the bottom a little. Using glue decreases the chance of pieces falling out.
- Optional: Fix the wall mount with glue, tape or a screw onto your wall or cabinet.
Print settings Required build volume: 170mm x 170mm x 20mm Material usage: 50g Print time: 6h
Material: PETG or ABS recommended, PLA works Print direction: stls are rotated correctly, check images Support: none Nozzle size: 0,4 mm Line width: 0,4 mm Layer height 0,2 mm Outer walls: 3 Infill: 15% Build plate adhesion type: none