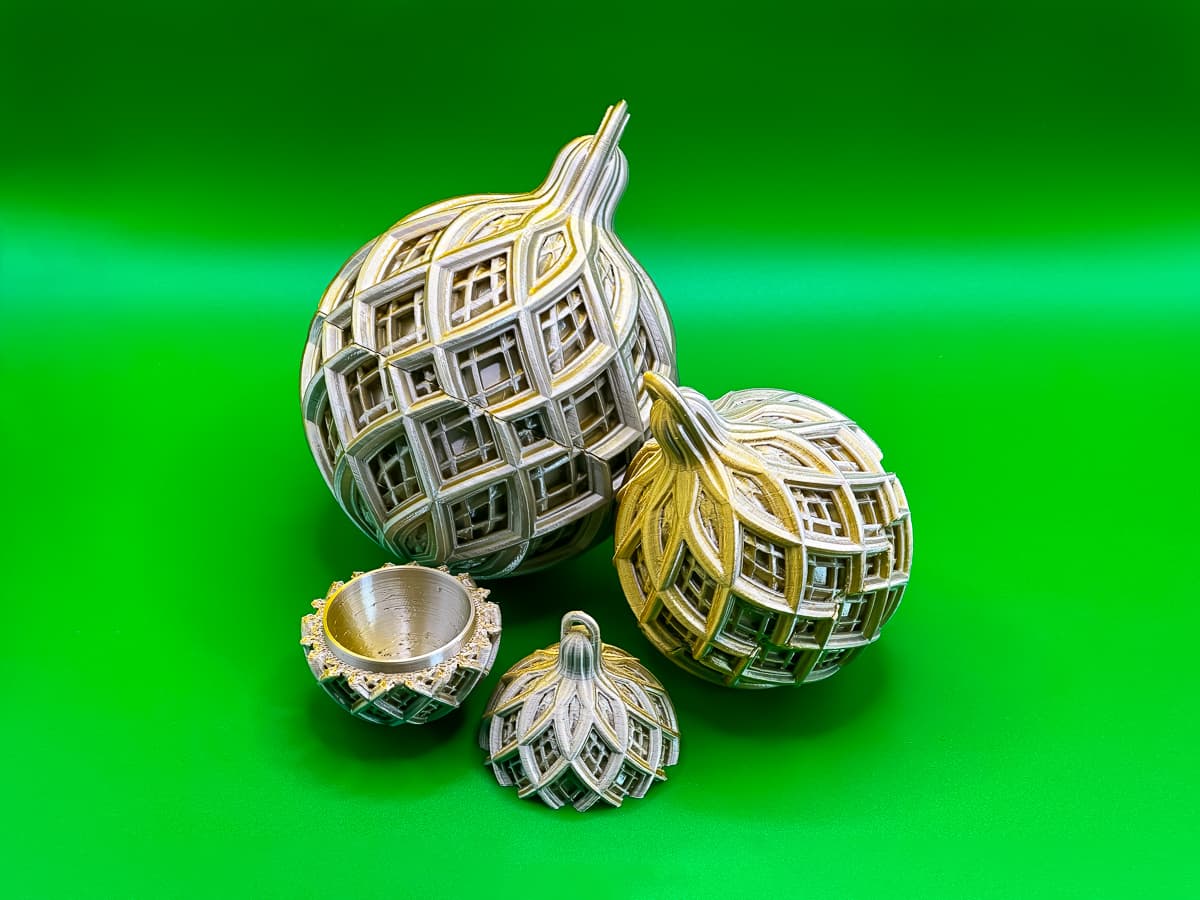
Here's a Christmas ornament that hides a secret compartment. Use it to conceal a special gift on your tree!
Not for commercial use. Please see license agreement.
This is a remix of my own design. I've converted it from a simple Christmas ornament into a secret gift box that still looks like an ornament. The default size (100%) is twice the size of the original. To convert it, I've filled in the diamond-shaped holes on the outside and created a spheroidal interior compartment. I've designed it so the bottom half has an inset that snaps in place much like commercial plastic Easter eggs.
Summary
Every year, my father would hide a gift for my mother in a small stocking-shaped ornament on the tree. (And every year she would forget to check the ornament.) I thought I'd create something that would allow others to join in this tradition.
I've provided my STLs, PrusaSlicer 3MFs, and Prusa MK3S+ GCODE to make it easier for you to print this with good quality light enough to hold a gift and still hang nicely on a tree. I've provided 3 sizes: 100%, 75%, and 50%. The 50% version uses the 75% STLs.
NEW: It's all about presentation. So, I've added inserts for the bottom half to allow you to present your gift in the best possible way. They are a friction fit an designed to be loose enough to easily remove. That said, you may need to enlarge or reduce them slightly based on your printer's accuracy. I've included inserts for earrings for all 3 sizes of ball as well as blank inserts that you can modify using simple boolean operations to create holders for everything from a bracelet to a ring to a Benchy.
I've included a photo of the 75% ball with the dangly earring insert. It shows the insert covered in self adhesive felt. This is great for jewelry or anything else that might get scratched by rubbing up against PLA.
How big are the gift balls?
Below are descriptions of the balls, but if you're still not sure, try printing a hollow insert. That will tell you the diameter. The hollow inserts take between 15 minutes for the 50% and about an hour for the 100%.
50%
- Small, but practical. Can hold a bracelet chain and a men's ring with room to spare.
- Interior: about 33mm x 33mm x 40mm
- Weighs 12g with my settings
- Prints in about 3.5 hours
75%
- Standard Christmas ball sized. Can hold a flexible necklace.
- Interior: about 49mm x 49mm x 60mm
- Weighs about 30g
- Prints in about 7.5 hours
100%
- Large. Holds two Benchys with room to spare (you can almost fit 3) - or a heavy, semi-flexible neck chain. You could fit a few Hot Wheels cars - or the key to a real car.
- Interior: 67mm x 67mm x 80mm
- Weighs about 55g
- Prints in about 12.5 hours
The two pieces snap together easily and come apart with a twist. If yours is a little stiff, you can gently sand the tabs that lock them together. Really stiff? Reprint the with increased elephant foot compensation, level your bed, decrease flow, or decrease temp. You could also scale the bottom half slightly (maybe 0.25%) - but only in the X and Y. Do not scale Z or the pieces will not lock in place.
Print Settings
I printed most of the ornaments at 0.15mm layer height, just 1 perimeter and no infill. I only added extra perimeters or infill where they were needed for a clean print. If you use 2 perimeters or infill everywhere, you'll get a heavy print. I adjusted the layer height in some areas to get a cleaner print.
I used grid supports for the dome on both halves, for the ledge on the bottom half, and used paint-on supports for the loop at the top. The loop prints better with support and the supports comes out easily with side cutters and a hobby knife.
I used Arachne perimeter generator everywhere except the top half of the 50%. I used Classic there because the loop sliced better that way.
I set seam position to aligned, but used paint-on seams to replicate random inside the box as best I could. Aligned works better for the outside, which is the most important, but with just 1 perimeter, the seam in the inside created big holes. The paint on supports fix this, though it's still a little rough. If you want, you could use a shape modifier to add extra perimeters to just the inside, but that would increase the weight significantly.


