

Anycubic Mega S Trigorilla to MKS Tinybee adaptor
Model originally uploaded to Thingiverse at https://www.thingiverse.com/thing:5405607.
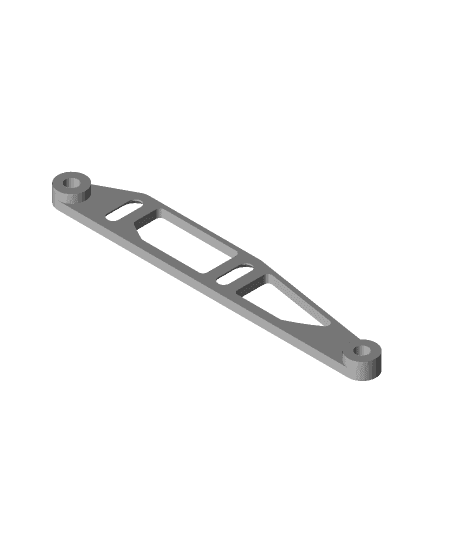
Update 24 Apr 2023: I actually been using a bracket to hold a 120x15mm fan, but yeah i totally forgot to update. It uses the same mounting holes for 2x50mm fan bracket. Needs 2pcs M3x8 or longer countersunk screws and 2pcs M3 threaded brass insert. I will update more if I can find the photos or when I open up the printer.
Update 21 Apr 2023: I forget to update this. MKS Tinybee was working for me but I accidentally shorted the fan pin and blotched the repair and have switched to BTT SKR 1.3 instead. It is a drop-in replacement for the mainboard, though it would be challenging to use the SKR USB port.
Note that the MKS 12864mini display does not work directly (the pins are reversed from online search) and I have to change to the BTT 12864mini display as well.
Description
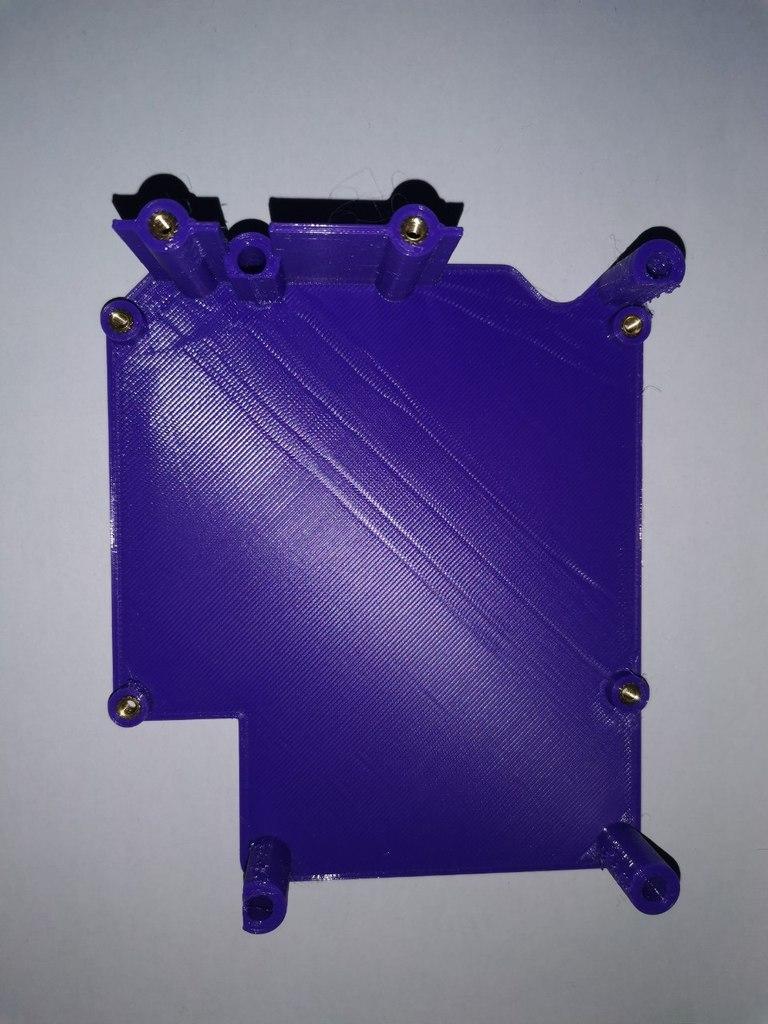
Project to integrate MKS Tinybee into my Anycubic Mega S. The mainboard mount is complete, now fiddling with the firmware. Note that Tinybee has only 4 endstops, so I forgo the filament runout sensor, keeping X, Y, and dual Z. I have the firmware running but still tweaking it to my liking.
I wanted to see if 32 bit mainboard would improve performance and saw this MKS Tinybee + mini12864v3 going for less than USD30 at time of my purchase.
I liked the design by Steho_83 but wanted the Tinybee ports to face the holes to make it easier to have the cables go out of the enclosure.
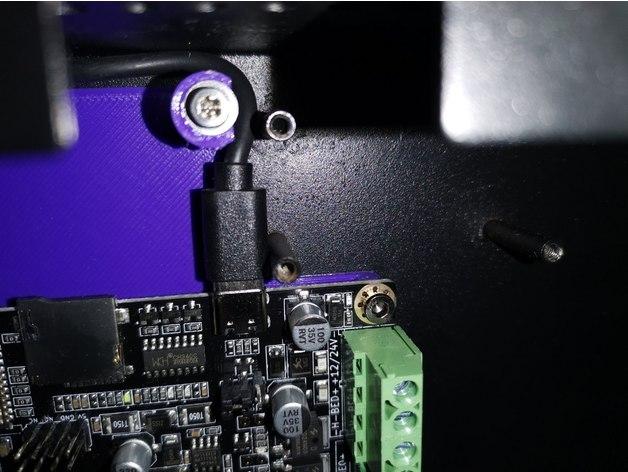
I used the USB C that came with the Tinybee and it can squeeze between the standoffs. I kept the mounting holes for the original 40mm fan as close as possible to the original as I know that there are many fan solutions that utilize those holes.
There is now more depth to add a thicker fan.
Note: I am currently using this design for BigTreeTech SKR 1.3, USB port access is a challenge and I am using the UART port to connect to my Raspberry Pi instead.
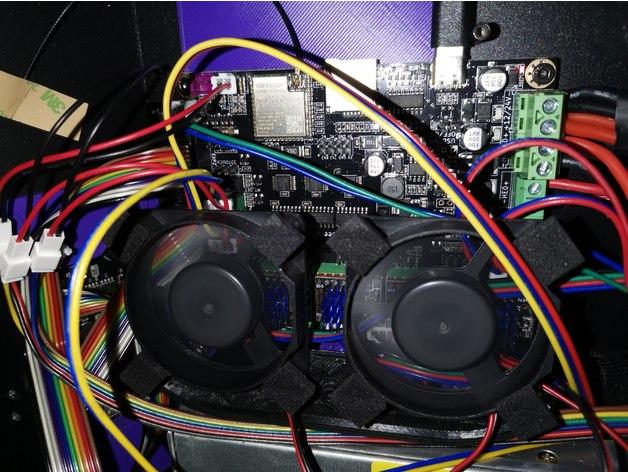
If you are interested, check out my design for mini12864v3 housing https://www.thingiverse.com/thing:5401579 or dual 5010 fans mount https://www.thingiverse.com/thing:5196689
Things that you'll need:
- 8pcs M3x5 screws (it is possible to use back the screws taken out from the SD card reader and Trigorilla mainboard)
- 4pcs M3 washers
- 6pcs M3 brass inserts
- 2pcs M3x8 countersunk screws (for 120x15mm fan, longer is ok)
Want to buy me a coffee?https://www.buymeacoffee.com/zer0s
Clicking on my affiliate links below will give me a small kickback if you purchase something. (at no extra cost to you)
AliExpress Affliate links: MKS Tinybee and mini12864v3 https://s.click.aliexpress.com/e/_Anj8yD BTT SKR 1.4 (lower price at time of posting) https://s.click.aliexpress.com/e/_DCYpvbR BTT SKR 1.4 (official looking store) https://s.click.aliexpress.com/e/_DmzpPa5
Consolidated affiliate links of other 3D printing-related items: https://wp.me/peMLu6-j
For Amazon affiliate links https://wp.me/peMLu6-2C