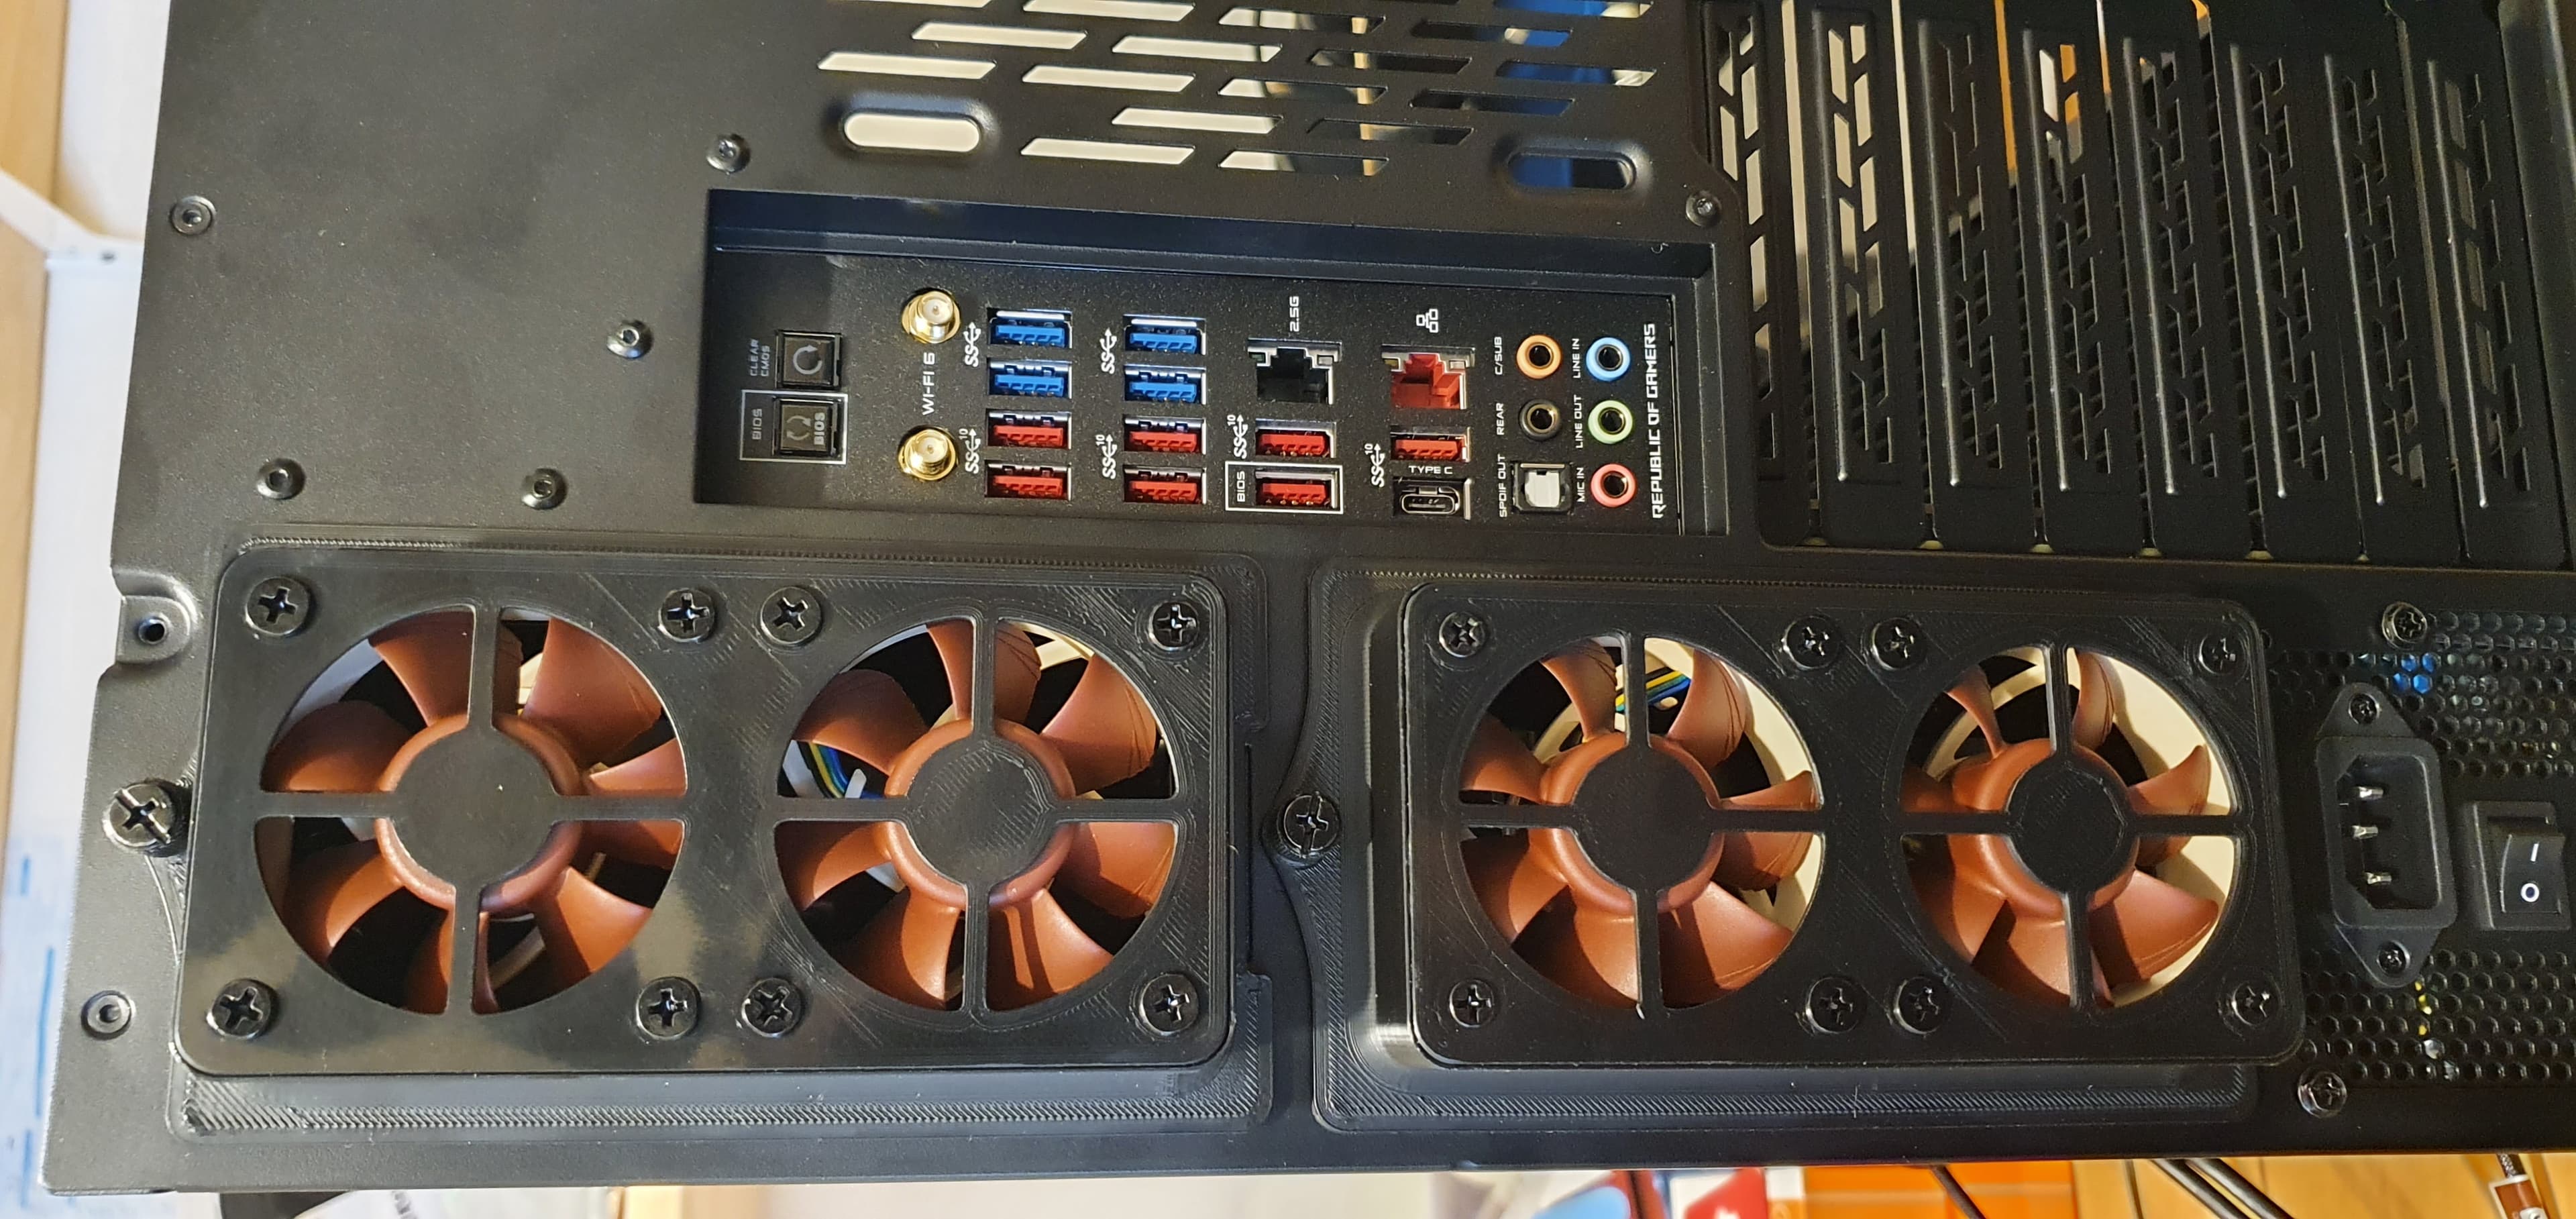


This is an external fan shroud for the Lian Li O11D XL ATX Computer Case, also known as the O11 Dynamic XL or PC-O11D-XL.
The Hard Drive bays in this XL case enable HDD hot swap, but they do not feature very good openings for HDD cooling, or any place to mount fans (even inside the case) to provide active cooling.
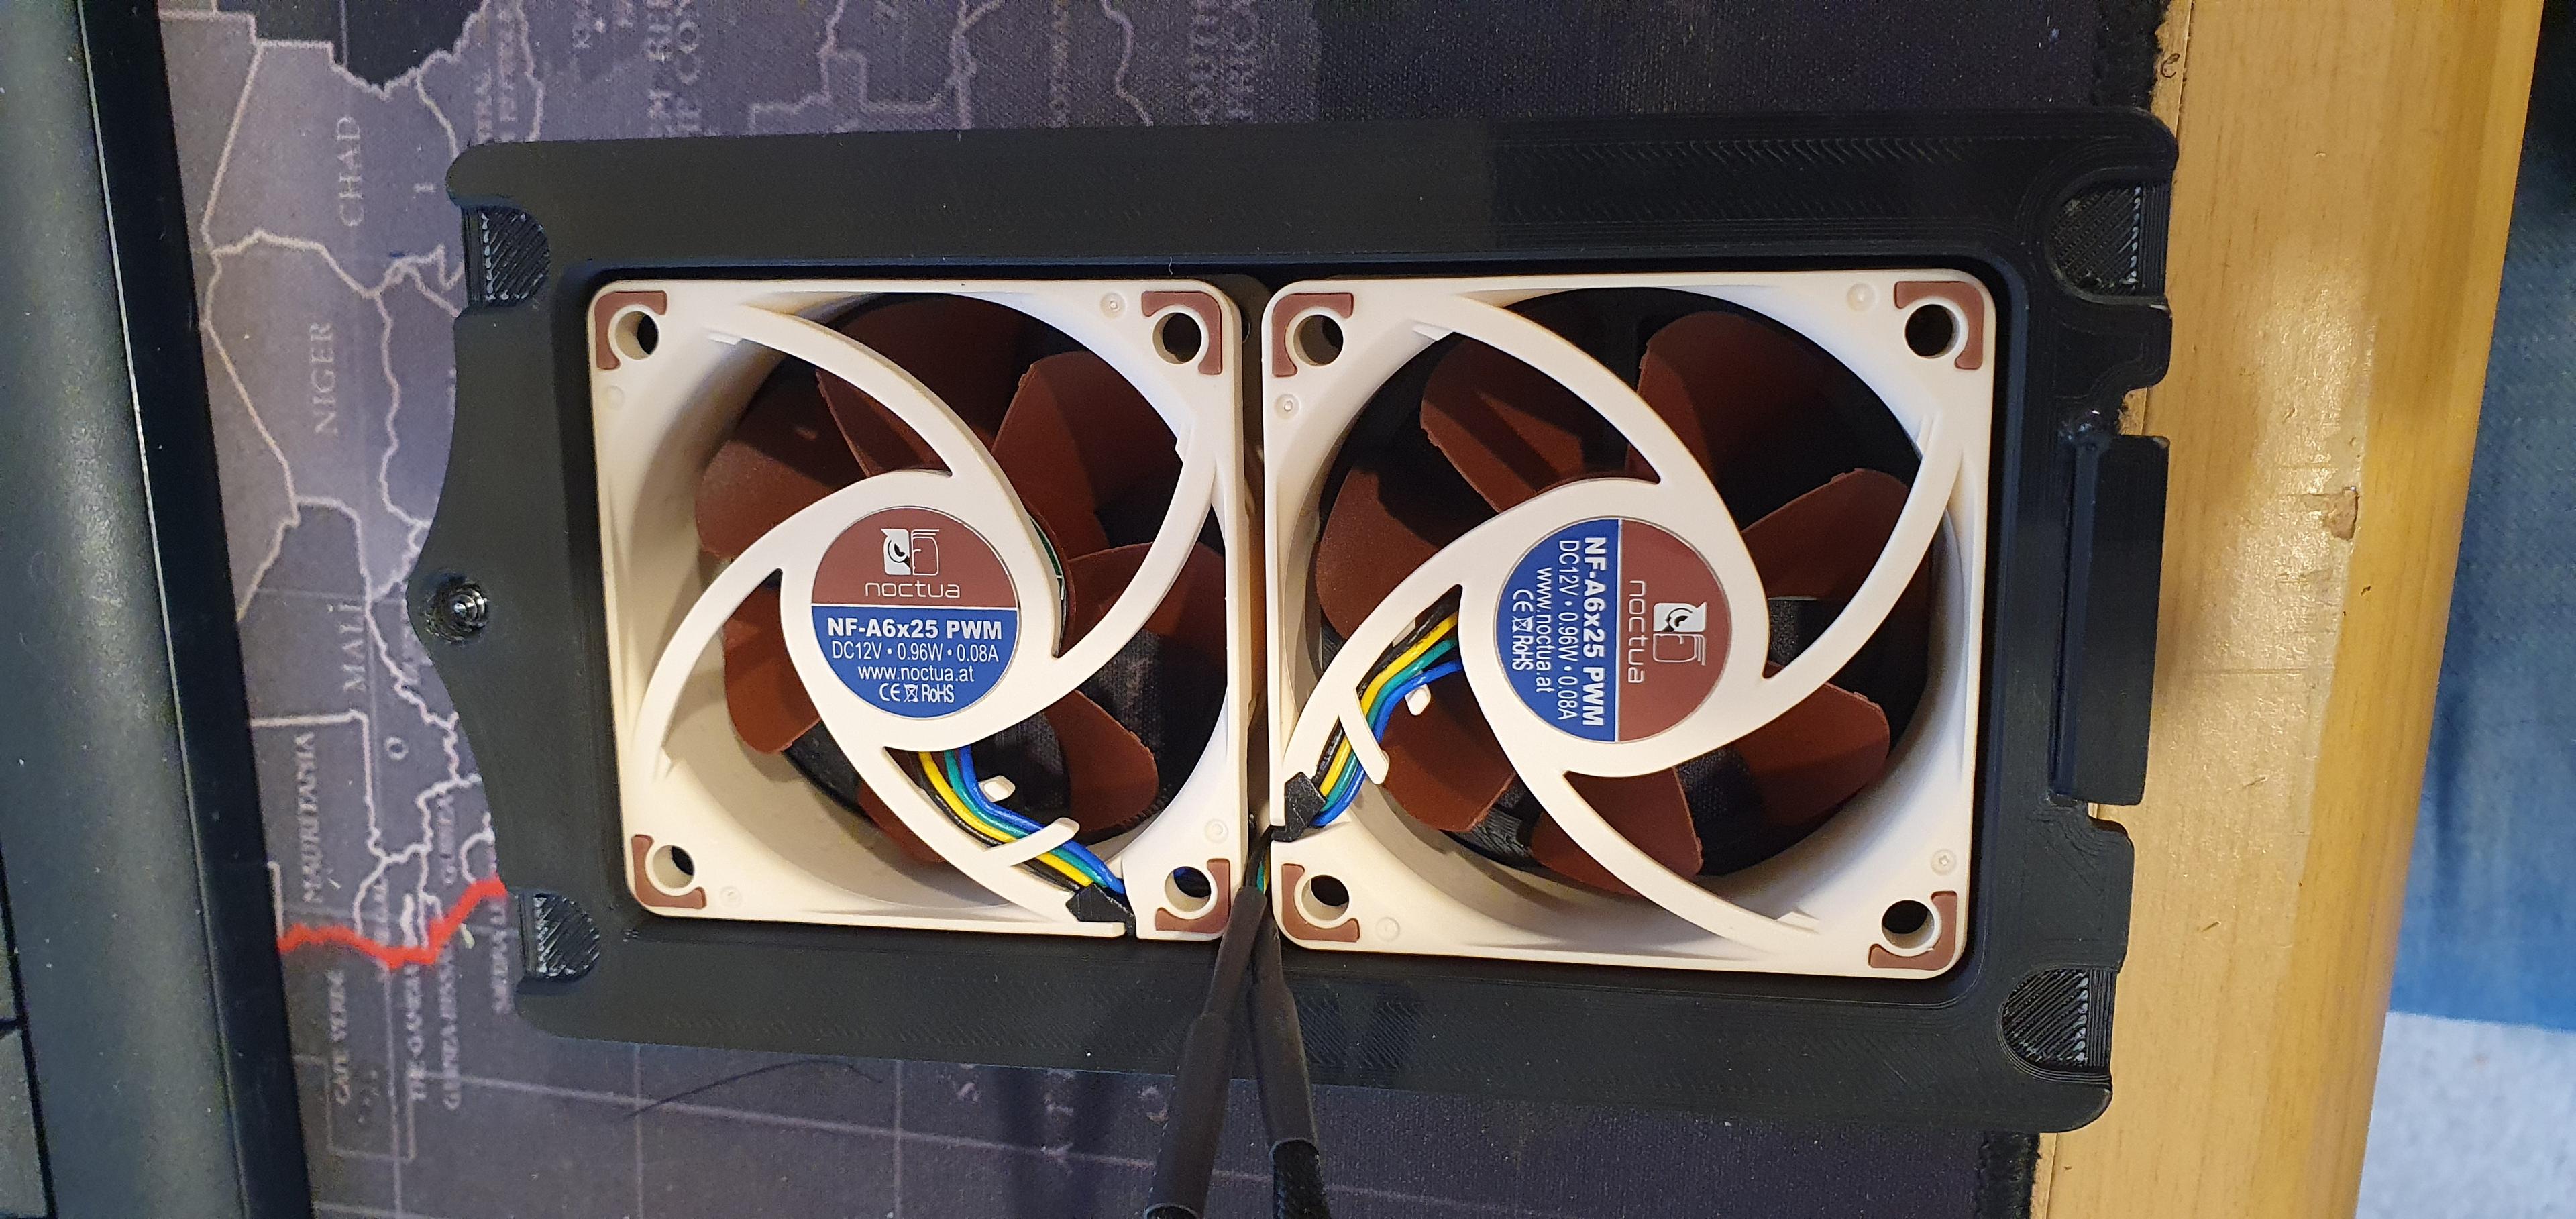
I decided to design an external fan shroud which takes 2x Noctua A6x25 fans for each bay (total of 2 bays), which provides active cooling for the HDD's in that bay.
These bays fit perfectly in place of the metal doors which come with the case. Remove the thumbs screw from the metal door, and screw it into this plastic shroud, and it remains functional and captive like the original metal door.
I have submitted 3 options for how to print this, one option may be better for your printer or method of printing.
Not in the correct order, but this makes the most sense for explaining.
Option 2 - This is the full shroud as 1 piece. It can be printed right way up, or upside down, however both require support which can leave undesirable marks on a FDM printer. This however would be the best option for SLA type printers, or if you have a dissolvable support material, as it is simply print and install, without any post-printing work.
Option 1 - This is the full shroud, less the 'Lock' at the bottom, which latches the bottom of the shroud into the case, as only the top is held by the thumb screw. The lock is a separate part, which is a tight fit into the slot in the body of the fan shroud, but is best to be glued in place with a drop of superglue. The lock inserts with the shorter side into the body of the plastic, leaving the longer side sticking out and down (refer to Option 2 what it looks like)
Option 3 - This is a 3 part option, the first is the main body (Part 1), however it features no attached front (Part 2) so there is no overhang requiring support. The front where the air passes the fans is a separate part, and has a recess where it sits on the main body. This is attached with a light ring of superglue in the recess, and then the front placed in. This also has the Lock which needs printing separate, like Option 1.
Hopefully that is not confusing.
I opted for Option 3 myself, printing the 3 parts of Option 3, and gluing them together with superglue. I first started with Option 2 but the surface finish I was not happy with on visible areas due to the amount of support required for the front. Even printing upside down required support, so I looked to redesigning and made Option 3. Option 1 I didn't print, but its just another variation which might appeal to someone more.
The fans fit nicely, and I used the metal fan screws that came with the fans, to attach them into the plastics. Fans are then connected together with the Y-cable that came with the fans, and then the top pair and the bottom pair were connected with another Y-cable, and into the motherboard.
Note: Do not tighten the screws too tight or you will break the plastic. Same goes with the thumb screw, for attaching the completed shroud to the case.
I personally used eSun Black ABS+ on a BCN3D Sigma printer with enclosure, on Filafarm + Filaprint bed, to print these with.
I hope this helps someone.
I have included STEP files, in case anyone wants to modify or Remix the design.
Support is best on all the Options, as the underside has a few indents which go over the screw heads of the case, and over the sticking out thread which the thumb screw goes into to. So best to have support on these.