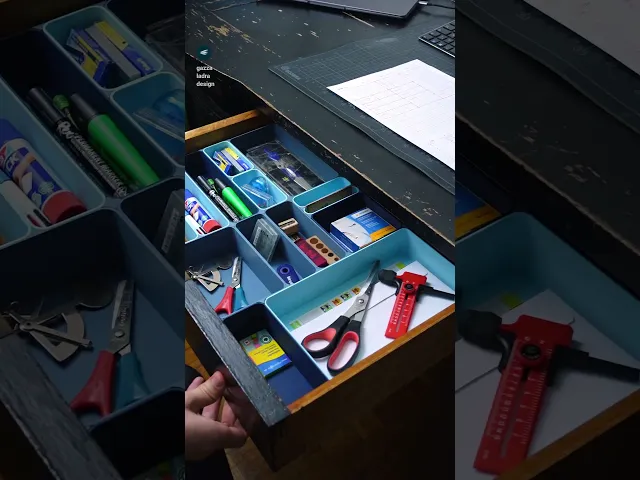
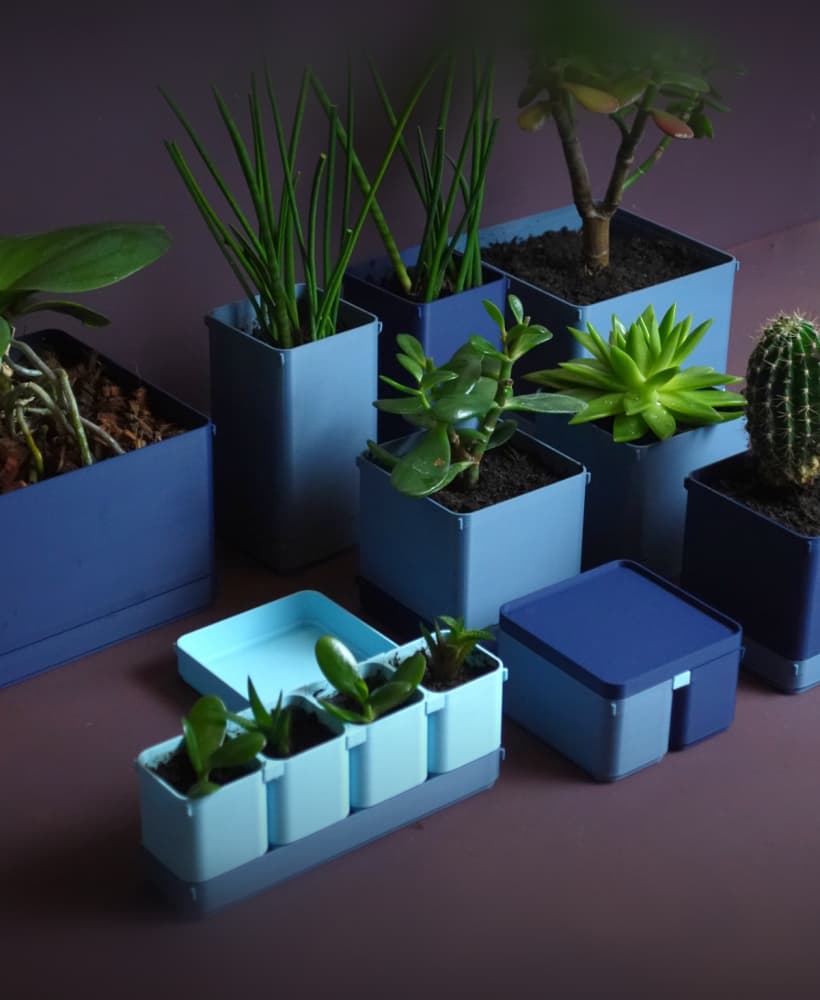
**A modular and stackable box and drawer divider system for all use cases. **
With 10 000 + sizes this design is highly customizable. The parts are super quick to print and easy to assemble. The connector system keeps everything together tightly.
The system is based on 10mm to the next size in all directions. There is also a easy bundle included that only has all parts in 50 mm to the next size for getting to know the system and print quick uniform boxes.
The files are attached as zip folders for a quicker download. They are sorted in subfolders by z-height.
There is a PDF template for smooth and easy planning included. I also attached some examples.
Parts
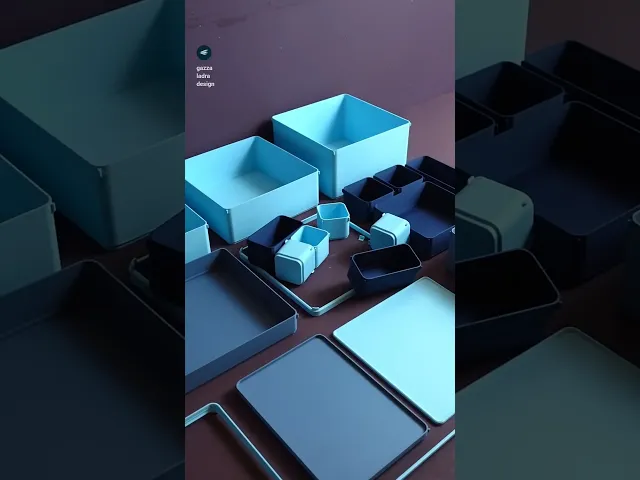
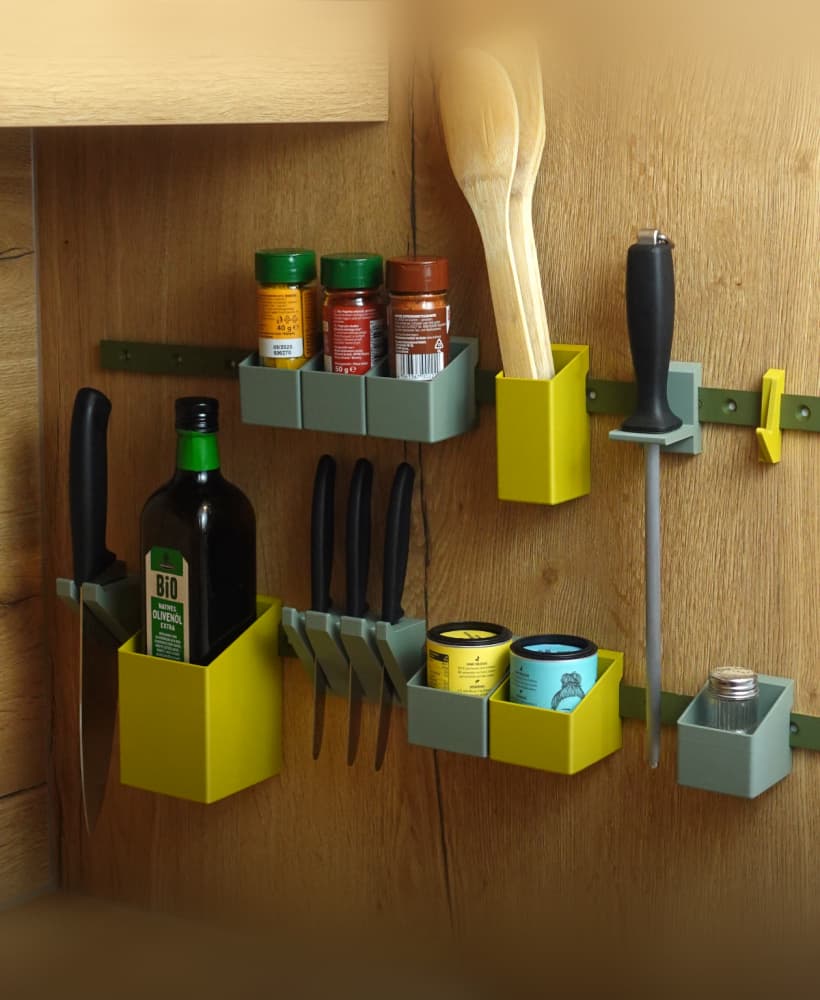
Boxes: The stackable boxes in the range from X20 x Y20 x Z20 mm to X300 x Y300 x Z200 mm.
Bases: The non-stackable box variant in the range from X20 x Y20 x Z30 mm to X300 x Y300 x Z100 mm.
Rings: Rings in the height of 10 mm to be able to stack bigger boxes onto a assembly of smaller ones. They range from X40 x Y40 mm to X300 x Y300 mm.
Trays: Trays in the height of 10mm that snap into a ring to close an assembly or put a array of small boxes on a big one. They range from X20 x Y20 mm to X300 x Y300 mm.
Connectors: The box connectors with 4, 2 and 1 corner. They come in a snug and tight fit.
Spacers: With these you can make your assembly fit your drawer with up to 1 mm accuracy.
Instructions
Unzip all folders to your desired location
Print the attached PDF (If you do not have a 2D printer, checkered paper works as well)
Plan your assembly by measuring the space you have and everything that you want to fit in there.
One grid on the template is 10x10 mm. Draw out your layout in top-view. If you plan on doing multiple levels, place them next to each other.
Write the height into every box.
Fill in the parts list.
Count the connectors by circling the corners and fill in the number. (or just print a bunch)
Browse the file folders (pro tip: if you want to print a lot of sizes, you can use the search function of your explorer) and import all files into your slicer. Cross of the row “import” on the template so you don’t forget anything.
Multiply the parts in your slicer according to your plan.
Change the color of the parts if you want to use multiple filaments.
Arrange the parts on as many build plates as necessary.
Print all files and assemble according to your plan.
If you fill a drawer, use the spacers to make the assembly fit tight.
Print settings
Material: PLA
Print direction: stls are rotated correctly, check images
Support: none
Nozzle size: 0,4 mm
Line width: 0,4 mm
Layer height 0,2 mm
Infill: 15%
Build plate adhesion type: none but a brim might be helpful for larger boxes if you have bed adhesion issues.
For really fast printers make sure that the seam position is not right on the corner connector pieces of the boxes. Place it in the radius right next to it. It should also not be on the flat side, or the parts might get difficult to place next to each other.


having the ability to put a carry handle on this (folding or otherwise) would be a wonderful addition
thanks for the input!
lovely, i also see a wave bowl lurking there!
An awesome addition to this would be label plates or something that can clip on to trays. I plan to use these to organise a lots of items and it would be nice to have a way to attach a label to each box. Great work on this set!
Thats a fun idea thank you!
thats a smart solution! i have heard this feedback a few times now and it is definitly something to consider, thank you!
Hi, so have you added such "connectors file? that we can use for the long boxes? :)
Hi there, unfortunately not yet! I have been working on an update set that will come out this week, but this option is not in there...
Hi, I too would love a connecter because I'd love to make some bigger than my build plate. Other than that I am LOVING this system. I'm in the middle of doing two drawers and i feel like I i want everything in my house to be organized by some system. Thanks for making this, I'm not great at 3D printing (yet) and this has been my favorite print job by far!
Love this project! what's the path to the template though? I only see the 2 examples in the zip files.
Can you try to re-download the whole thing? I put it in there again, unfortunately the system has a issue with the amough of files - but it definitly should be there now!
I'm working with a Bambu A1 printer and need to be able to make rectangular boxes that are as long as 407mm (16"), and these won't fit on my print bed. Are you open to including some additional models that allow you to connect multiple pieces together to get the length needed for kitchen utensils?
I do not have something like this planned but i will add it to my list of potential improvements! thanks for the input
Maybe slowing down the print a bit coud help? I did also sometimes get some artifacts there on a P1S, while they always come out great on an A1 or A1 mini. My only guess is Speed
I had to put this on hold, but sharing my findings as I get back to it: speed alone was not a viable option for me, what worked was to slightly reduce the line width so the inner wall in the connectors could be printed with a single movement. The 2-steps movement was causing the extrusion variation that caused this issue at high speeds.
I increased the infill to 20% to compensate for potential loss of rigidity and it came out great even at full speed. I actually managed to shave off 1h of print time for each box. I'm editing the make with some screenshots that might help others if they face the same situation.
ohhhh cool!!!! definitly share those!
I found the example template PDF files in the zip file, but where do I get the blanks?
Can you try to re-download the whole thing? I put it in there again, unfortunately the system has a issue with the amough of files - but it definitly should be there now!