Model originally uploaded to Thingiverse at https://www.thingiverse.com/thing:4560737.
I integrated TMC2208 V3.0 stepper drivers into my Anycubic Mega S.
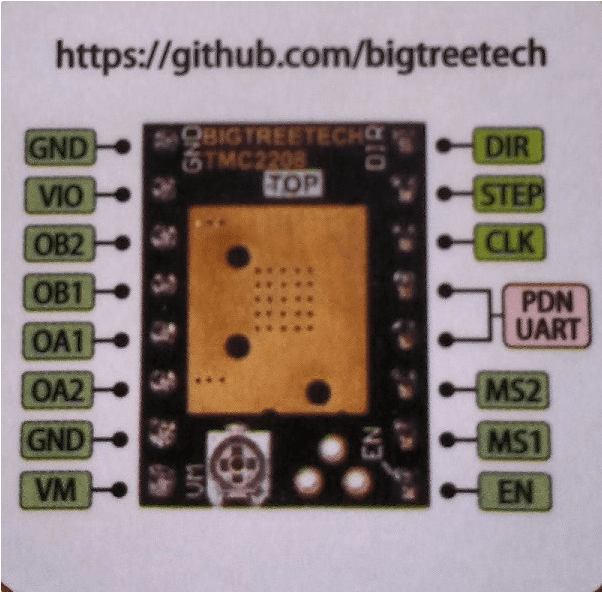
Make sure you have the mainboard with non-soldered stepper drivers! I ordered 4 x TMC2208 V3.0 UART version, please refer to the picture for pin usage. I use the stock firmware that is pre-installed on the printer.
-
Switch off and unplug your printer
-
Open the bottom of your printer
-
I changed X, Y and 2 x Z. The extruder can be left as it is, it's not that noisy.
-
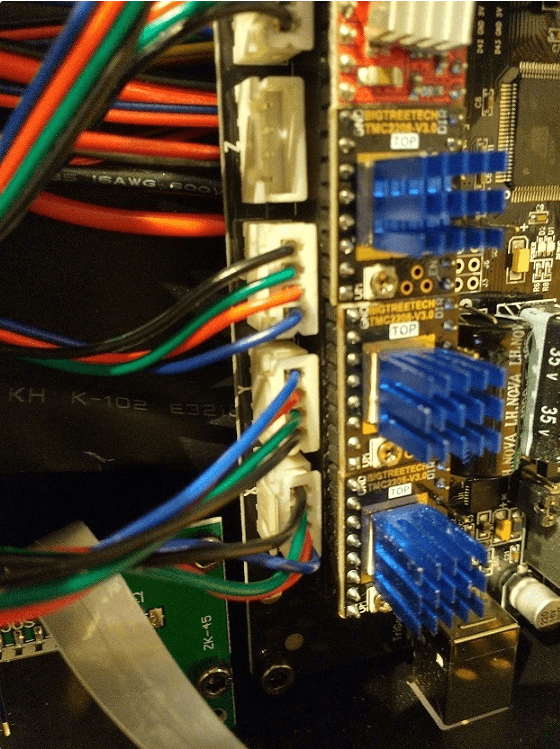
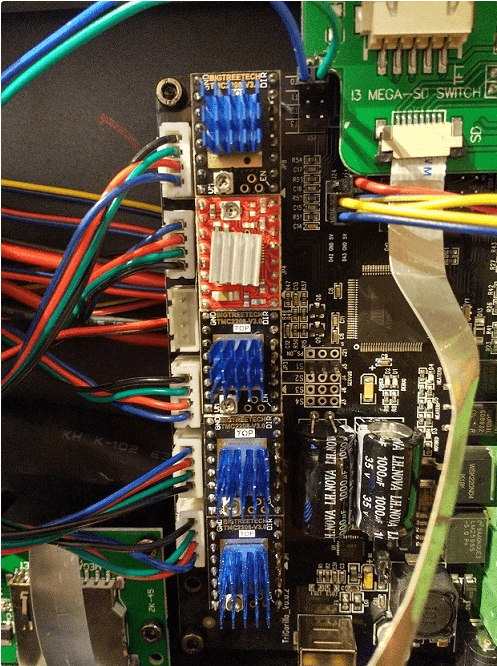
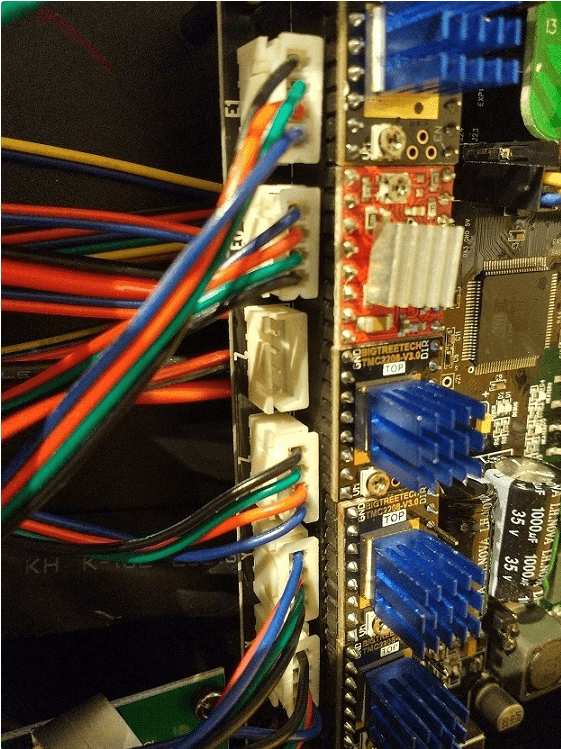
Adjust the voltage, I used ~0.95 V on all drivers. Be careful not to cause a short-circuit, let someone help you if possible. Something between 0.90-1.00 V will do. The adjustment screw is shown in the pictures below the blue heatsink.
-
Now the tricky part: As I am not keen in programming and such stuff, I decided to do the hardware trick. As you can see in the pictures, !! E0 AND Y !! are in the original "wiring state". All other cables need to be moved according to the pictures. In my case from top to bottom Black-Green-Red-Blue.
You can either pull out the brackets gently using pliers or you change the wiring in the connector. Manuals about that can be found online, it's not that hard...
Keep in mind that the new drivers tend to get a bit warmer than the old ones. So you might want to cool them properly to avoid hardware damage or print failures.
I use this thing to cool the drivers: https://www.thingiverse.com/thing:4280158
When homing the axes for the first time, push them to their end stops before starting the motors. This is especially for Y. (Thanks to Exerptus for the reminder). Otherwise, the axis movement might behave strangely.
Aaaaand that's about it.
Switch on your printer and print one of those Benchy things or whatever you like and enjoy the silence :)


