
EVERNESS | Table lamp E27 & E26 & E14
EVERNESS | Table lamp E14 & E27 & E26 fast print
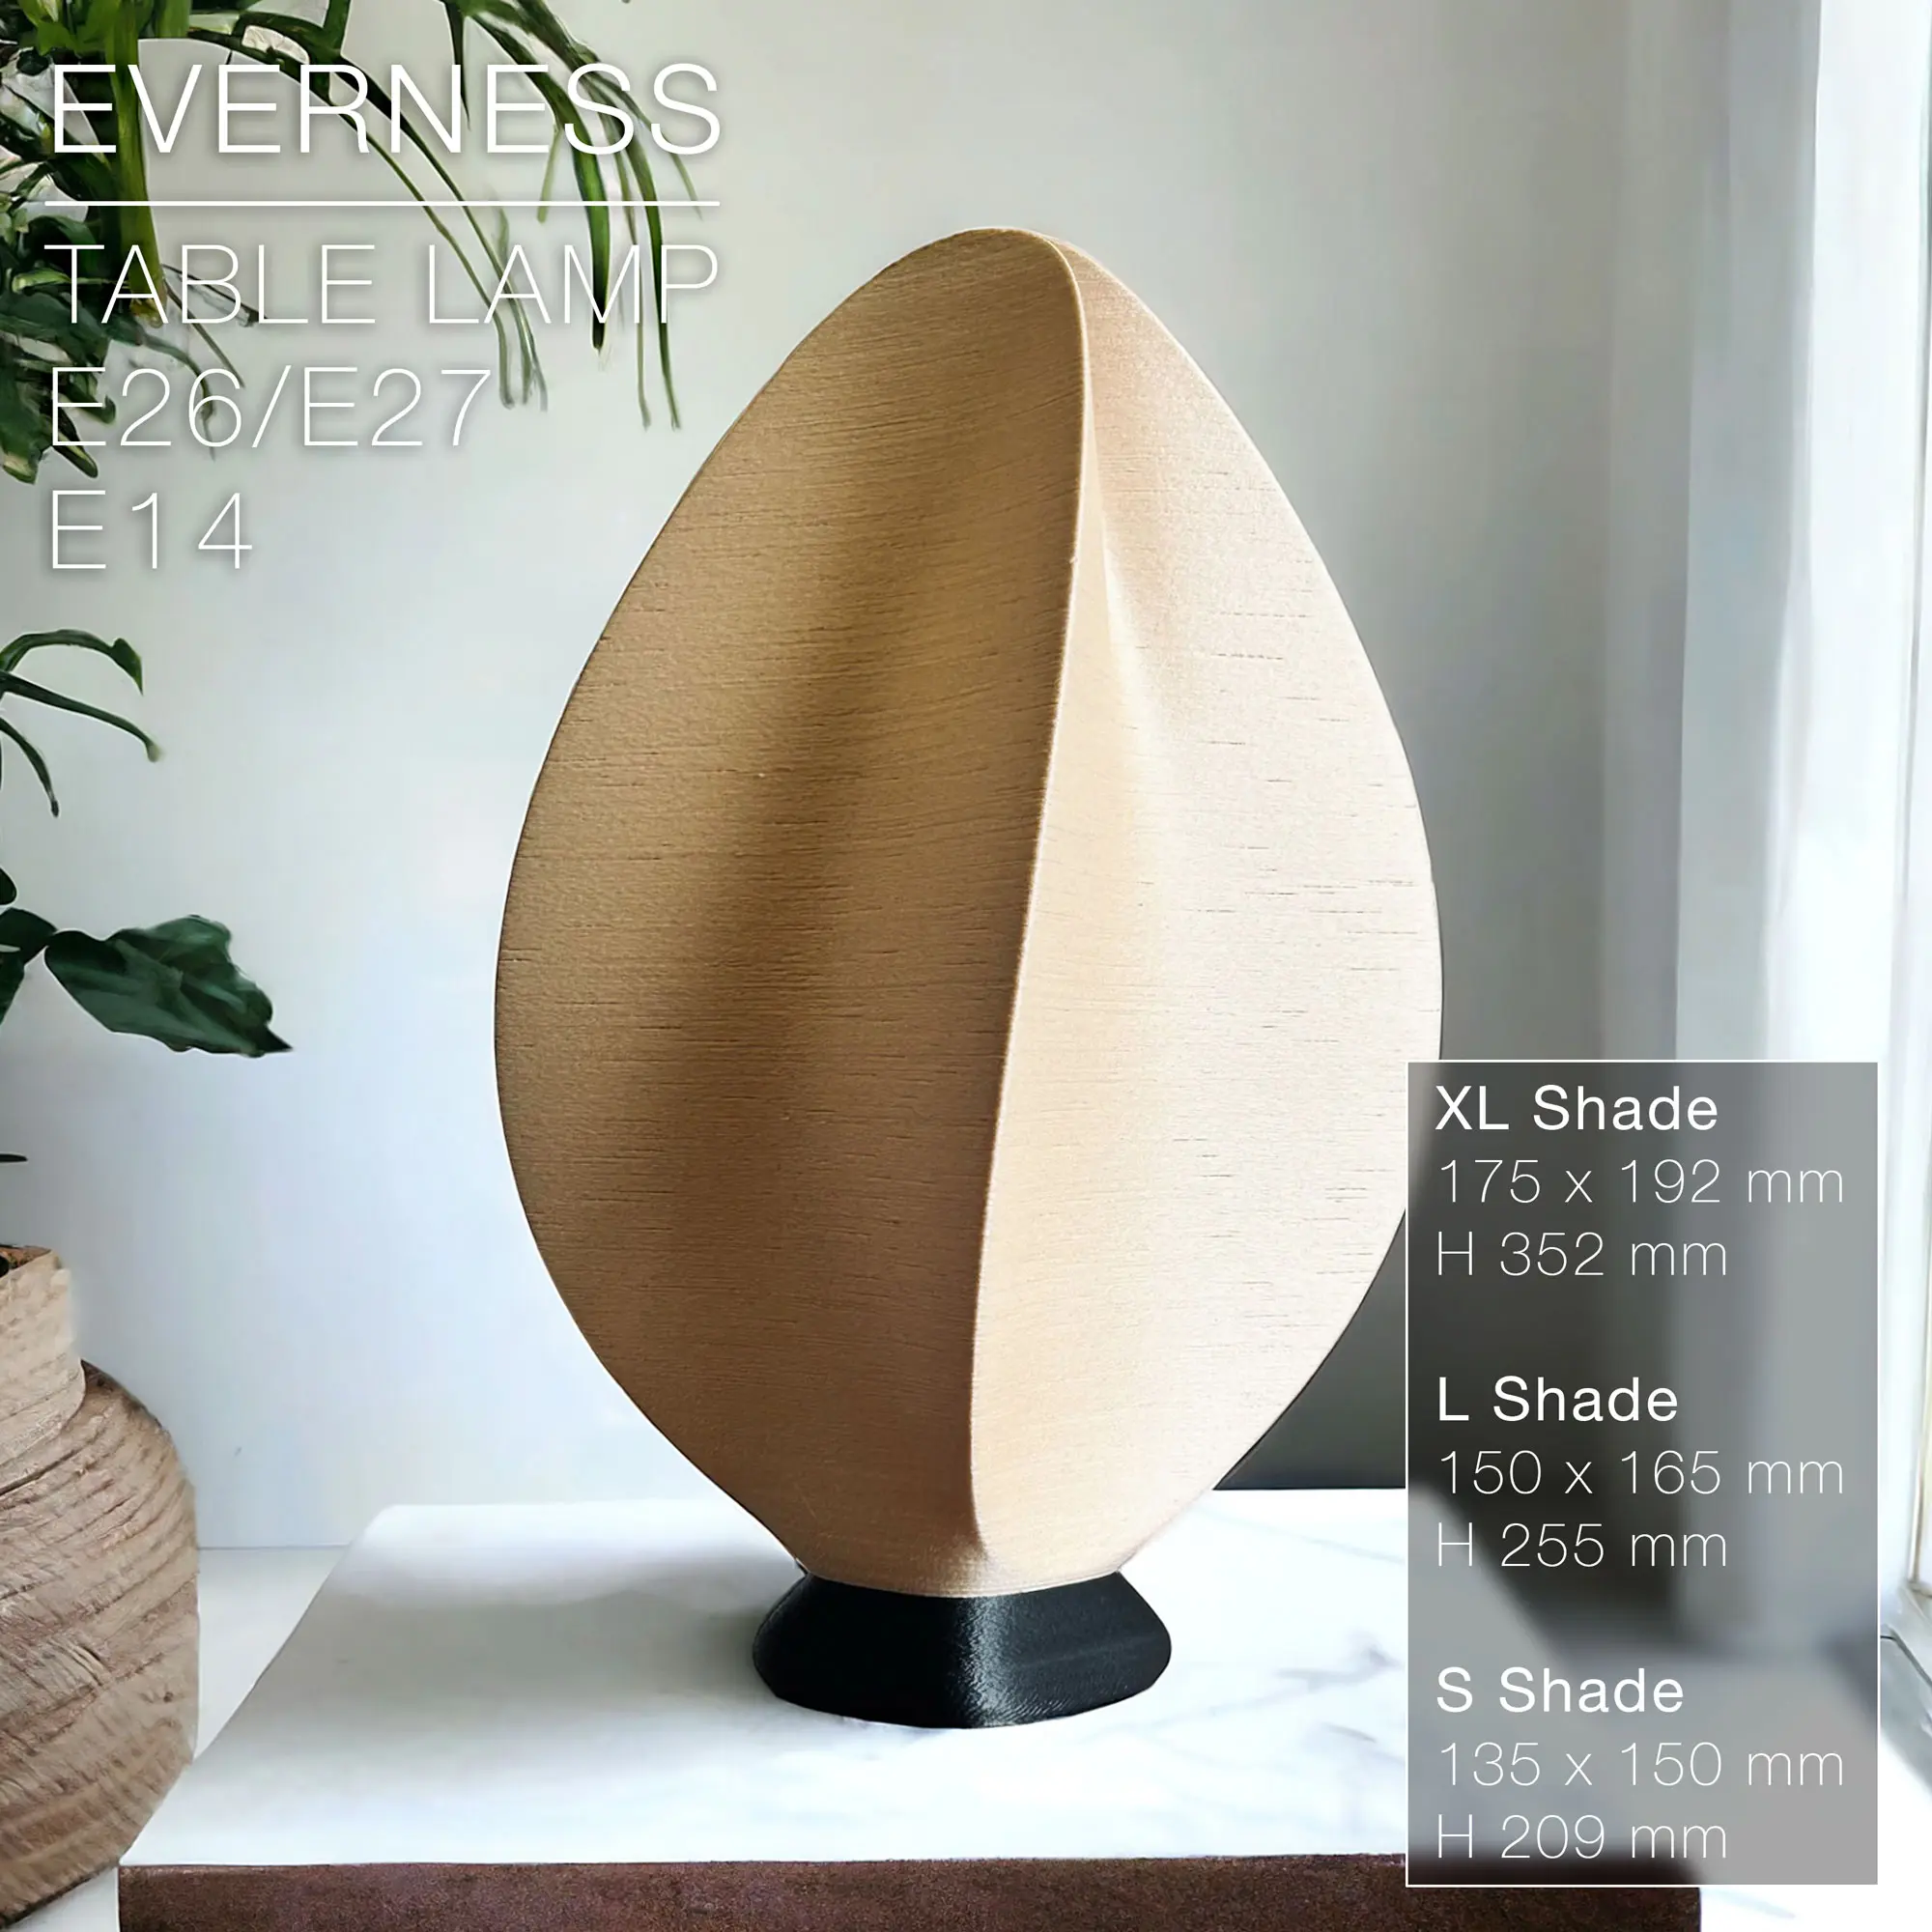
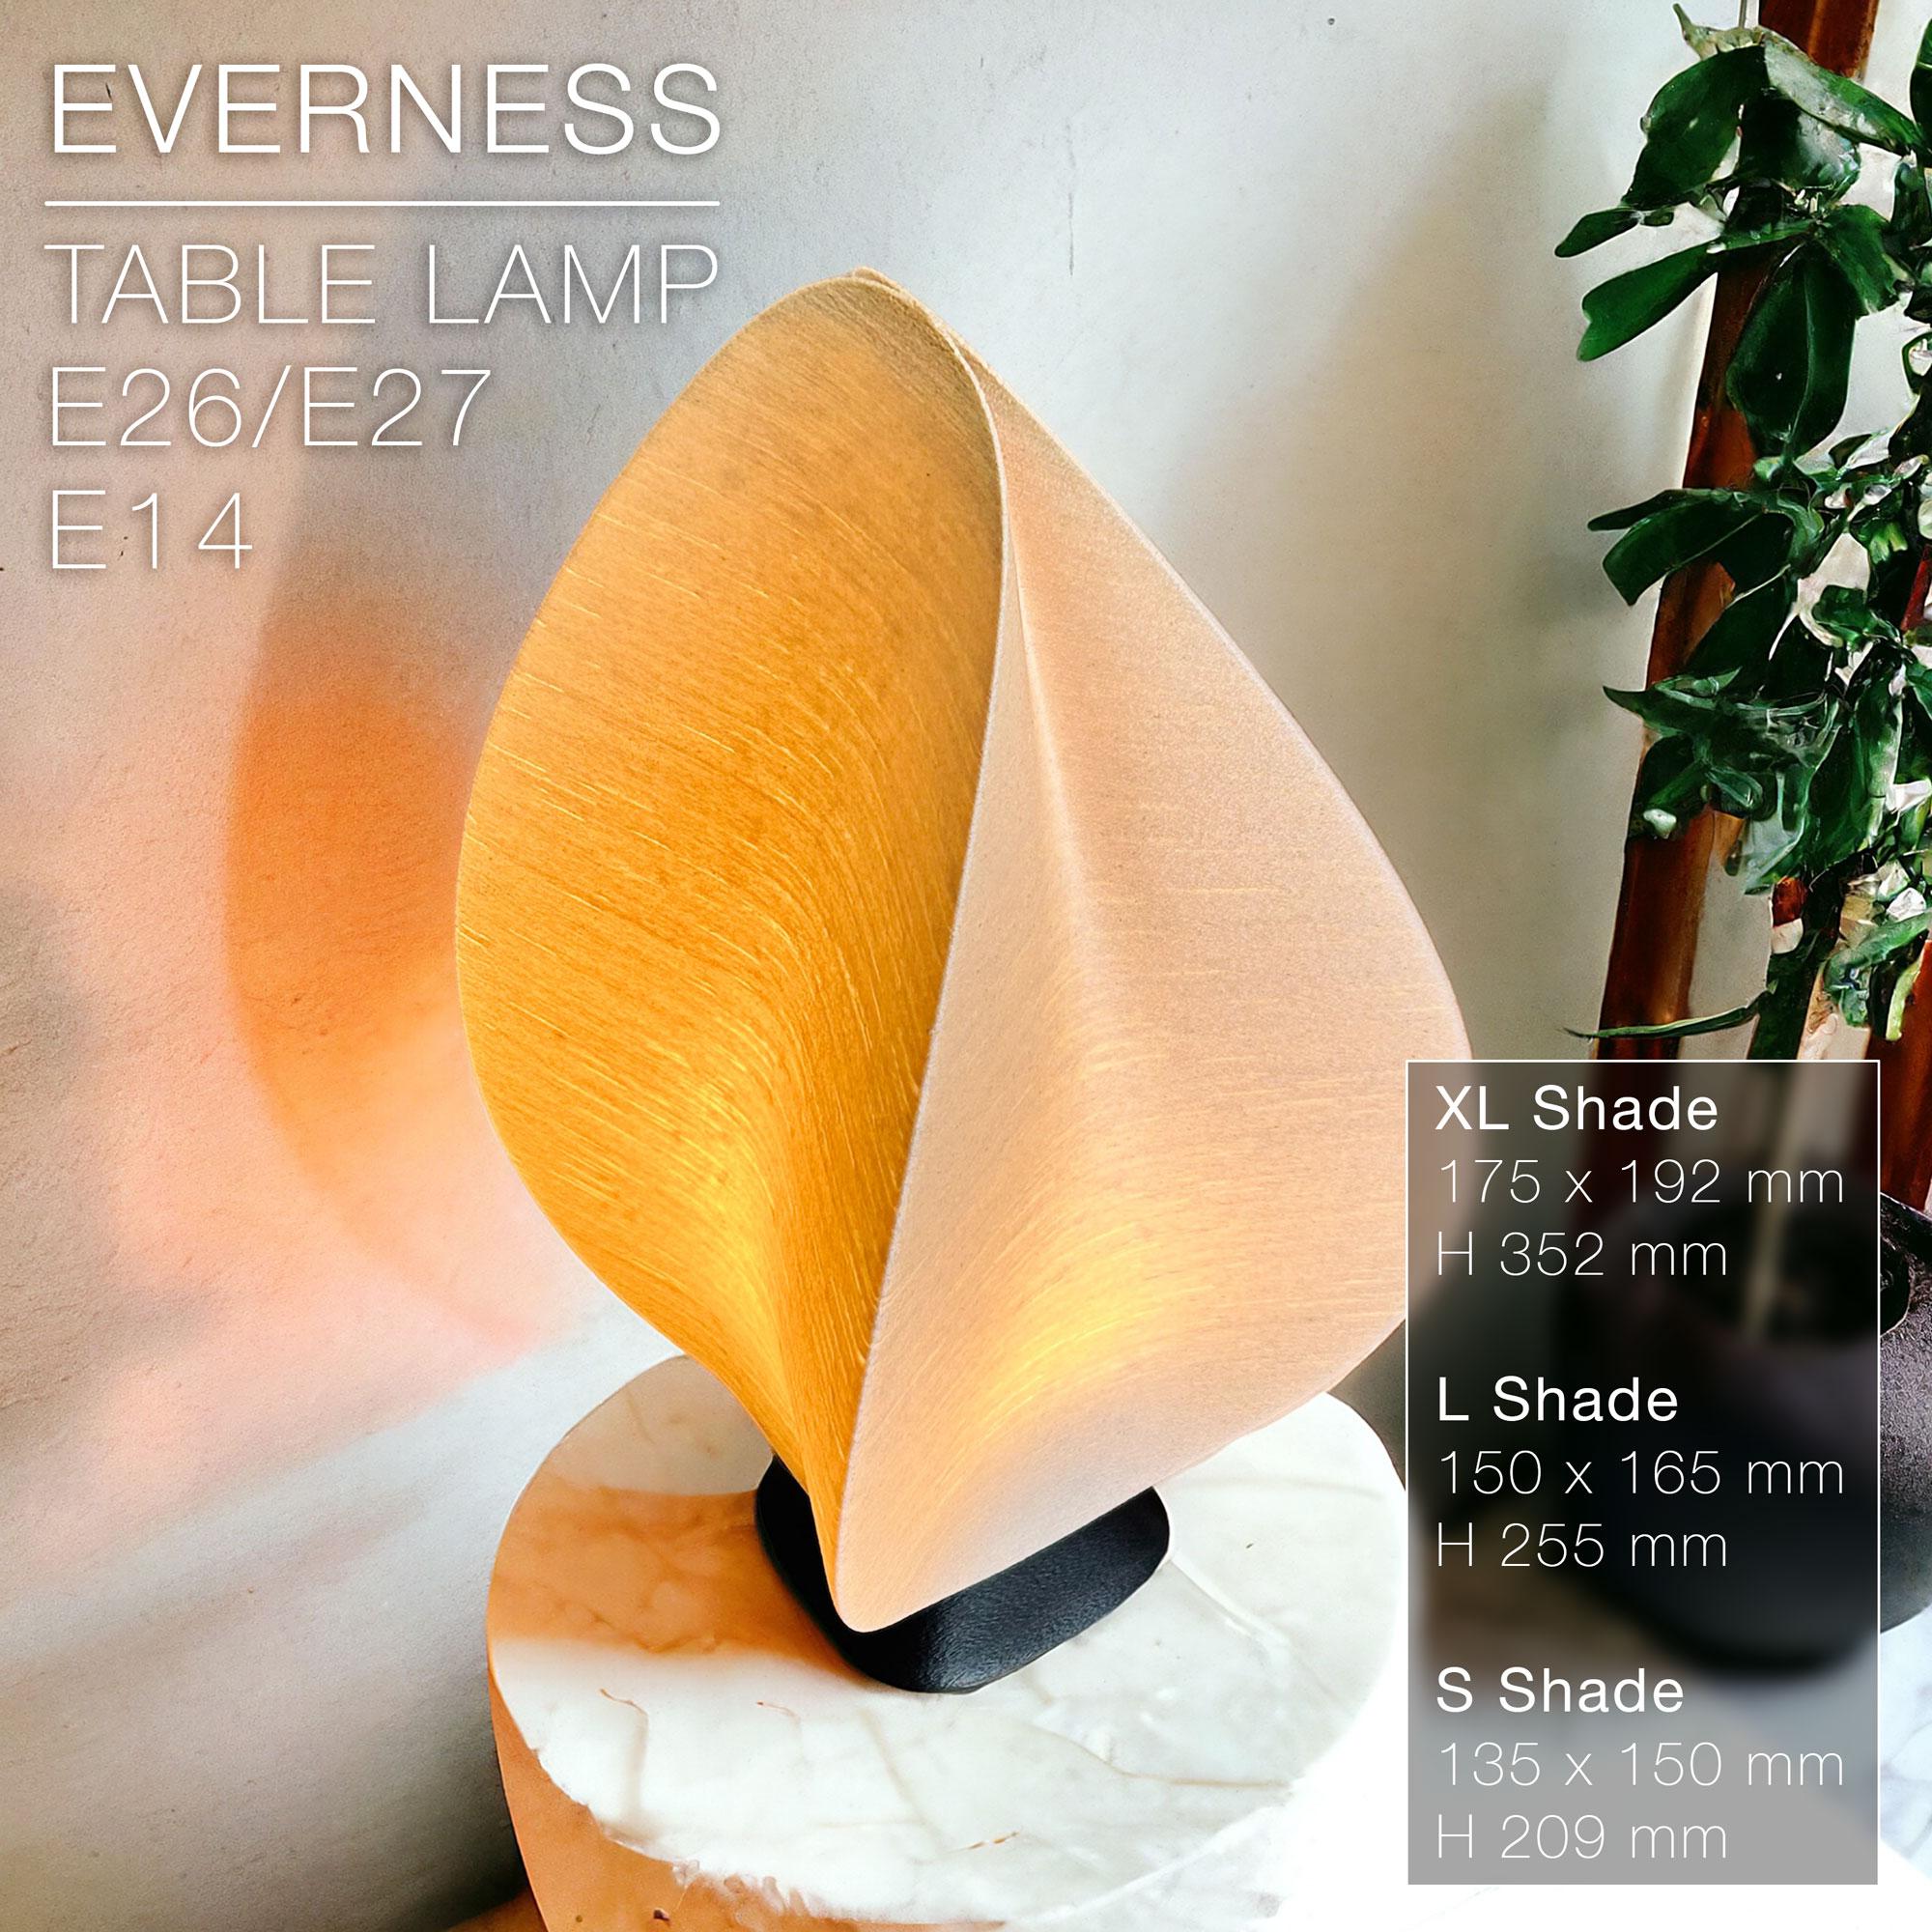
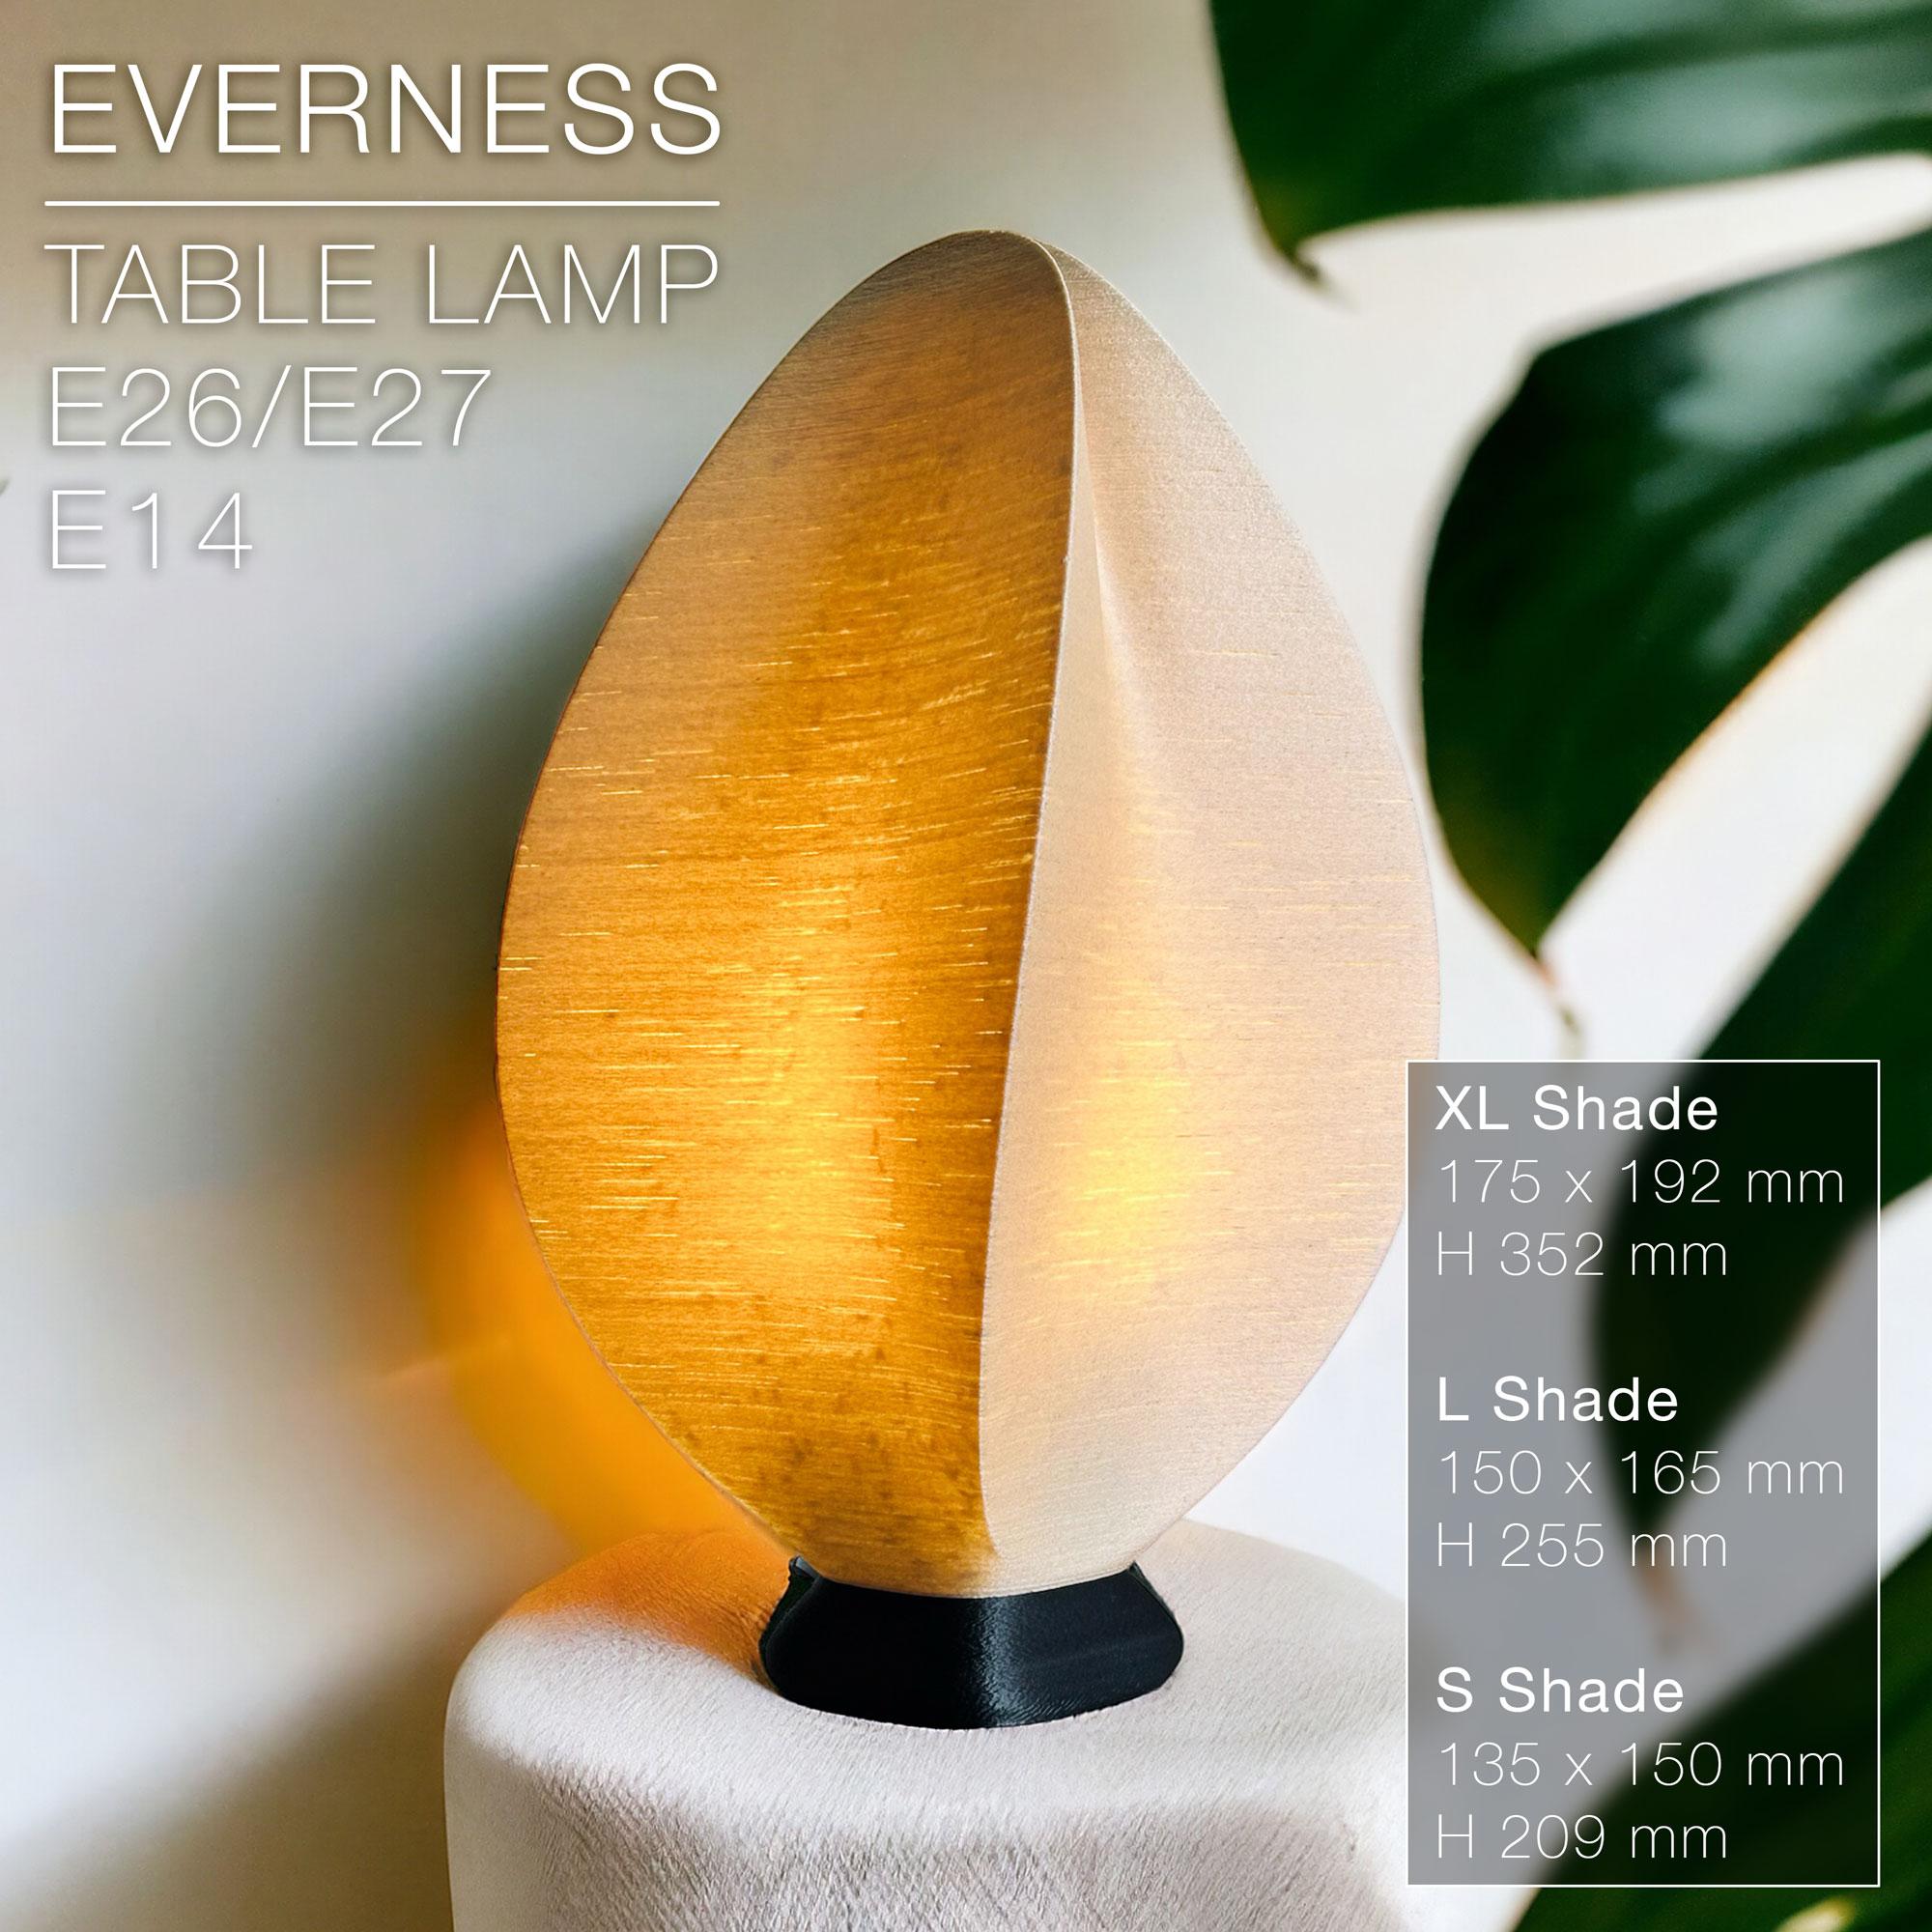
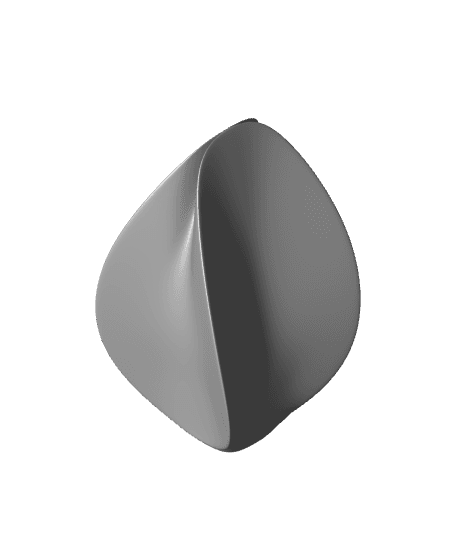
A piece of art. Or is it a lamp? The EVERNESS table lamp was crafted to ressemble an elegant sculpture, a soothing curve endlessly wrapping around on itself.
The shade is available in 3 sizes: XL shade: W 175 x L 192 mm x H 352 mm L shade: W 150 x L 165 mm x H 255 mm S shade: W 135 x L 150 mm x H 209 mm
There are 2 versions of the base:
- E14
- E26 / E27 BASE: W 97 x L 91 mm x H 80 mm
You can get the power cords from Amazon here: For Europe: E27 cord: https://amzn.to/3OVrZjK E14 cord: https://amzn.to/3TchBqs
For the US: E26/E27 cord: https://amzn.to/3U0Xyvy
Happy printing!
3D PRINT SETTINGS
All STL files are already oriented properly. The shade and base both print upright.
BASE: Infill: 20% or more Wall line count: 2 Resolution: 0.2~0.3mm or less (the bases in the pictures were printed in 0.2mm/layer) Build adhesion type: None Supports: None
The shade in the pictures was printed with some "fuzzy skin". The settings were:
- fuzzy skin thickness: 0.15mm
- fuzzy skin point distance: 0.6mm
- Z-seam alignment: Random
SHADE: Resolution: 0.2 or 0.3mm/layer or less Wall line count: 2 infill: 20% for the "shell" version, 0% for the "full" version Build adhesion type: None. But you can add a 5~6mm brim if you have adhesion issue. Supports: None
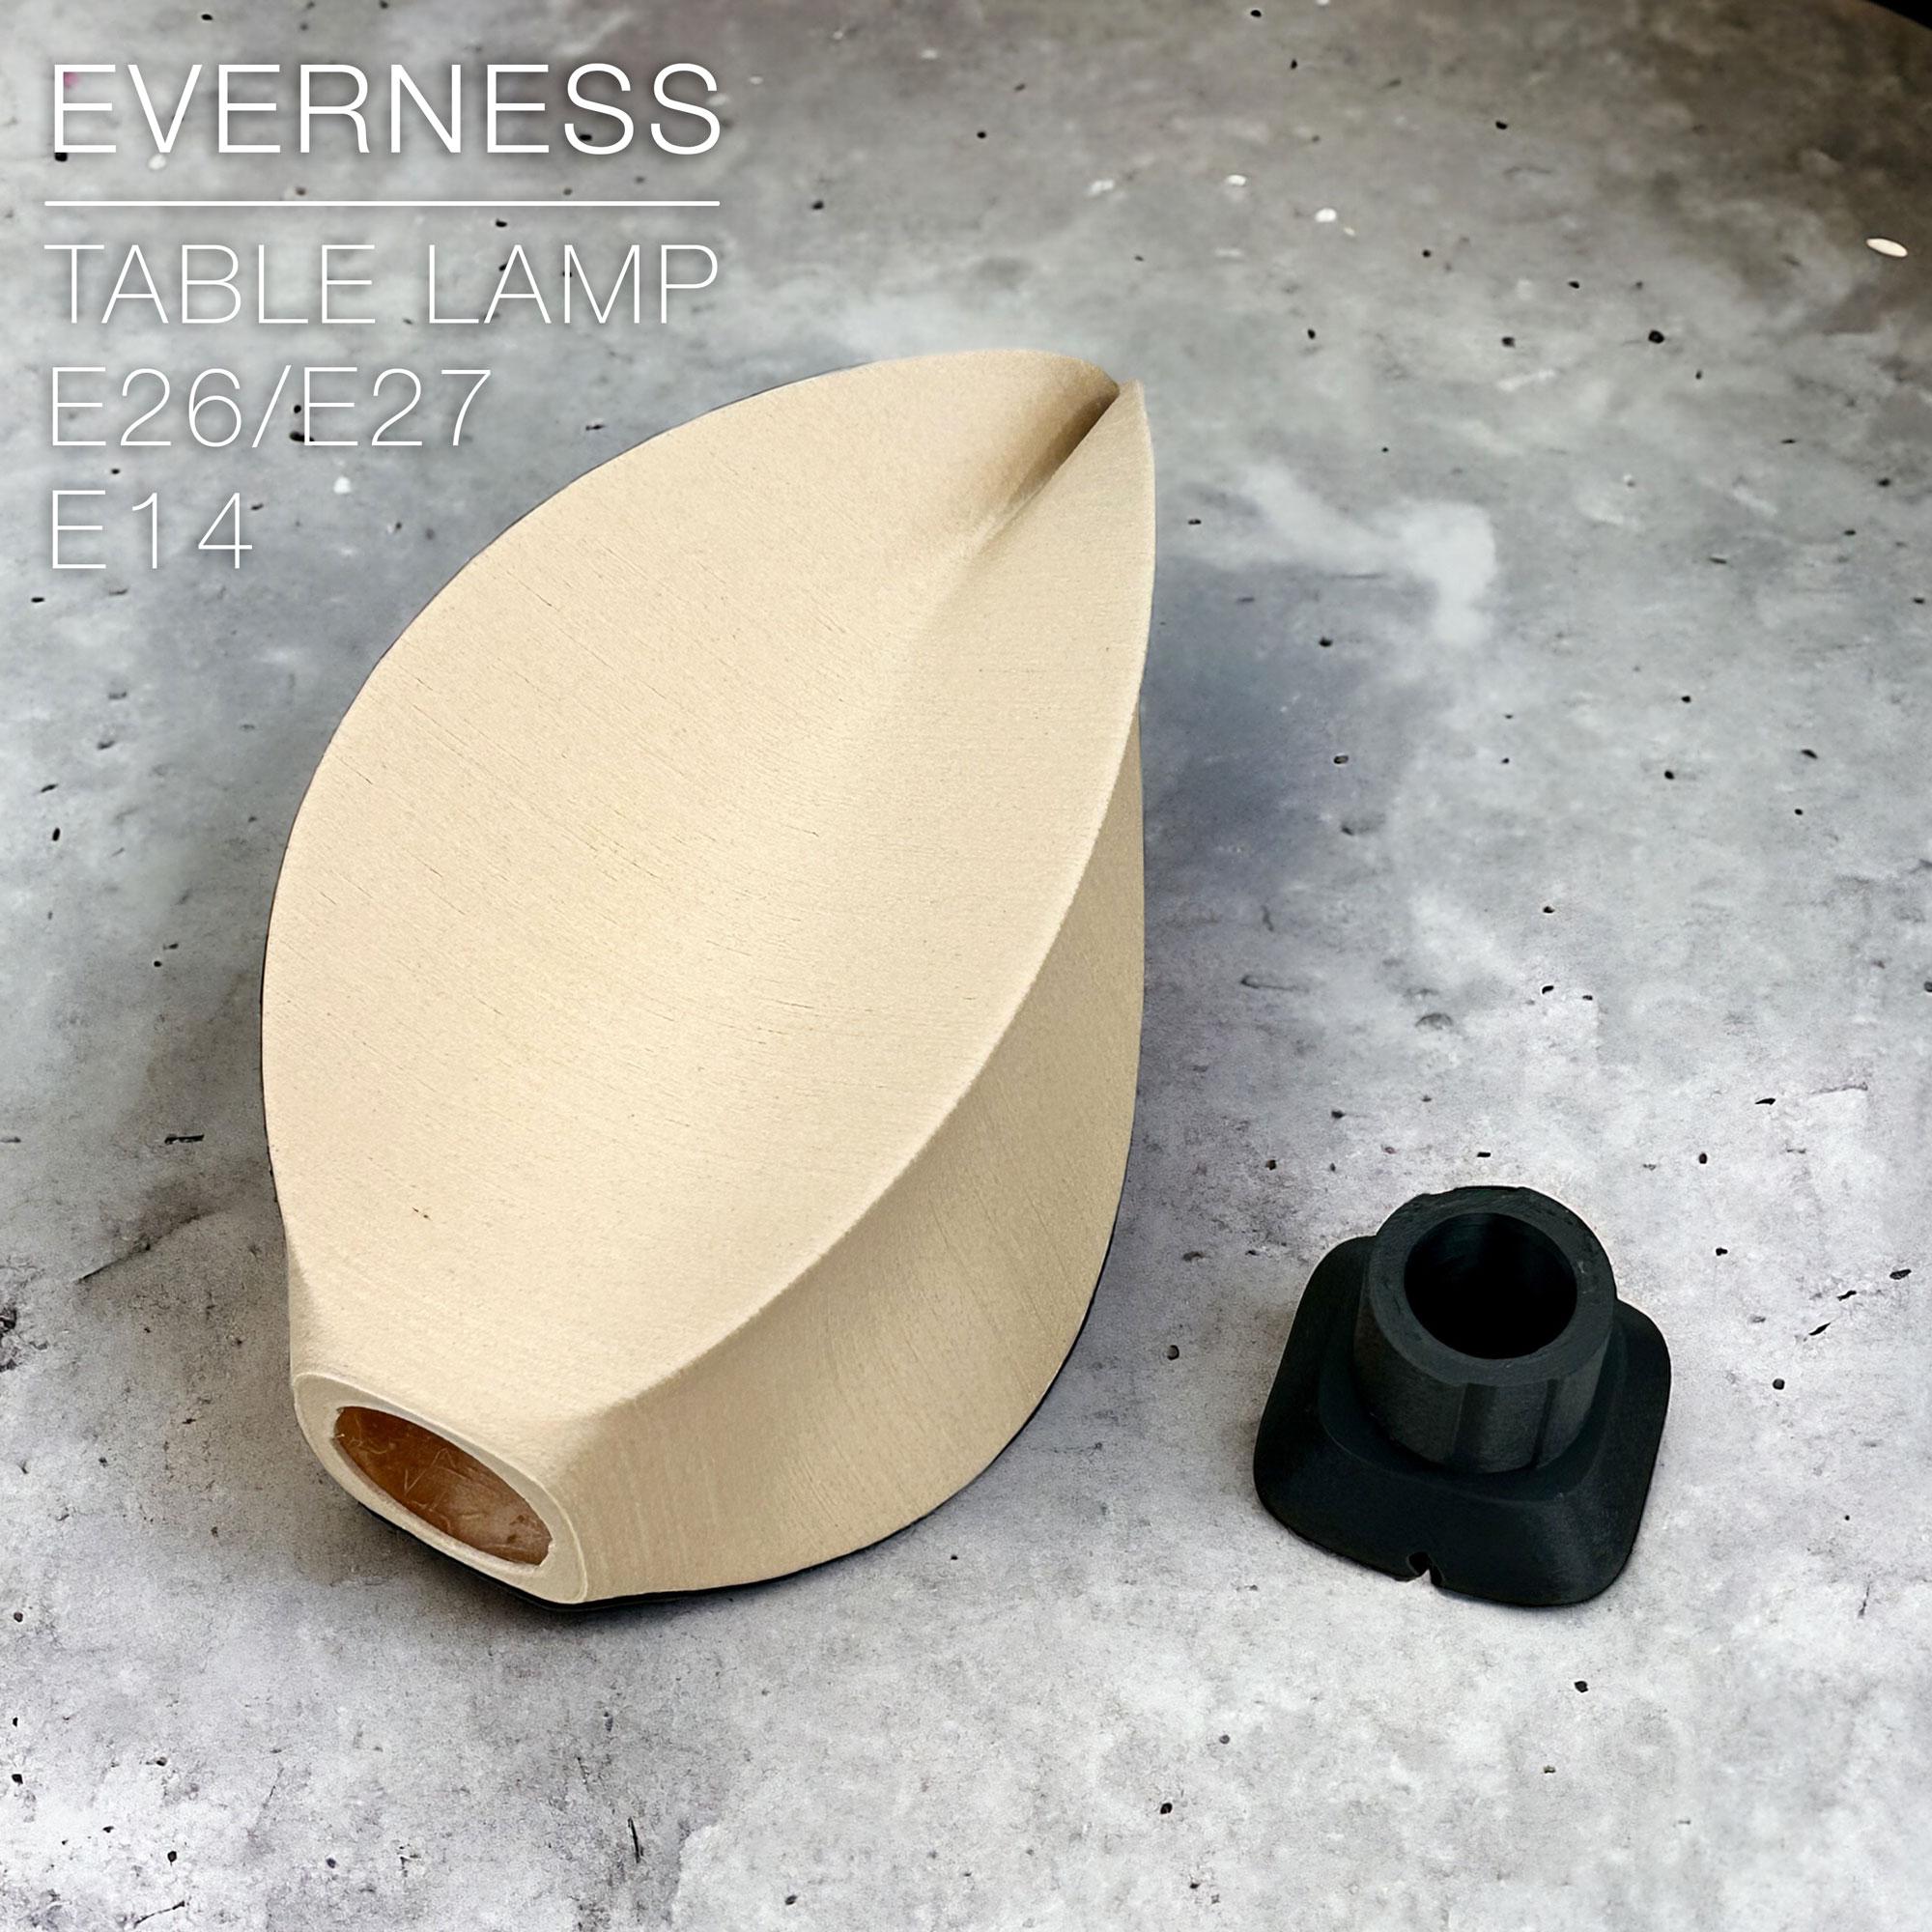
IMPORTANT: There are 2 versions for each size of shade:
- a "shell" version, empty inside and which walls already have some thickness of 0.9mm.
- a "full" version, that you can empty in your slicer with a vase mode or the spiralize mode and chose whatever wall thickness you want.
Both versions must be printed with a base plate thickness of 2mm, so the shade clips properly on the base.
The opening at the base of the "full" shade has already been modeled with a 2mm extrusion cut. But the trick is to find a way to keep the top of the hole open when you print it.
With Prusa slicer, you can use modifiers to cancel the face at the top of the opening.
If you use Cura, in advanced settings you can:
- set the "initial bottom layers" to 7 if you use 0.3mm/layer, 10 if you use 0.2mm/layer, to build the 2mm thickness of the bottom plate
- set "bottom layers" to 1, which means the top face of the opening will be filled with only 1 layer that you can later cut off with a small cutter. This 1 layer will be messy and easy to cutt off since it's hanging over nothing.
I recommend the "full" version, which will have less printing defects, since your slicer will make the walls the same thickness all over, either 1 or 2 or whatever perimeter wall count you pick. The wall thickness on the "shell" version isn't as consistent, slightly thickner around sharp edges. 3D softwares can't calculate them right enough.