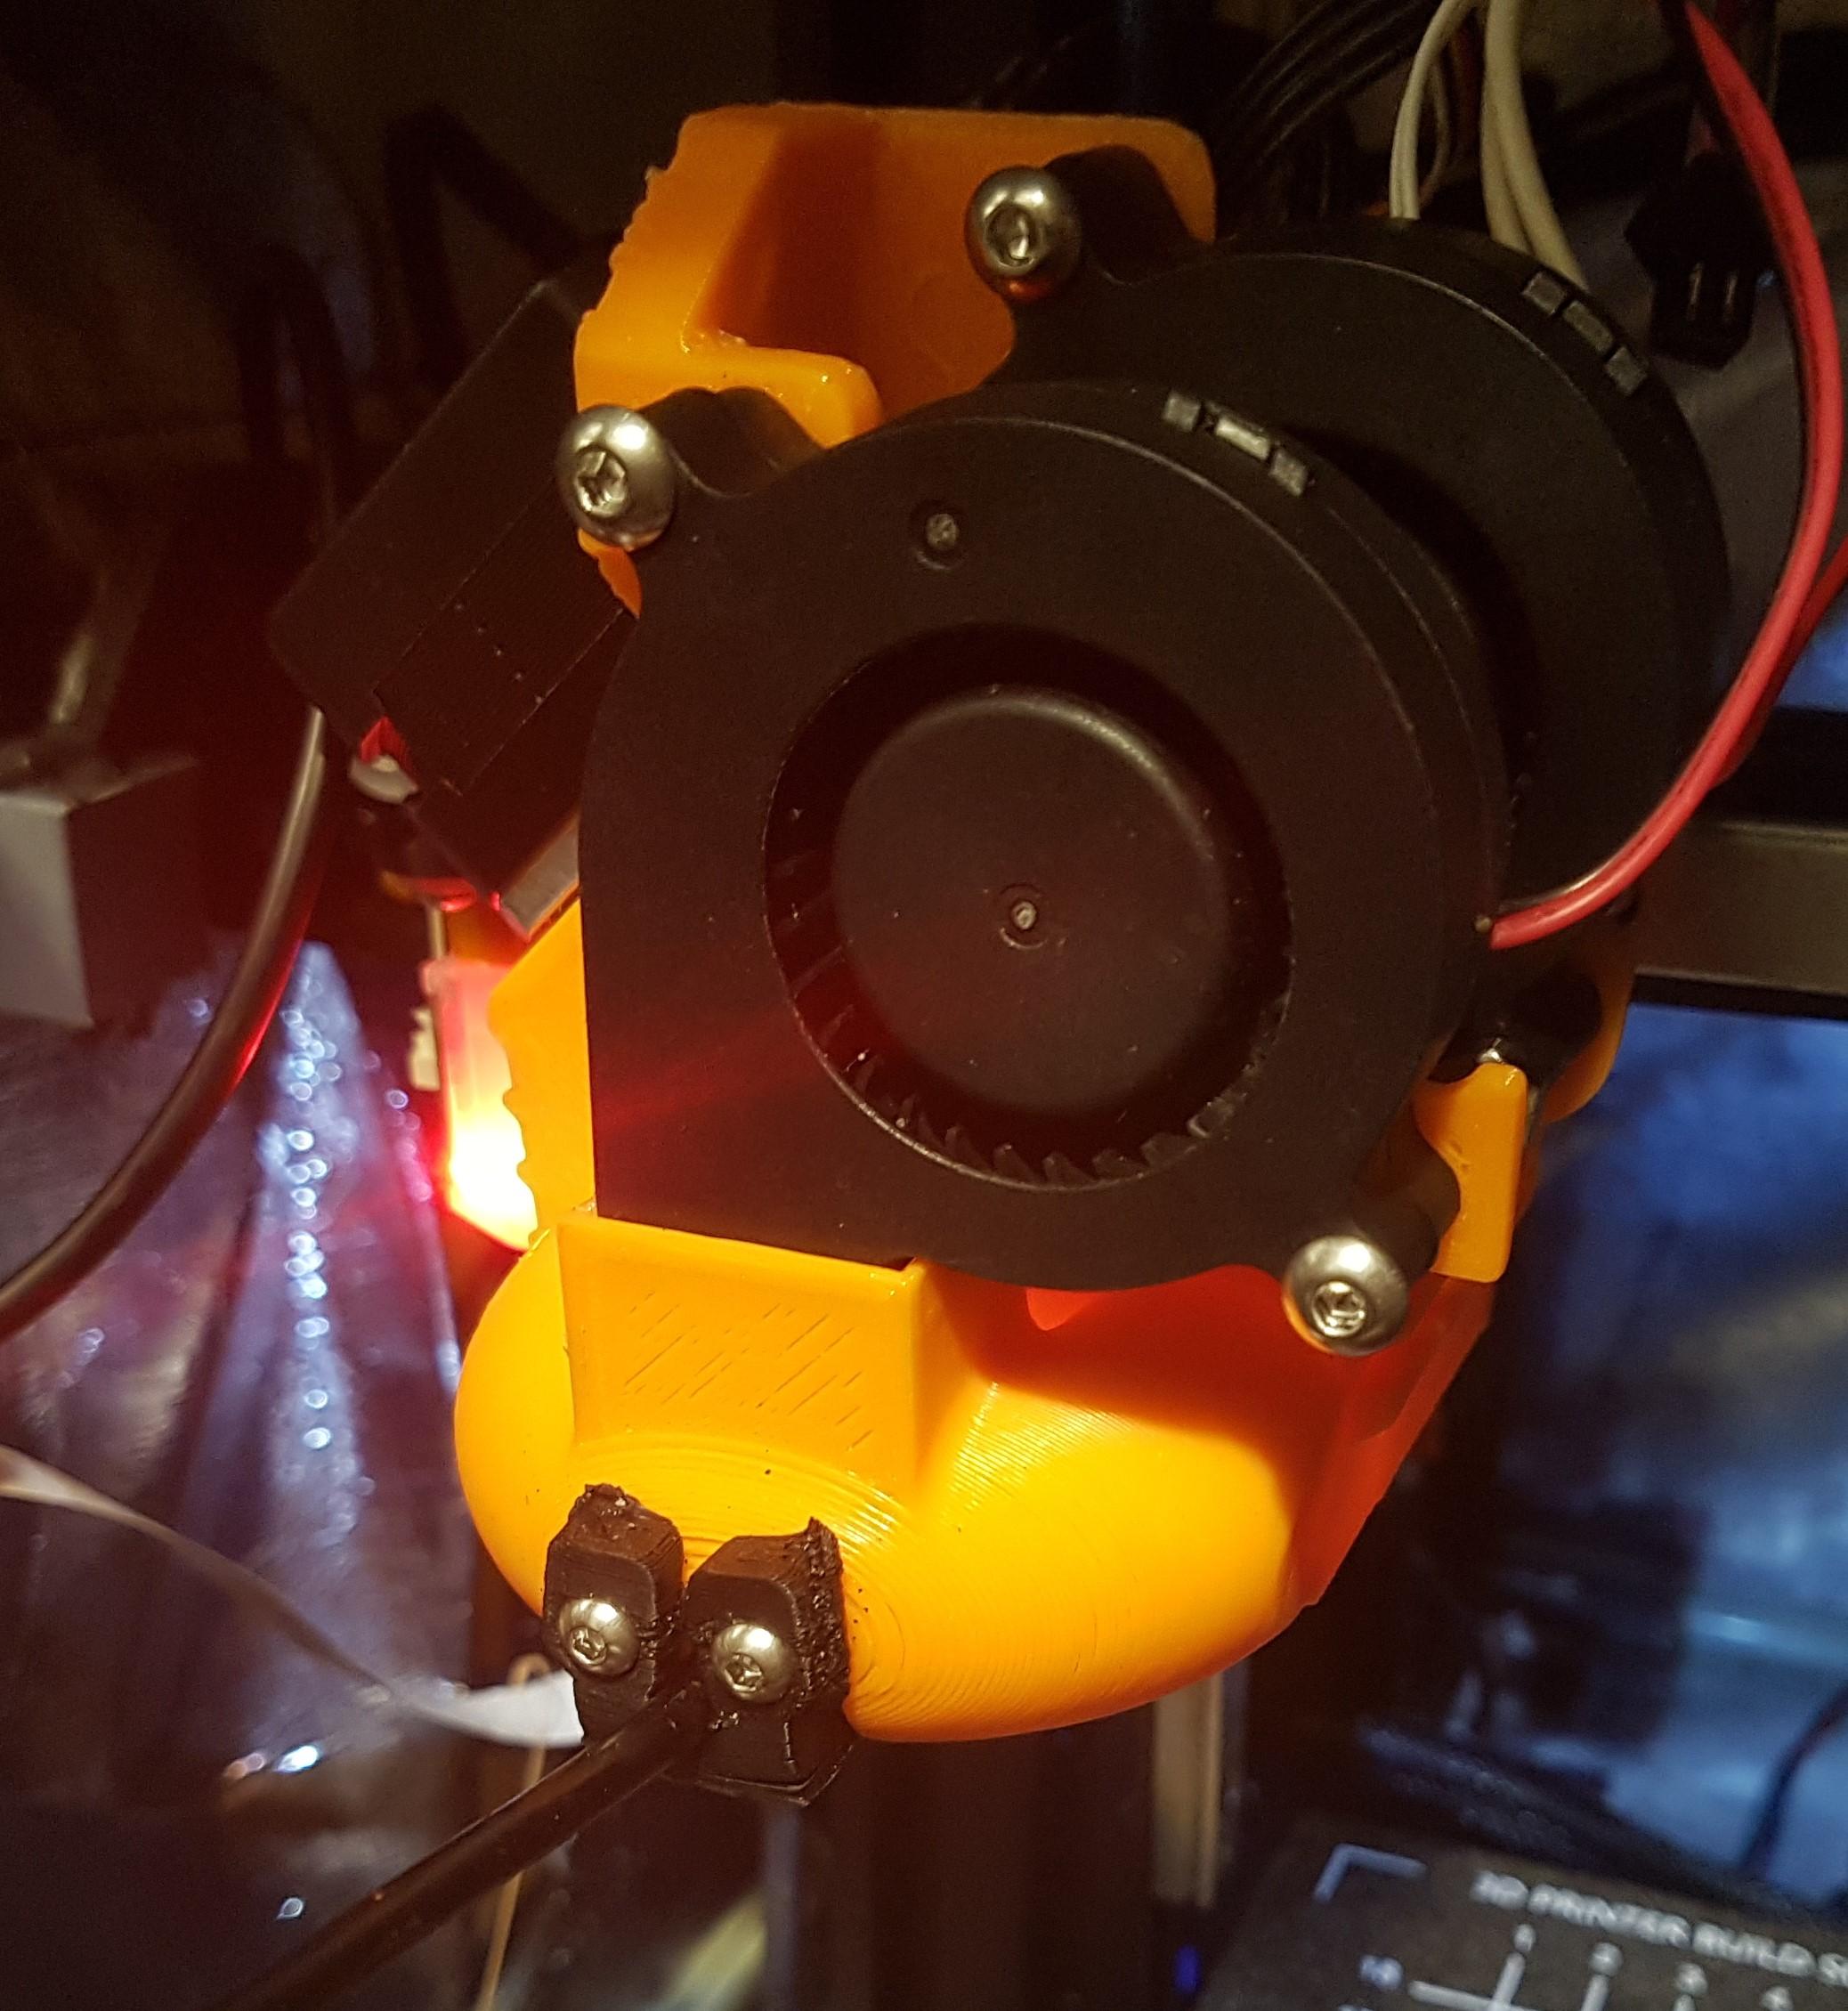
Microswiss NG Dual 5015 blower shroud with Borescope camera attatchment
byBeatruteThis shroud is identical to the model i released minus the borescope.
I printed these in ABS and Nylon. I would not reccomend PLA or PETG as per the original Microswiss shroud.
For the borescope:
The borescope i used is one of the cheap USB ones you can find on amazon/ebay/aliexpress. The one i chose has white leds in the barrel for lighting when in use. This camera works straight out of the box plug and play on a raspberry pi and crowsnest had no issue displaying the feed.
The camera barrel is 7.3mm and the cable is 3.8mm diameter.
You will need 2 M3 threaded inserts (see pic for which type) and 2 M3x10 Button head cap screws for the borescope clamp. Take care to order the correct type of threaded inserts for this as its important they are correct due to the hole size. You could also glue this in place but you will be permanently affixing the borescope to the shroud by doing so. Completely up to you.
For the fans as per the original model you will need 4 M4x20mm button head screws and 4 M4 nuts to secure the fans to their mounts.
Also required is a M3 10mm button head screw and nut for the right side screw mount to the backplate. Screw it on from the opposite side of the backplate, mount the shroud and use a M3 nut to secure the right side of the shroud. (see pic).
The left side screw goes in as per the original shroud into the backplate.
I printed the version i am using now using .2mm layer height and 40% gyroid infill, but when i was running test prints during the iteration process of designing this .32 layer height and 25% infill came out just fine. Important that the clamp is printed at .2mm layer height, it loses too much detail at .32 and above.
Might pay to print this a bit slower than normal, you know your printer better than me, but i got best results when slowing it down.


