Model originally uploaded to Thingiverse at https://www.thingiverse.com/thing:4554215.
EDIT*** 8/25
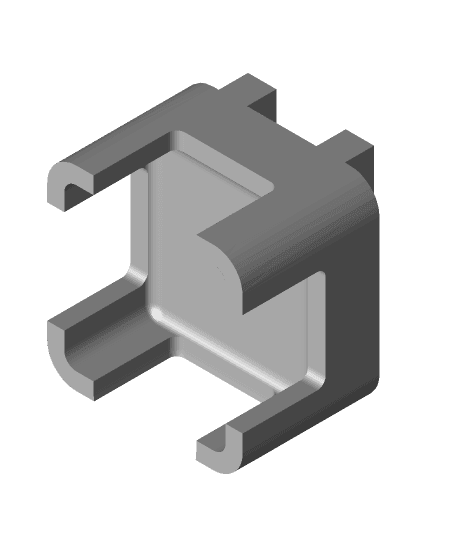
In keeping with using less filament, I've added a second TPU block. This version slides over the original foot, keeping the same ~40mm height, but widening the overall footprint just a tad. This uses a bit less TPU than the first block.
EDIT*** 8/24
I've noticed that the foam just doesn't hold up over time. It flattens out until the feet are touching the table. You can continue to replace the foam as needed, or I've added two models that you can choose from to print in TPU.
One is a block that will work with the original feet. It will take the place of the foam entirely, and still raise the printer ~40mm.
The second is an entire new foot design, designed to use as little TPU filament as possible, but still raise the bed around 30mm - Function over fashion. This does not need to be printed upside down like the original feet were.
I noticed my Ender 3 Pro was shaking the desk I have it on during prints, so I wanted to create some kind of dampener without having to spend any money on racquetballs or whatever. I also wanted it raised up so I could store some small things underneath it.
I used the packing foam (~28.3mm thick) that came in the box with the Ender 3 Pro, and cut it to size with an X-acto knife. The 'slot' for the foam is 18mm deep, so, it sticks out about 10mm, raising the printer roughly 40mm total.
The foam is really strong and great for dampening the motion of the printer. Any strong foam will do, if you didn't save your printer box.
*Print these upside down to save on support filament.
I designed these in a way that they could be easily placed under the printer without having to screw/unscrew anything or pull the existing pads to get to the rails. Which in turn means, they're easily removed. I just lifted the printer one side at a time and placed them, making sure they slotted into the rails. Not too difficult.
If you are someone who is constantly moving their printer around, you may find these a bit tedious. If I get enough requests, I can make them with T-slot heads and add them for those who want a more 'permanent' foot. In which case, you could probably just super glue the foam in place, though, mine fit snugly without any.
Thanks and enjoy!
***I tried to upload pictures but Thingiverse is giving me a max 500KB error message...? If/when this gets resolved, I'll update the pictures. But for now, I just turned them into a quick mp4. https://youtu.be/LX8RX5IWj1A