Mutant V2 Interface Plates for Popular 3D Printers
byMediaMan3D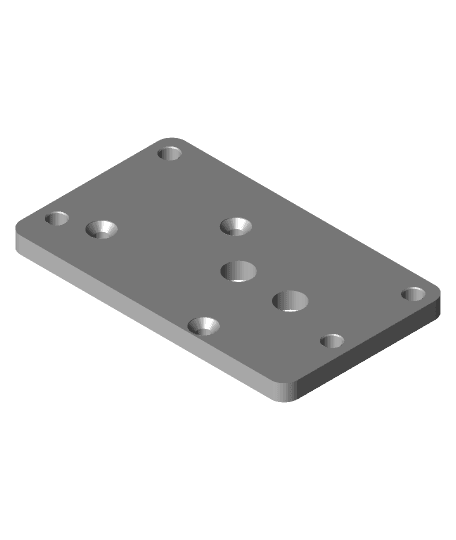
Model originally uploaded to Thingiverse at https://www.thingiverse.com/thing:4708312.
##Wham Bam Mutant V2 Interface Plates for Popular 3D Printers
####Designed to be used with the Wham Bam Mutant V2 Universal Tool Swapping System.
<iframe width="560" height="315" src="https://www.youtube.com/embed/bql39s__IqQ" title="YouTube video player" frameborder="0" allow="accelerometer; autoplay; clipboard-write; encrypted-media; gyroscope; picture-in-picture" allowfullscreen></iframe>####Learn more about the Mutant V2 here: https://whambamsystems.com/mutant
####Welcome to the Mutant Invasion!
Mutant V2 Interface Plates - When you do not want to dis-assemble the X gantry and replace the carriage plate on a 3D printer, these brand and model specific adapters attach to the printer’s OEM X carriage plate, and then the Mutant base attaches to the interface plate. While these will add 3-5mm to the Y axis offset, they save set time, complexity, and the cost of the Wham Bam’s optional universal carriage plates.
The Mutant Interface plates come in two versions for each supported printer model: Threaded inserts ready and self-tap screw holes.
The threaded insert ready Mutant interface plates require four M3 threaded inserts 4.7mm OD, 4.3mm length. Wham Bam will be providing the 4 threaded inserts. The other Interface plates have four 2.8mm holes to use with M3 screws to self-tap mount the Mutant to your printer’s X carriage.
Mutant V2 Interface plates are provided for the following 3D Printer models:
• Ender 3-Pro-X CR10-S-4-5-Max CR-20 (requires replacing one of the M5 V Wheel screw with a countersunk flat head M5 screw) • Ender 3 V2 (requires replacing one of the M5 V Wheel screw with a countersunk flat head M5 screw) • Ender 5-Pro-Plus (requires replacing one of the M5 V Wheel screw with a countersunk flat head M5 screw) • Creality CR-10 V2 • Creality CR-10S Pro • Creality CR-10S Pro V2 • Creality CR-10S Pro V3 • BLV Ender 3 • Exoslide • Geetech A10 A30 Series • OpenBuilds 3 wheel V-Slot • OpenBuilds 4 wheel V-Slot • Mutant Interface Builder (Generic Mutant Interface STL/STEP files can be modified for a specific 3D printer’s gantry mount points)
Support for additional printer brands and X carriage types are currently in development.
####Wham Bam Mutant X Carriage Interface Plate for CR-10/S & Ender 3/Pro
Use this interface plate to mount the Wham Bam Mutant to a Creality CR-10/S or Ender series 3D printer (specific compatible printer models listed below). This adapter is used when you do NOT want to replace your existing OEM carriage plate with Wham Bam's optional Mutant Universal carriage plate.
This is the first in a series of Mutant interface plates for a wide range of 3D printers. Links to other 3D printer model interface plates will be added below as they are created.
This interface plate saves you from having to disassemble the printer's hot-end and replace the X carriage assembly to use with the Mutant's optional Universal carriage plate (V wheel or Linear rail types).
This interface plate comes in two versions: Standard and Threaded Inserts
The Standard plate is 3mm thick, and has threads in the 3D model for a friction fit when mounting the Mutant to the plate with M3 screws.
The Threaded Inserts plate is 5mm thick, and requires four M3 threaded inserts (4.7mm OD x 4.3mm length) to mount the Mutant to the plate.
This Interface plate supports the following specific Creality 3D printer models:
• CR-10 • CR-10S • CR-10S4 • CR-10S5 • CR-10 Max • Ender3 • Ender3 Pro
While this interface plate was designed in collaboration with Wham Bam to match the specifications of the Mutant V2, this is not a Wham Bam product.
####Parts required: Wham Bam Mutant V2 (The Mutant will include all the hardware it needs to attach it to the adapter plate, including the threaded inserts) M5 30mm Flat head screw (Qty1) M3 8mm Flat head screws (Qty 2-3, depending on printer model) M3 nuts (Qty 2-3 threaded plate depending on printer model)
####Tools required: M3 hex wrench M2 hex wrench Small pliers or crescent wrench Box wrench (from printer)
Note, as part of the whole Mutant setup process, during the steps to install the interface plate you will keep all the wiring intact to the hot-end, fans, sensors, etc. that you have on your X carriage.
Instructions on how you will change the wiring to take advantage of the Wham Bam Mutant are included with the Mutant.
####Instructions for use of this Mutant Interface plate:
- Un-screw and remove the metal or plastic cover from the Hotend assembly.
- Un-screw the fan(s) from the cover and/or hot-end assembly.
- Un-screw the bolts that hold the hot-end to the X carriage.
- Un-screw the ABL sensor (if any) from the X carriage.
- With the X carriage now empty, use the box wrench to loosen the eccentric nut on the bottom V wheel.
- Un-screw and remove the top right V wheel and bolt using M5 hex wrench and pliers/crescent wrench.
- Attach the interface plate to the front of the X carriage and insert the M5 Flat head screw through the upper right V wheel hole on the interface, through the X carriage and add the spacer, V wheel, and attach and tighten the nut.
- Align the interface plate with your X carriage and insert and tighten 2 or 3 M3 Flat head screws. Depending on your printer model there may be only 2 additional mount points. Depending on your printer model, M3 nuts may be needed to secure the M3 screws. (some X carriages have threaded holes, some do not).
- Adjust the eccentric nut on the bottom V wheel to return the proper tension of the X carriage against the 2020 rail.
- Follow the instructions supplied with the Wham Bam Mutant to attach it to the interface plate (four M3 screws) and to continue setting up the Wham Bam Mutant.
__If you would like a way to store your Hero Me Mutant assemblies and other Mutant devices while not on a printer check out my Mutant Workstation mounts here: https://www.myminifactory.com/object/3d-print-mutant-workstation-mounts-149200 __