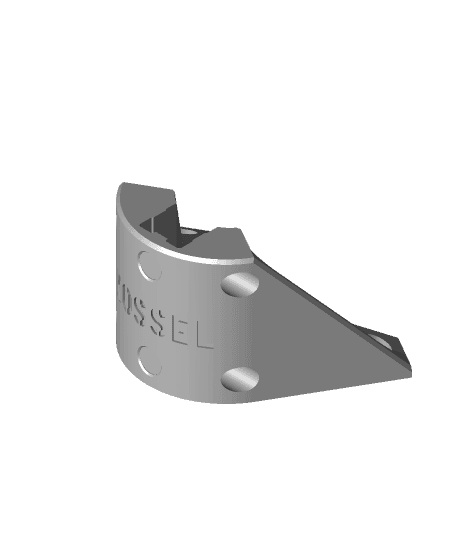
Model originally uploaded to Thingiverse at https://www.thingiverse.com/thing:4015353.
I was planning to print some of the other vertex models I found on thingiverse, but they appeared to have a bit too much clearance for my liking, or they didn't quite fit the 3D model I was using (which I've found to be extremely accurate). I started playing around in FreeCAD and realized that the Anycubic Linear Plus does not use the method (that I'm familiar with) of aligning the outside arc with the junction of the lines extended from the inside of the extrusions - it's off by a very odd amount which alters the relationship of the extrusions. Once I figured this out, I was able to model a reinforcement bracket that fit extremely snugly and slides into place without so much as filing.
I designed this to have a broad shell, rather than a skeleton, as it's much more rigid. After printing it, I think it looks better too. :) The bracket has protrusions that go into the extrusions, ensuring the alignment is consistent. The opening for the vertical extrusion also has two more shallow ones along its sides that allow the part to be snapped into place, then slid (with resistance, it's very snug by design!) down to the horizontal extrusions. The legs are longer than the more common models, matching up with the length of the stock vertex parts.
You may notice what appears to be a lack of holes in the model. The holes are there, but with a 0.4mm wall on the ends of the vertical holes and a 0.16mm floor on the bottom of the horizontal hole. This is to prevent the need for supports when printing small-side-down as simple bridges will be printed (preview in your slicer to see this). See below for post-print cleanup.
The holes and reliefs are sized for M5 button-head cap-screws (as can be seen in the pictures). If you use all available holes, you'll need 10 screws per bracket.
The cube in the pictures was printed after I installed these reinforcements and switched to a flying extruder (and reduced my retractions to 0.4mm).
I picked a font that was as close as I could find to the stencil font Anycubic uses. If anyone knows of a (free) font that's closer, please let me know and I'll switch and regenerate the STLs.
