

.png&w=3840&q=75)
.png&w=3840&q=75)
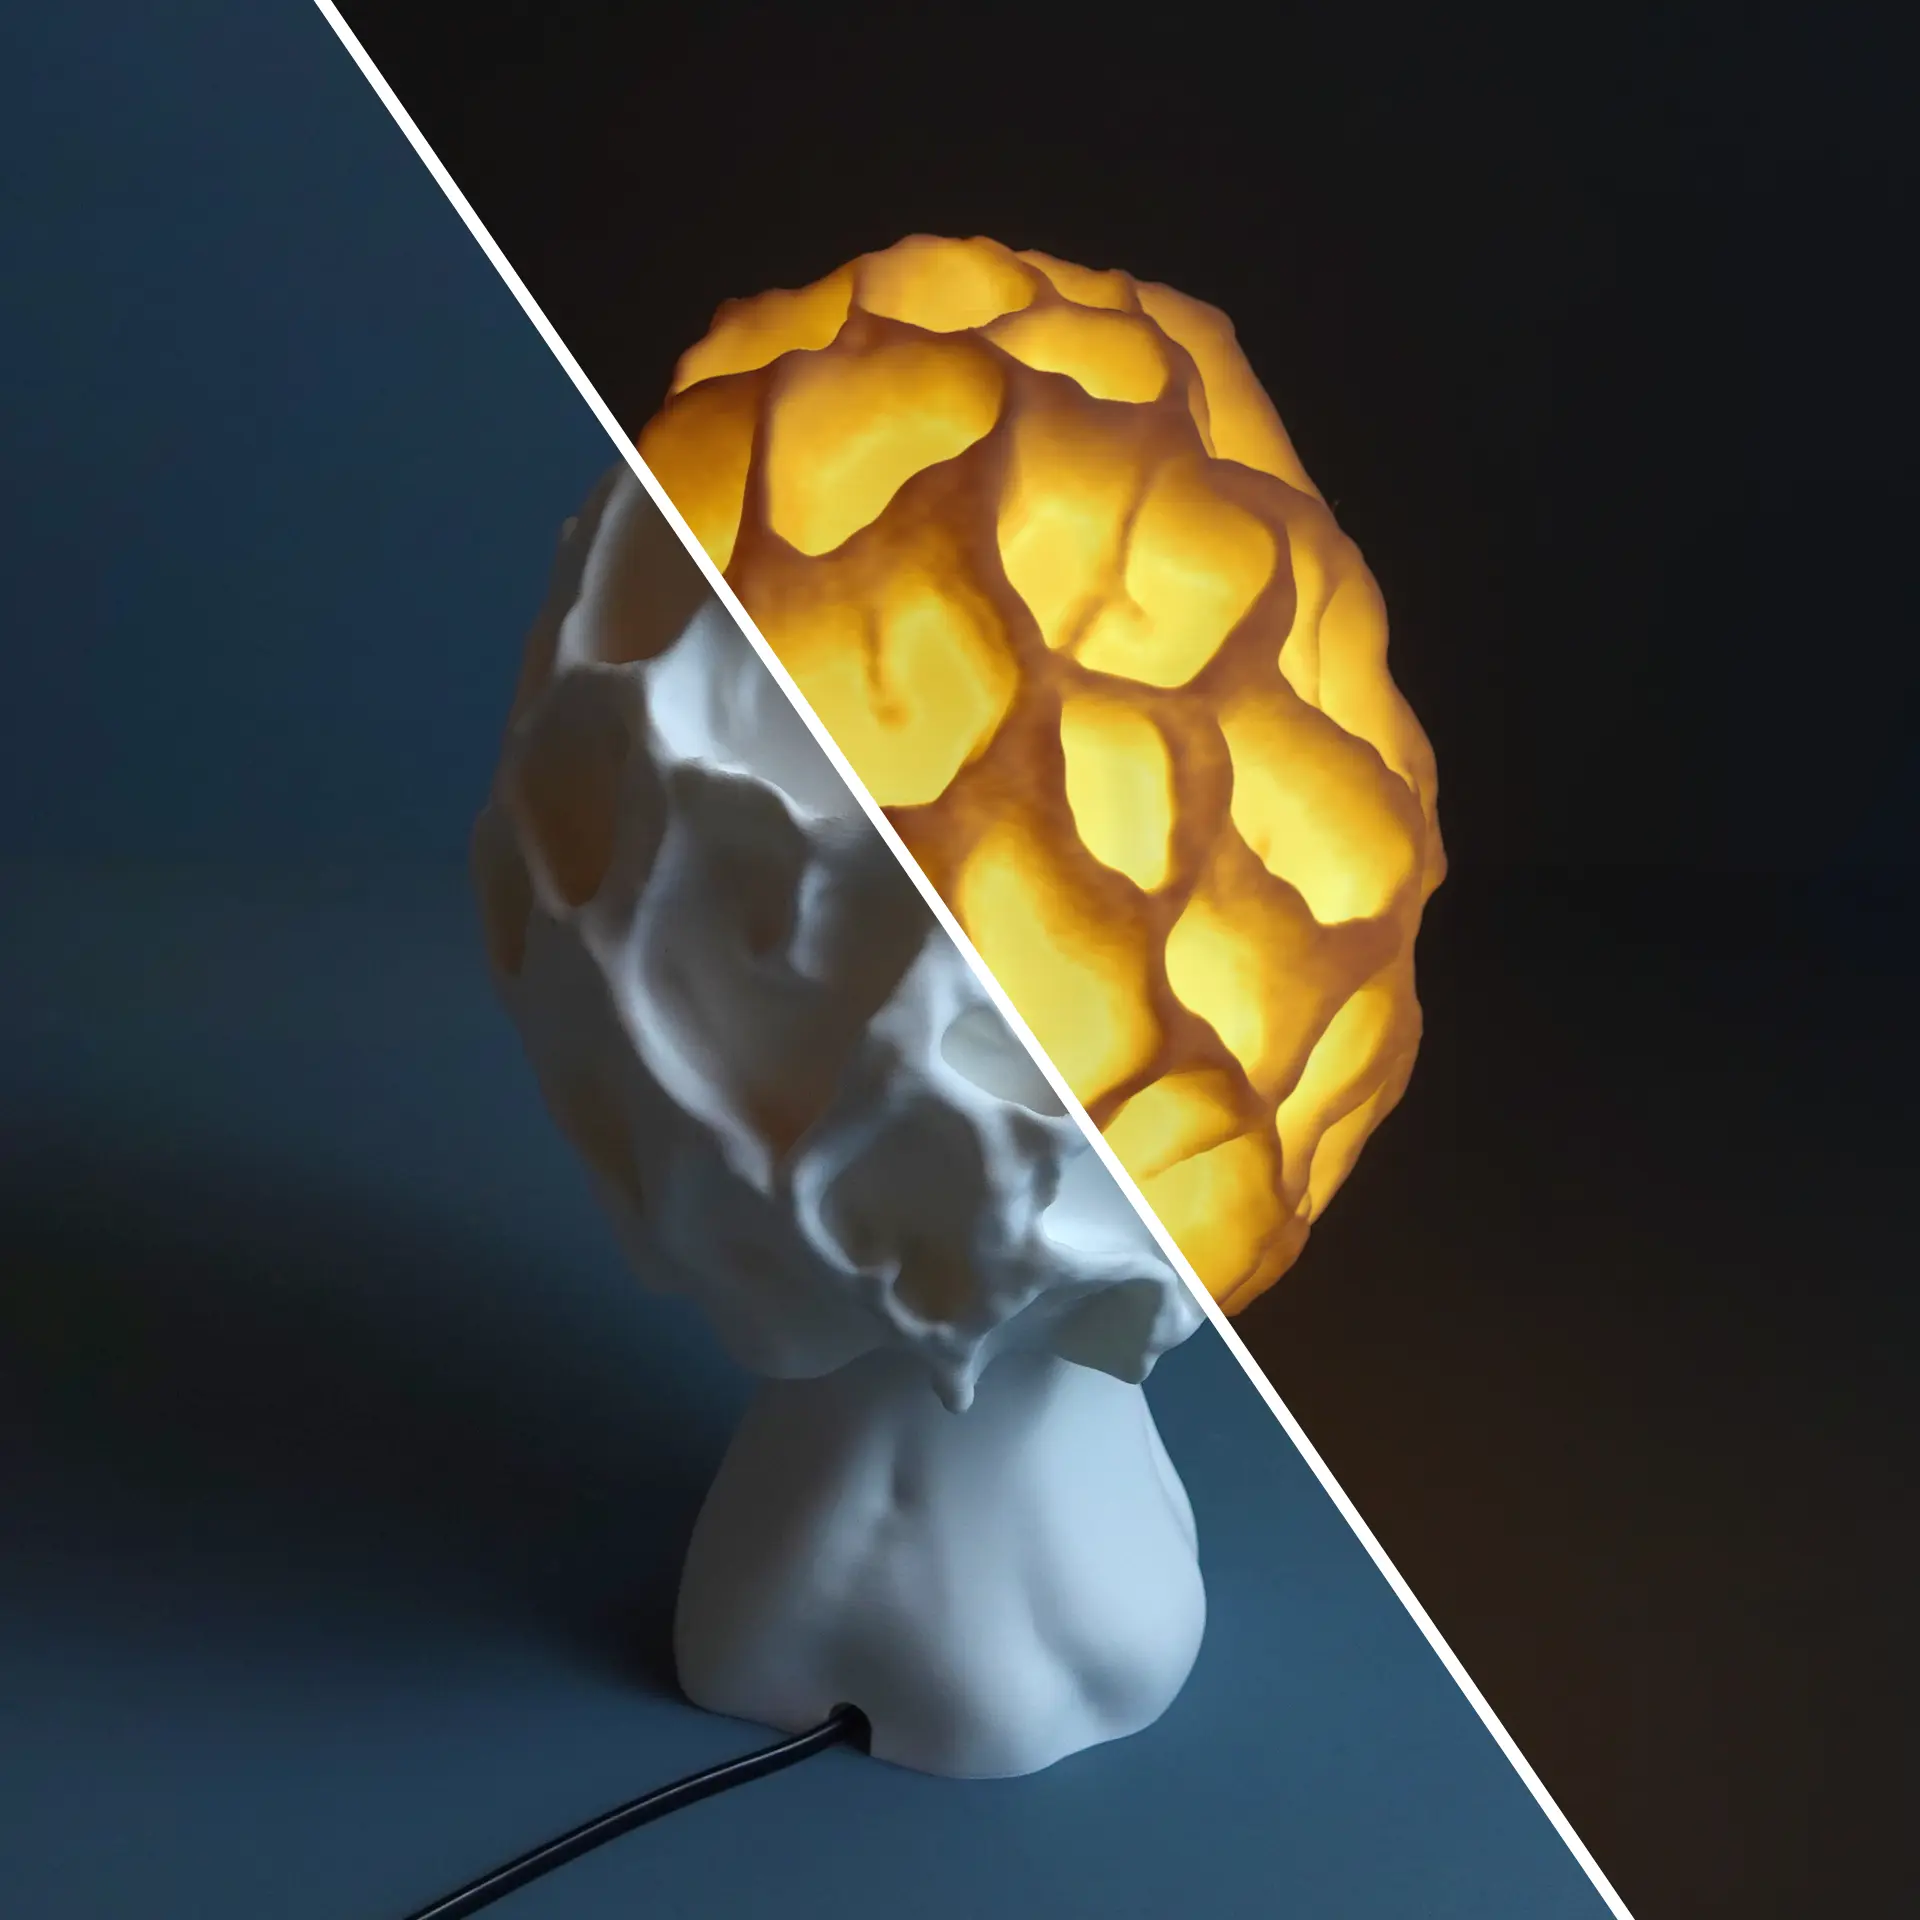
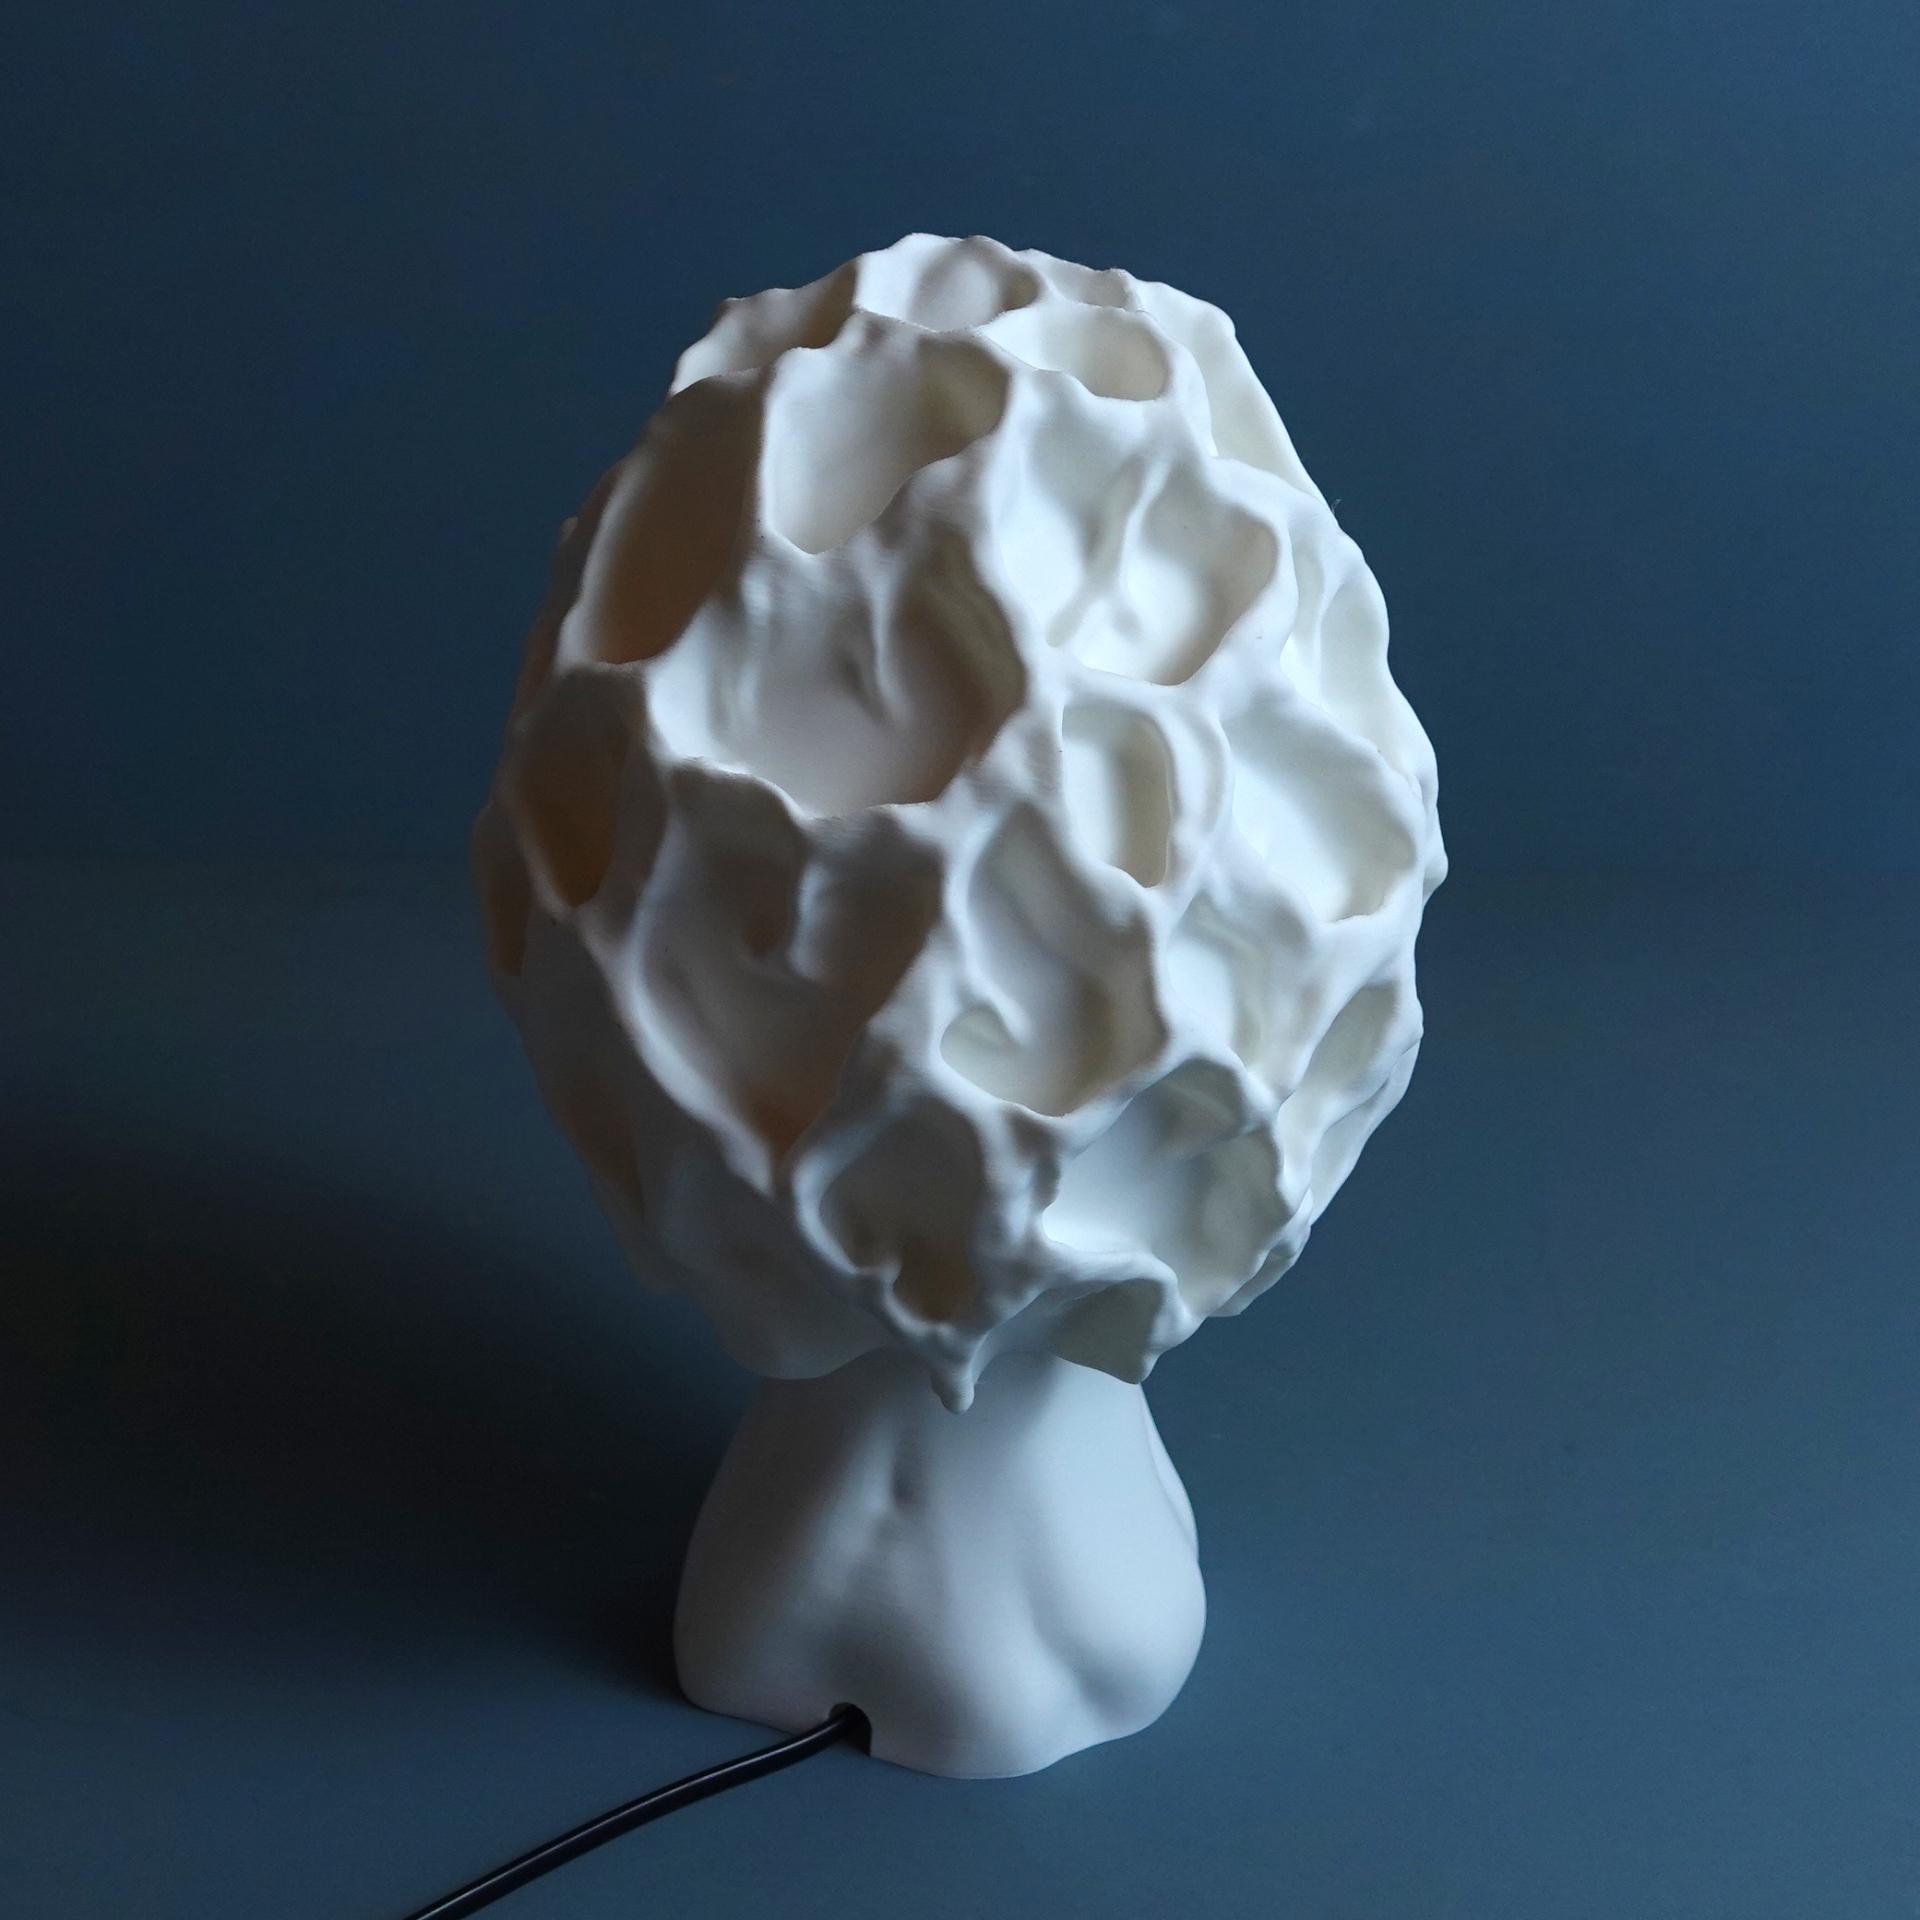
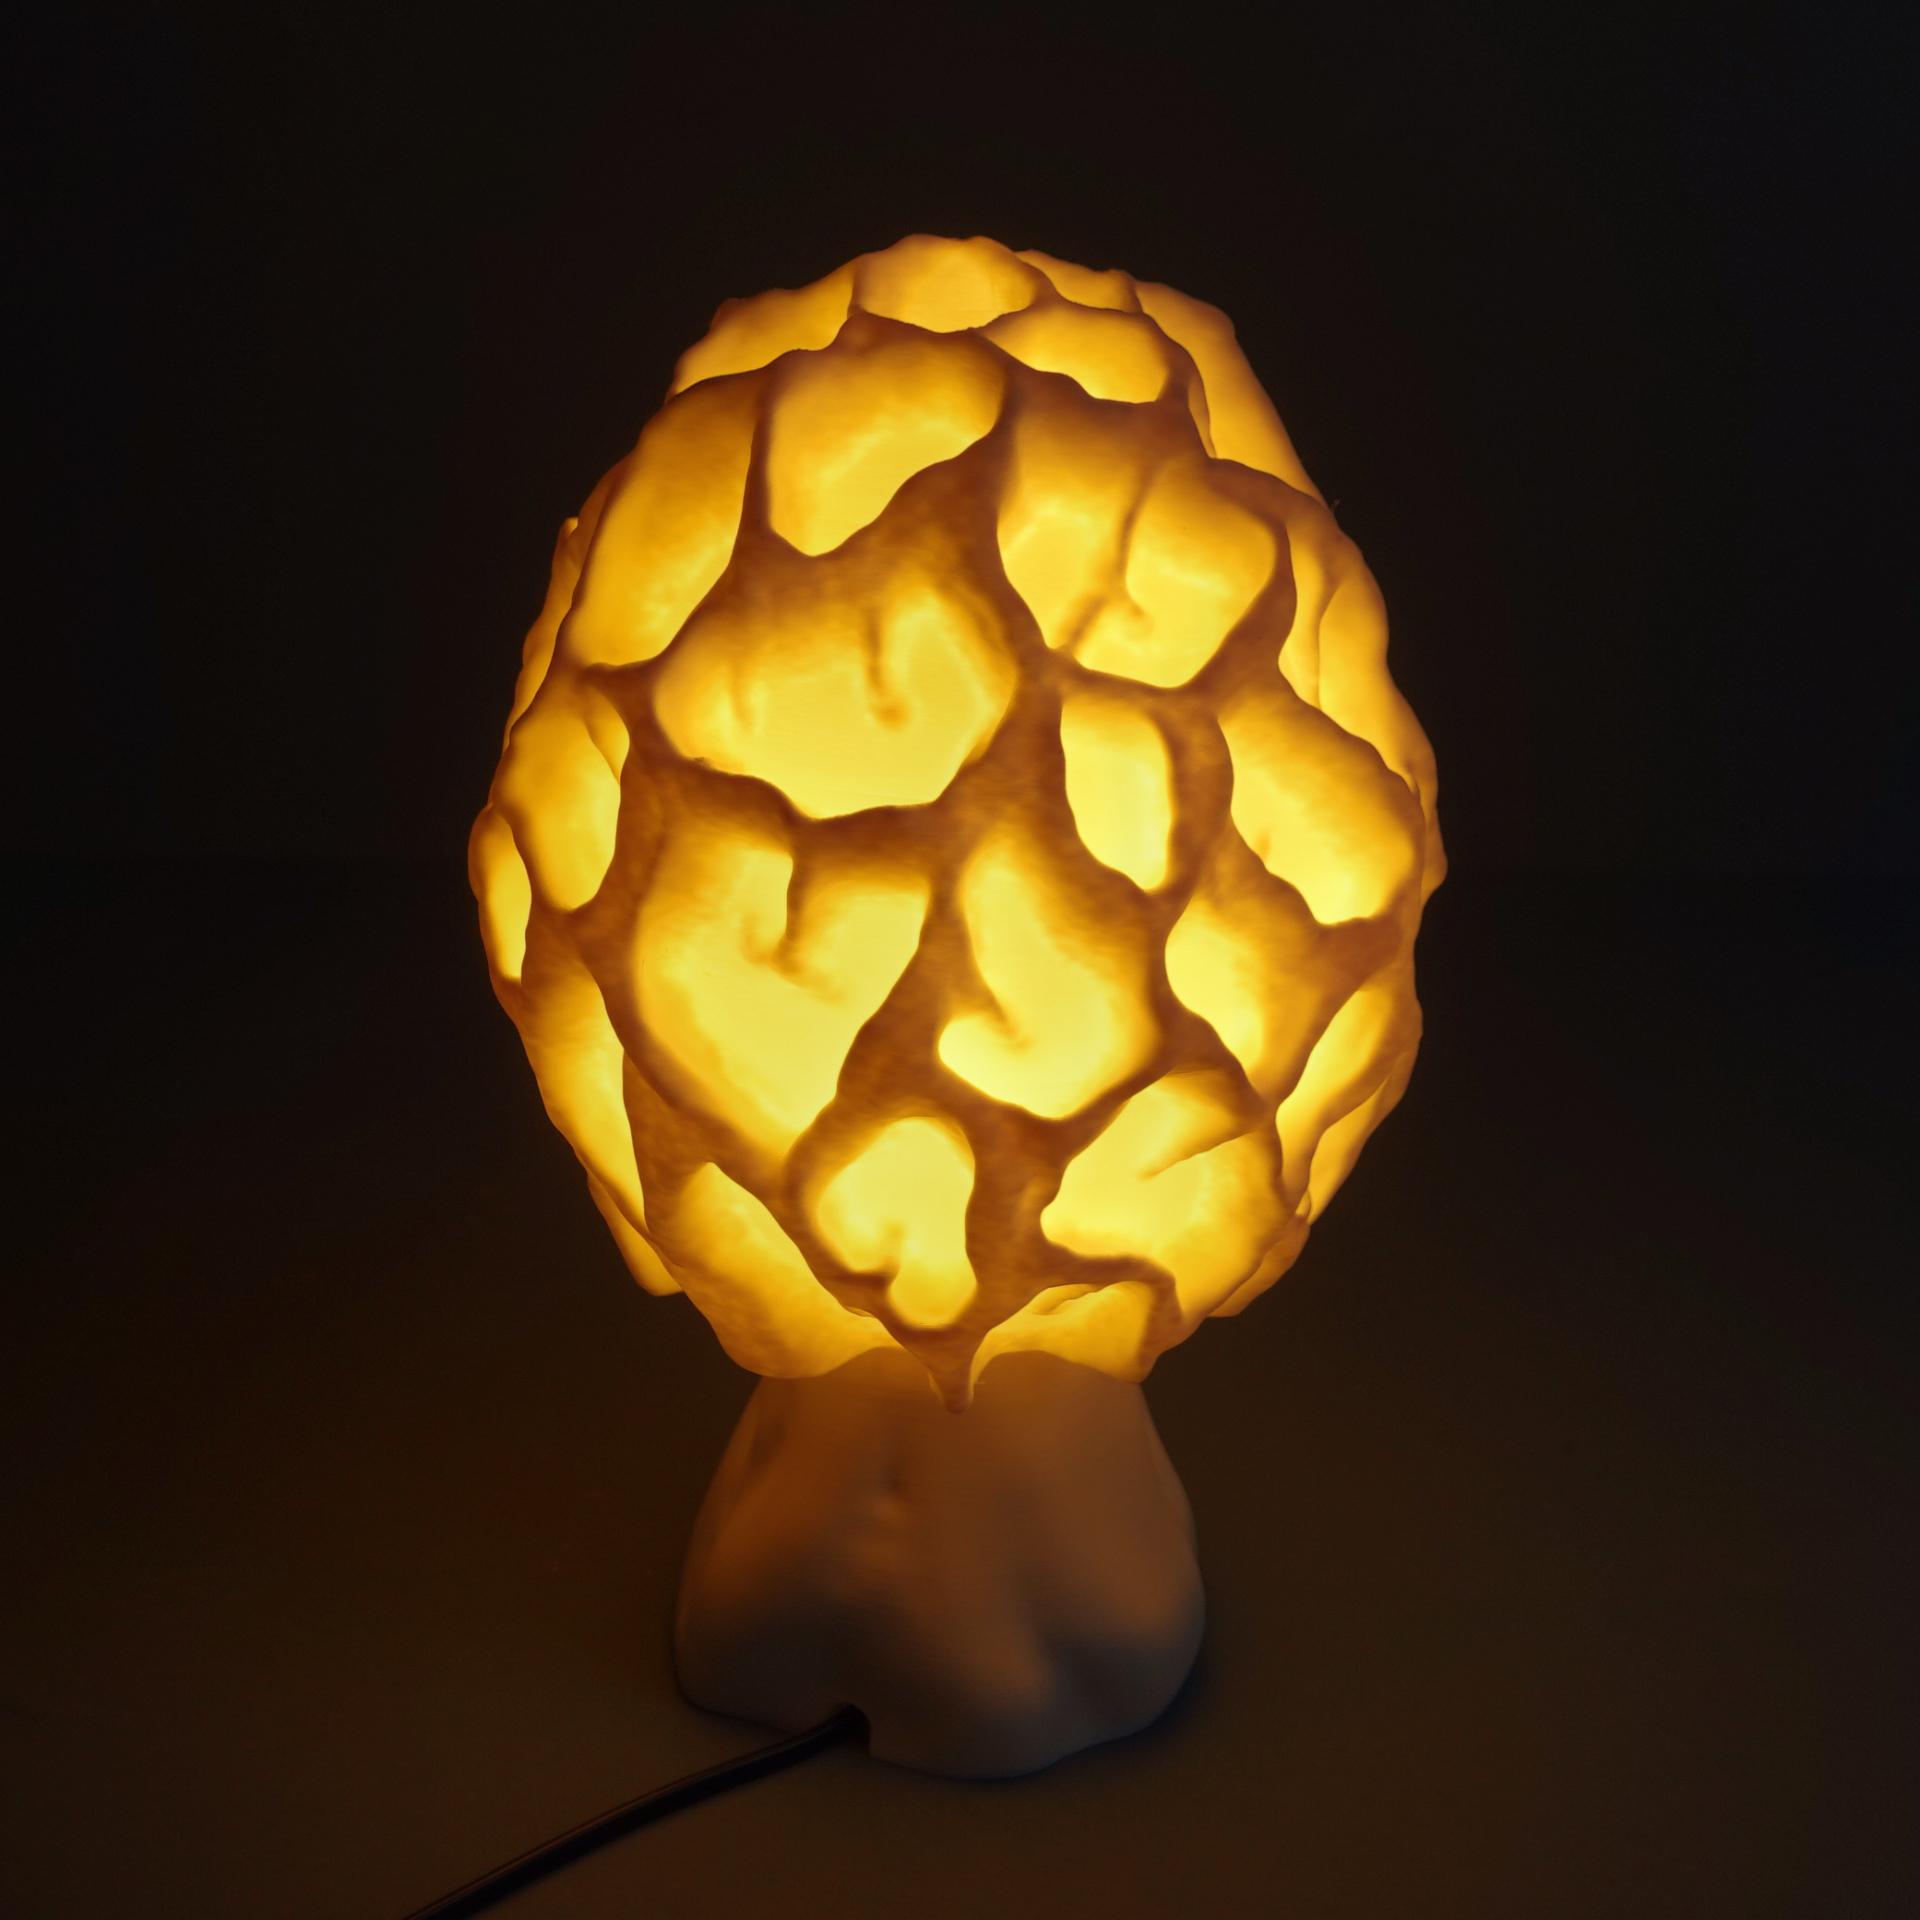
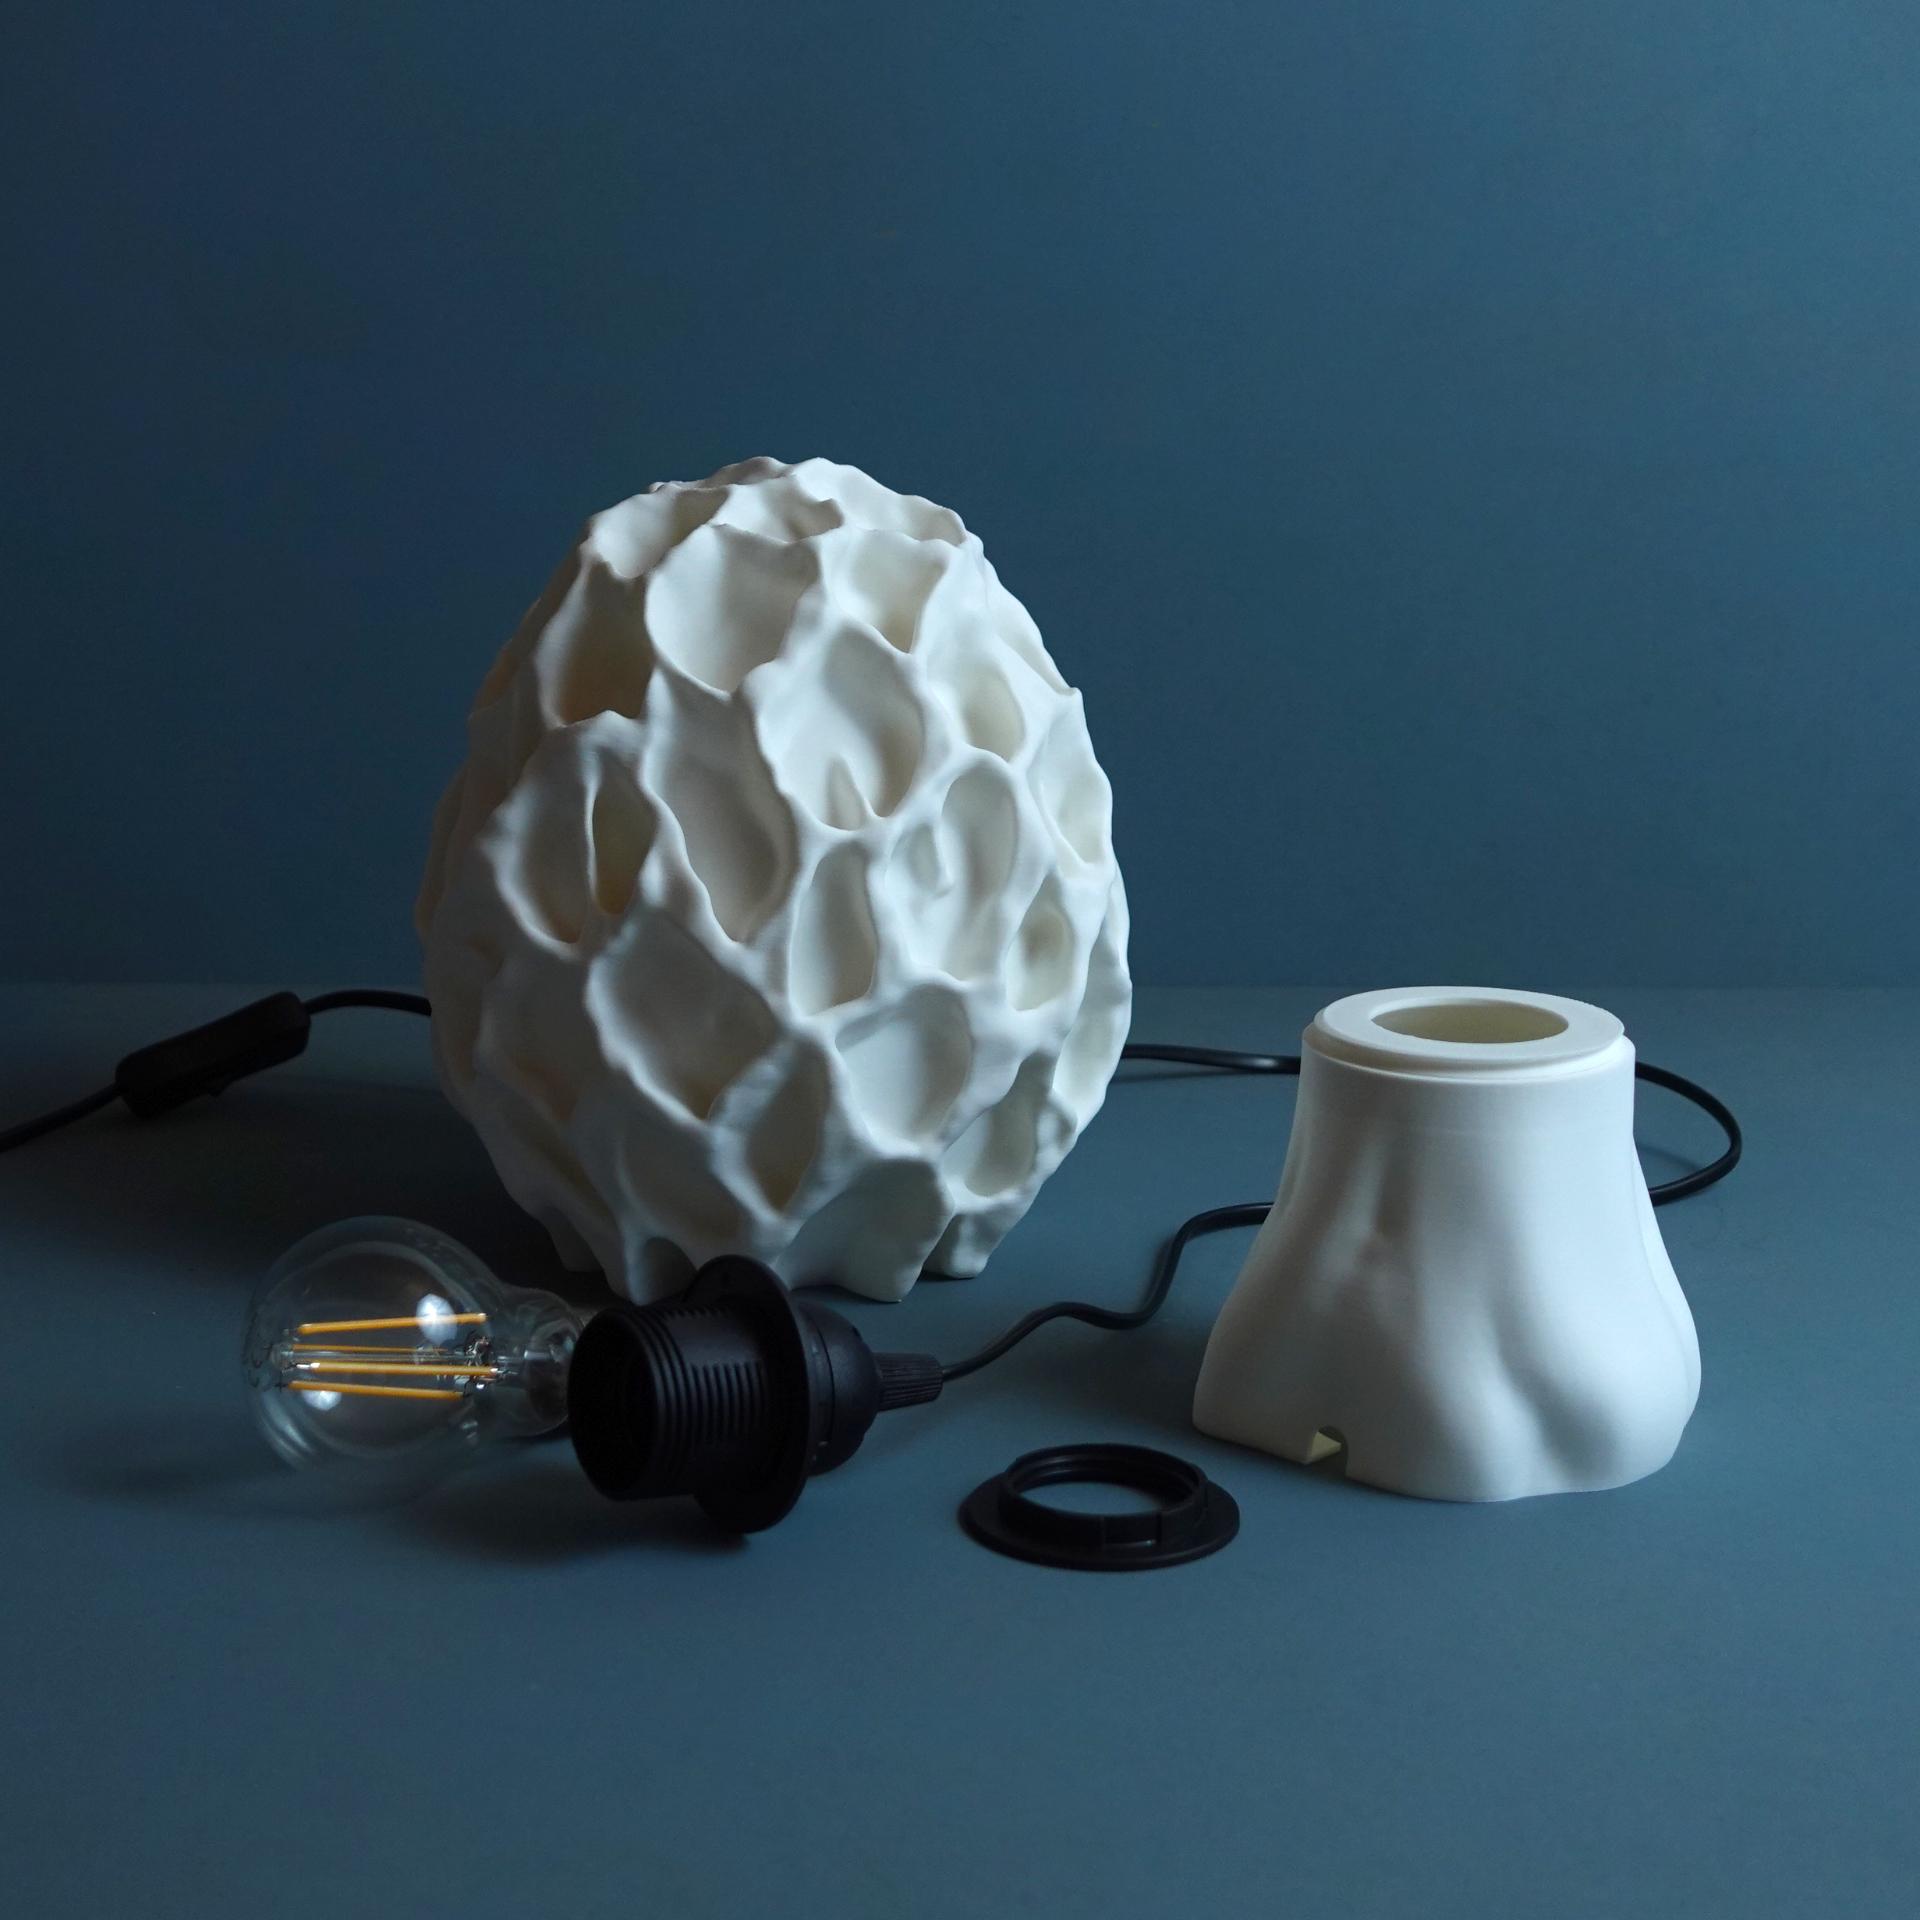
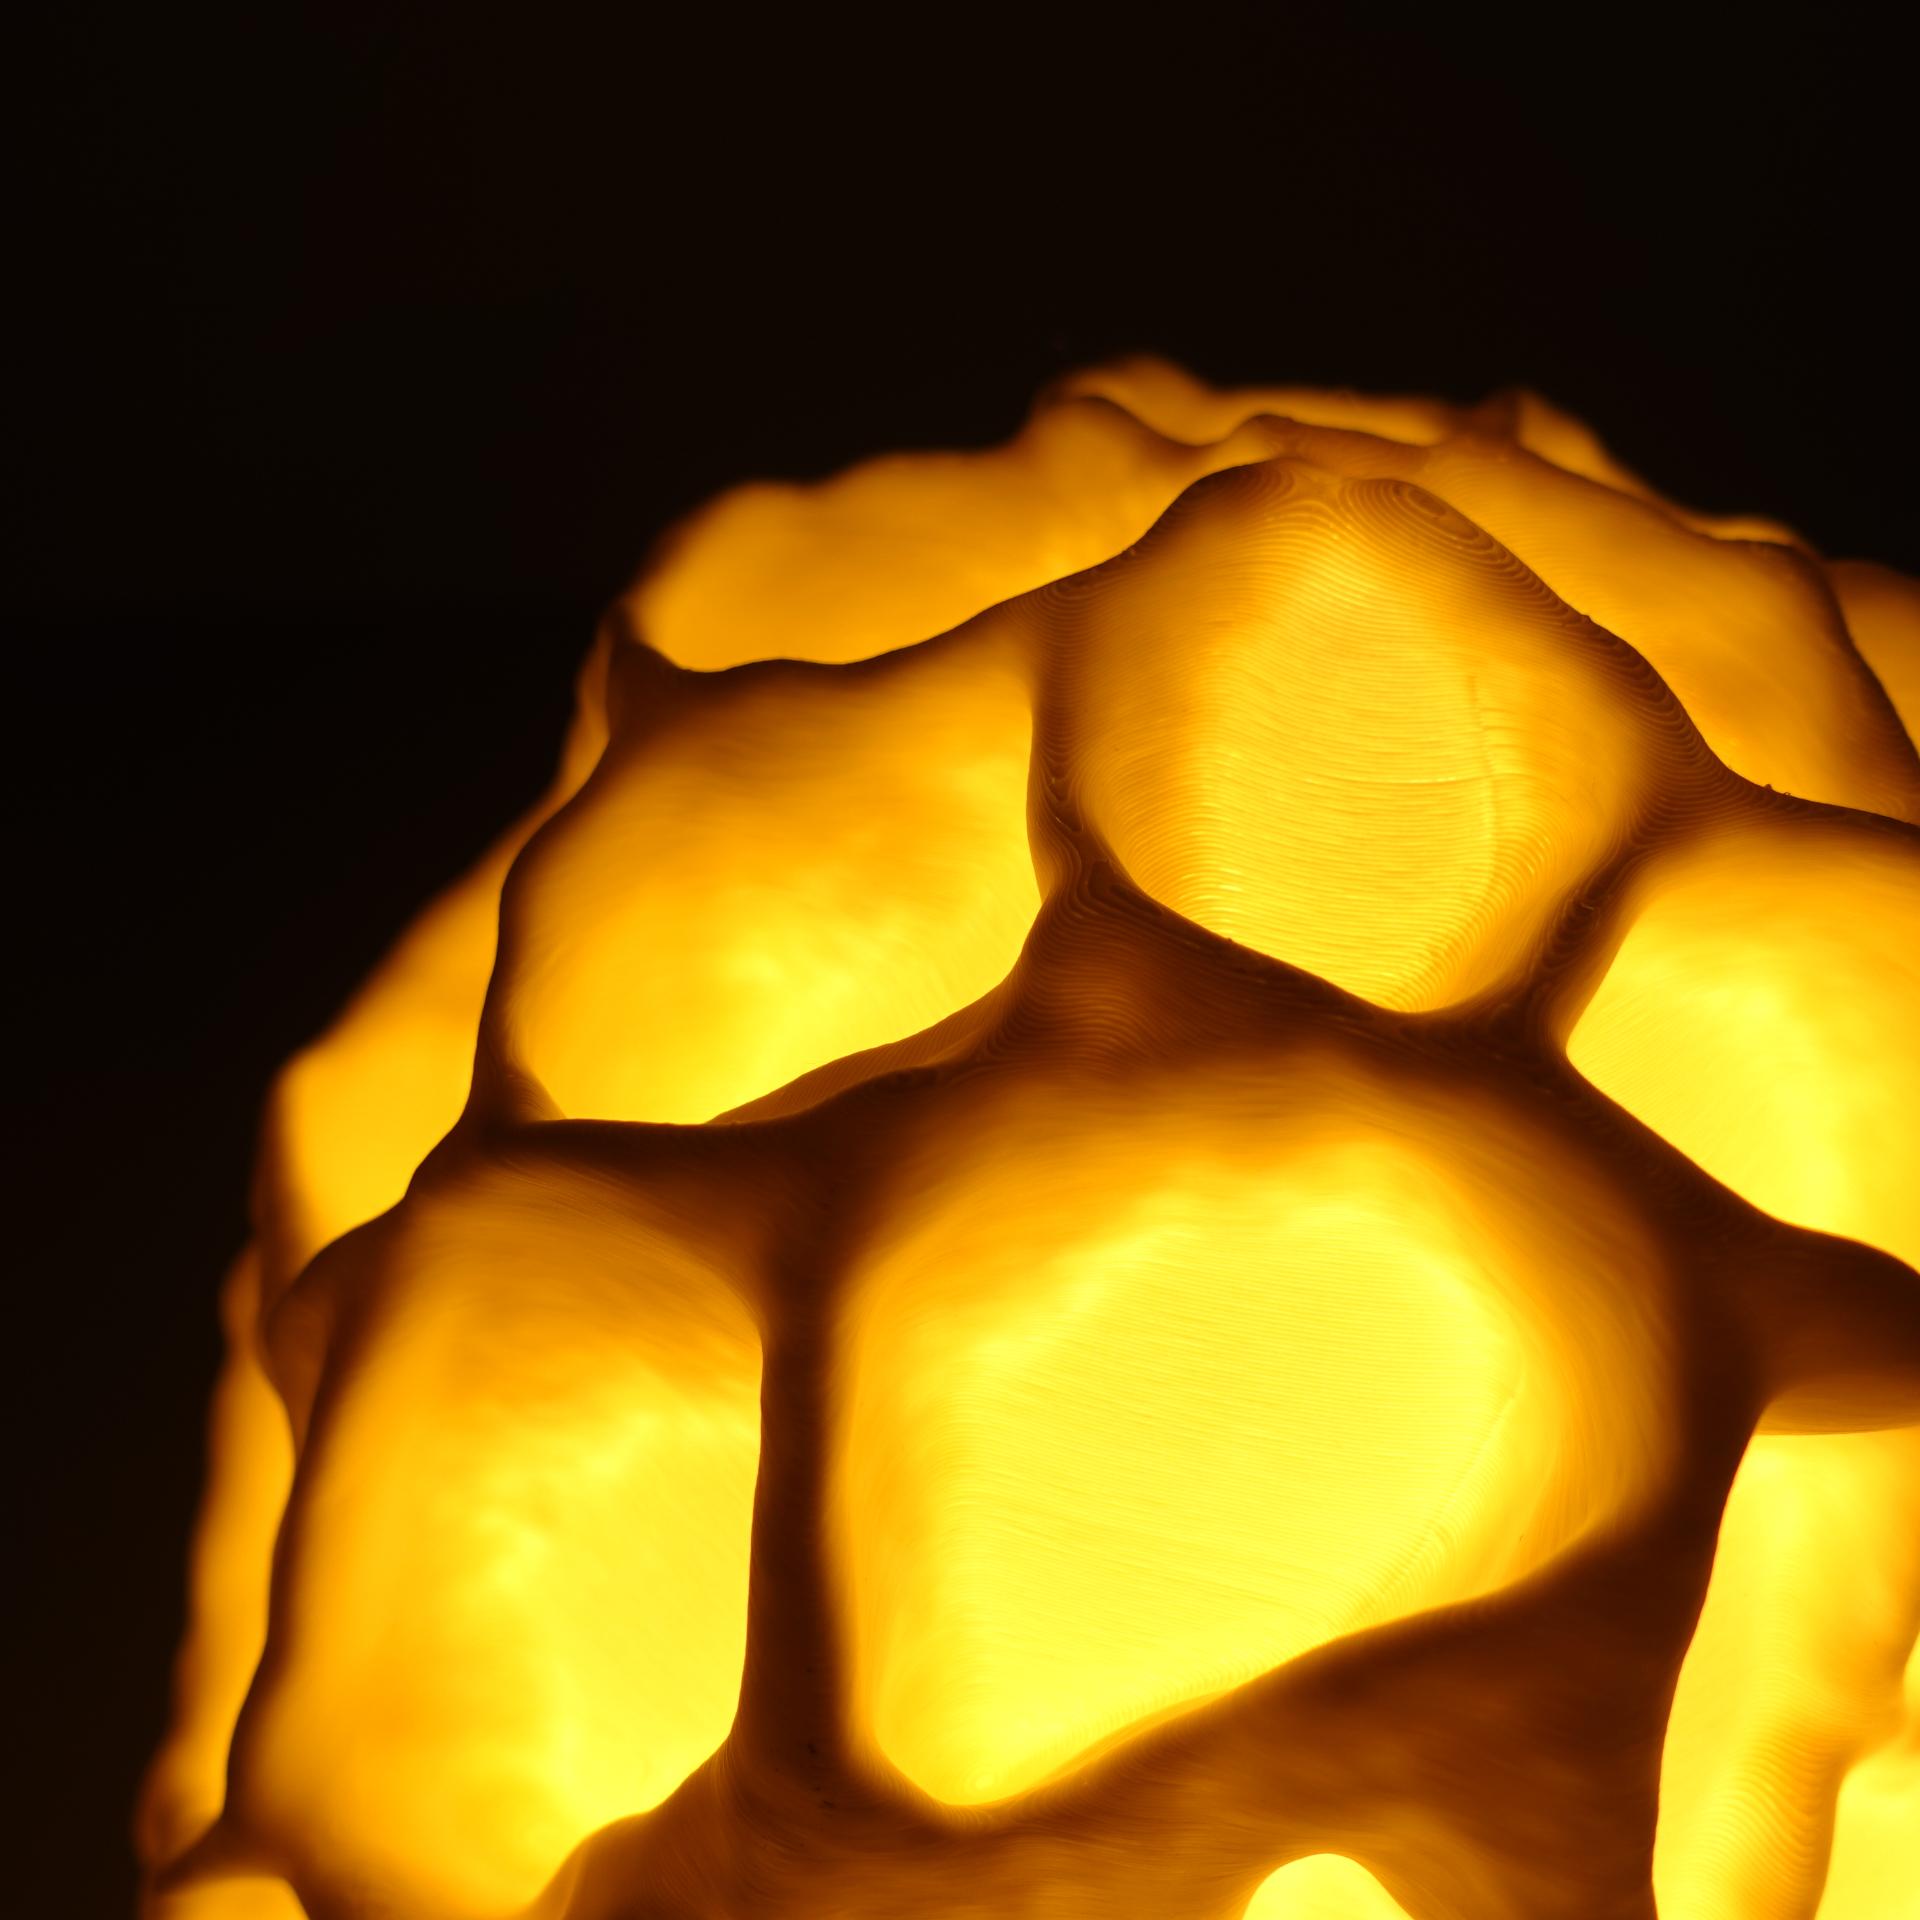
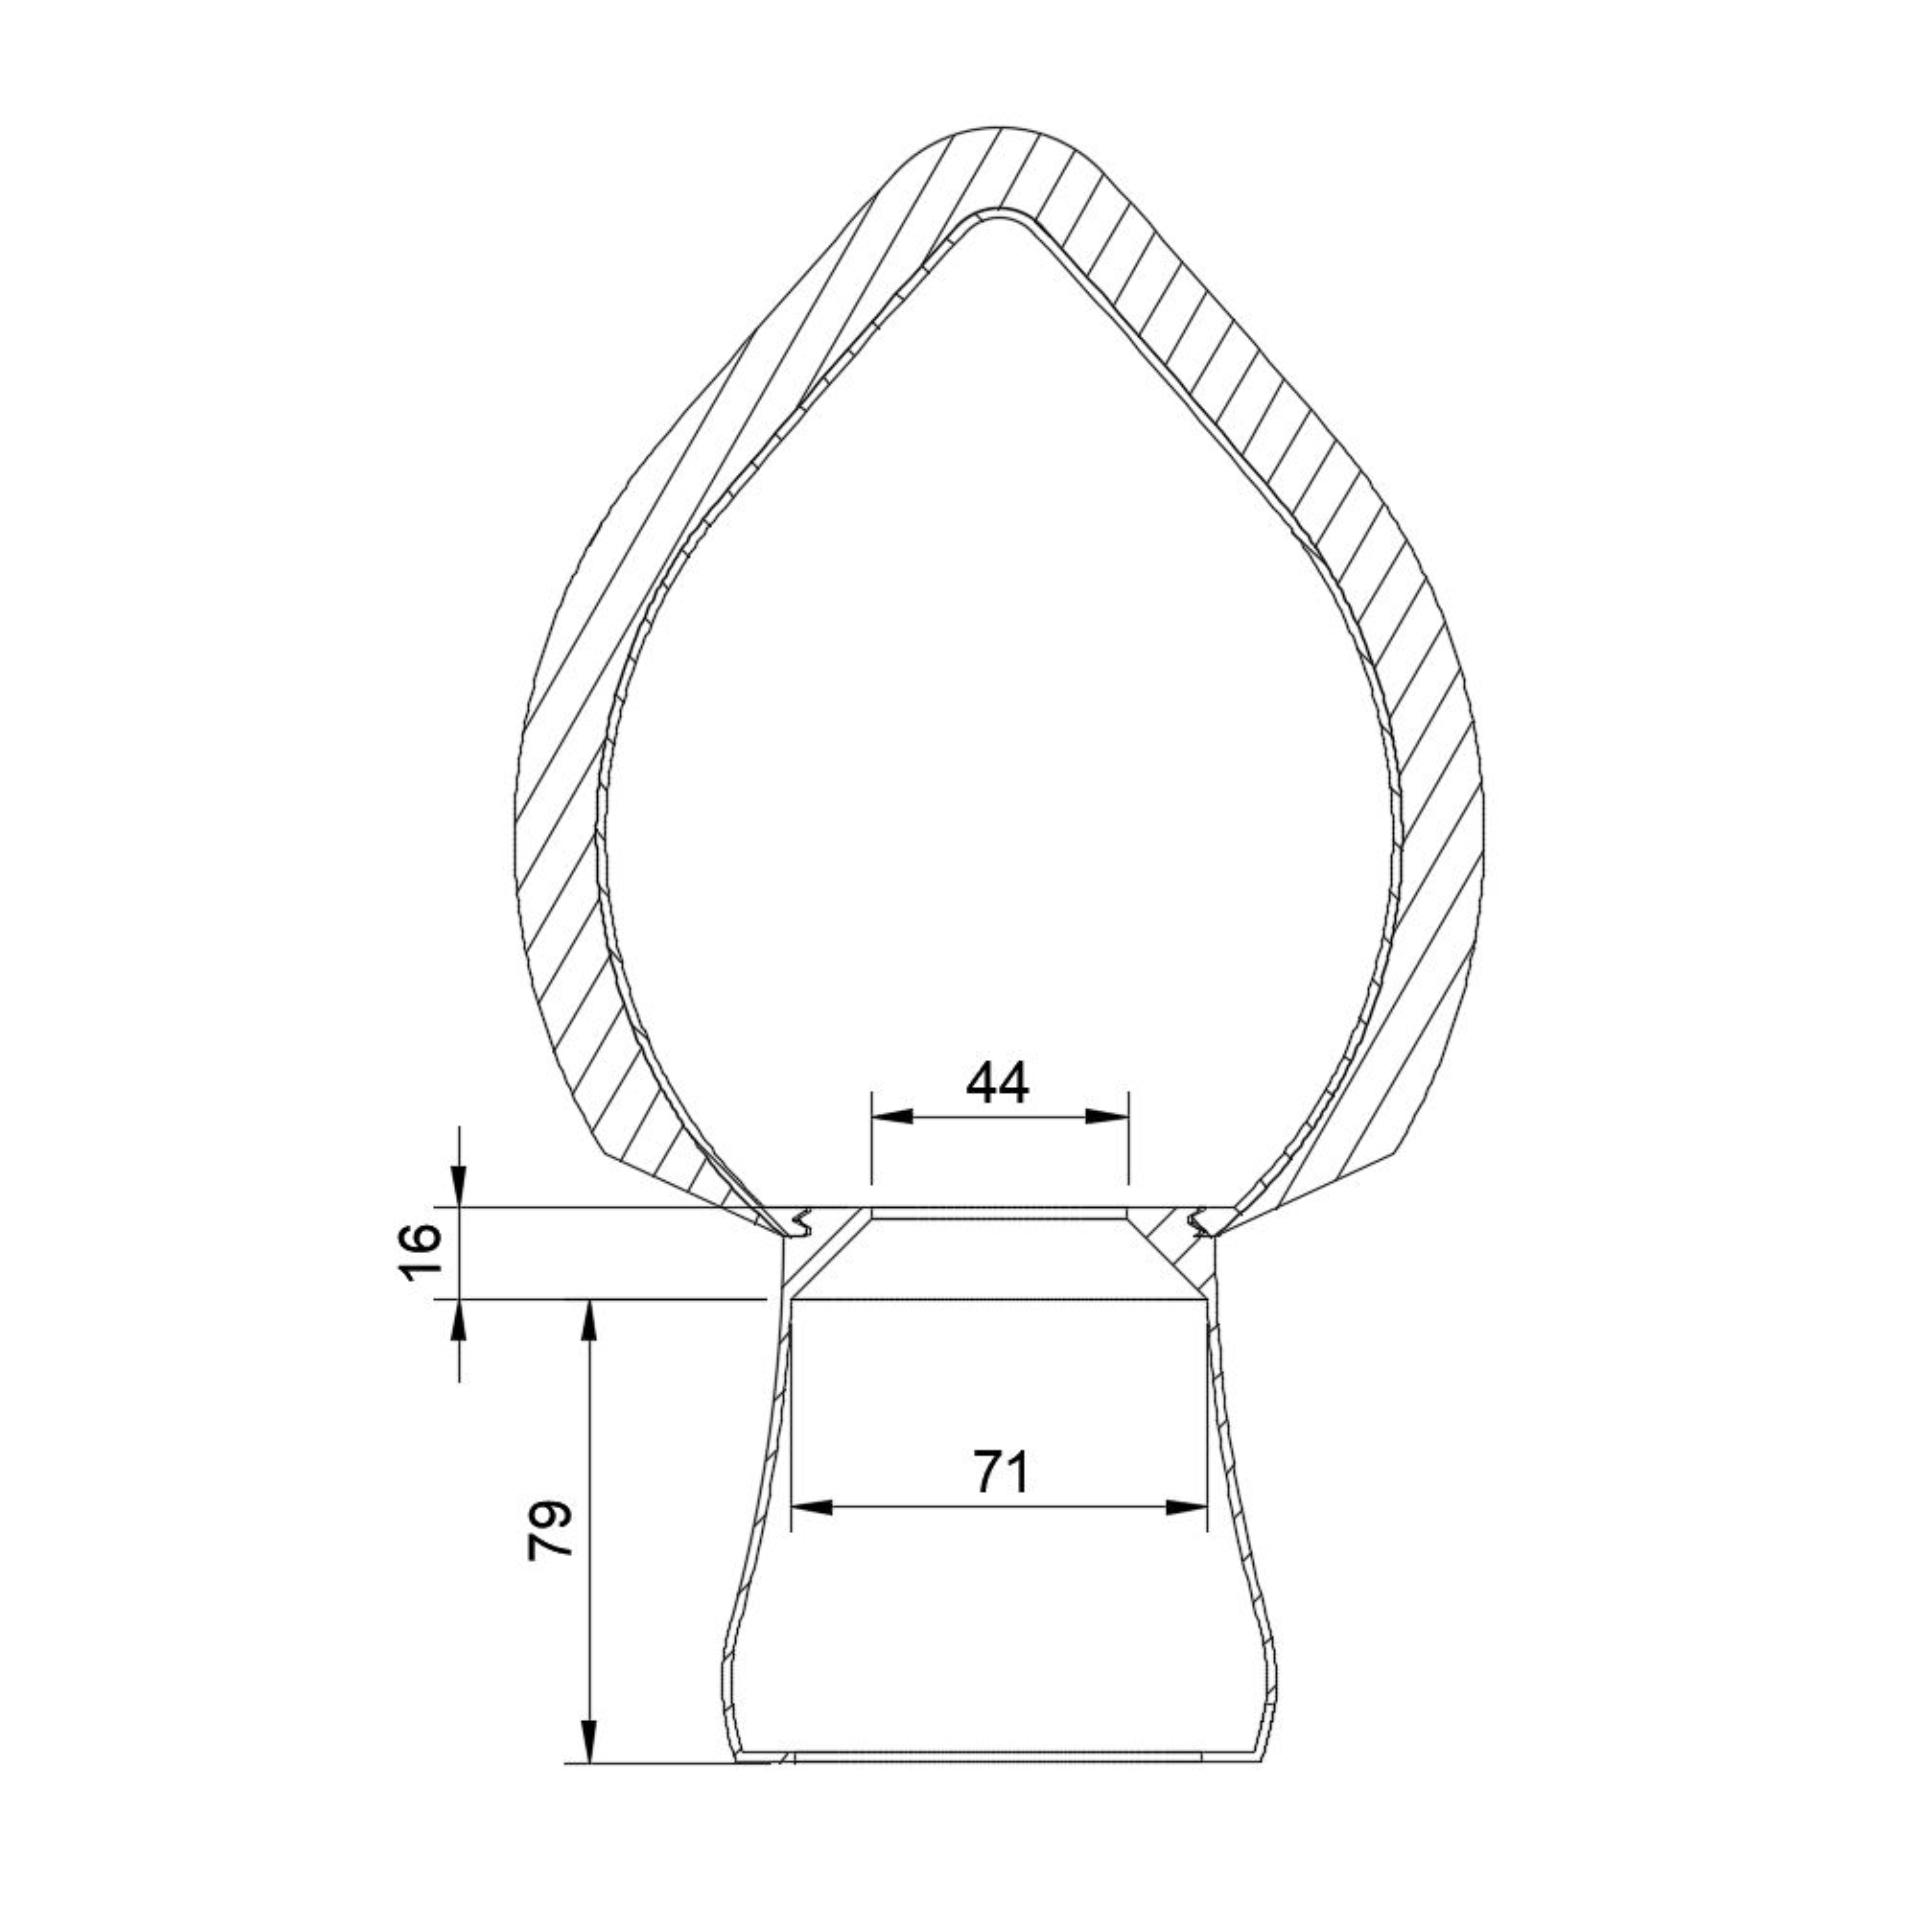
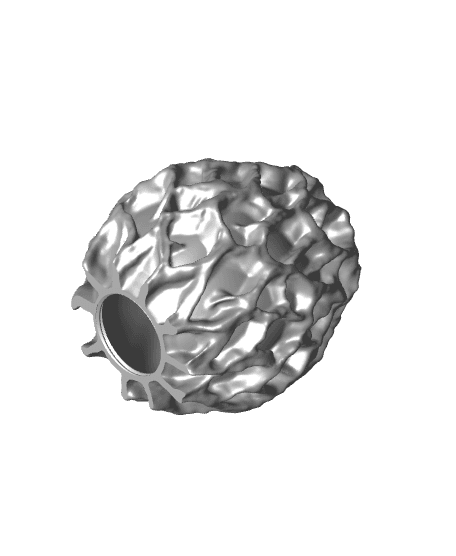
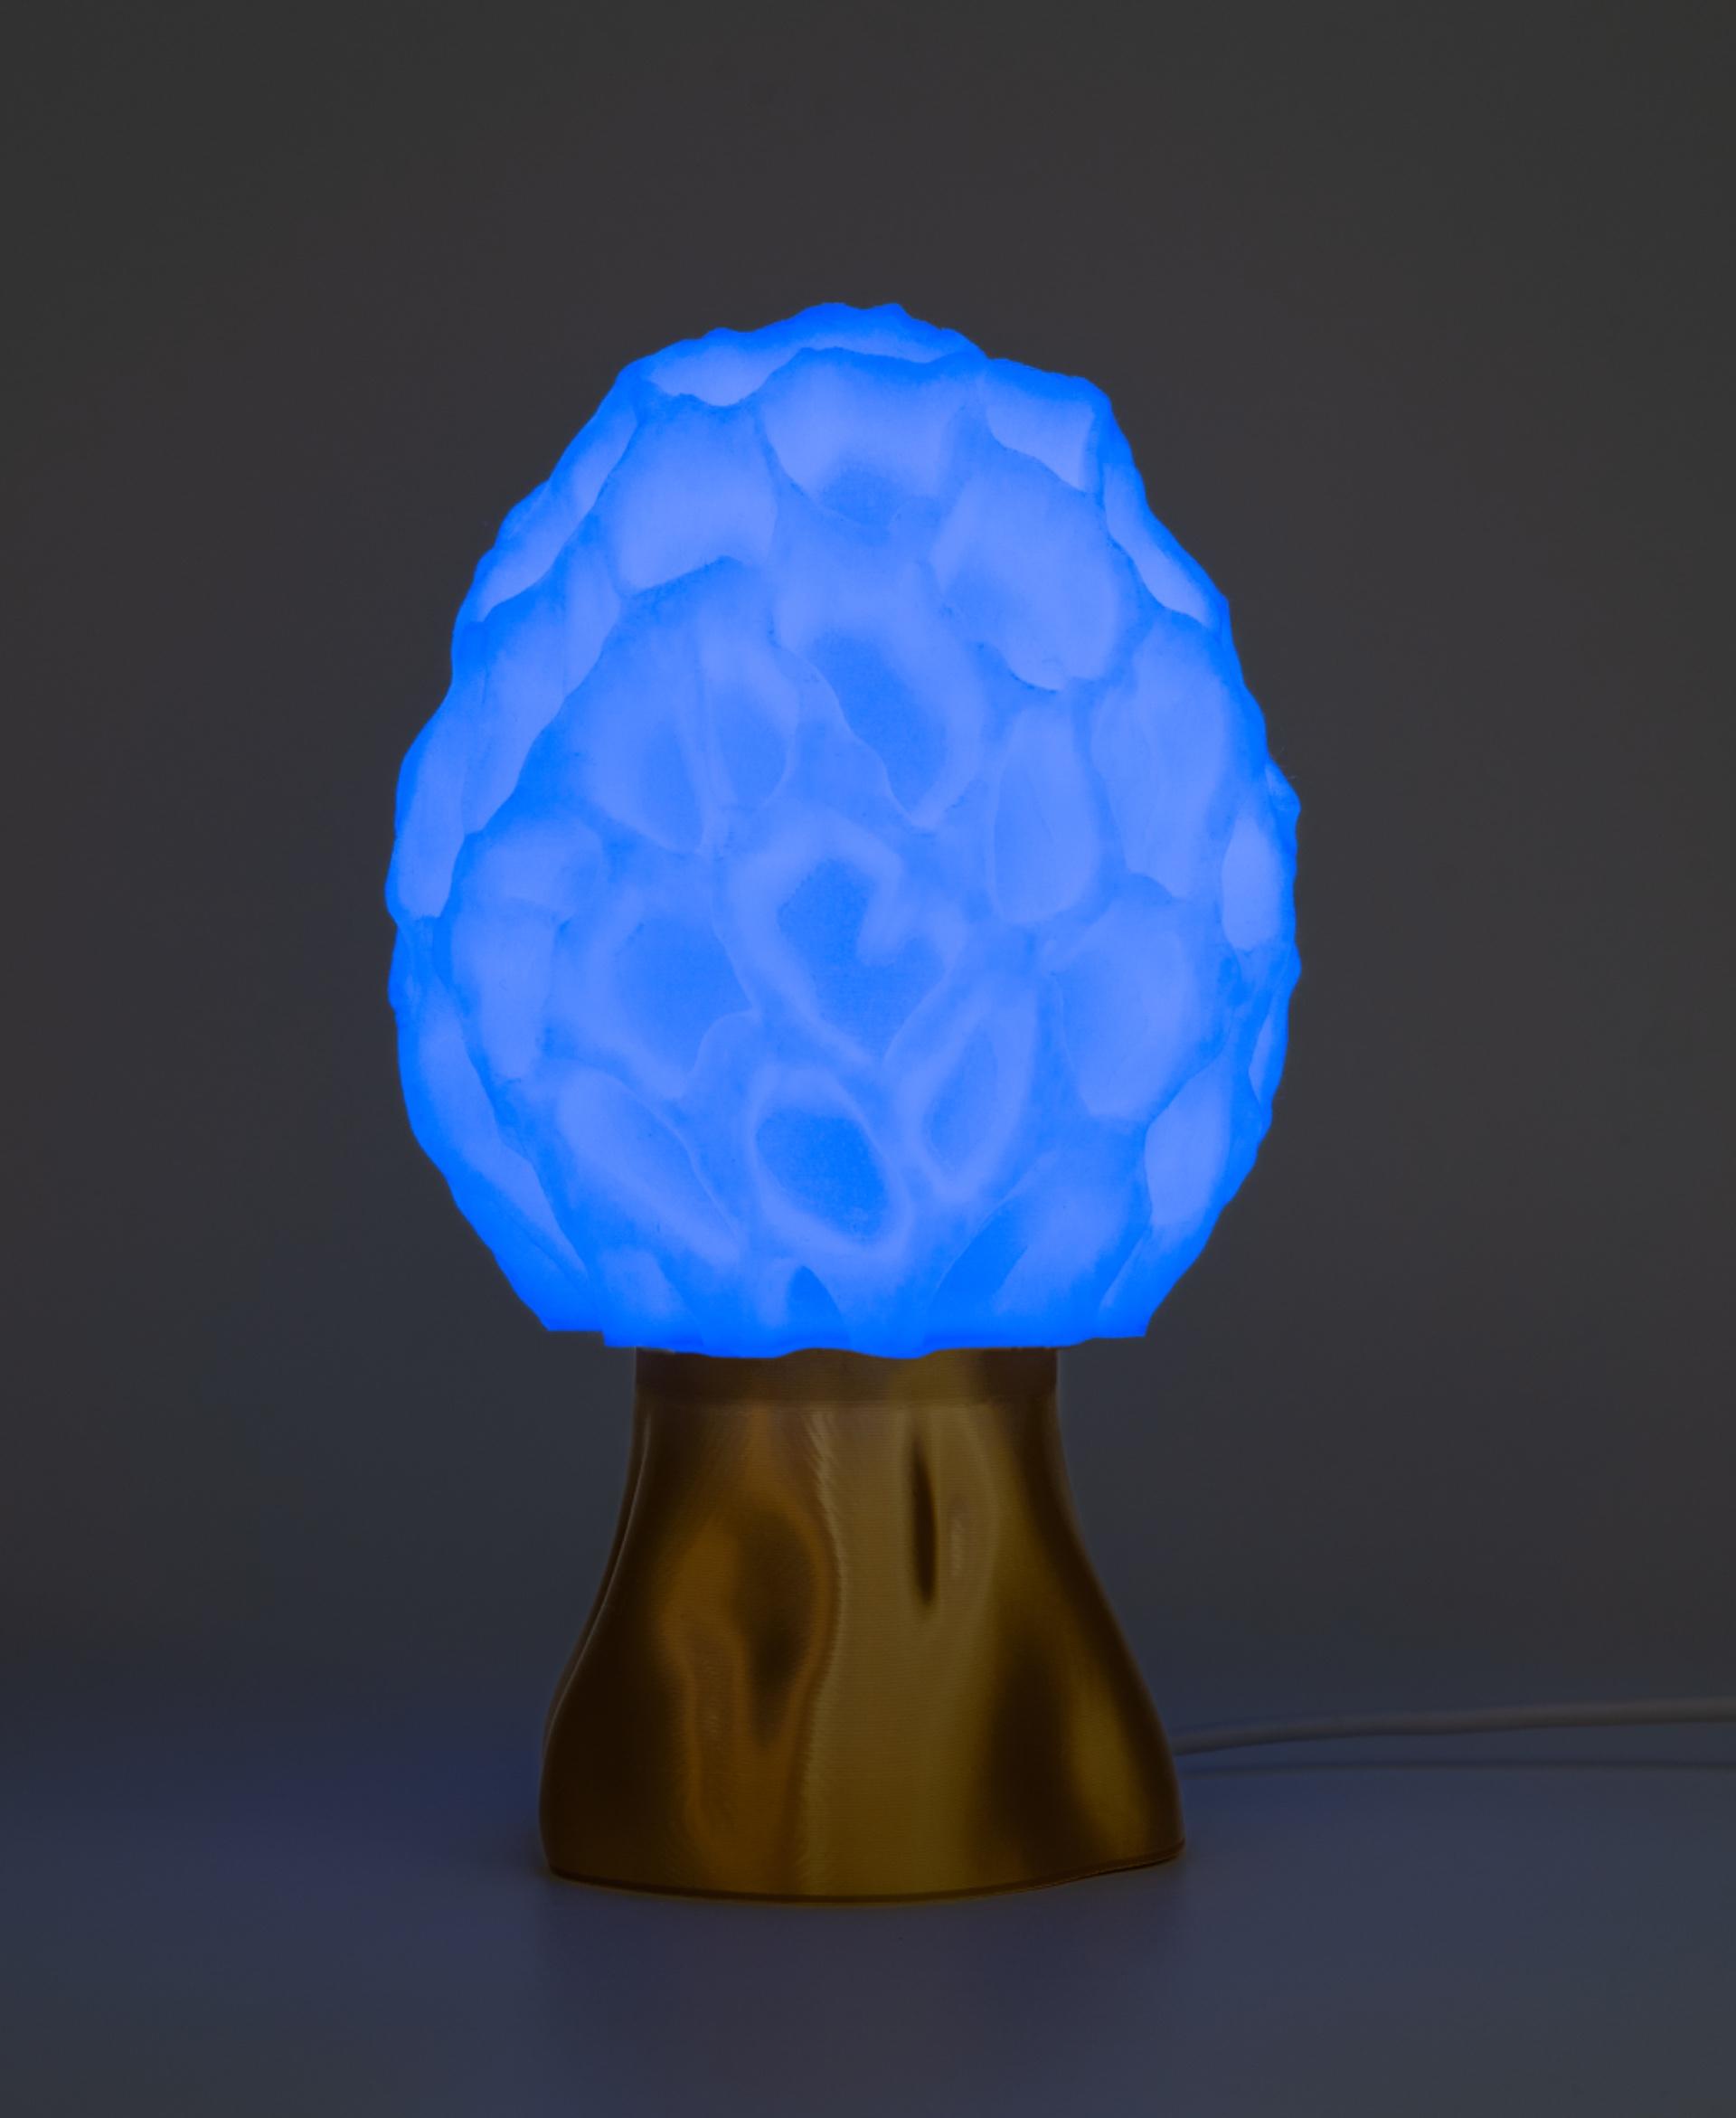
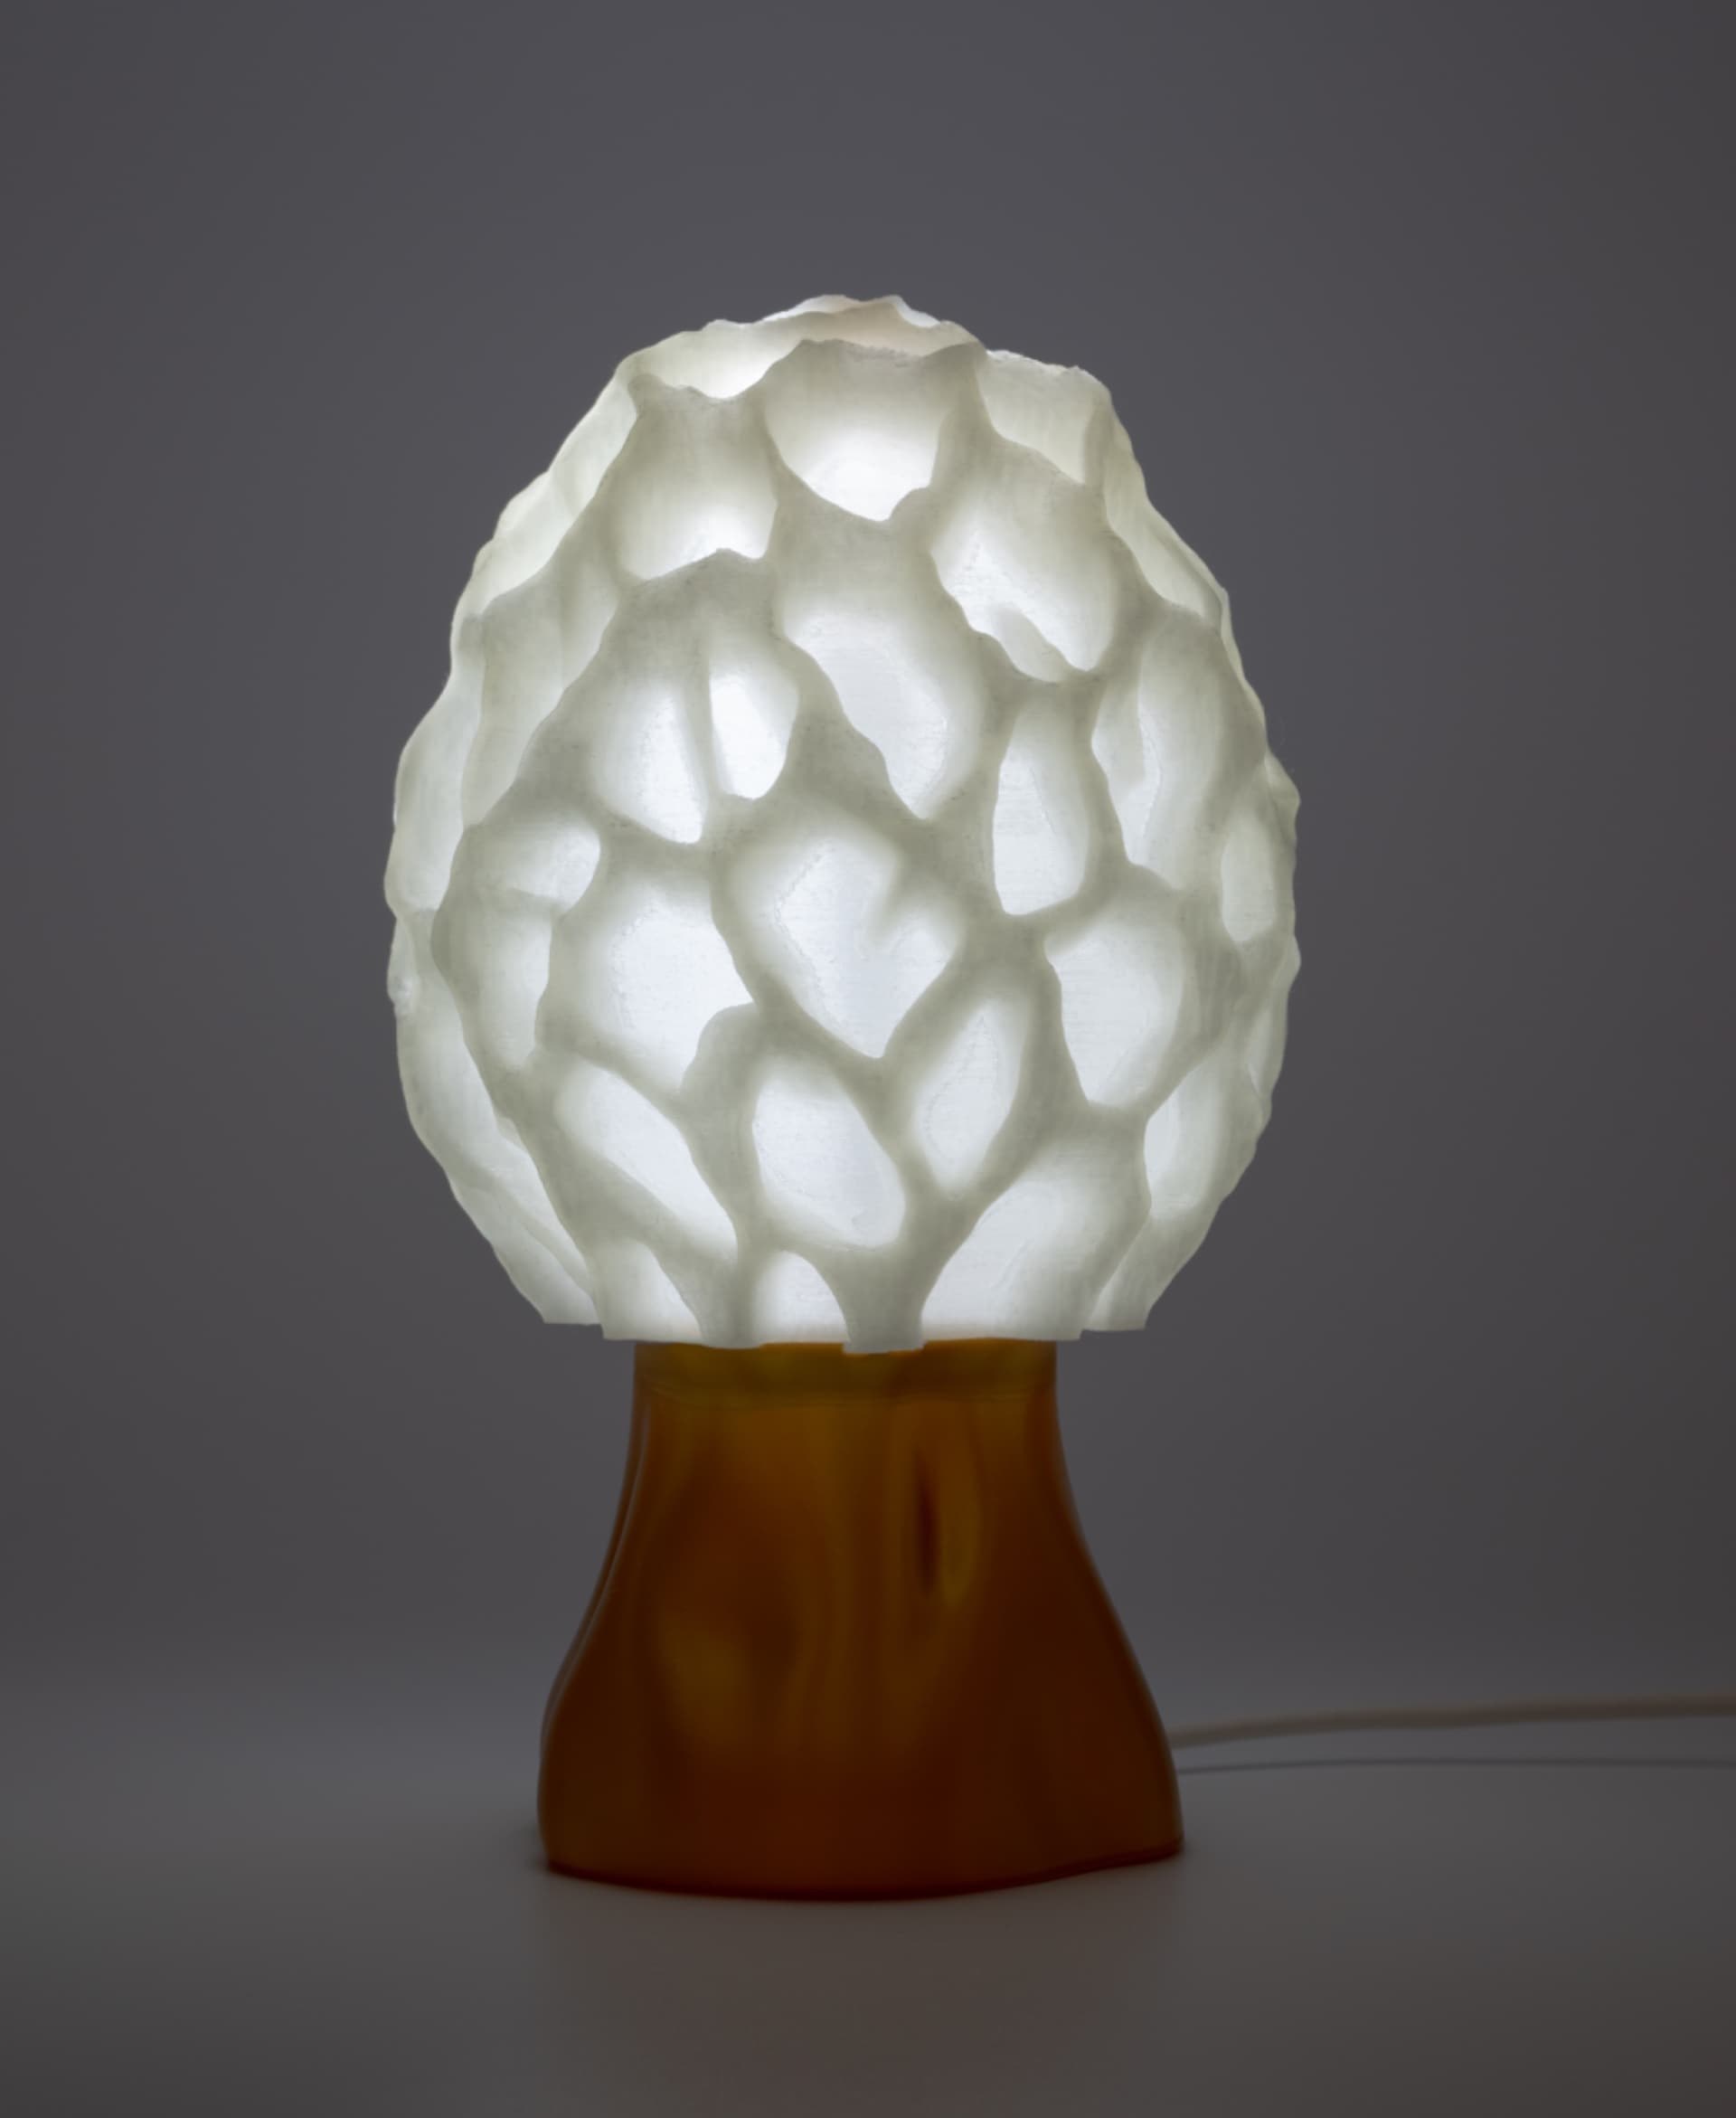
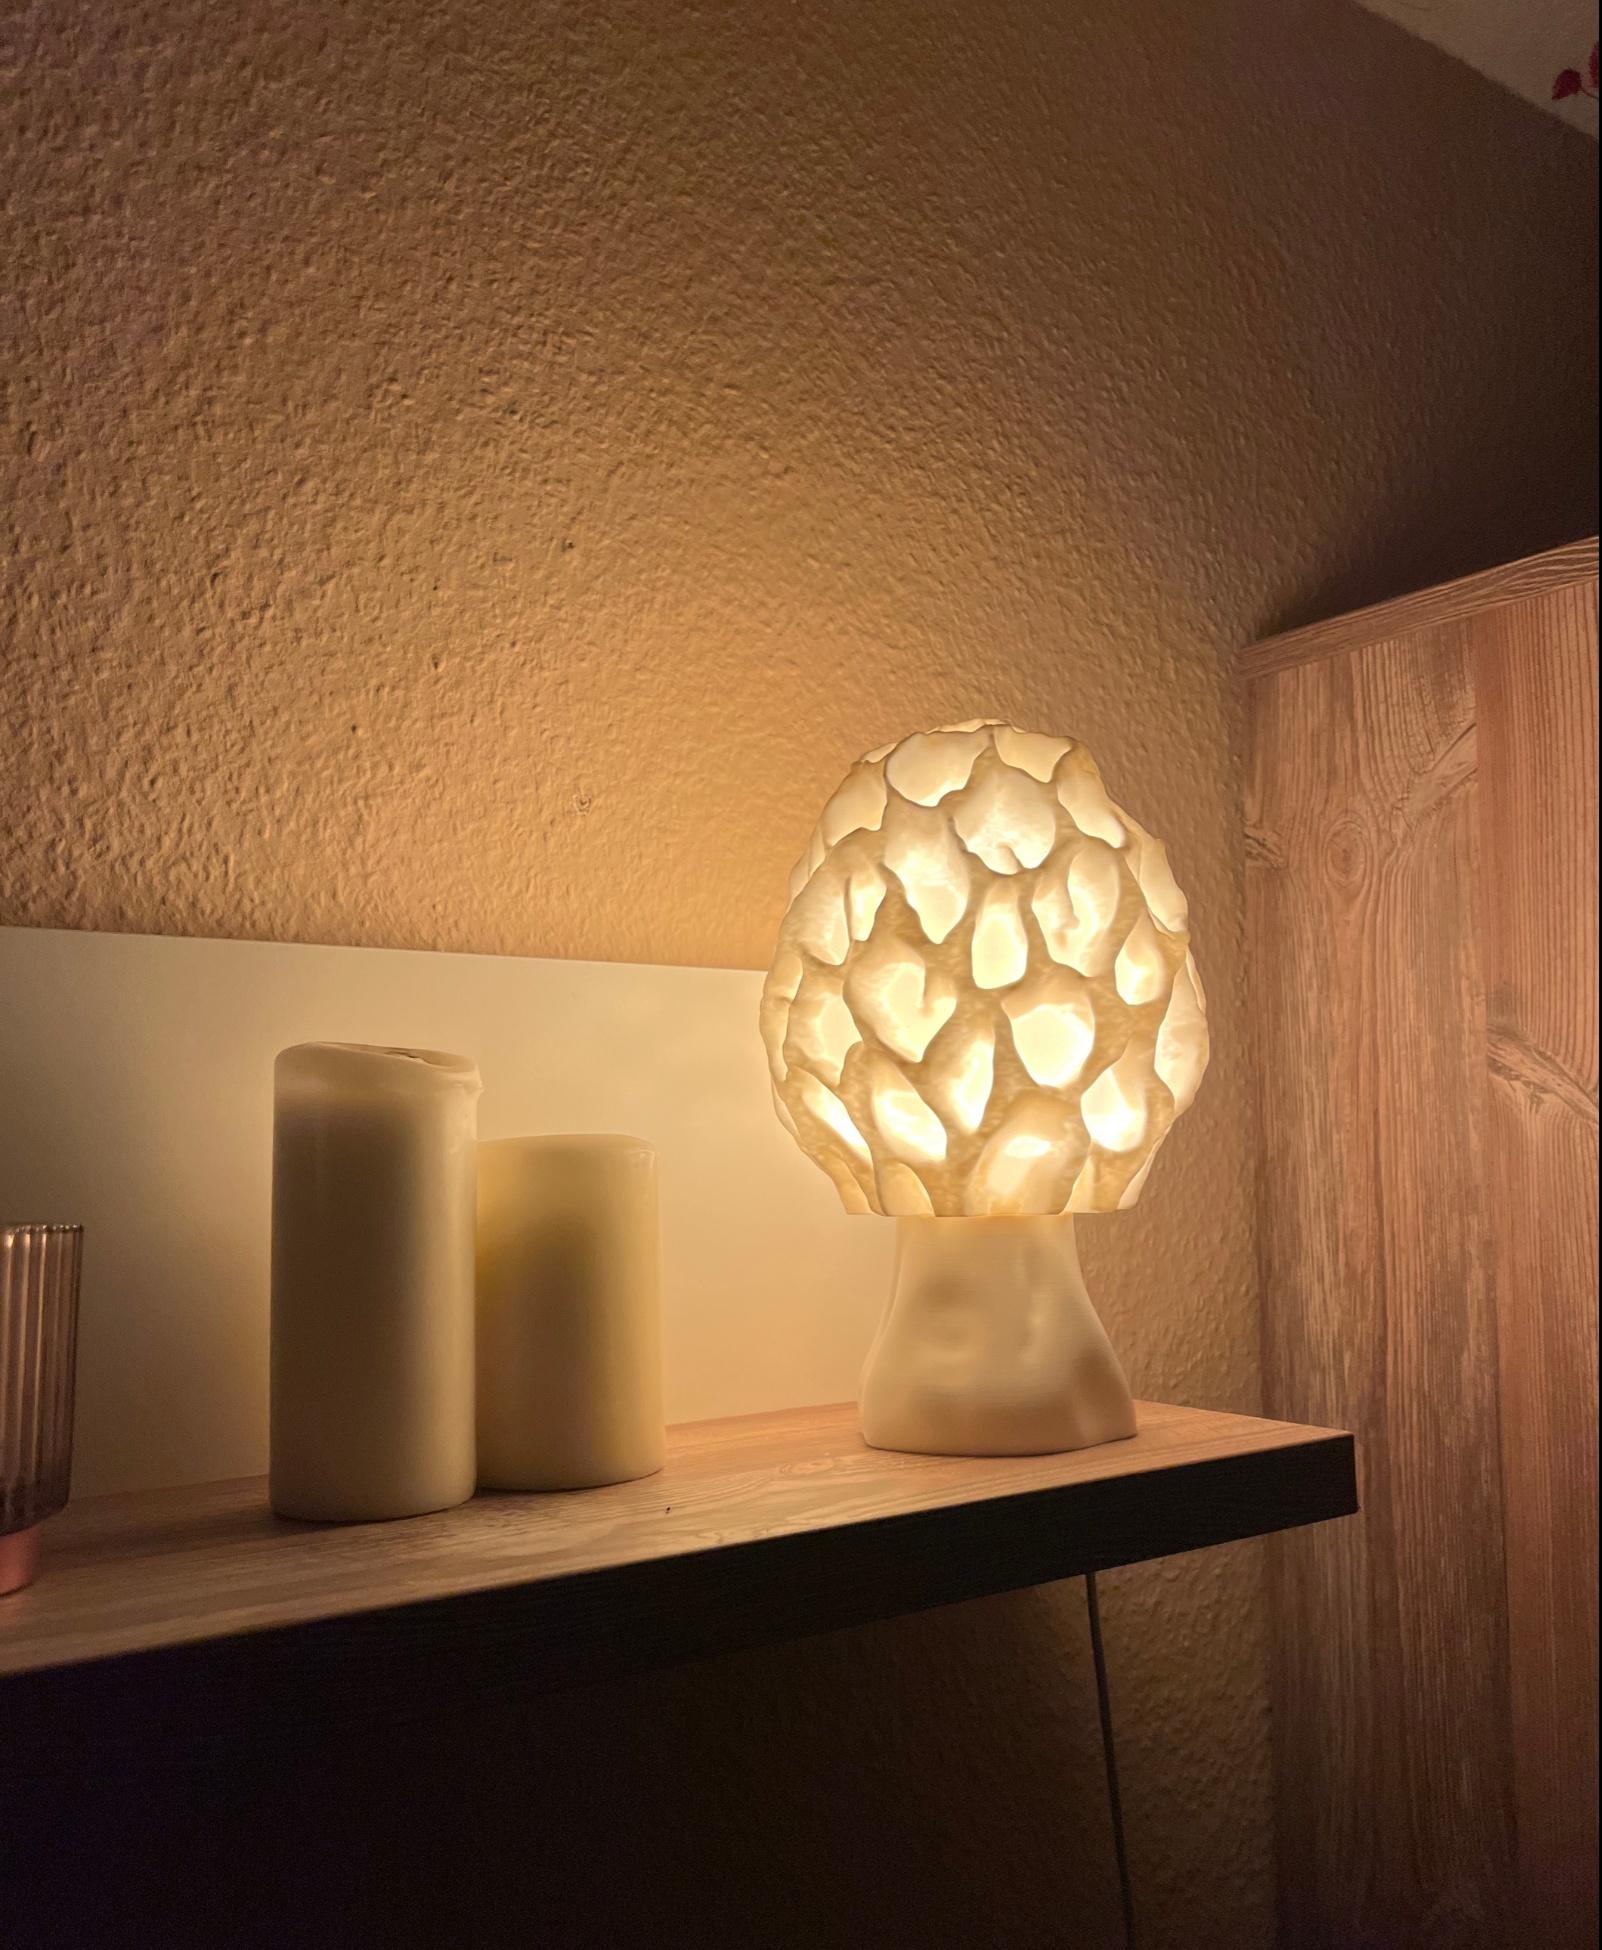
A table lamp inspired by the tasty mushroom Morchella Esculenta. It consists of two parts that are connected with a thread. The parts where the light shines through the design (check images) are 1.6 mm thick.
What you need
- The two 3d printed parts
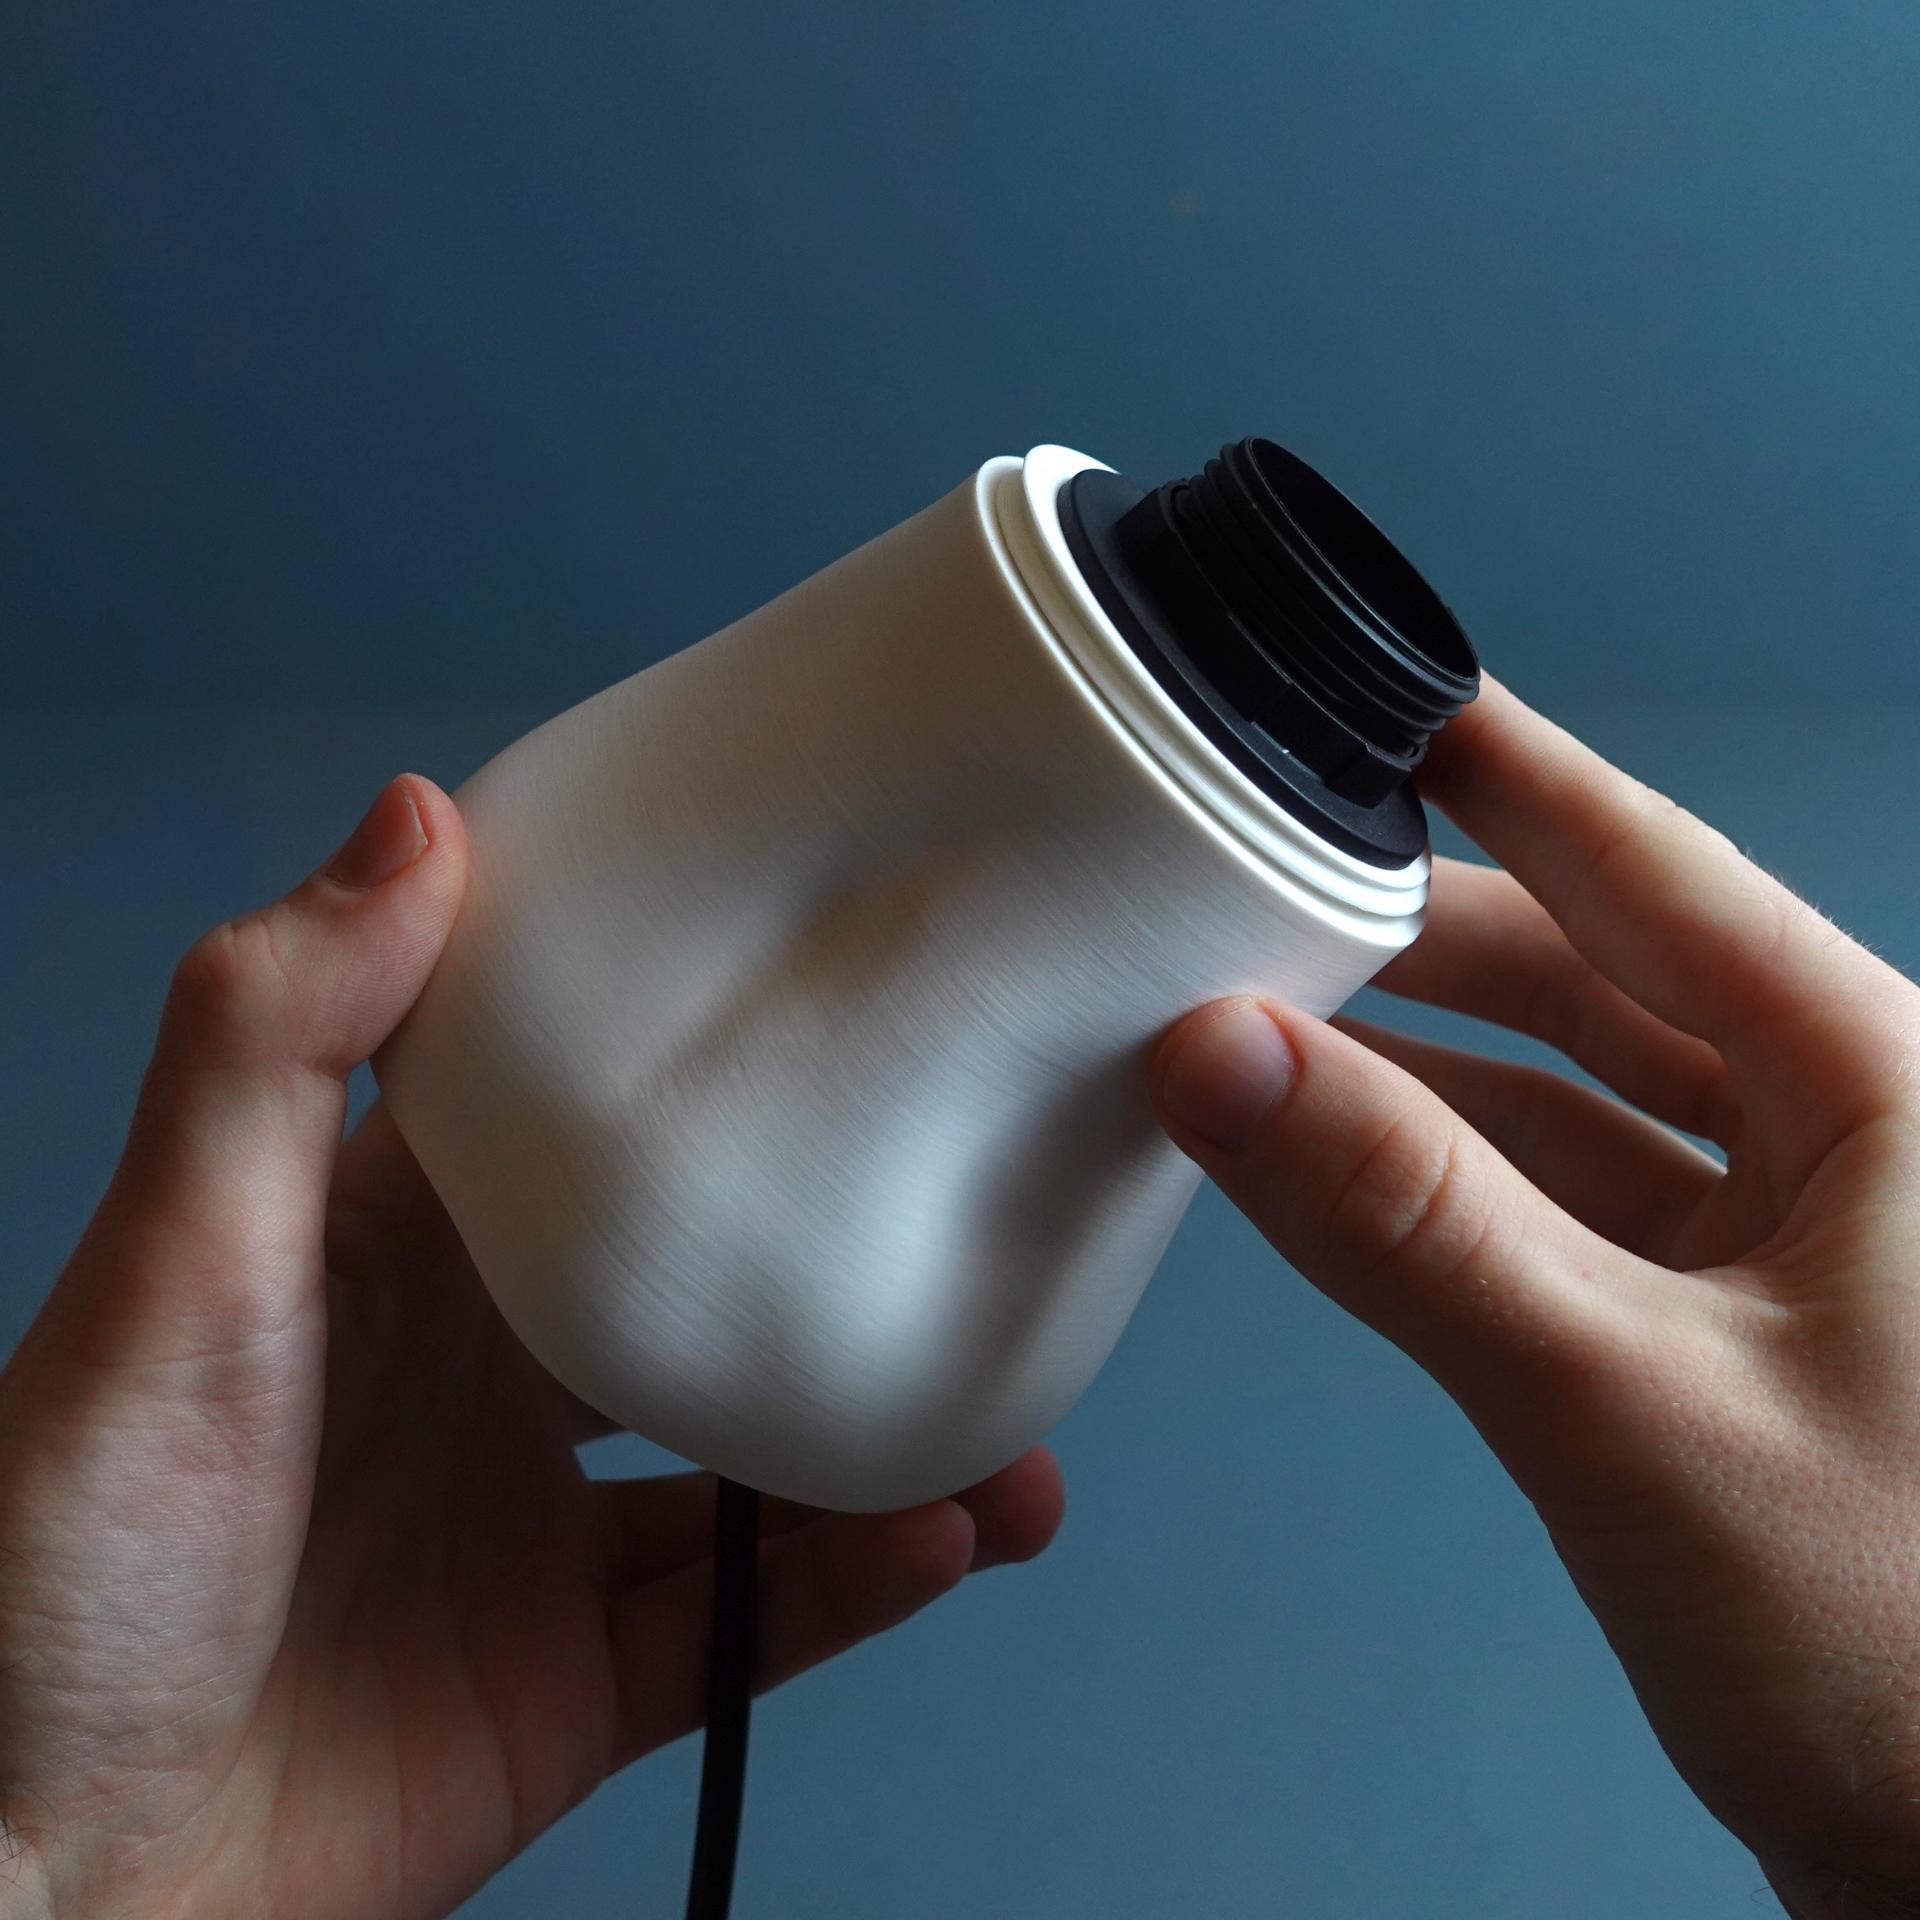
- A E27 (EU) or E26 (US) lamp socket kit that come with a screw-on attachment ring (check the images for a cross section with measurements). You can easily get the sockets with cord and switch on Amazon, Ikea or your local hardware store.
- A LED bulb
- Light-colored or transparent filament.
Versions included
- Stem: The stem in about 110 x 110 x 95 mm
- Head_big: The head in about 190 x 190 x 210 mm
- Head_small: The head in about 160 x 160 x 180 mm
Instructions
- Gather all required parts
- Decide which head you want to print (In the images the head_big is used)
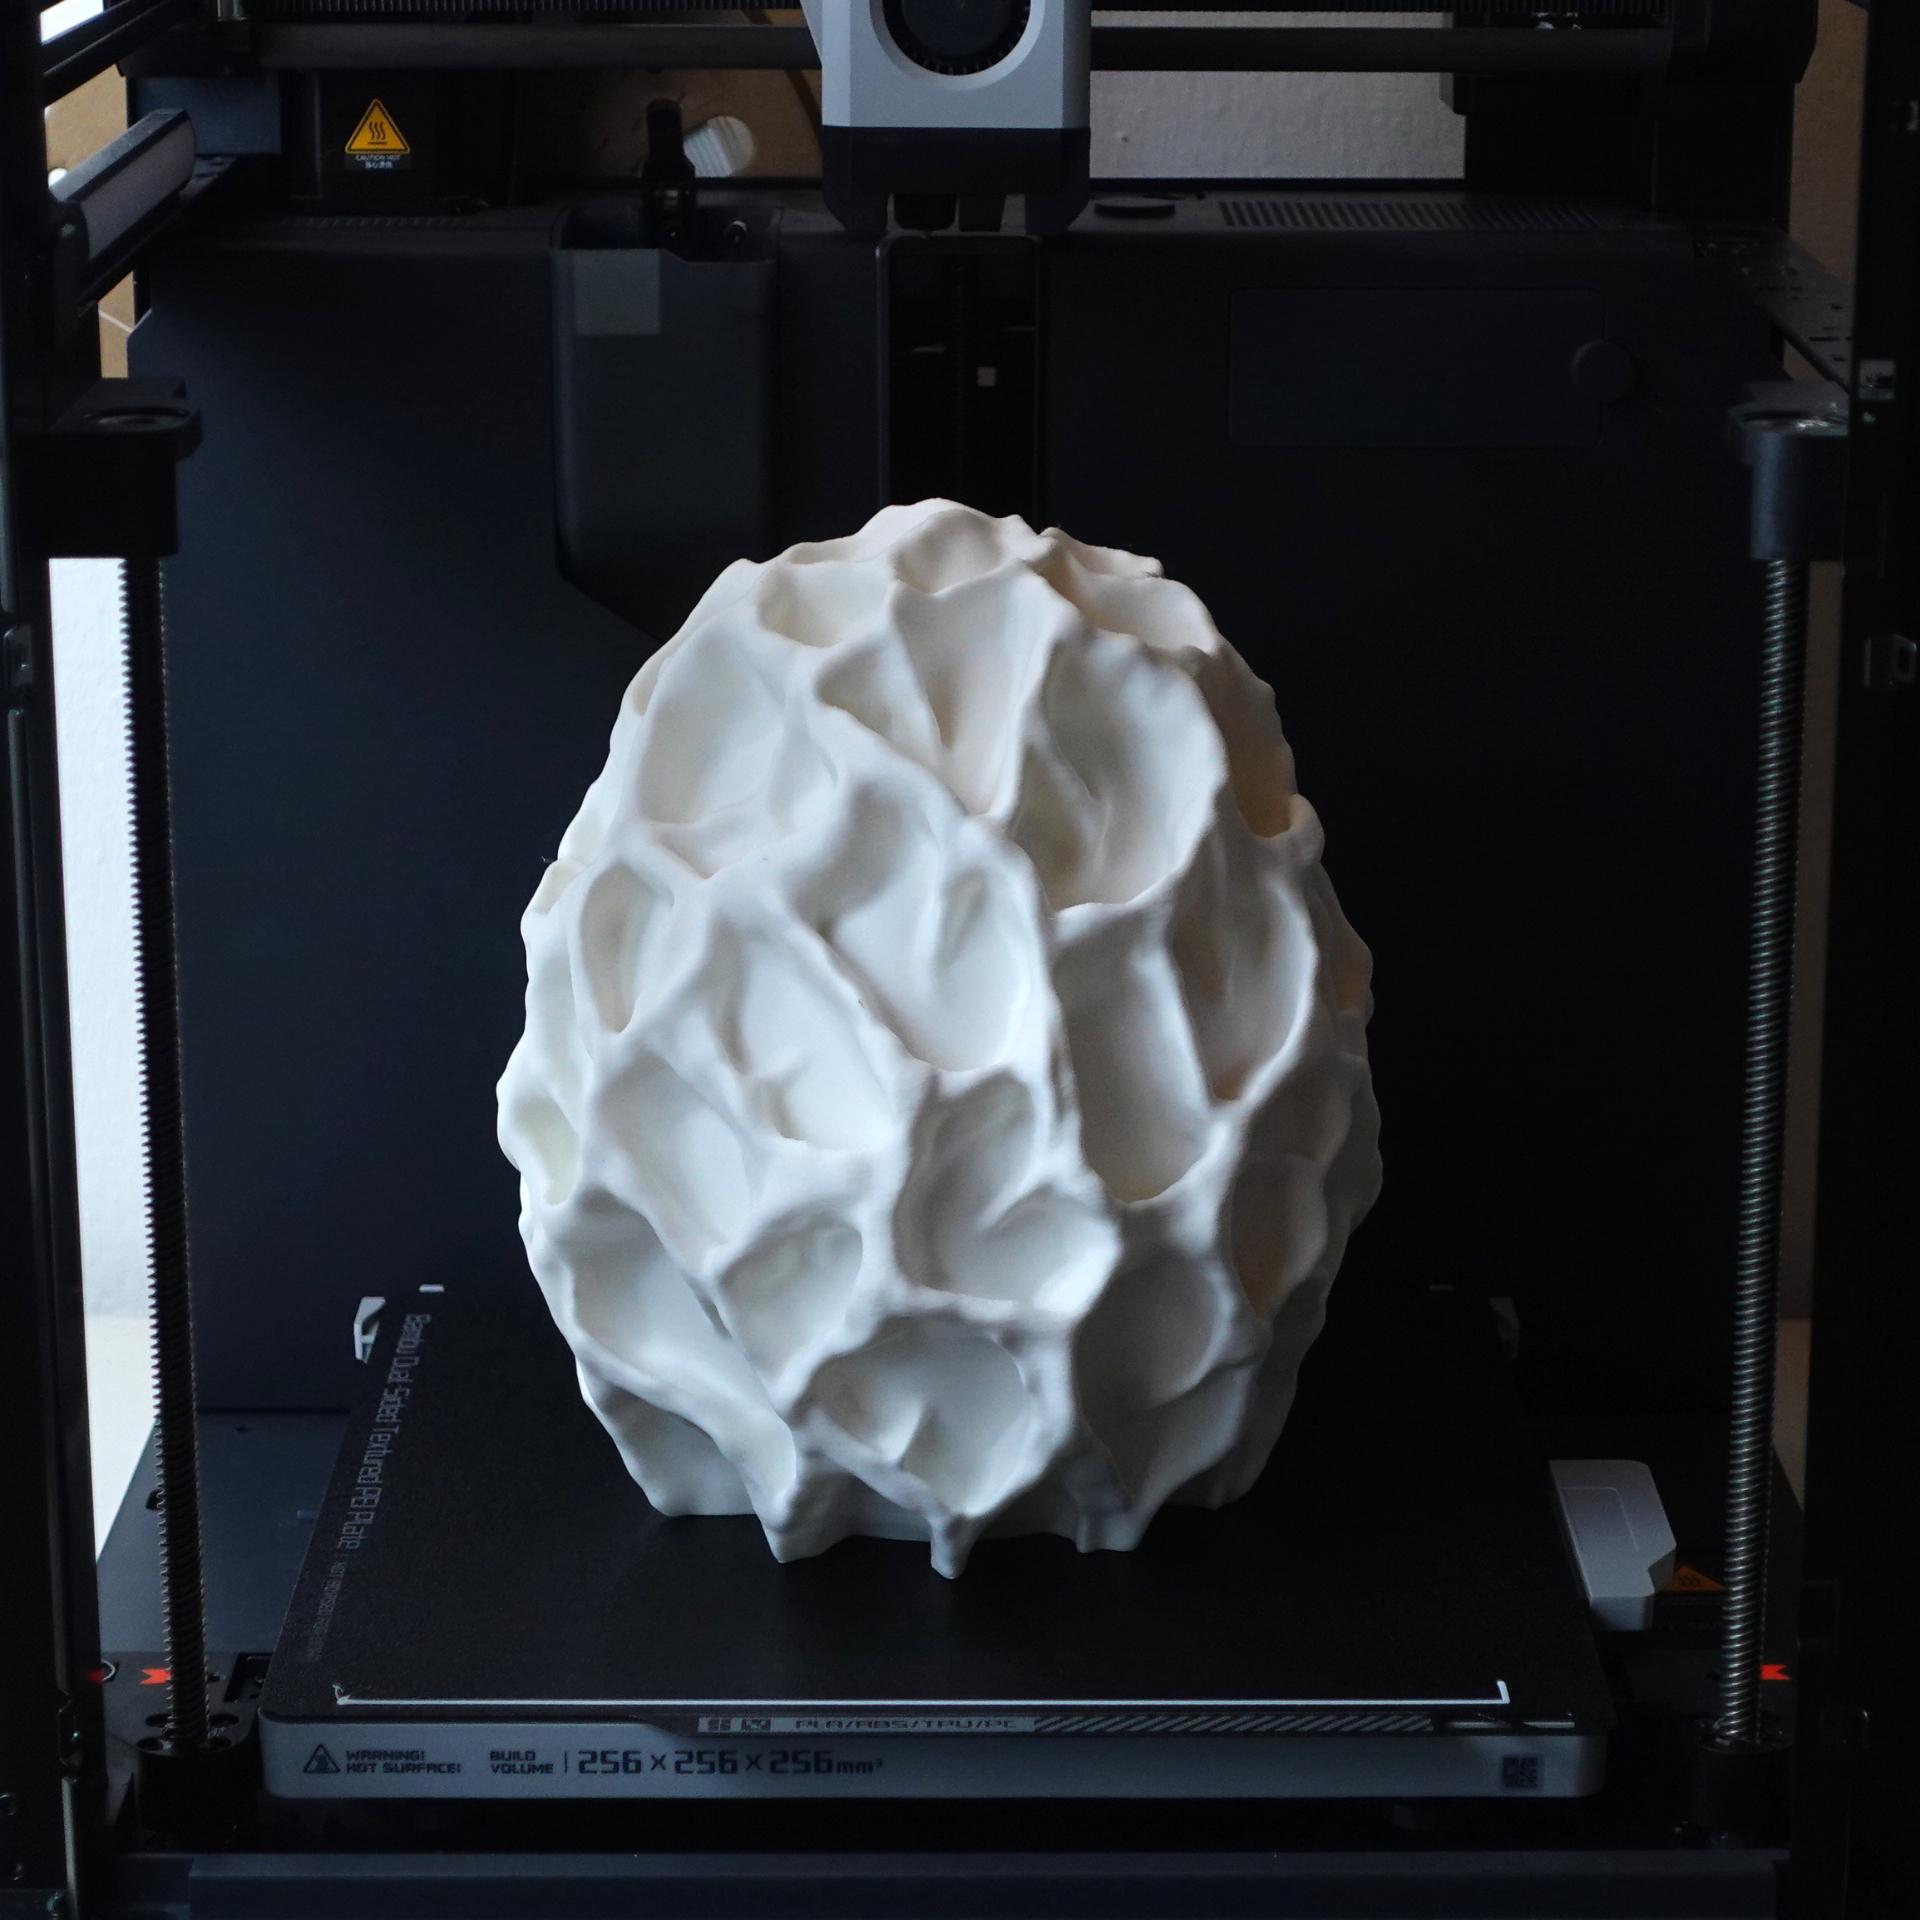
- Print the design
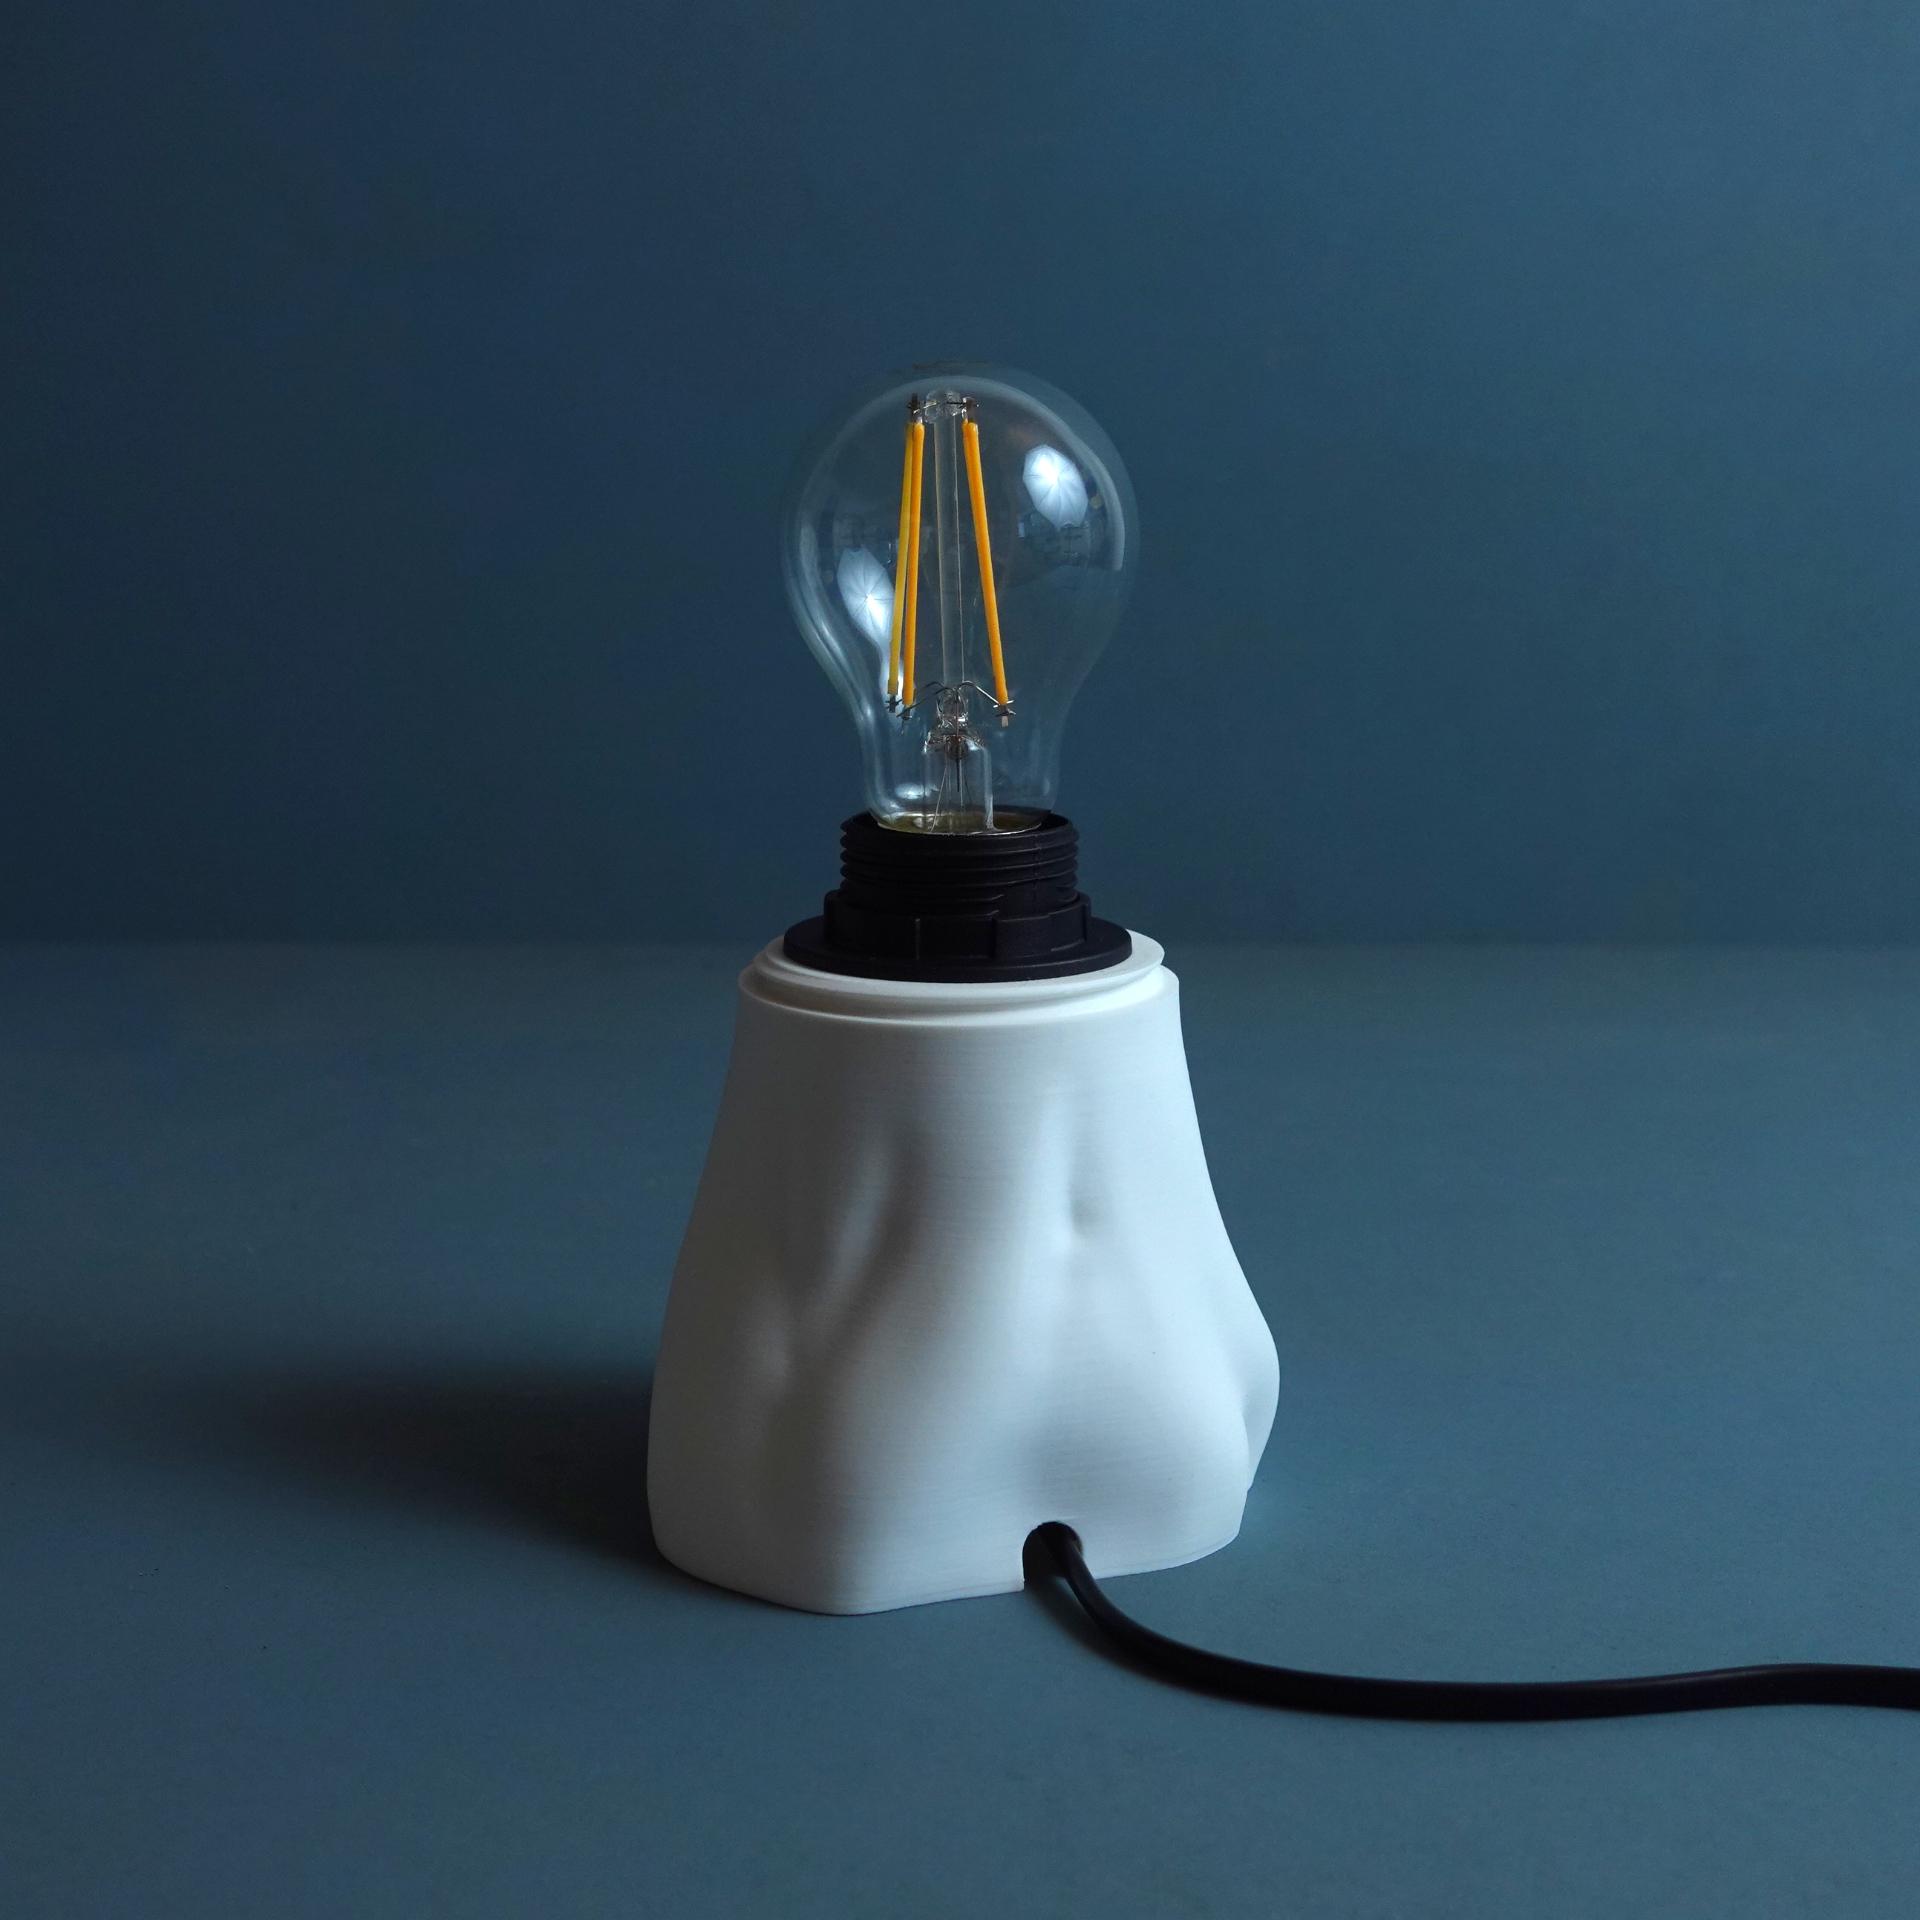
- Insert the Socket (without bulb) from below
- Screw on the Ring from above into the base to secure the socket
- Insert the bulb
- Screw on the head
- Enjoy your new lamp!
Print settings Important: You cannot use any other bulb type than LED! LEDs still give off a little heat. Depending on the strength of your bulb the design might warm up slightly. The material you use has a certain heat deflection temperature before deformation. Make sure to build a safe product by verifying that the print is not affected by the amount of heat that your bulb emits! If you are uncertain or have little experience in building electrified products, please consult a professional!
Usually, a strong LED bulb does not get hotter than 50 degrees Celsius while regular PLA does not deform under 58 degrees Celsius. Those are approximate numbers, and you need to verify that for own product selection.
Material usage: 400 - 500 g Material: PLA that can handle the heat that your bulb emits. Print direction: stls are rotated correctly, check images Support: none Nozzle size: 0,4 mm Line width: 0,4 mm Layer height 0,2 mm Outer walls: 2 Infill: 15% gyroid Build plate adhesion type: none, a brim for the head if you have poor bed adhesion
Depending on your wall line count, your infill type and percentage you will get slightly different results. With more wall lines the chances that the infill will shine through decreases. If you like the look of a slightly visible gyroid infill, go for the settings above.