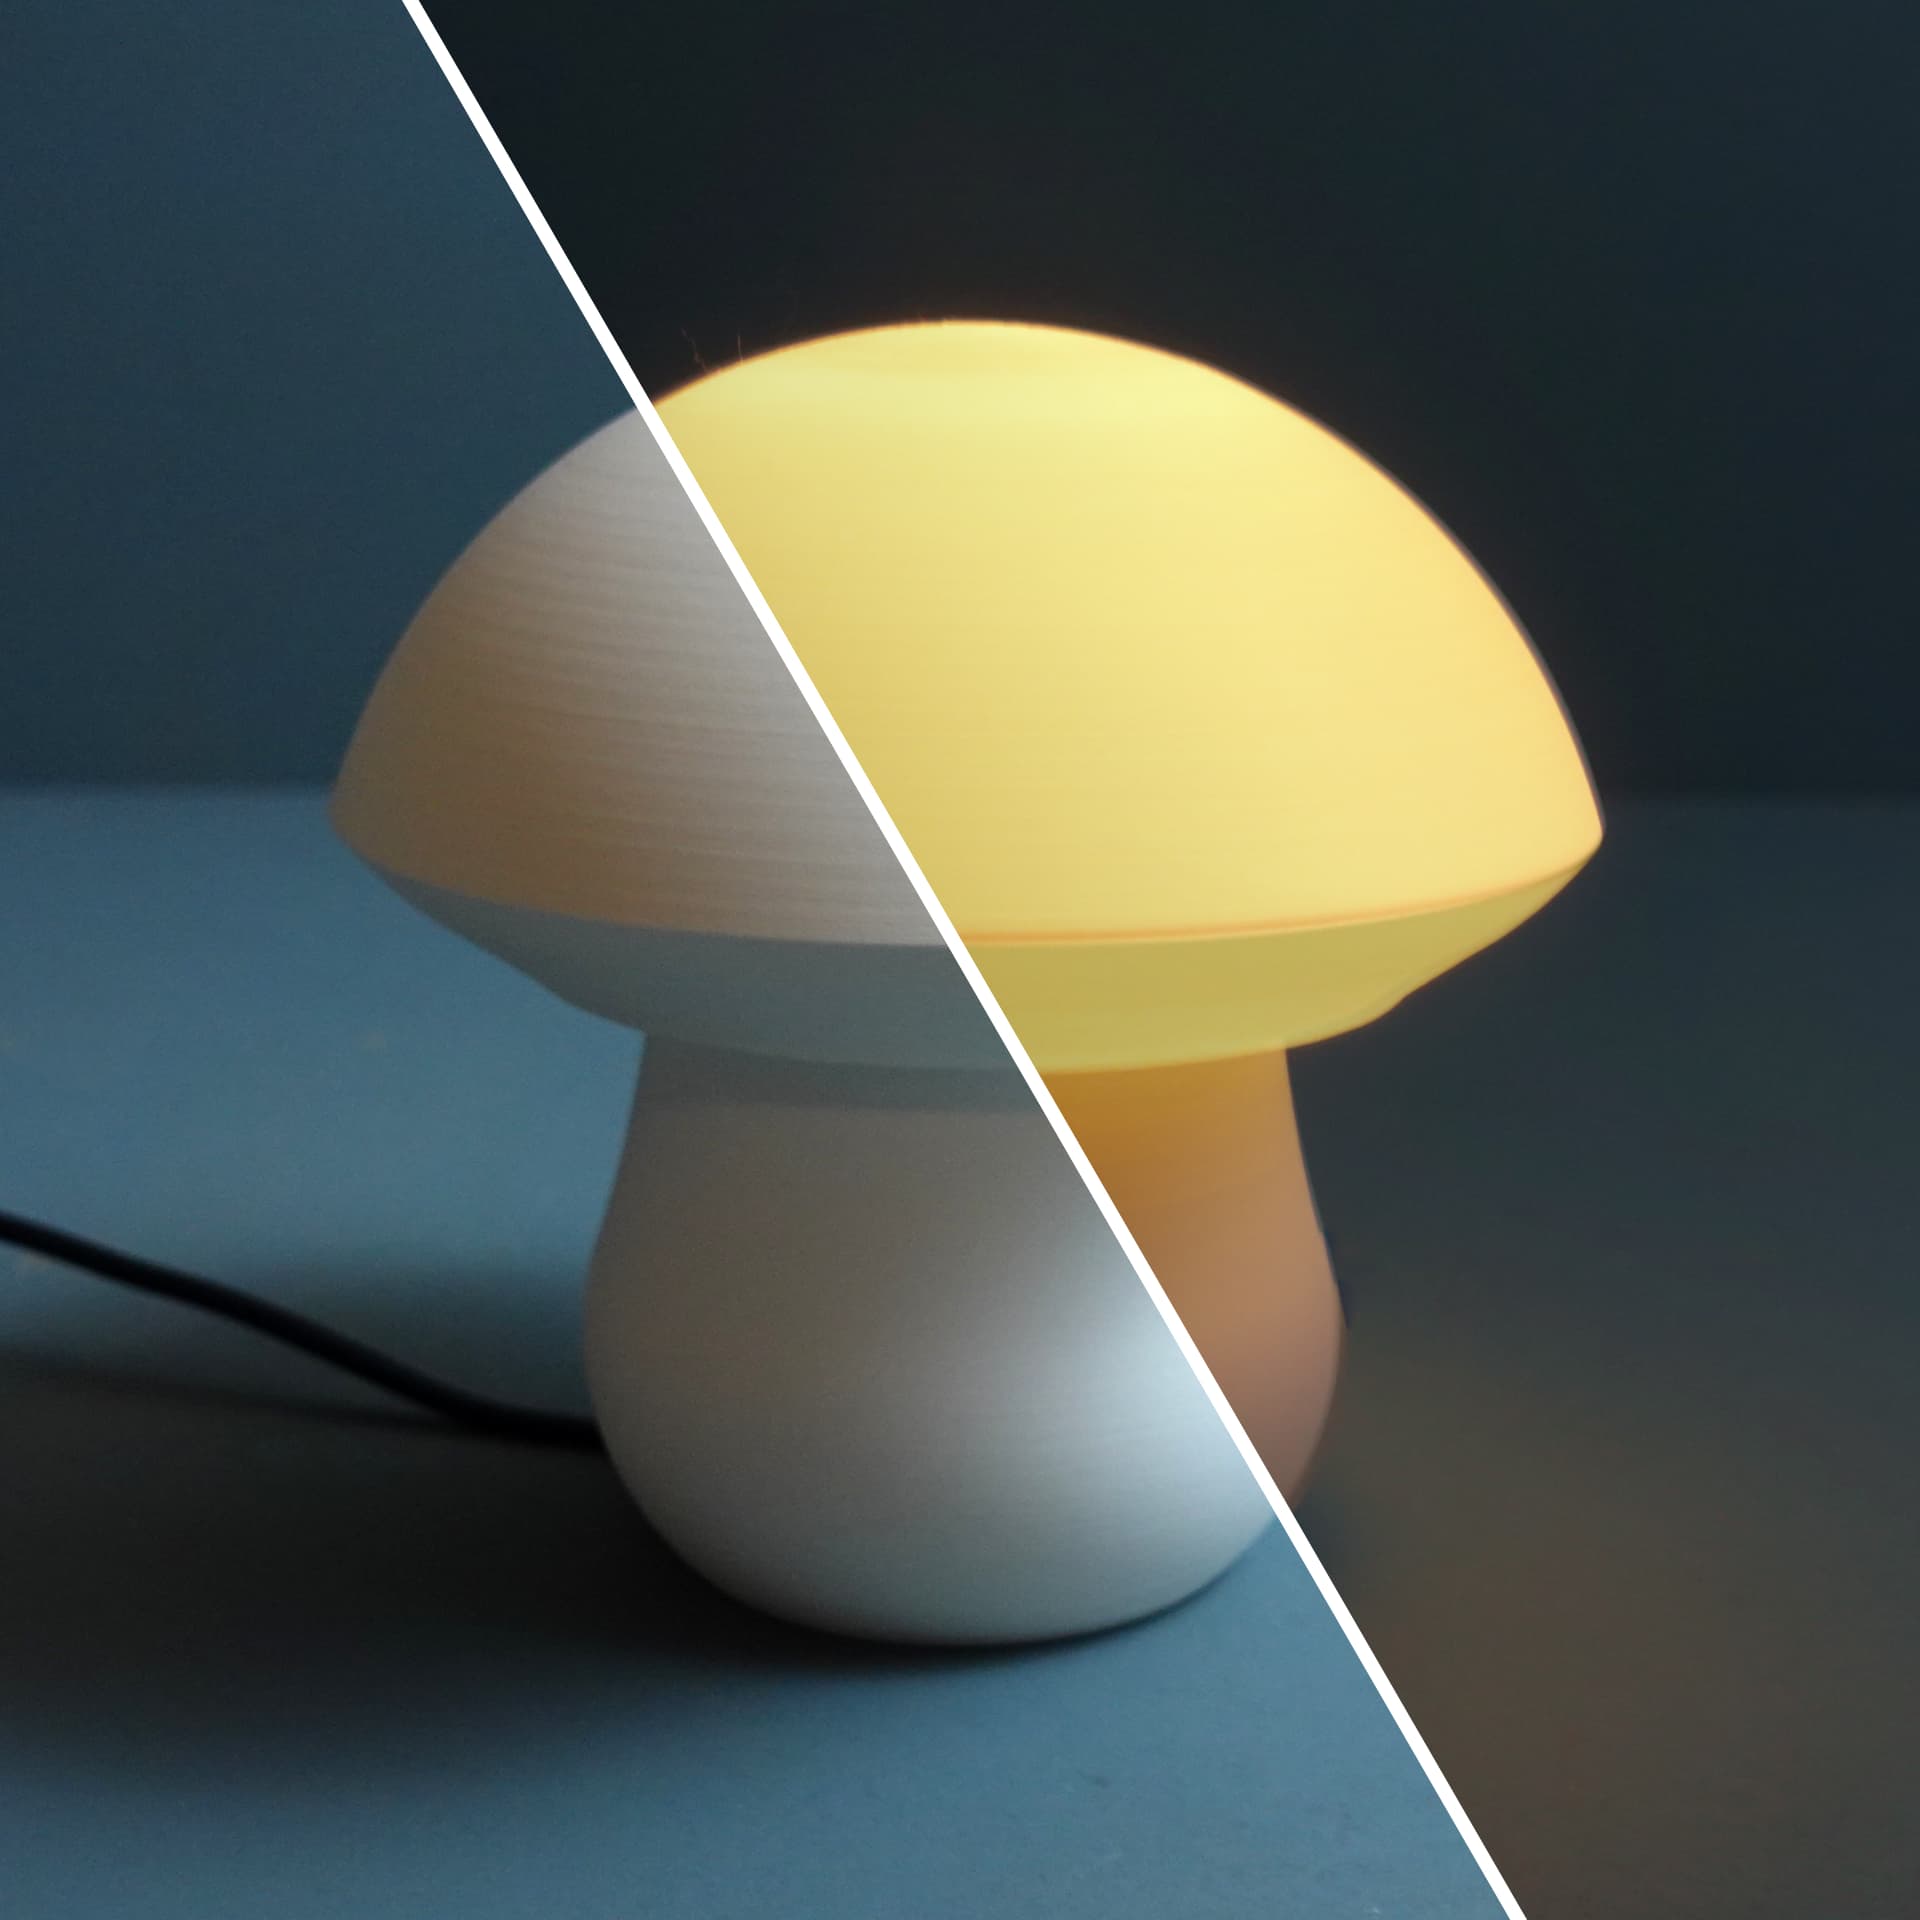
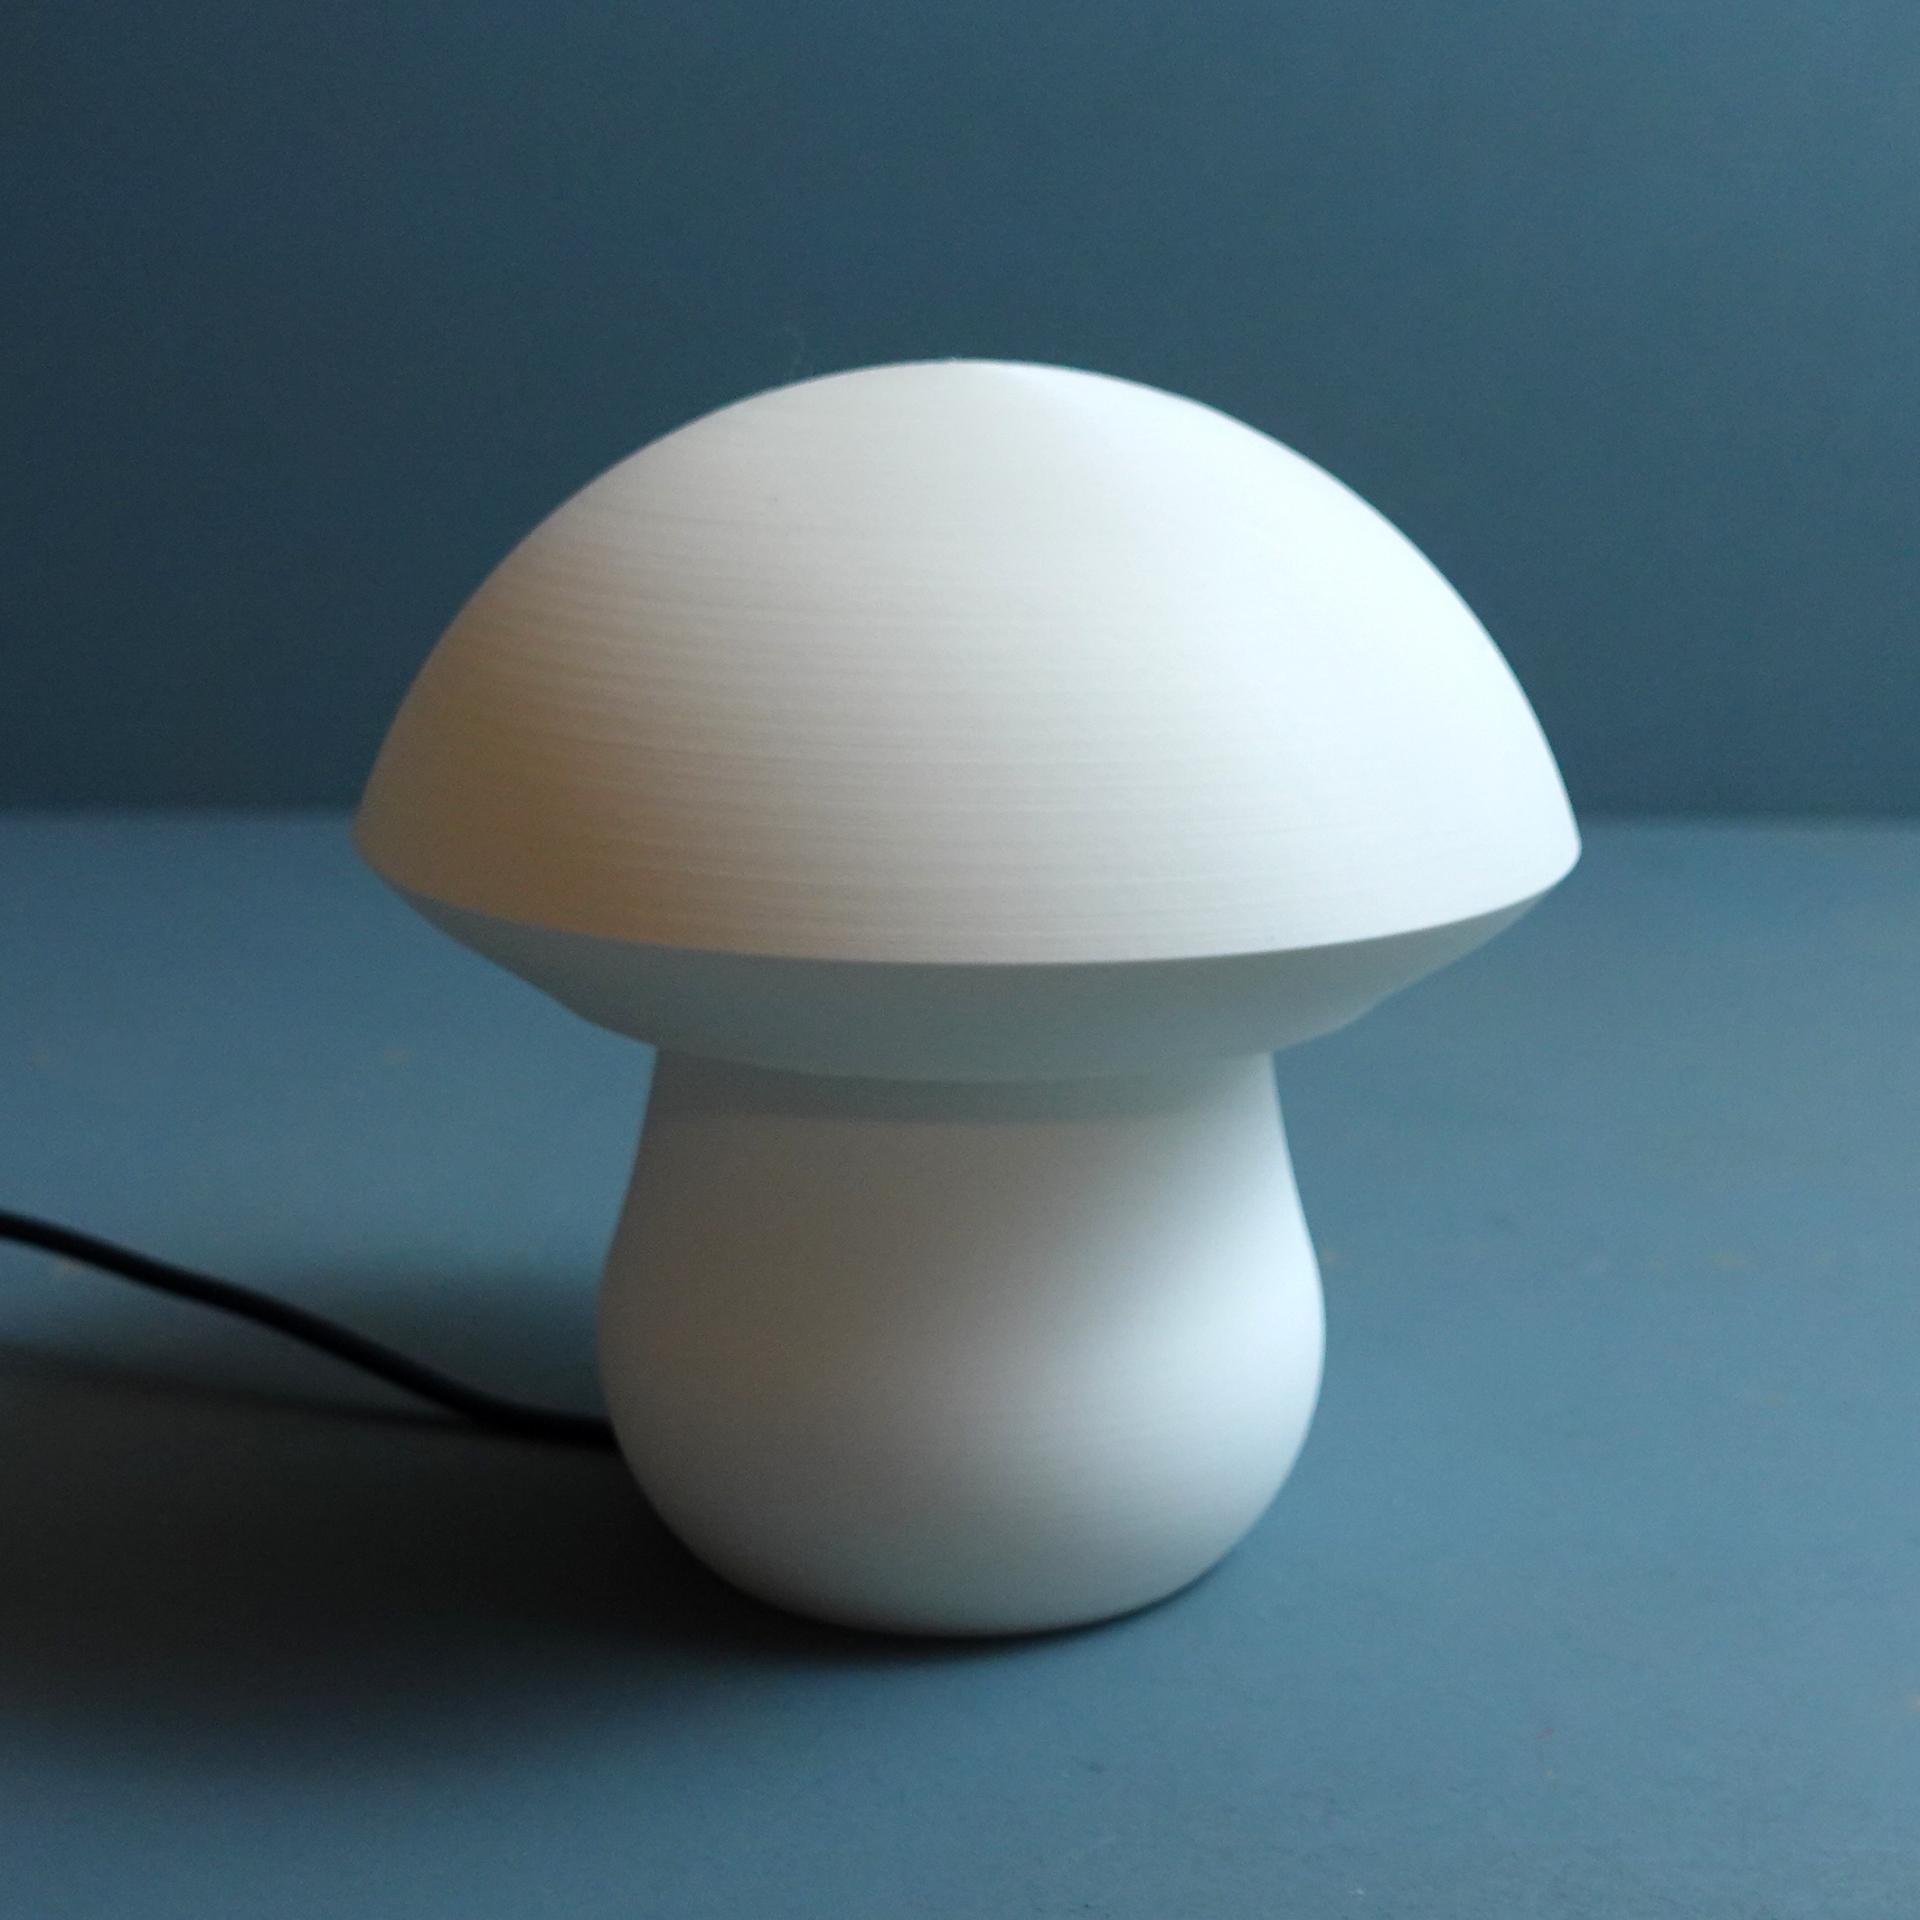
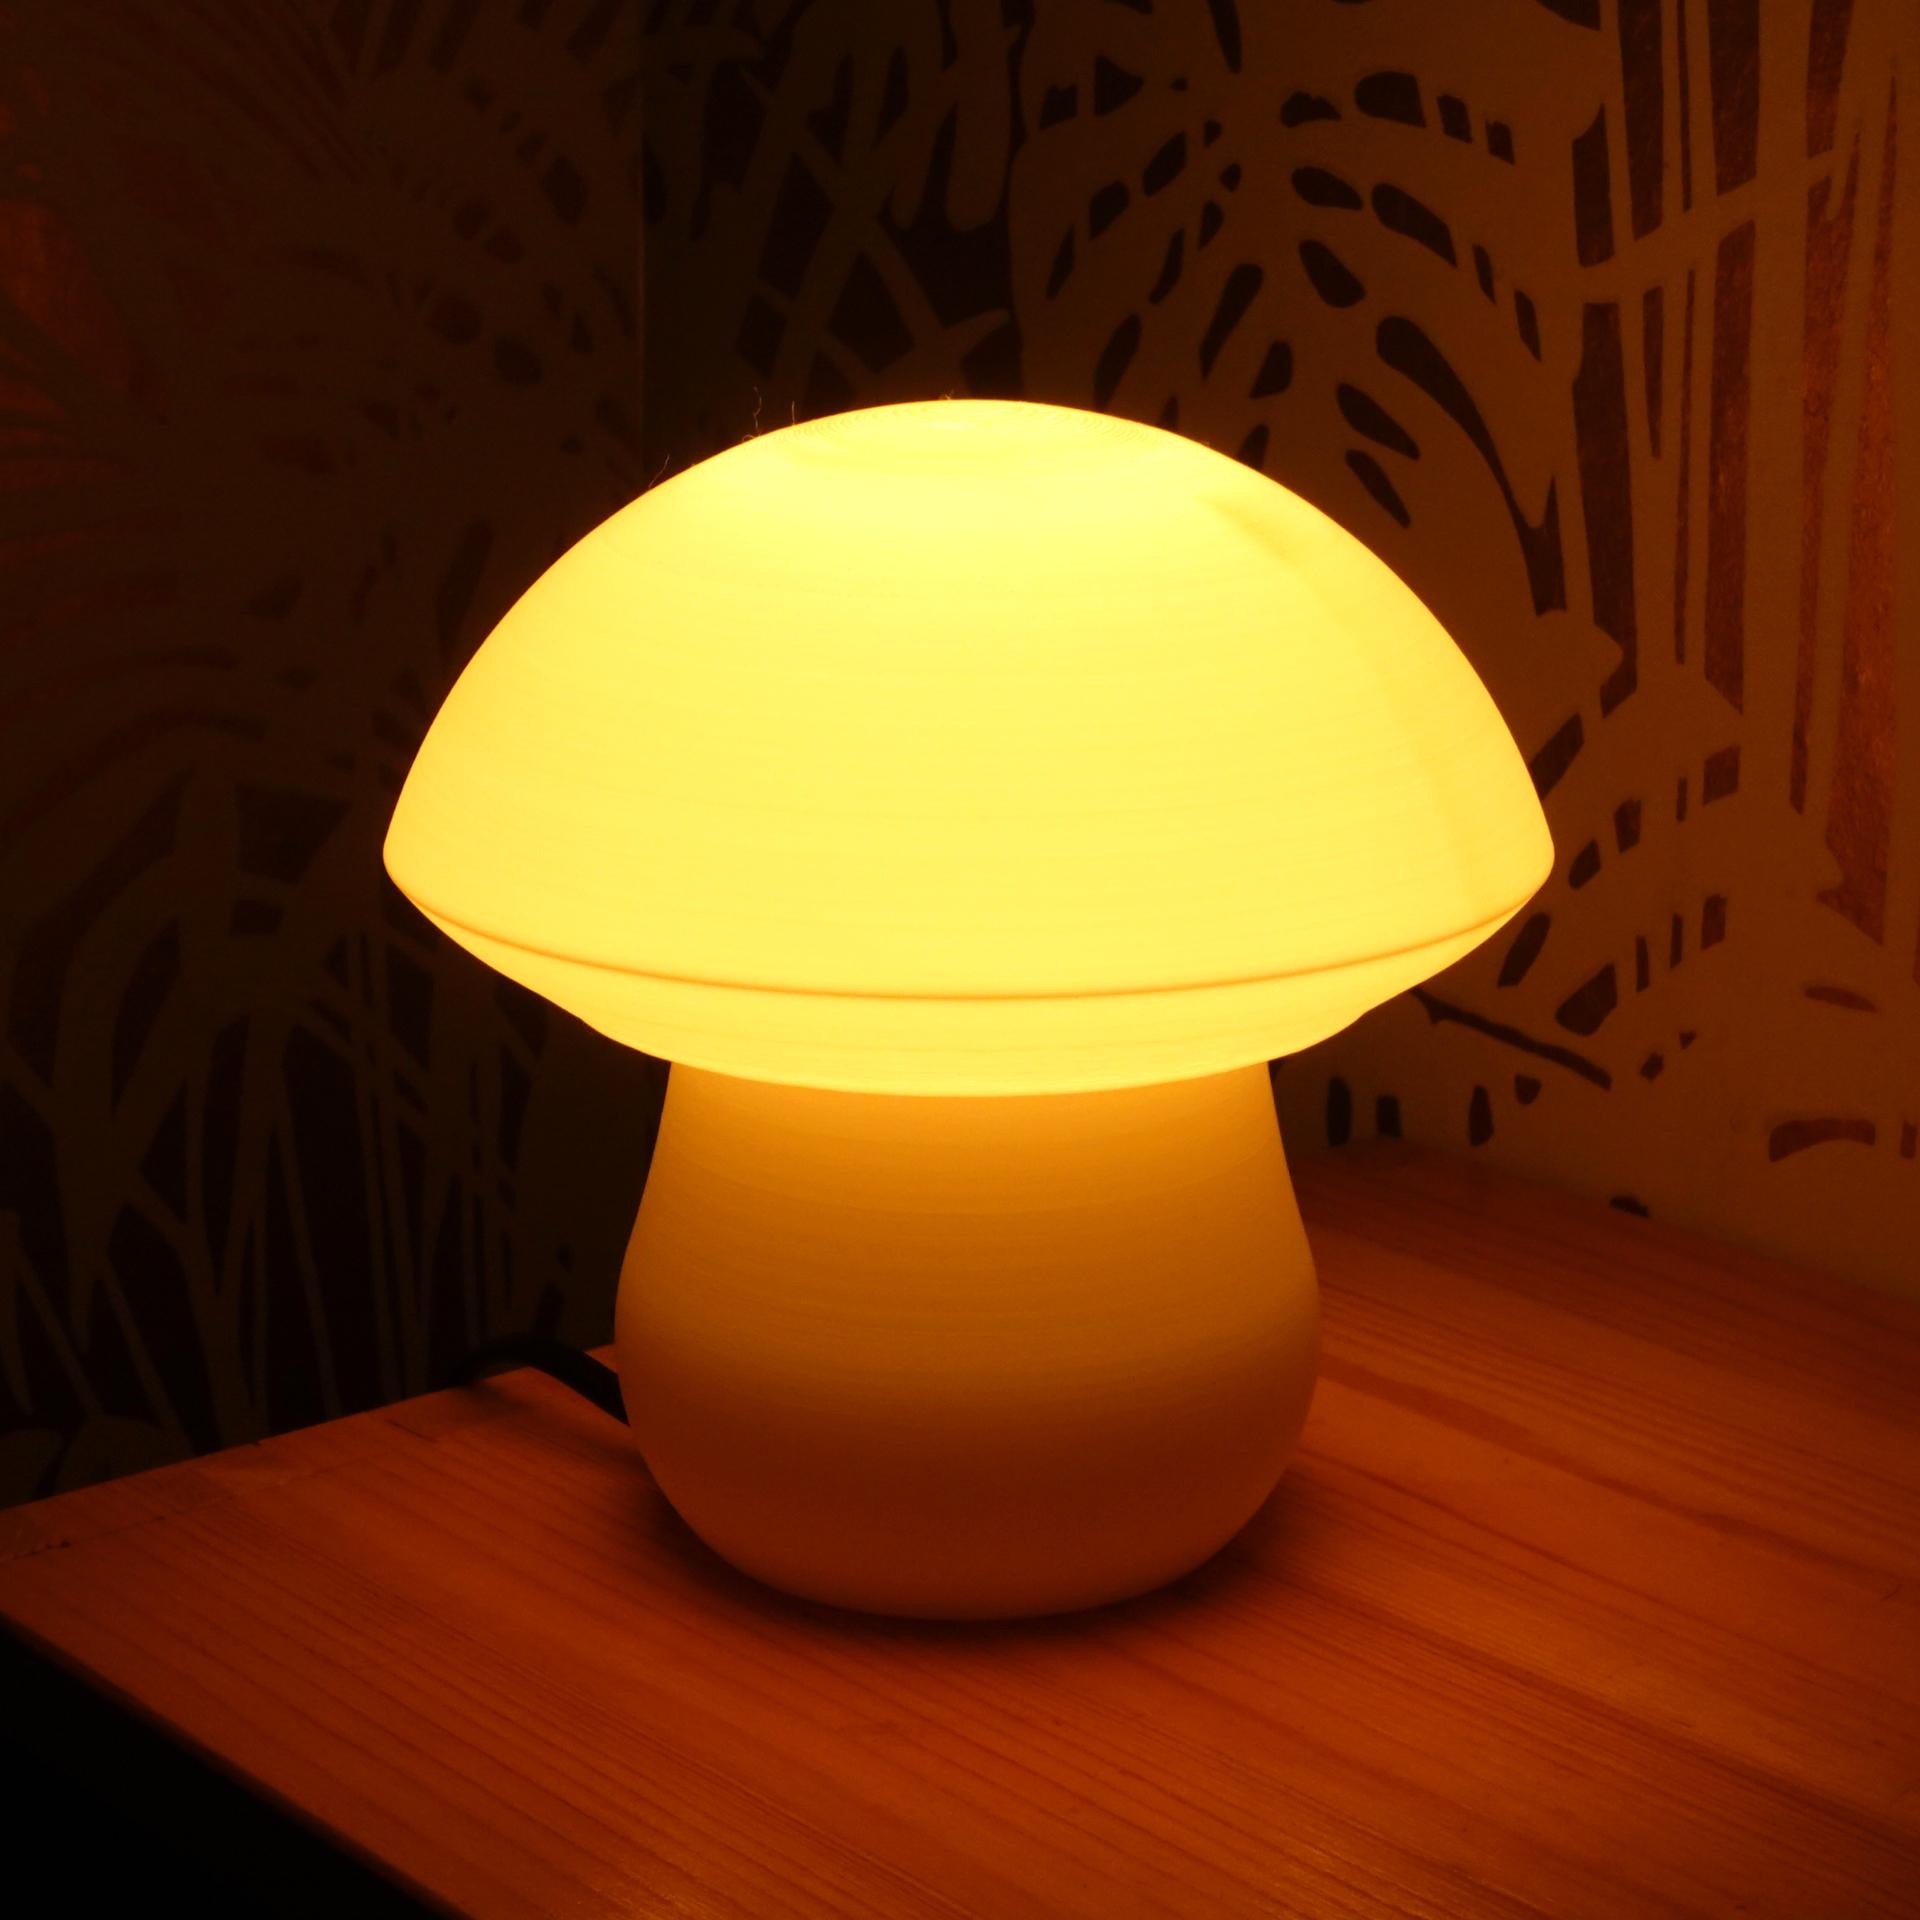
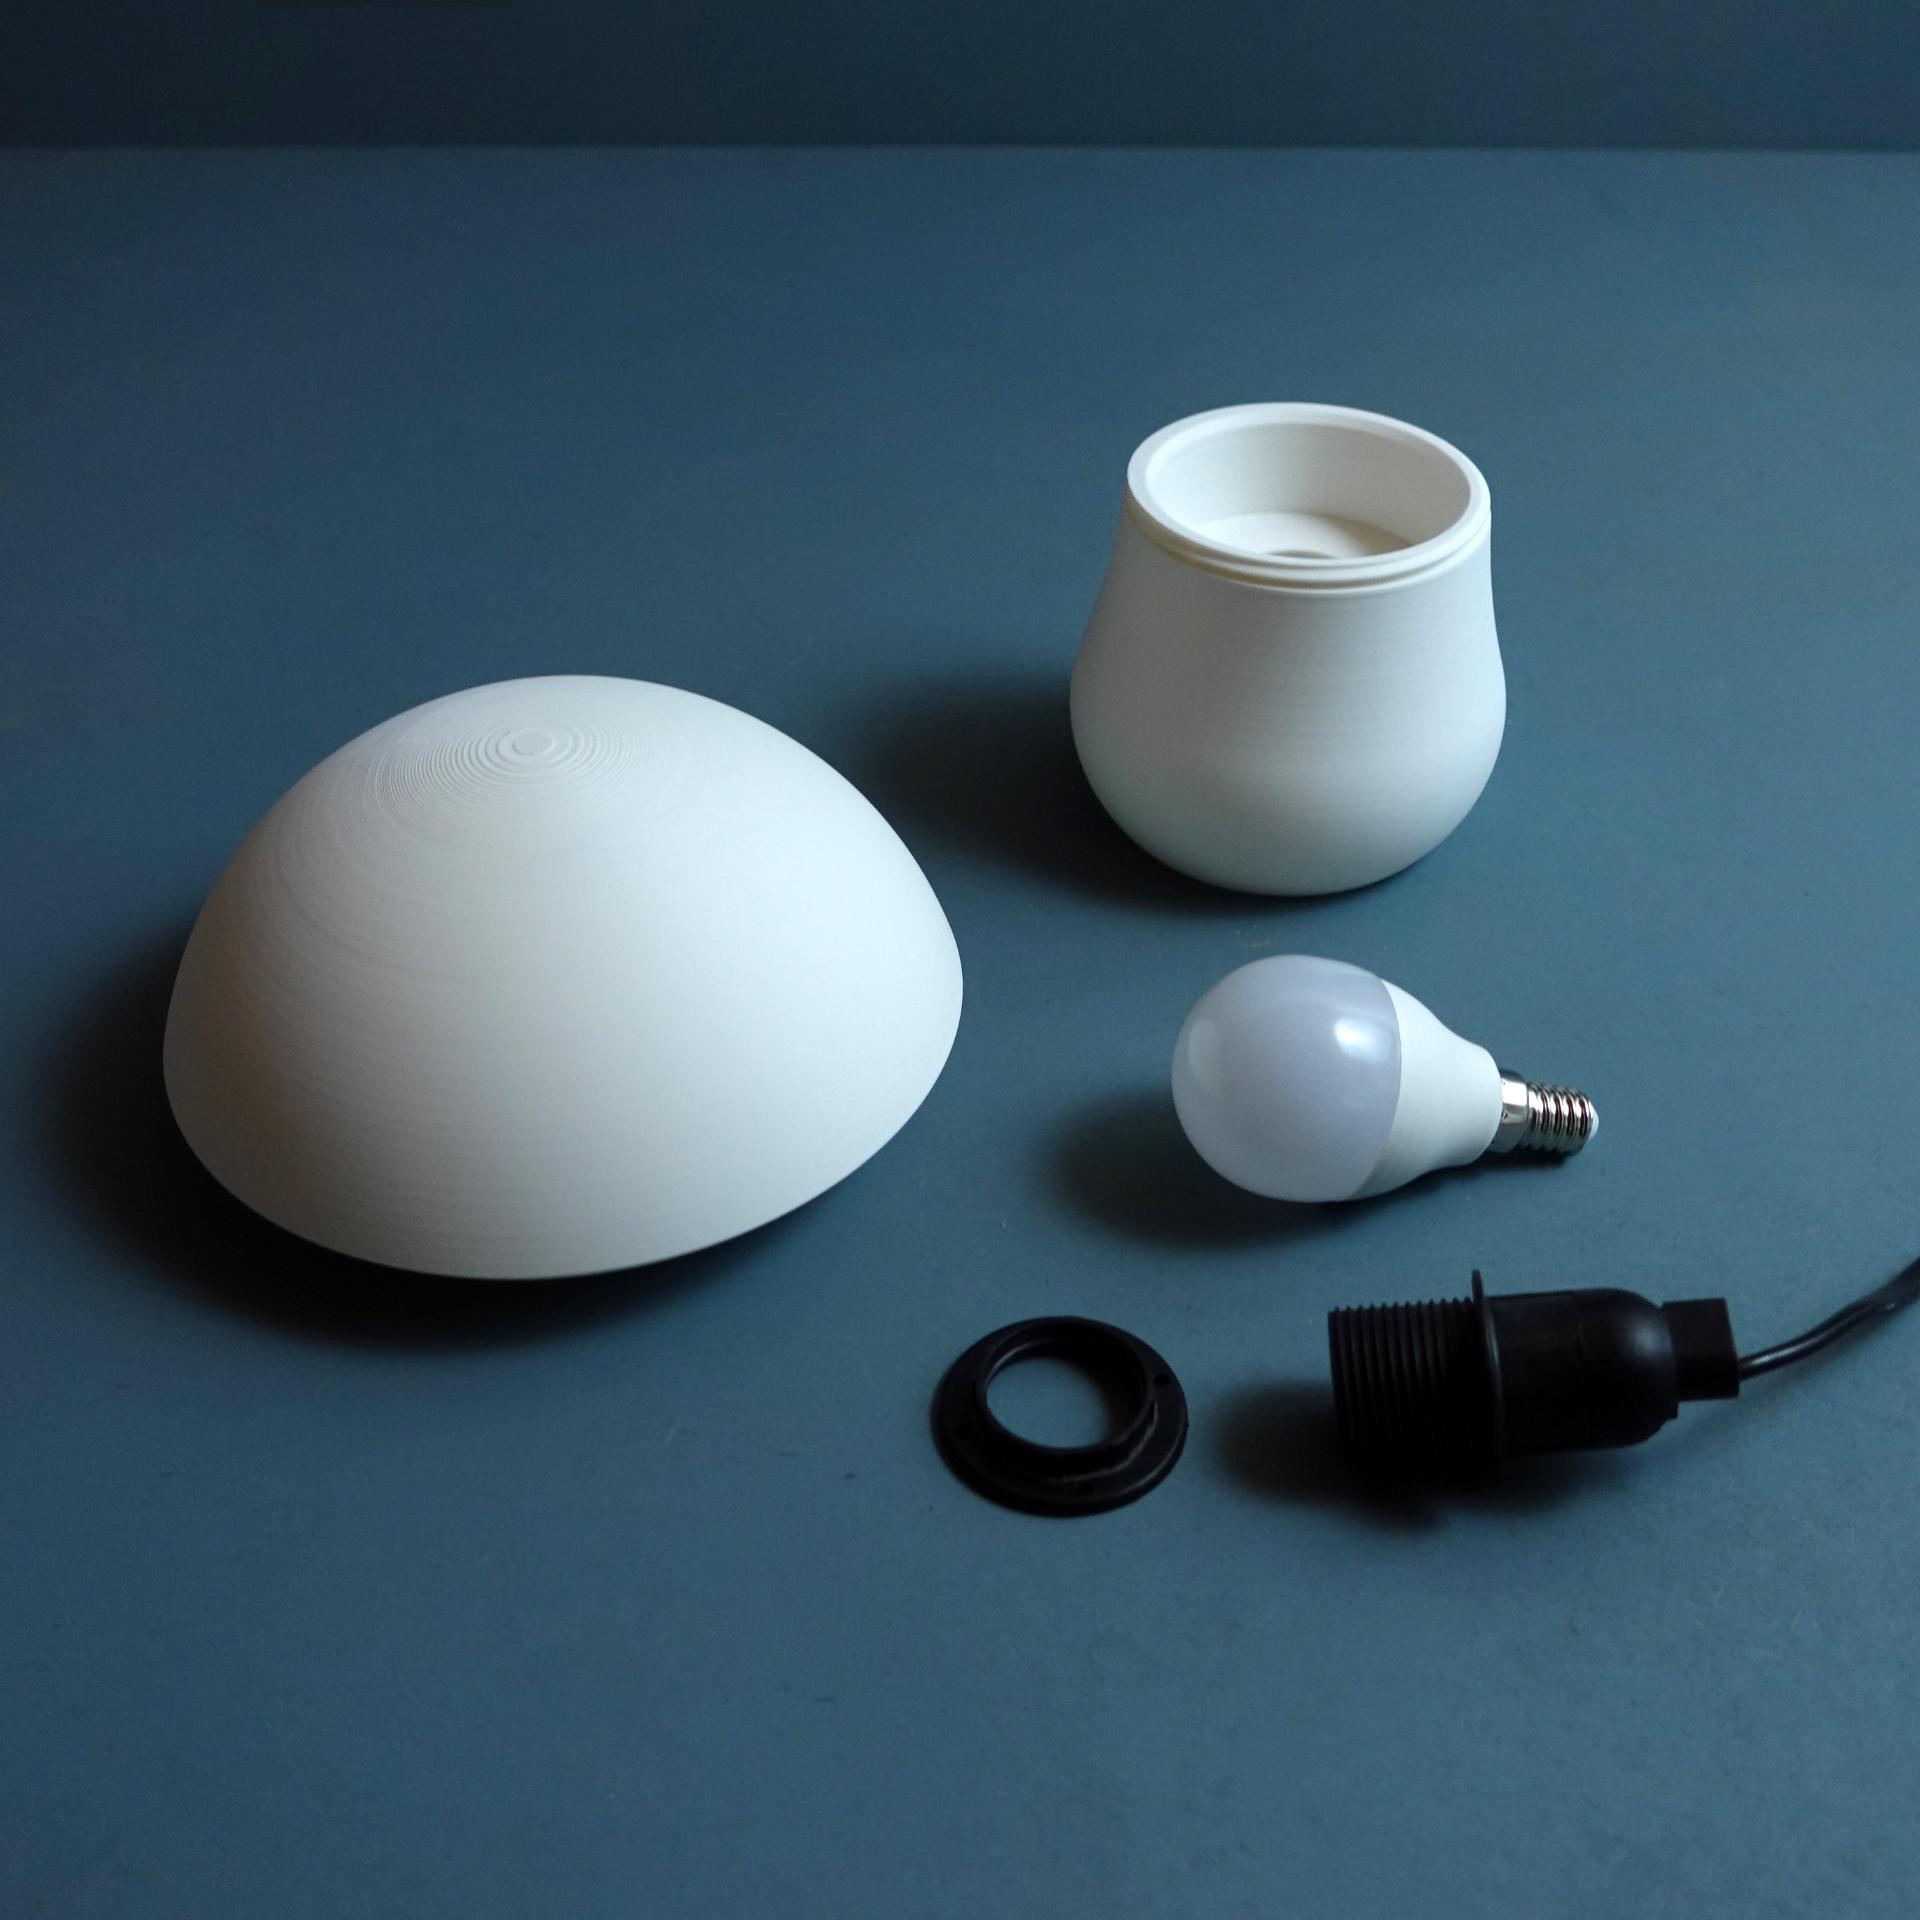
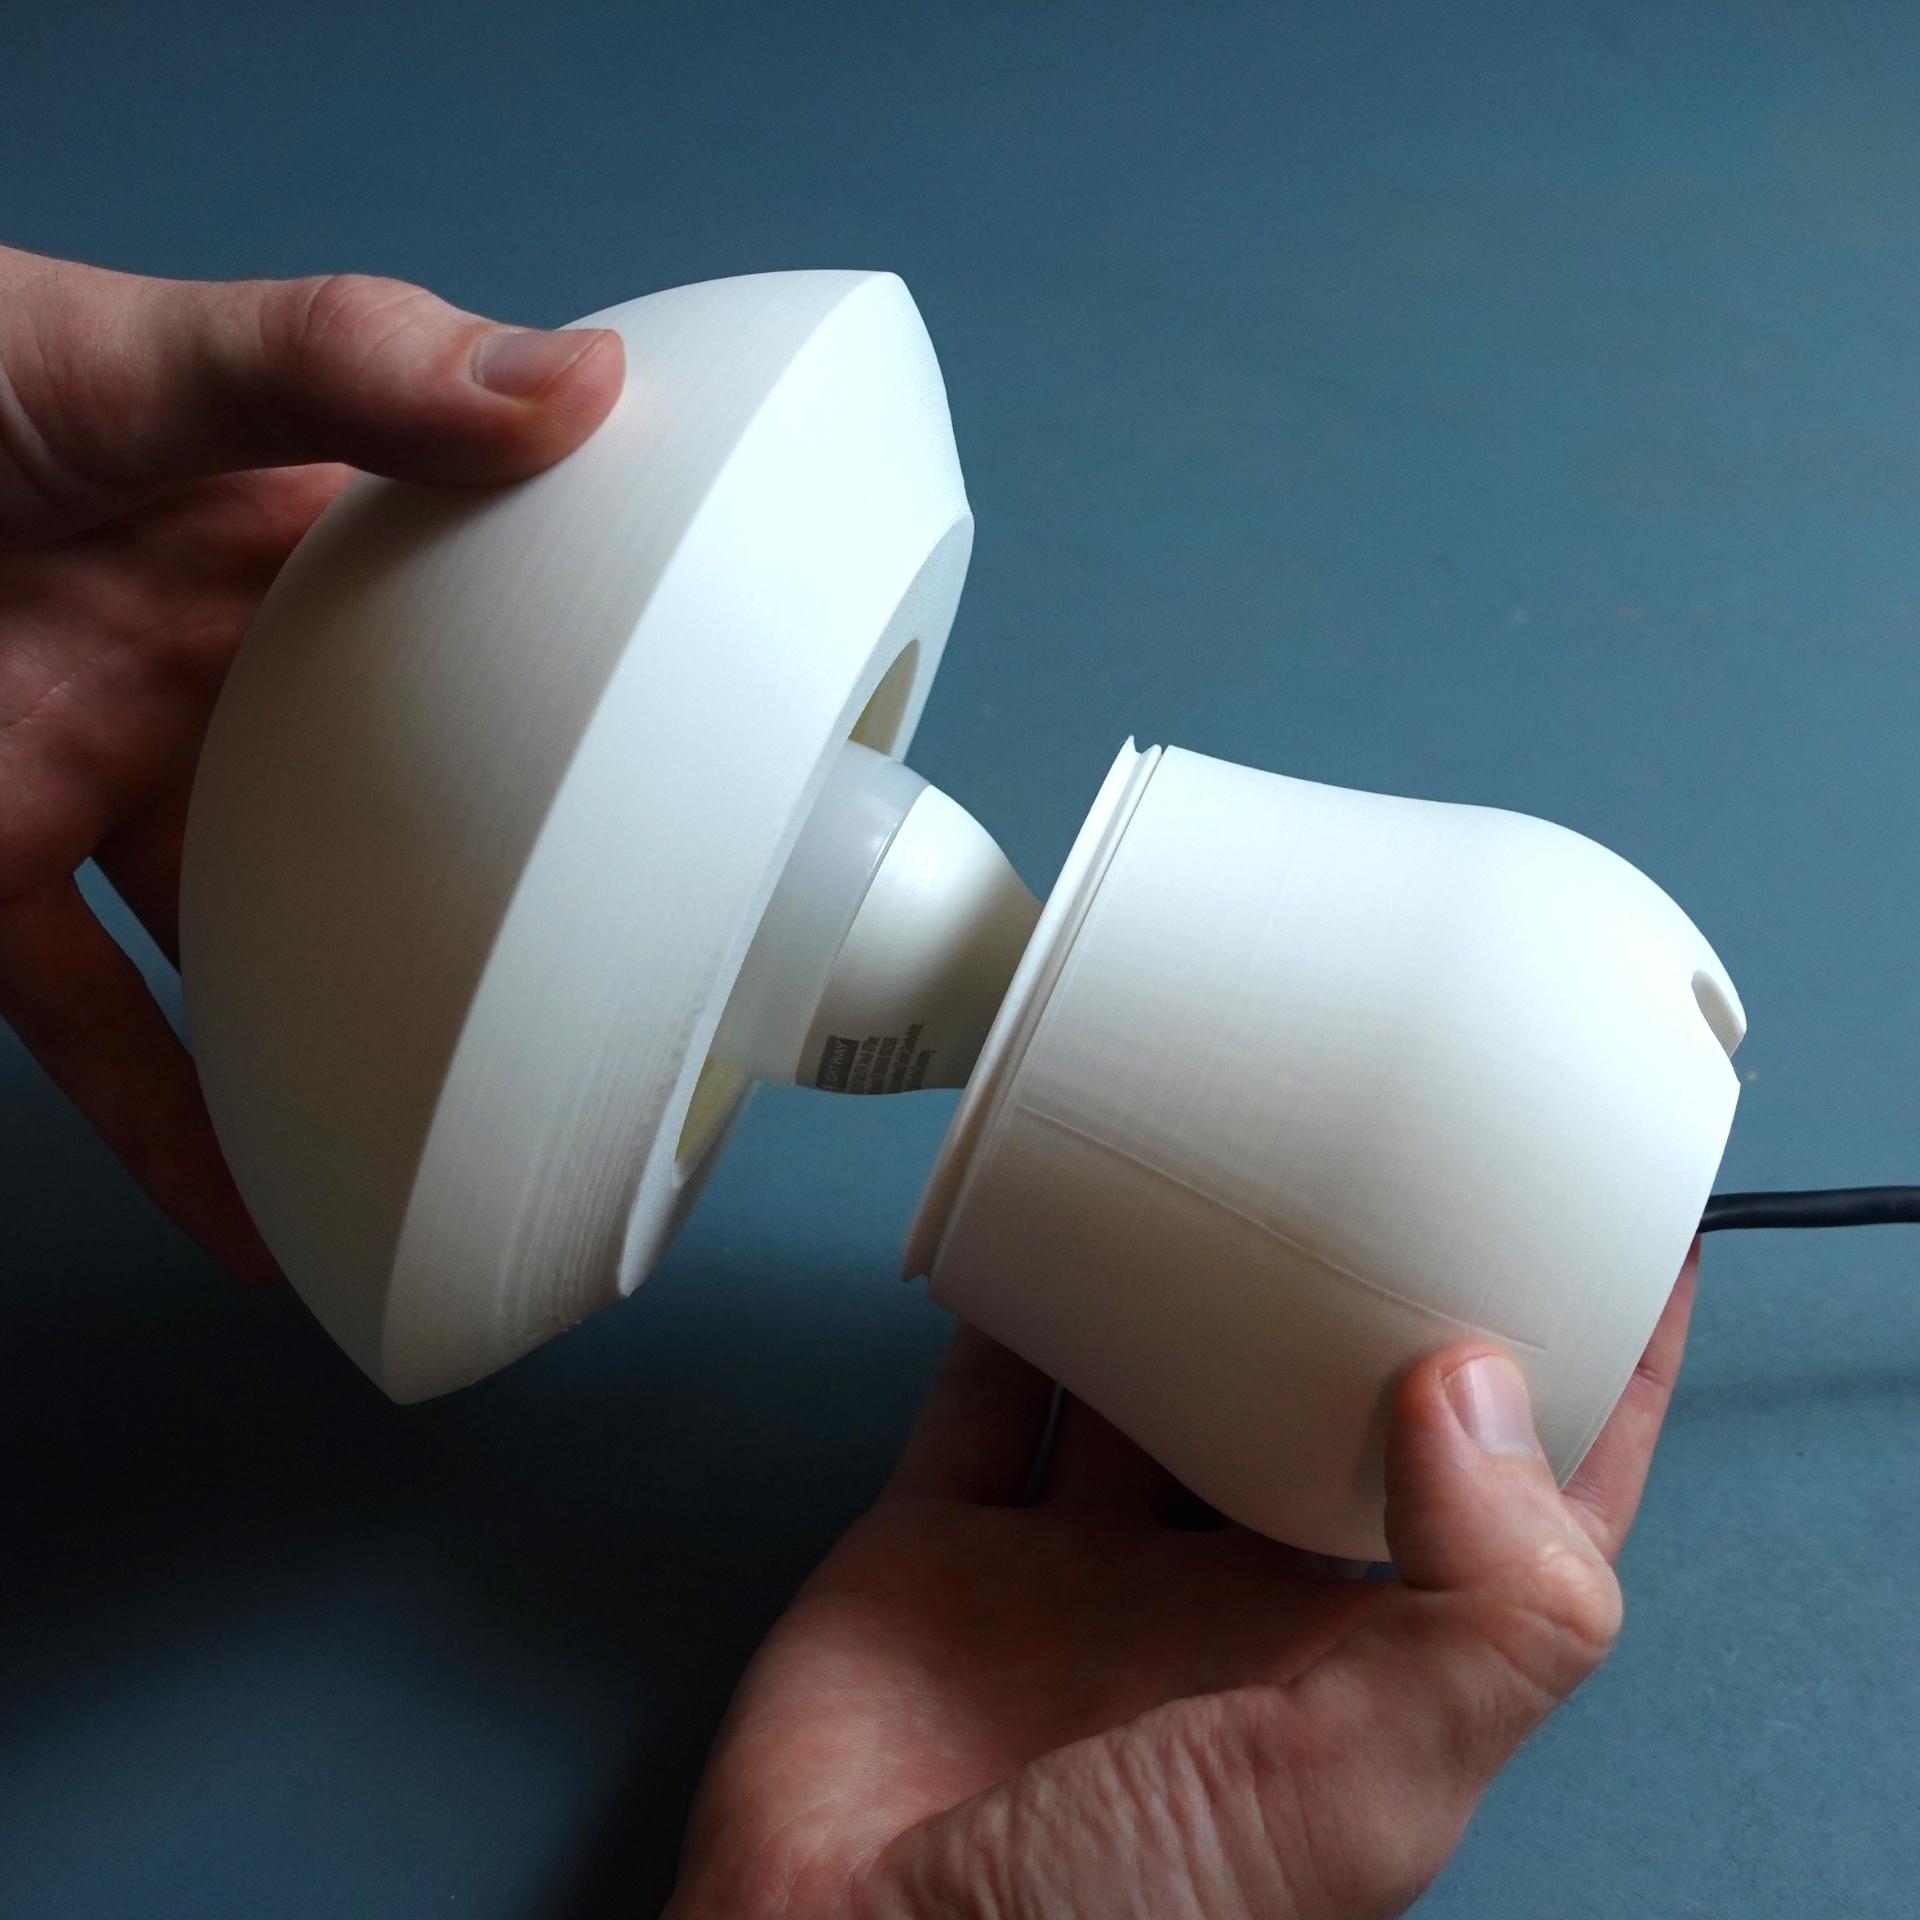
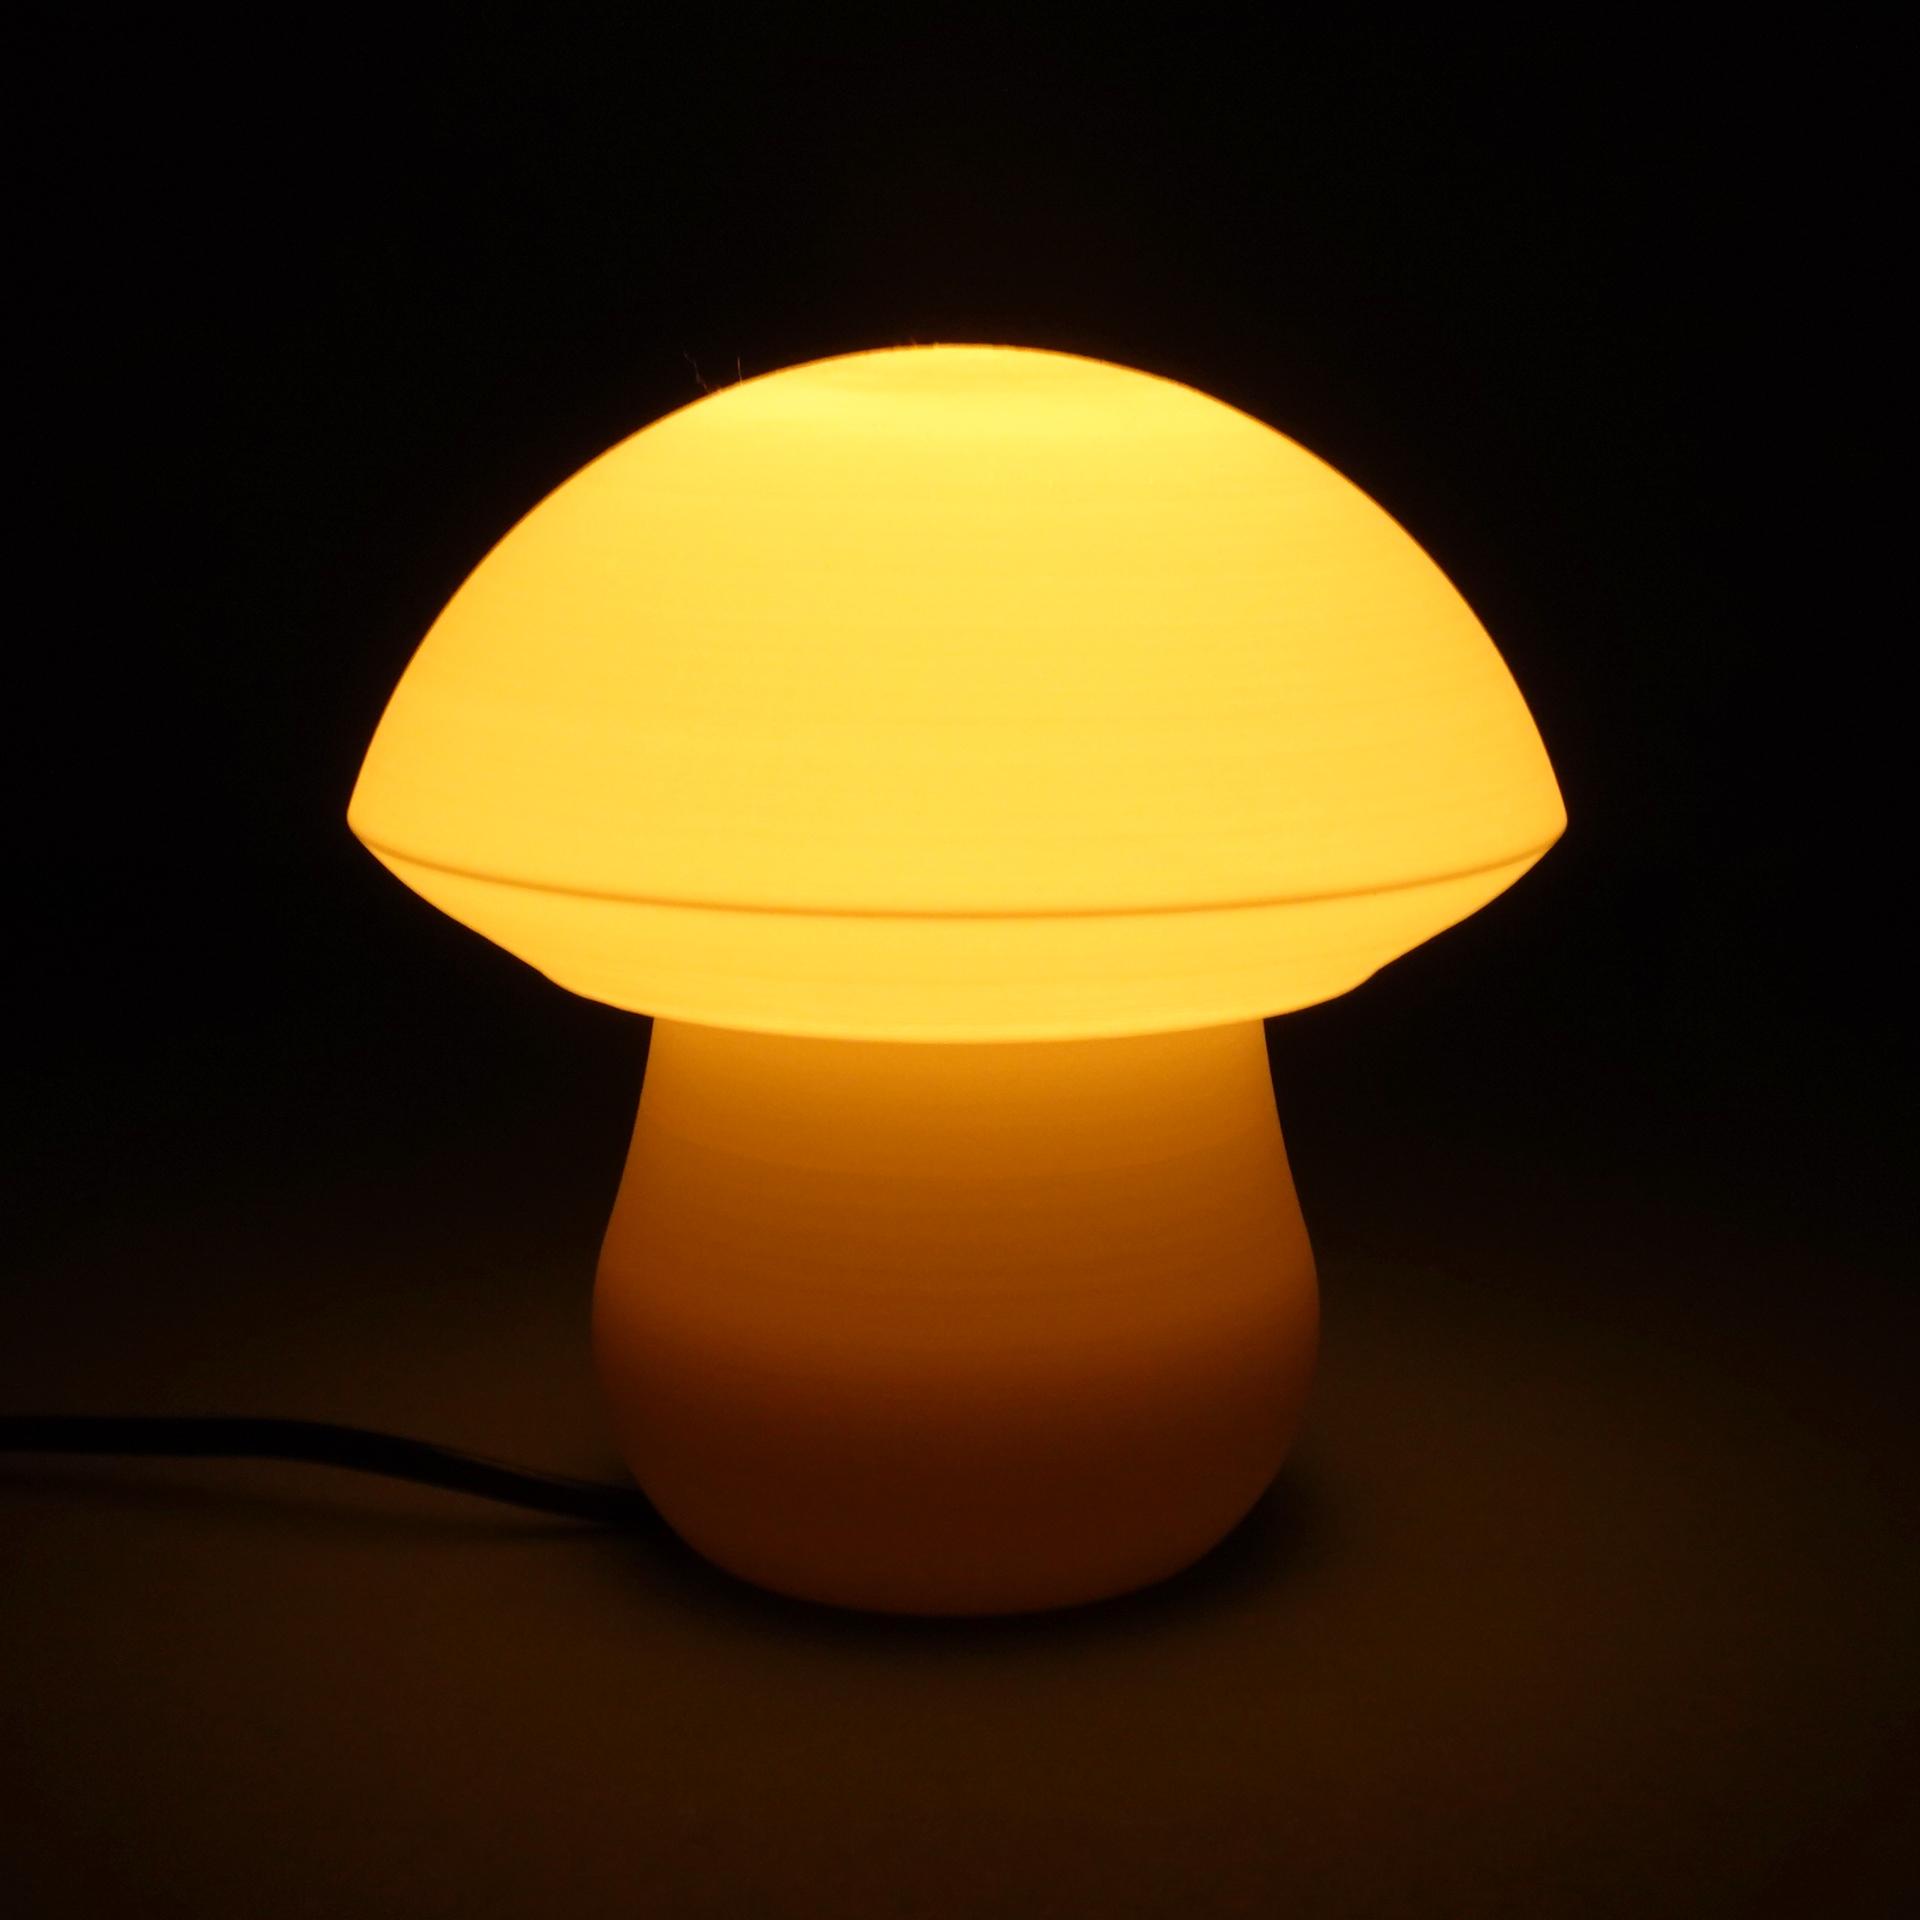
A table lamp inspired by the tasty mushroom Boletus edulis. It consists of two parts that are connected with a thread. The head comes presupported and no special settings are needed. The files have been testes with both US and EU standard sockets that are widely available.
Versions included
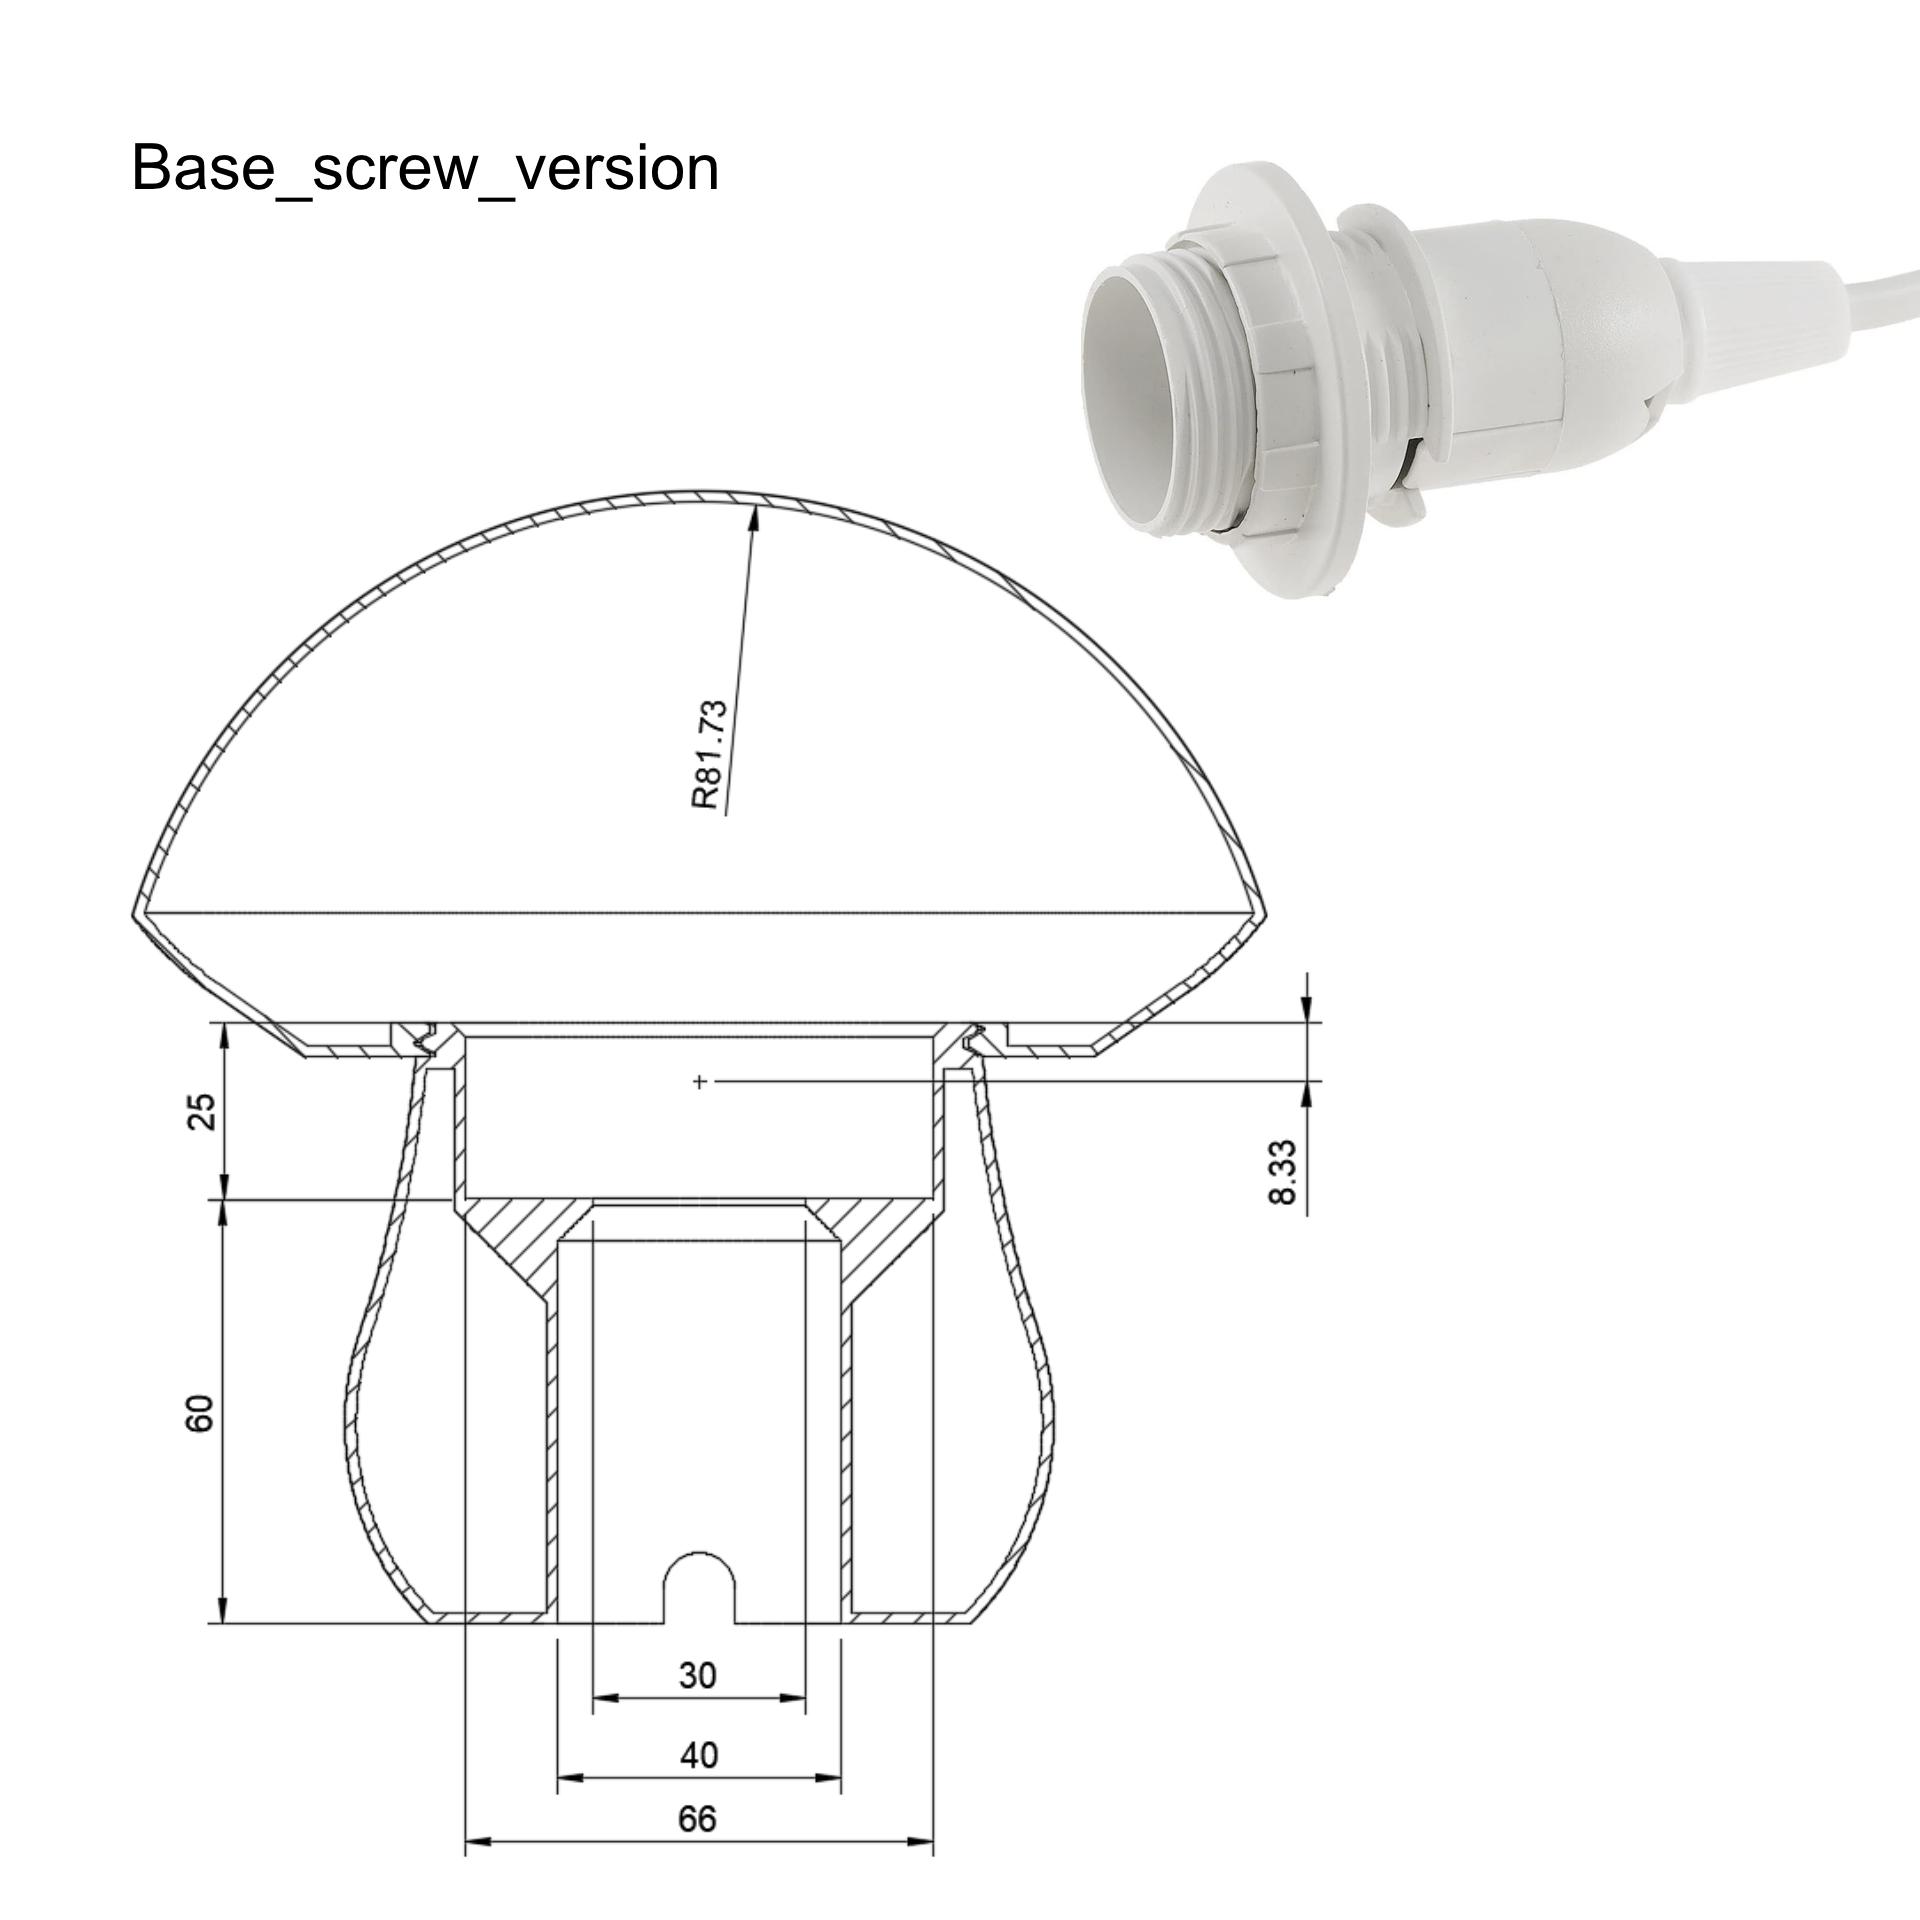
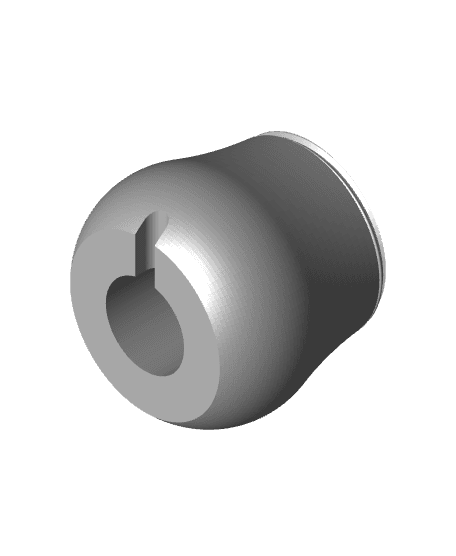
- Base_screw_socket: The Base to be used with E14 (EU) or E12 (US) sockets that come with a screw-on attachment ring (check the images for a cross section with measurements).
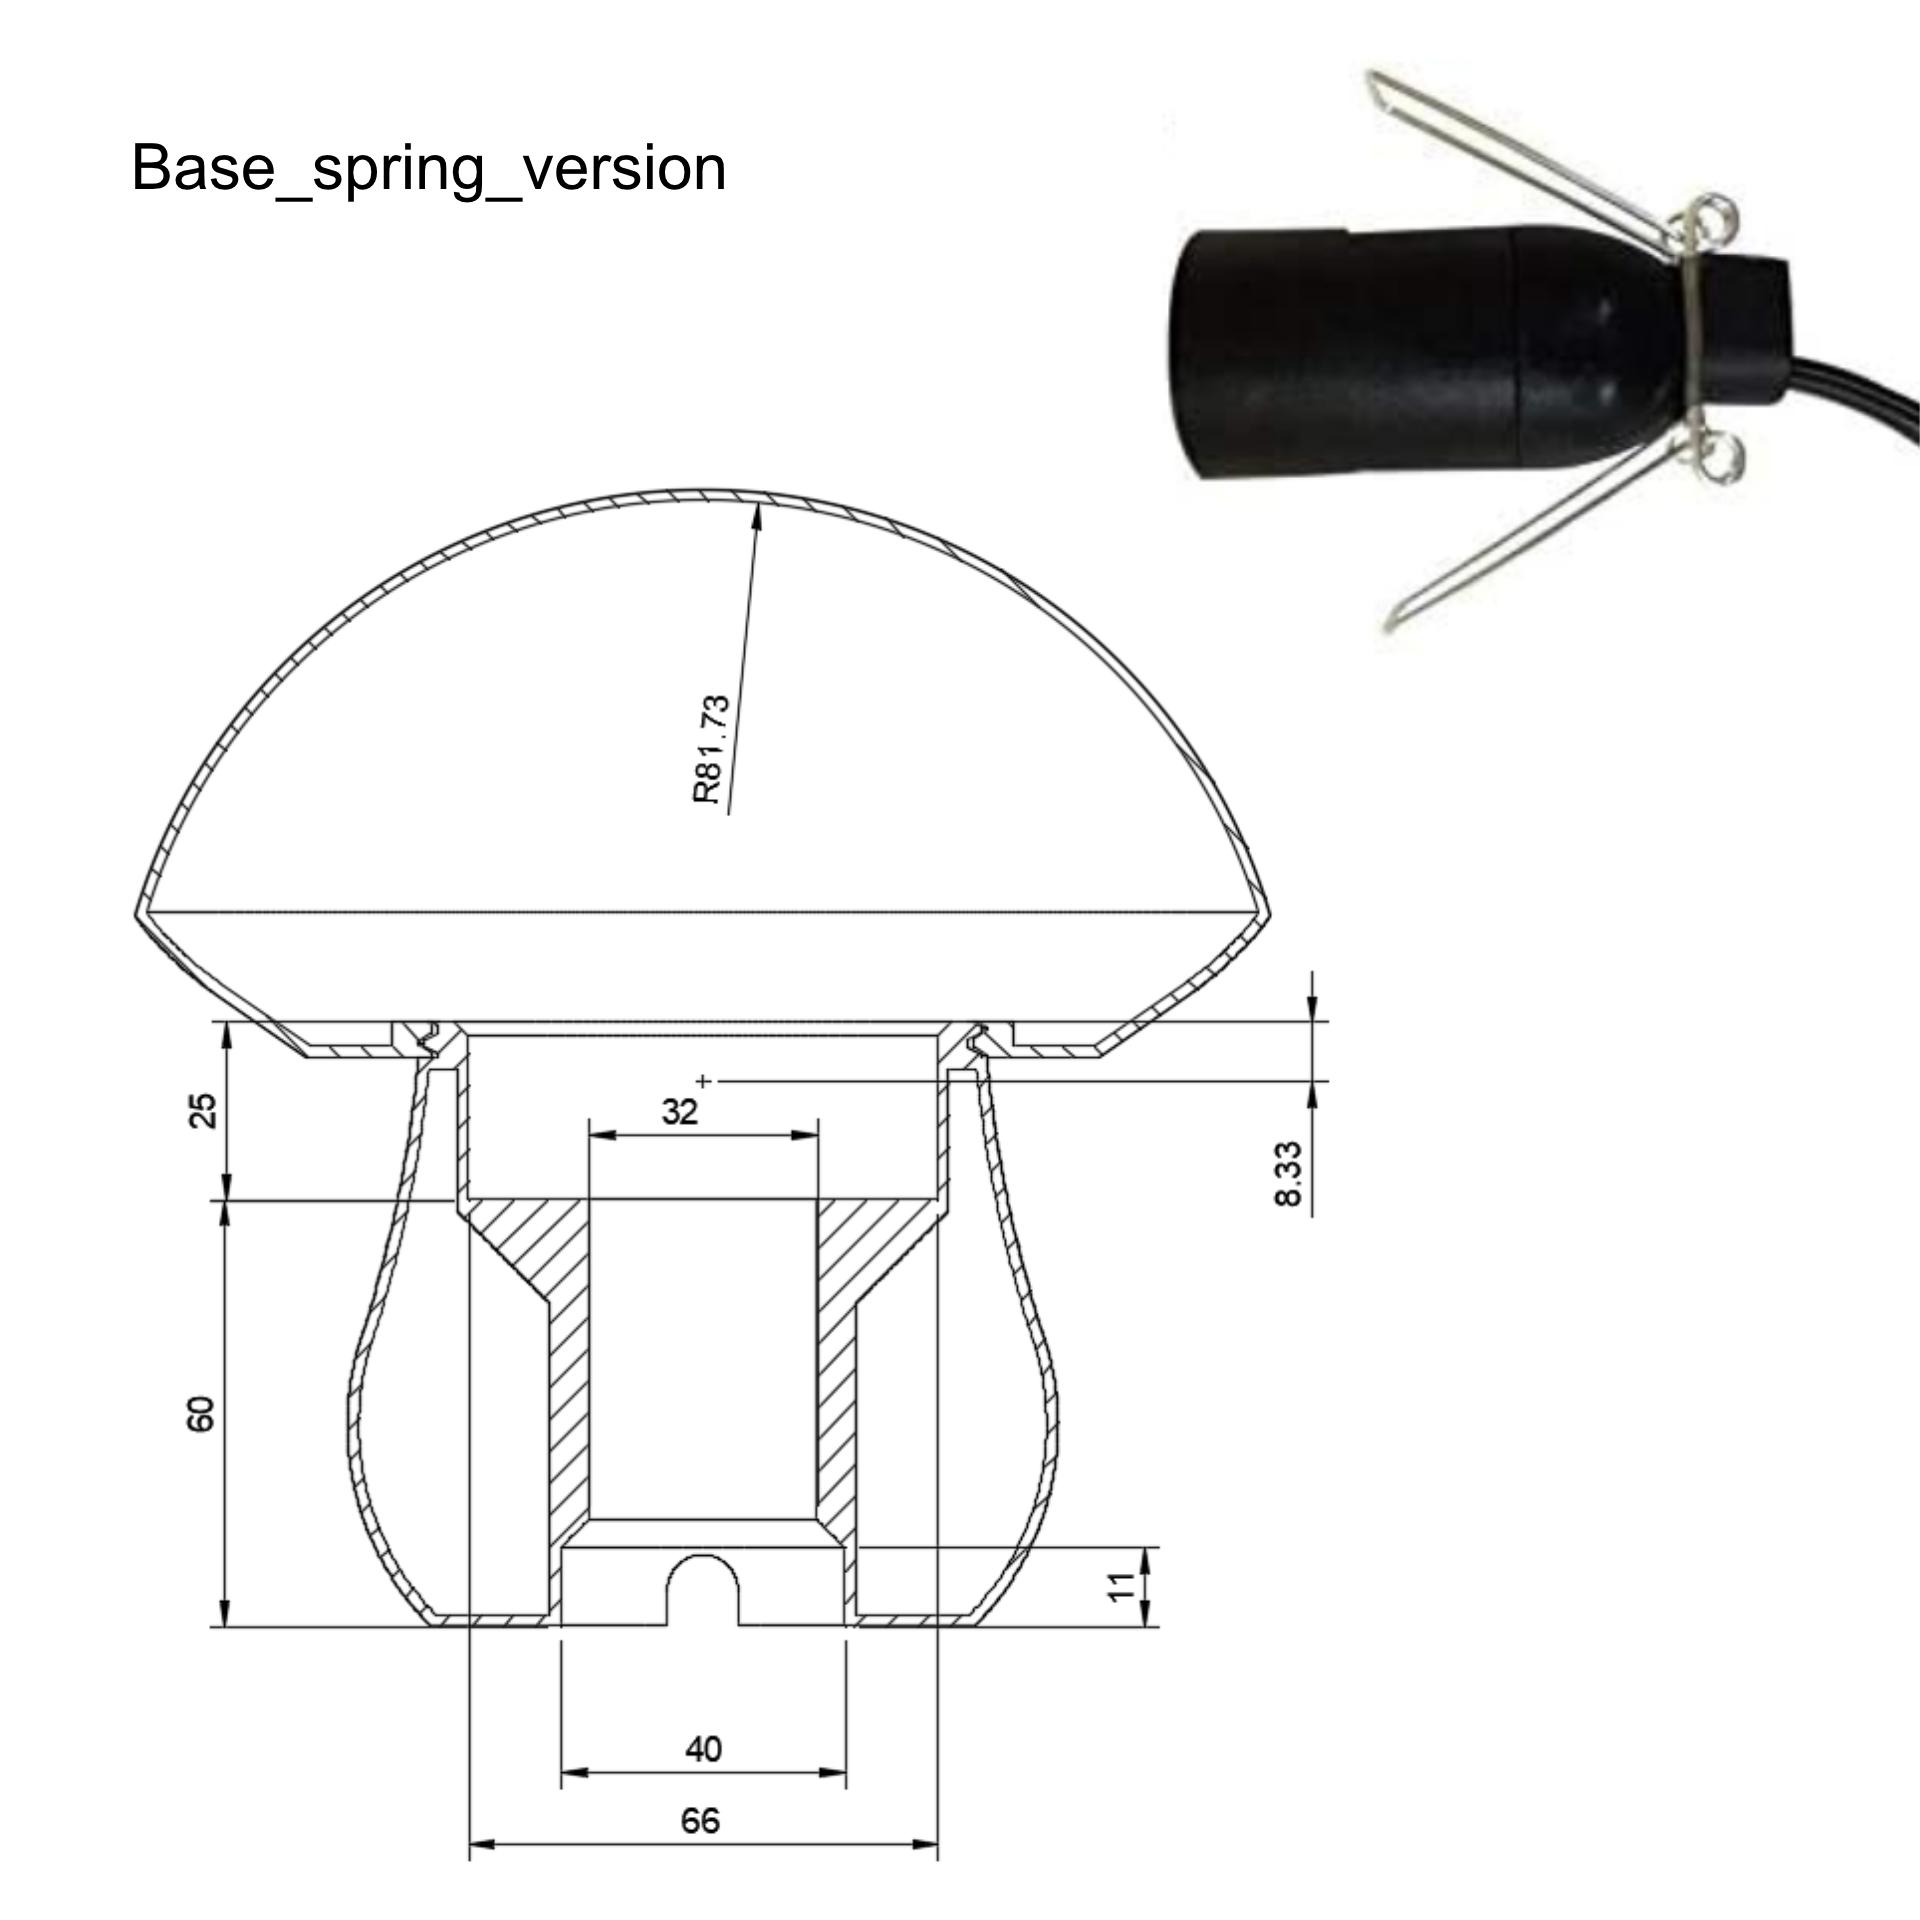
- Base_spring_socket: The base to be used with E12 (US) sockets that come with a spring load clip (check the images for a cross section with measurements)
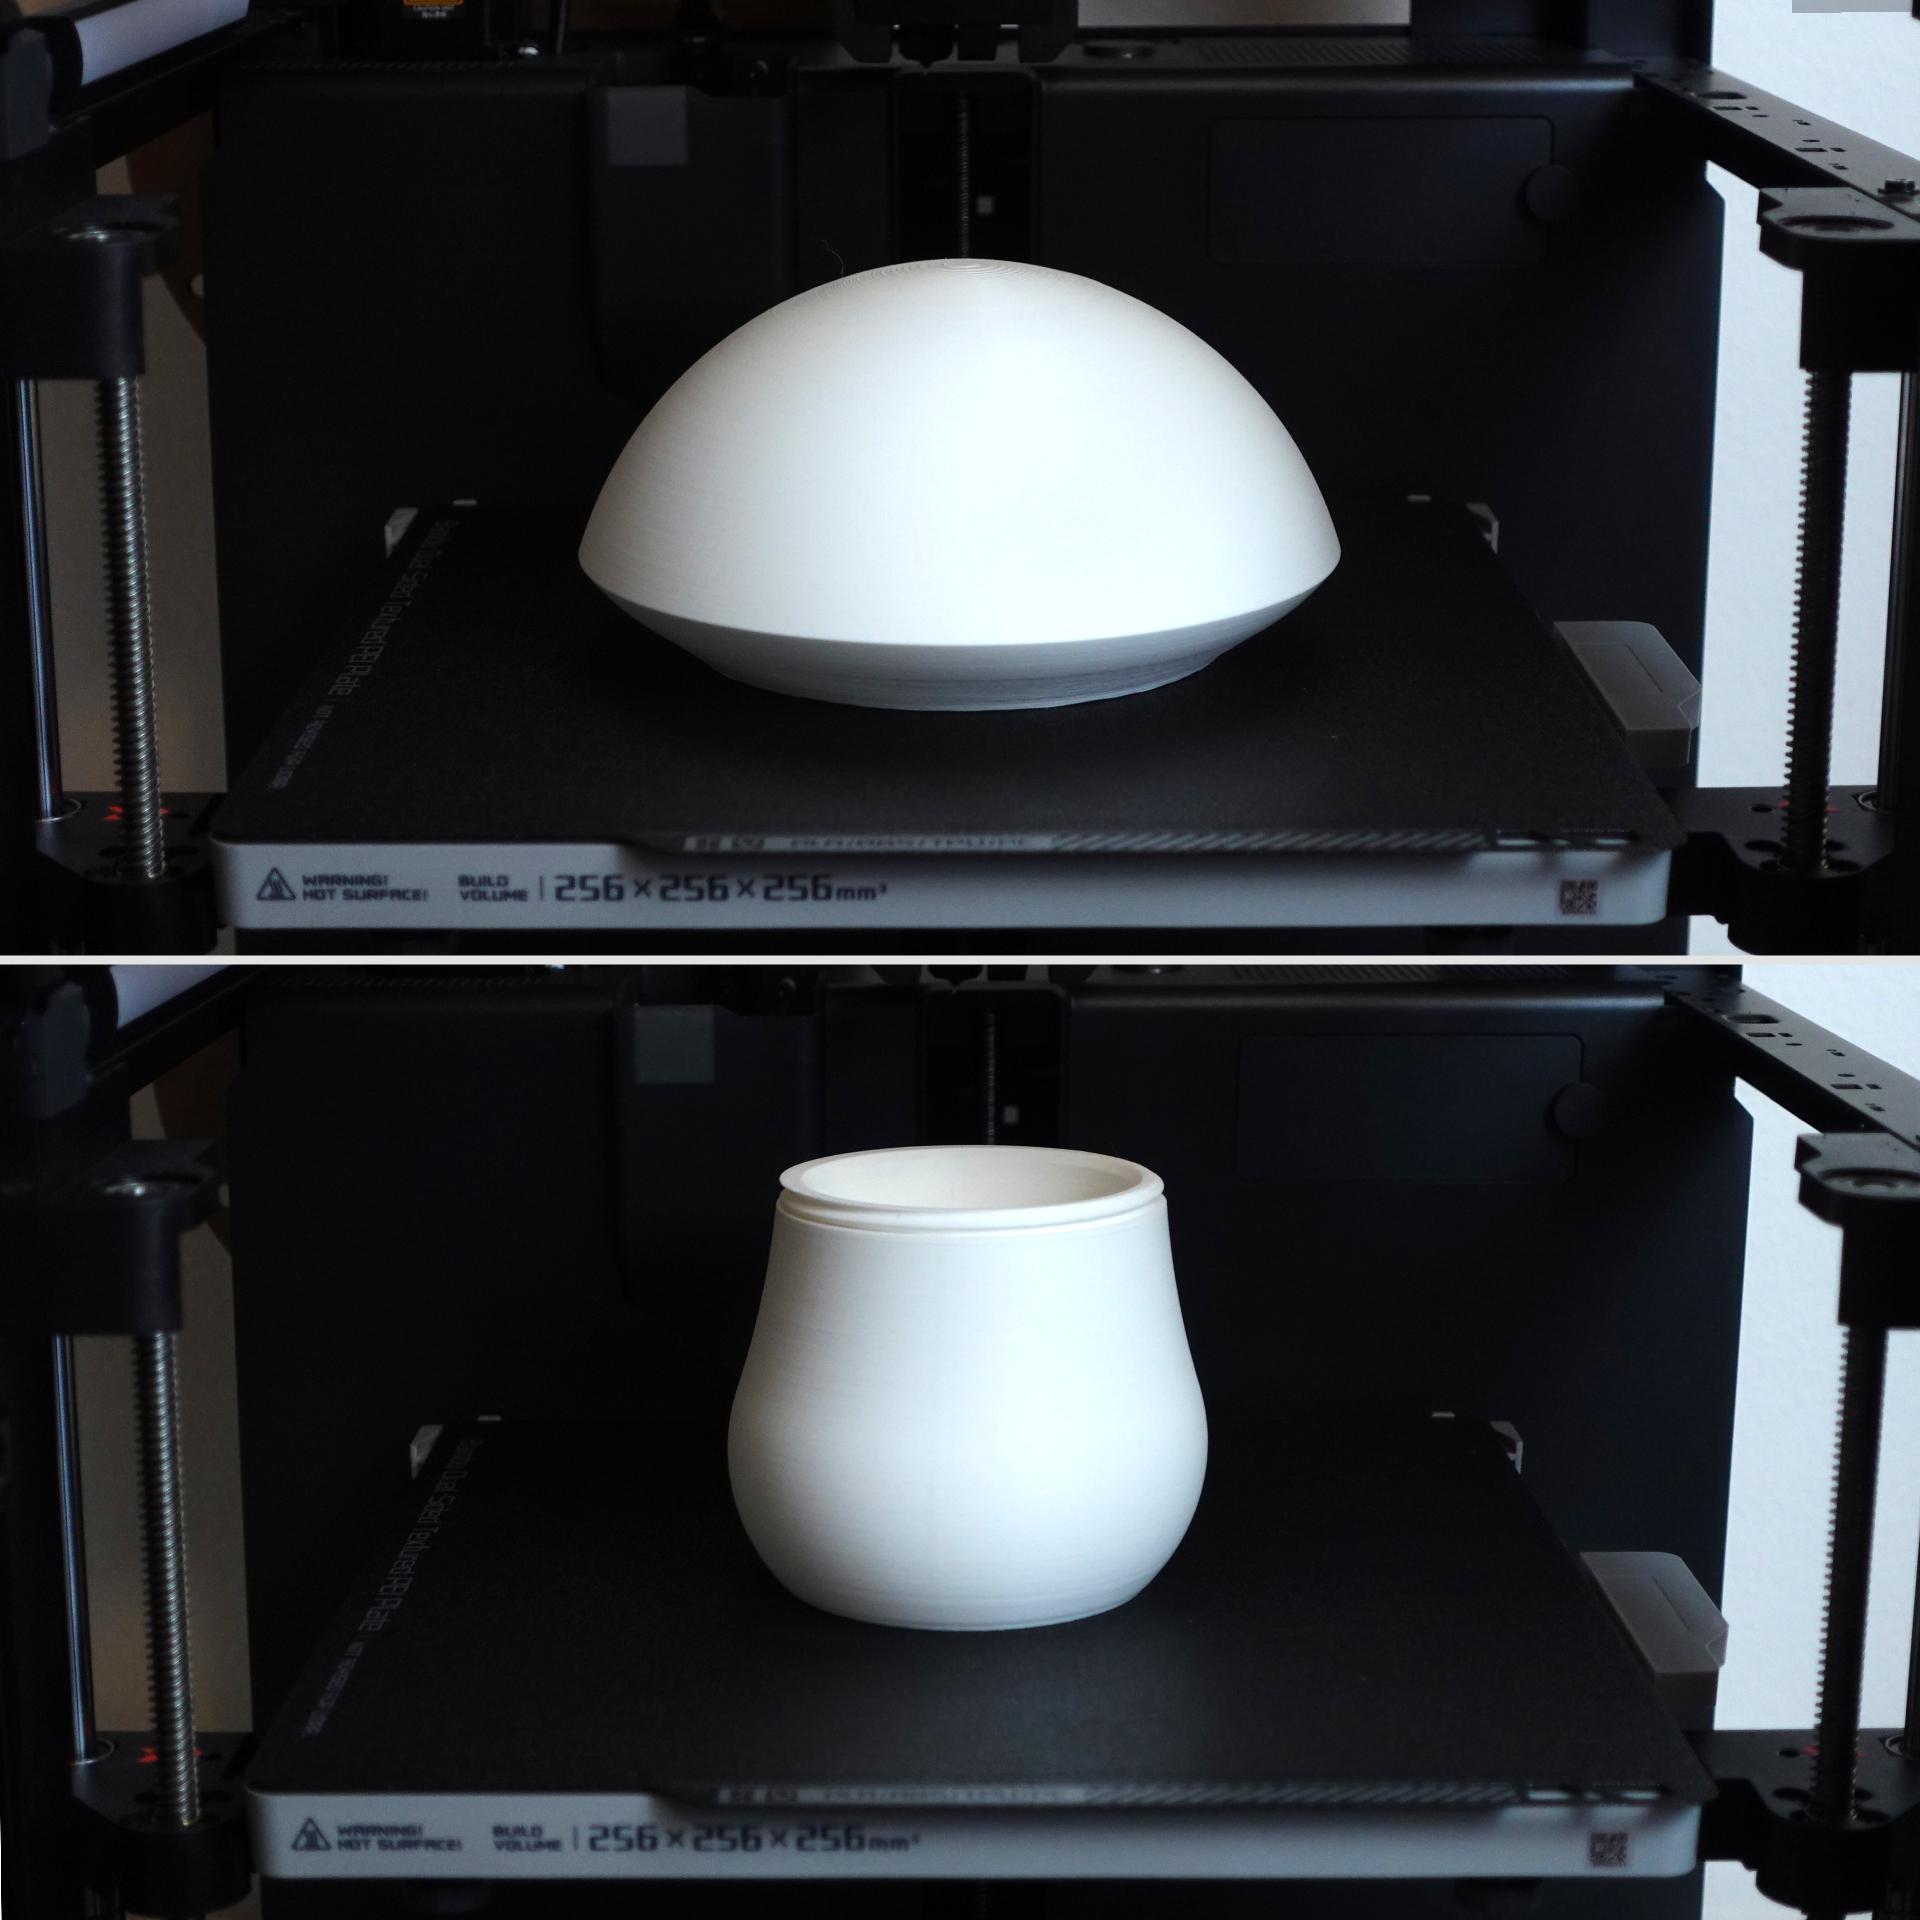
- Head_closed: The head closed.
- Head_closed_presupported: The head closed with support already in place.
- Head_open: The head with an opening.
Instructions
- Check the provided images for measurements.
- Get a lamp socket kit and a matching LED bulb. Under no circumstances use any other light than LED due to potential heat development! You can easily get the sockets with cord and switch on Amazon, Ikea or your local hardware store.
- Check the provided images to decide which version to print. Choose the base according to your socket and the head according to your preference on weather you want the top to be open or closed. Refer to the print settings below before you slice the parts. If you choose the closed version I recommend my presupported files, if you want to create the support structure yourself use the one without.
- Print the two parts
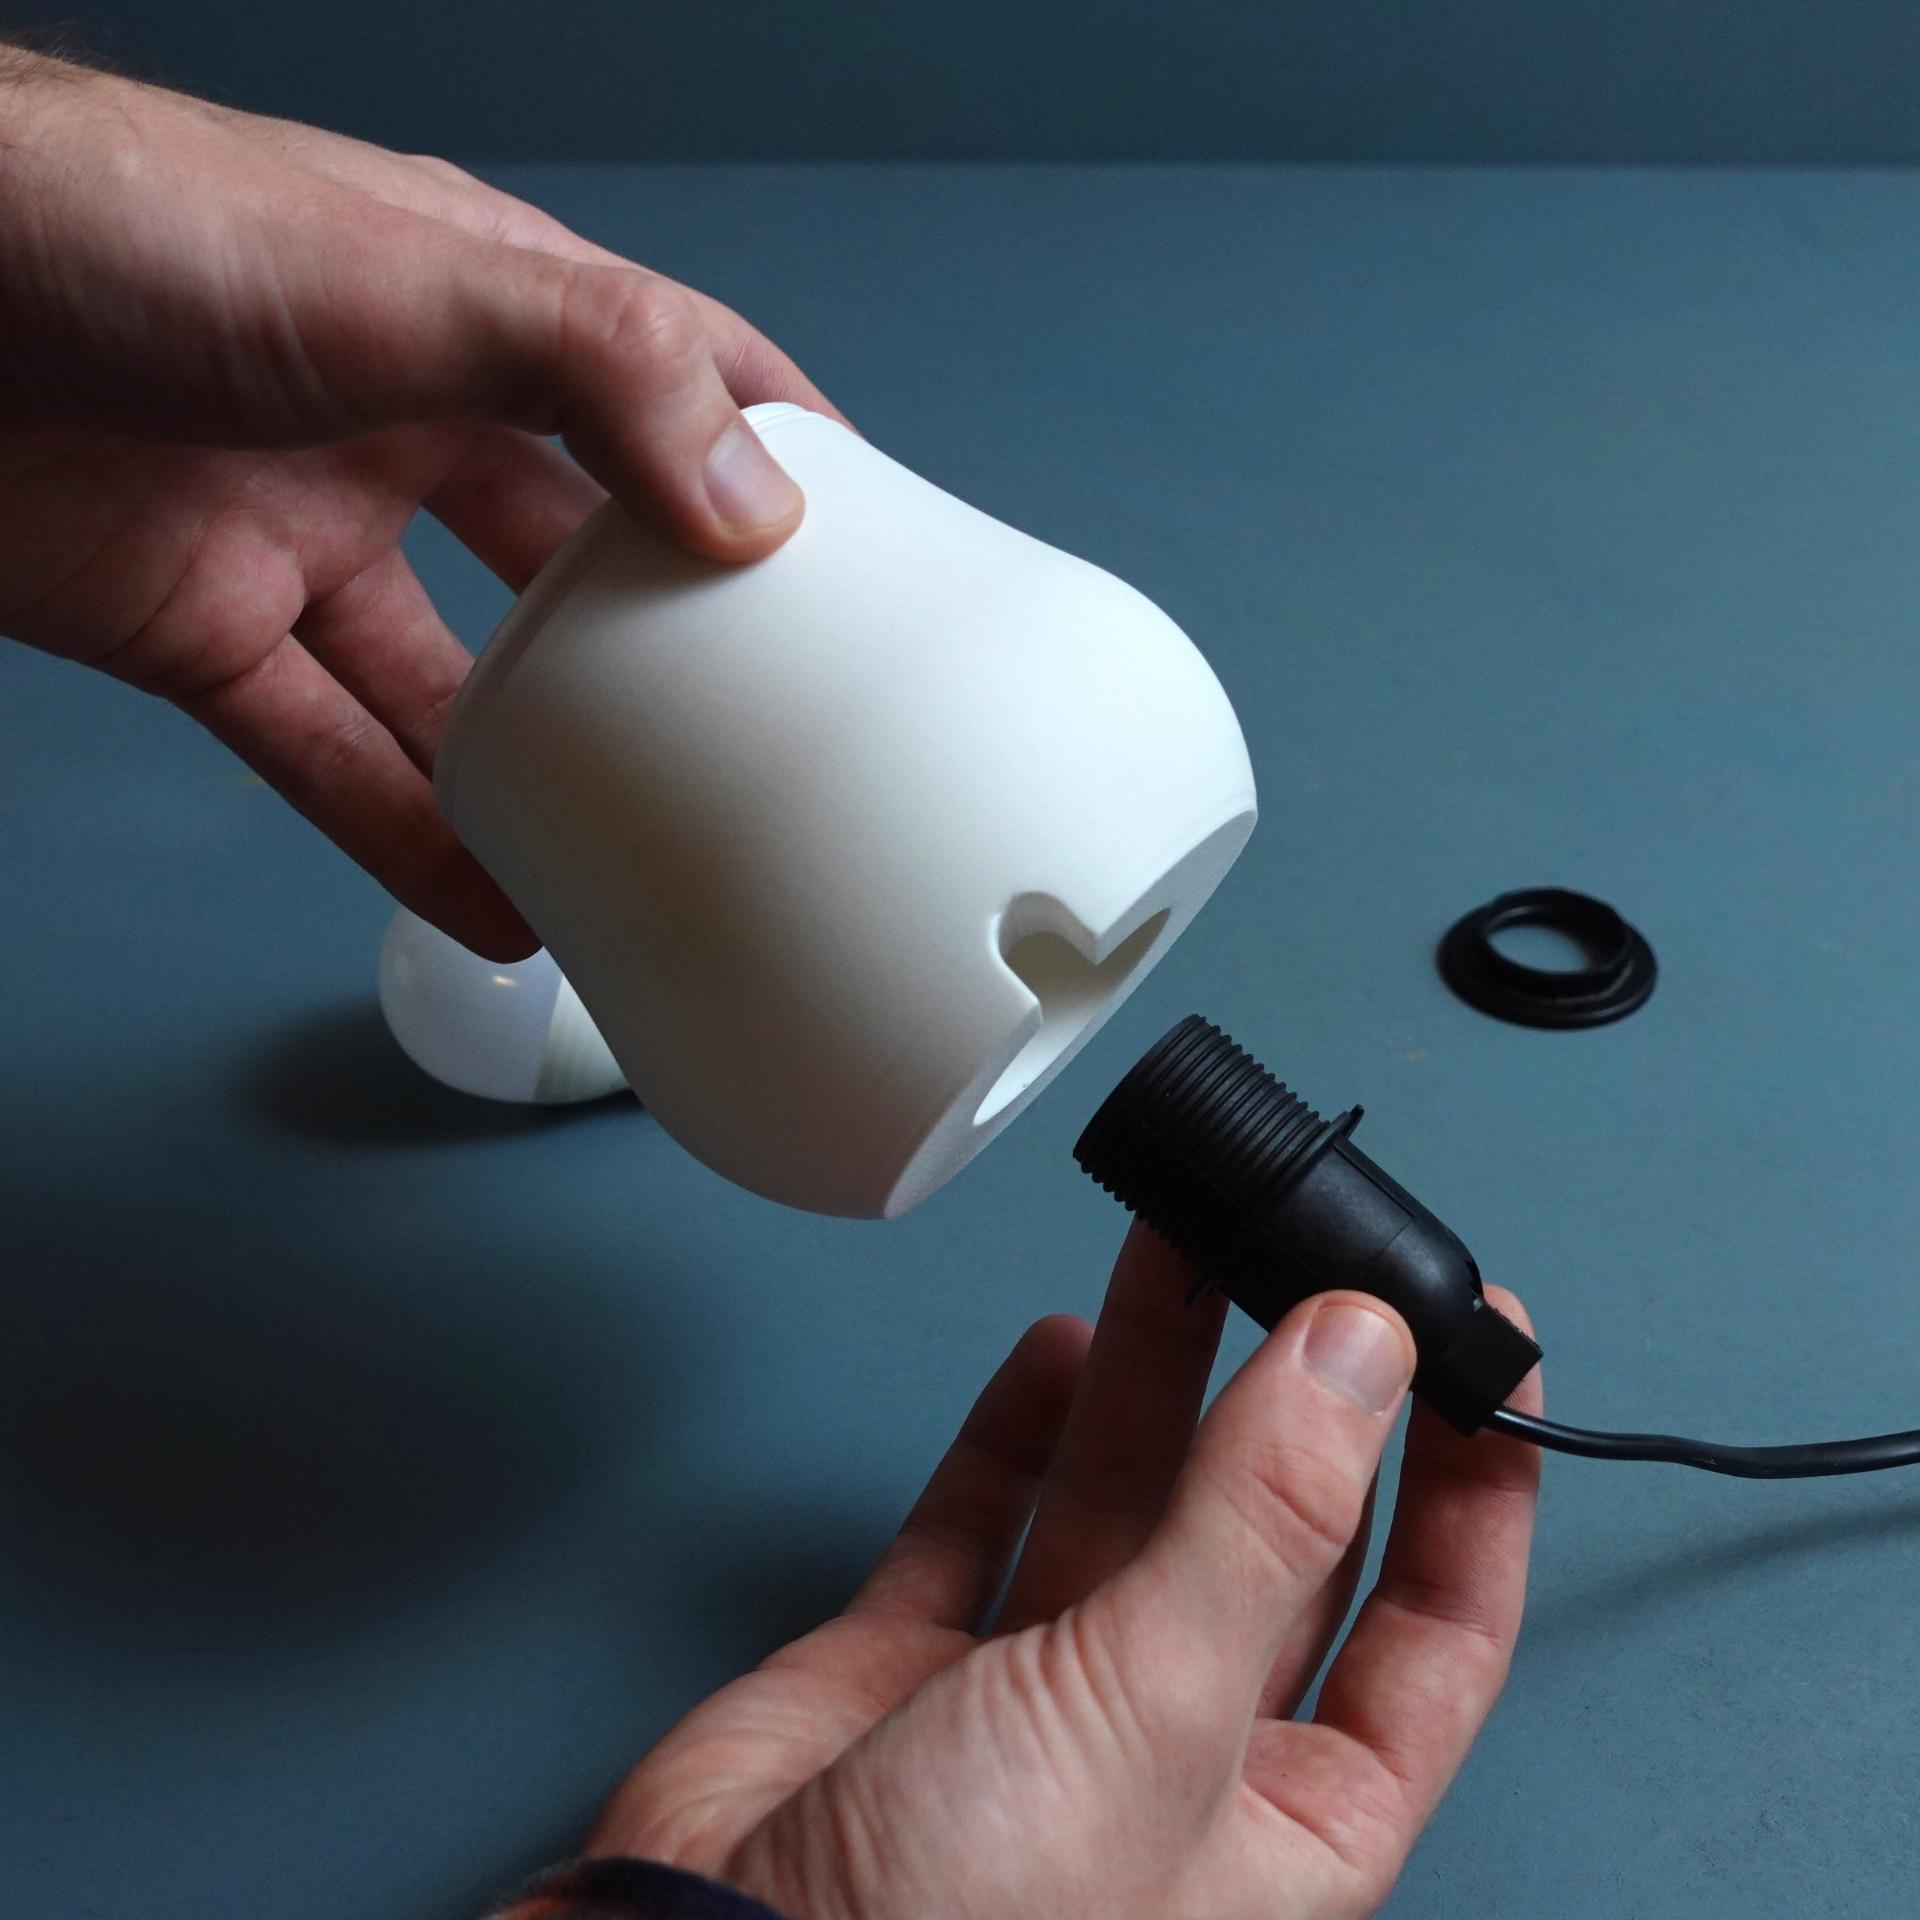
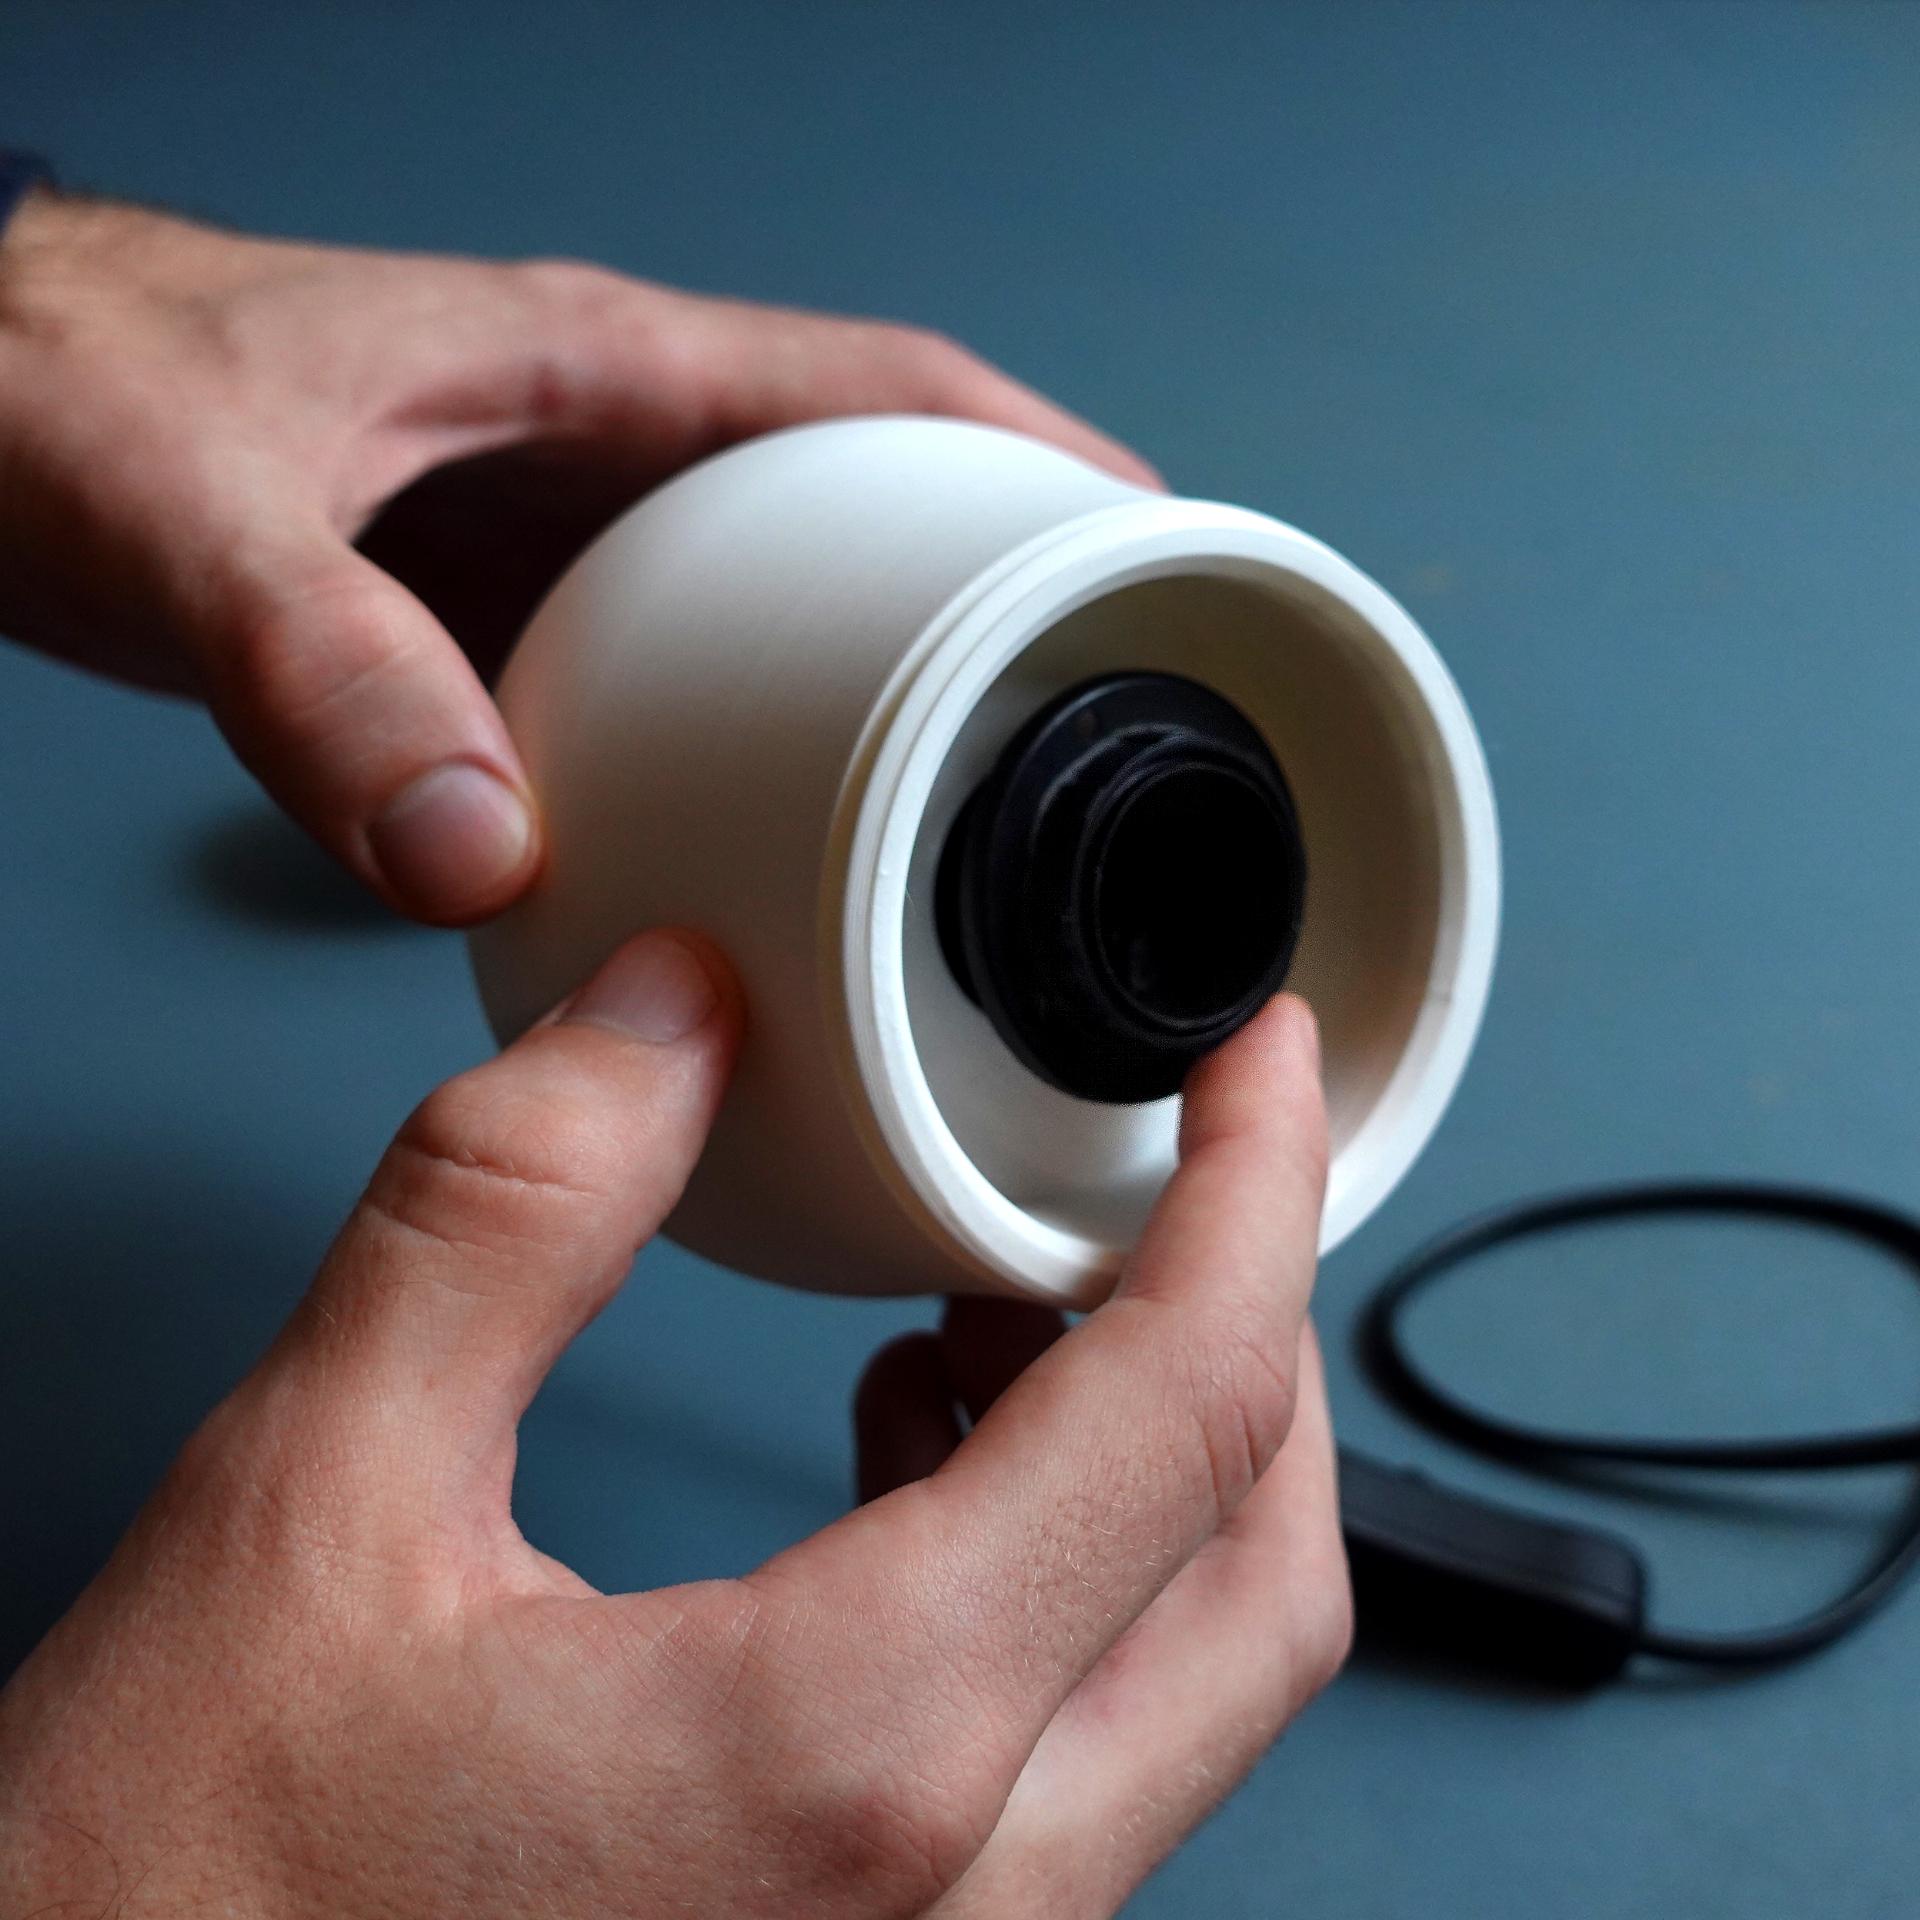
- If you printed Head_closed or head_closed_presupported: – remove the printed support material after cooldown. It comes off easily and no tools are required. Insert the Socket (without bulb) from below.
- If you printed the Base_screw_Socket: Screw on the Ring from above into the base to secure the socket.
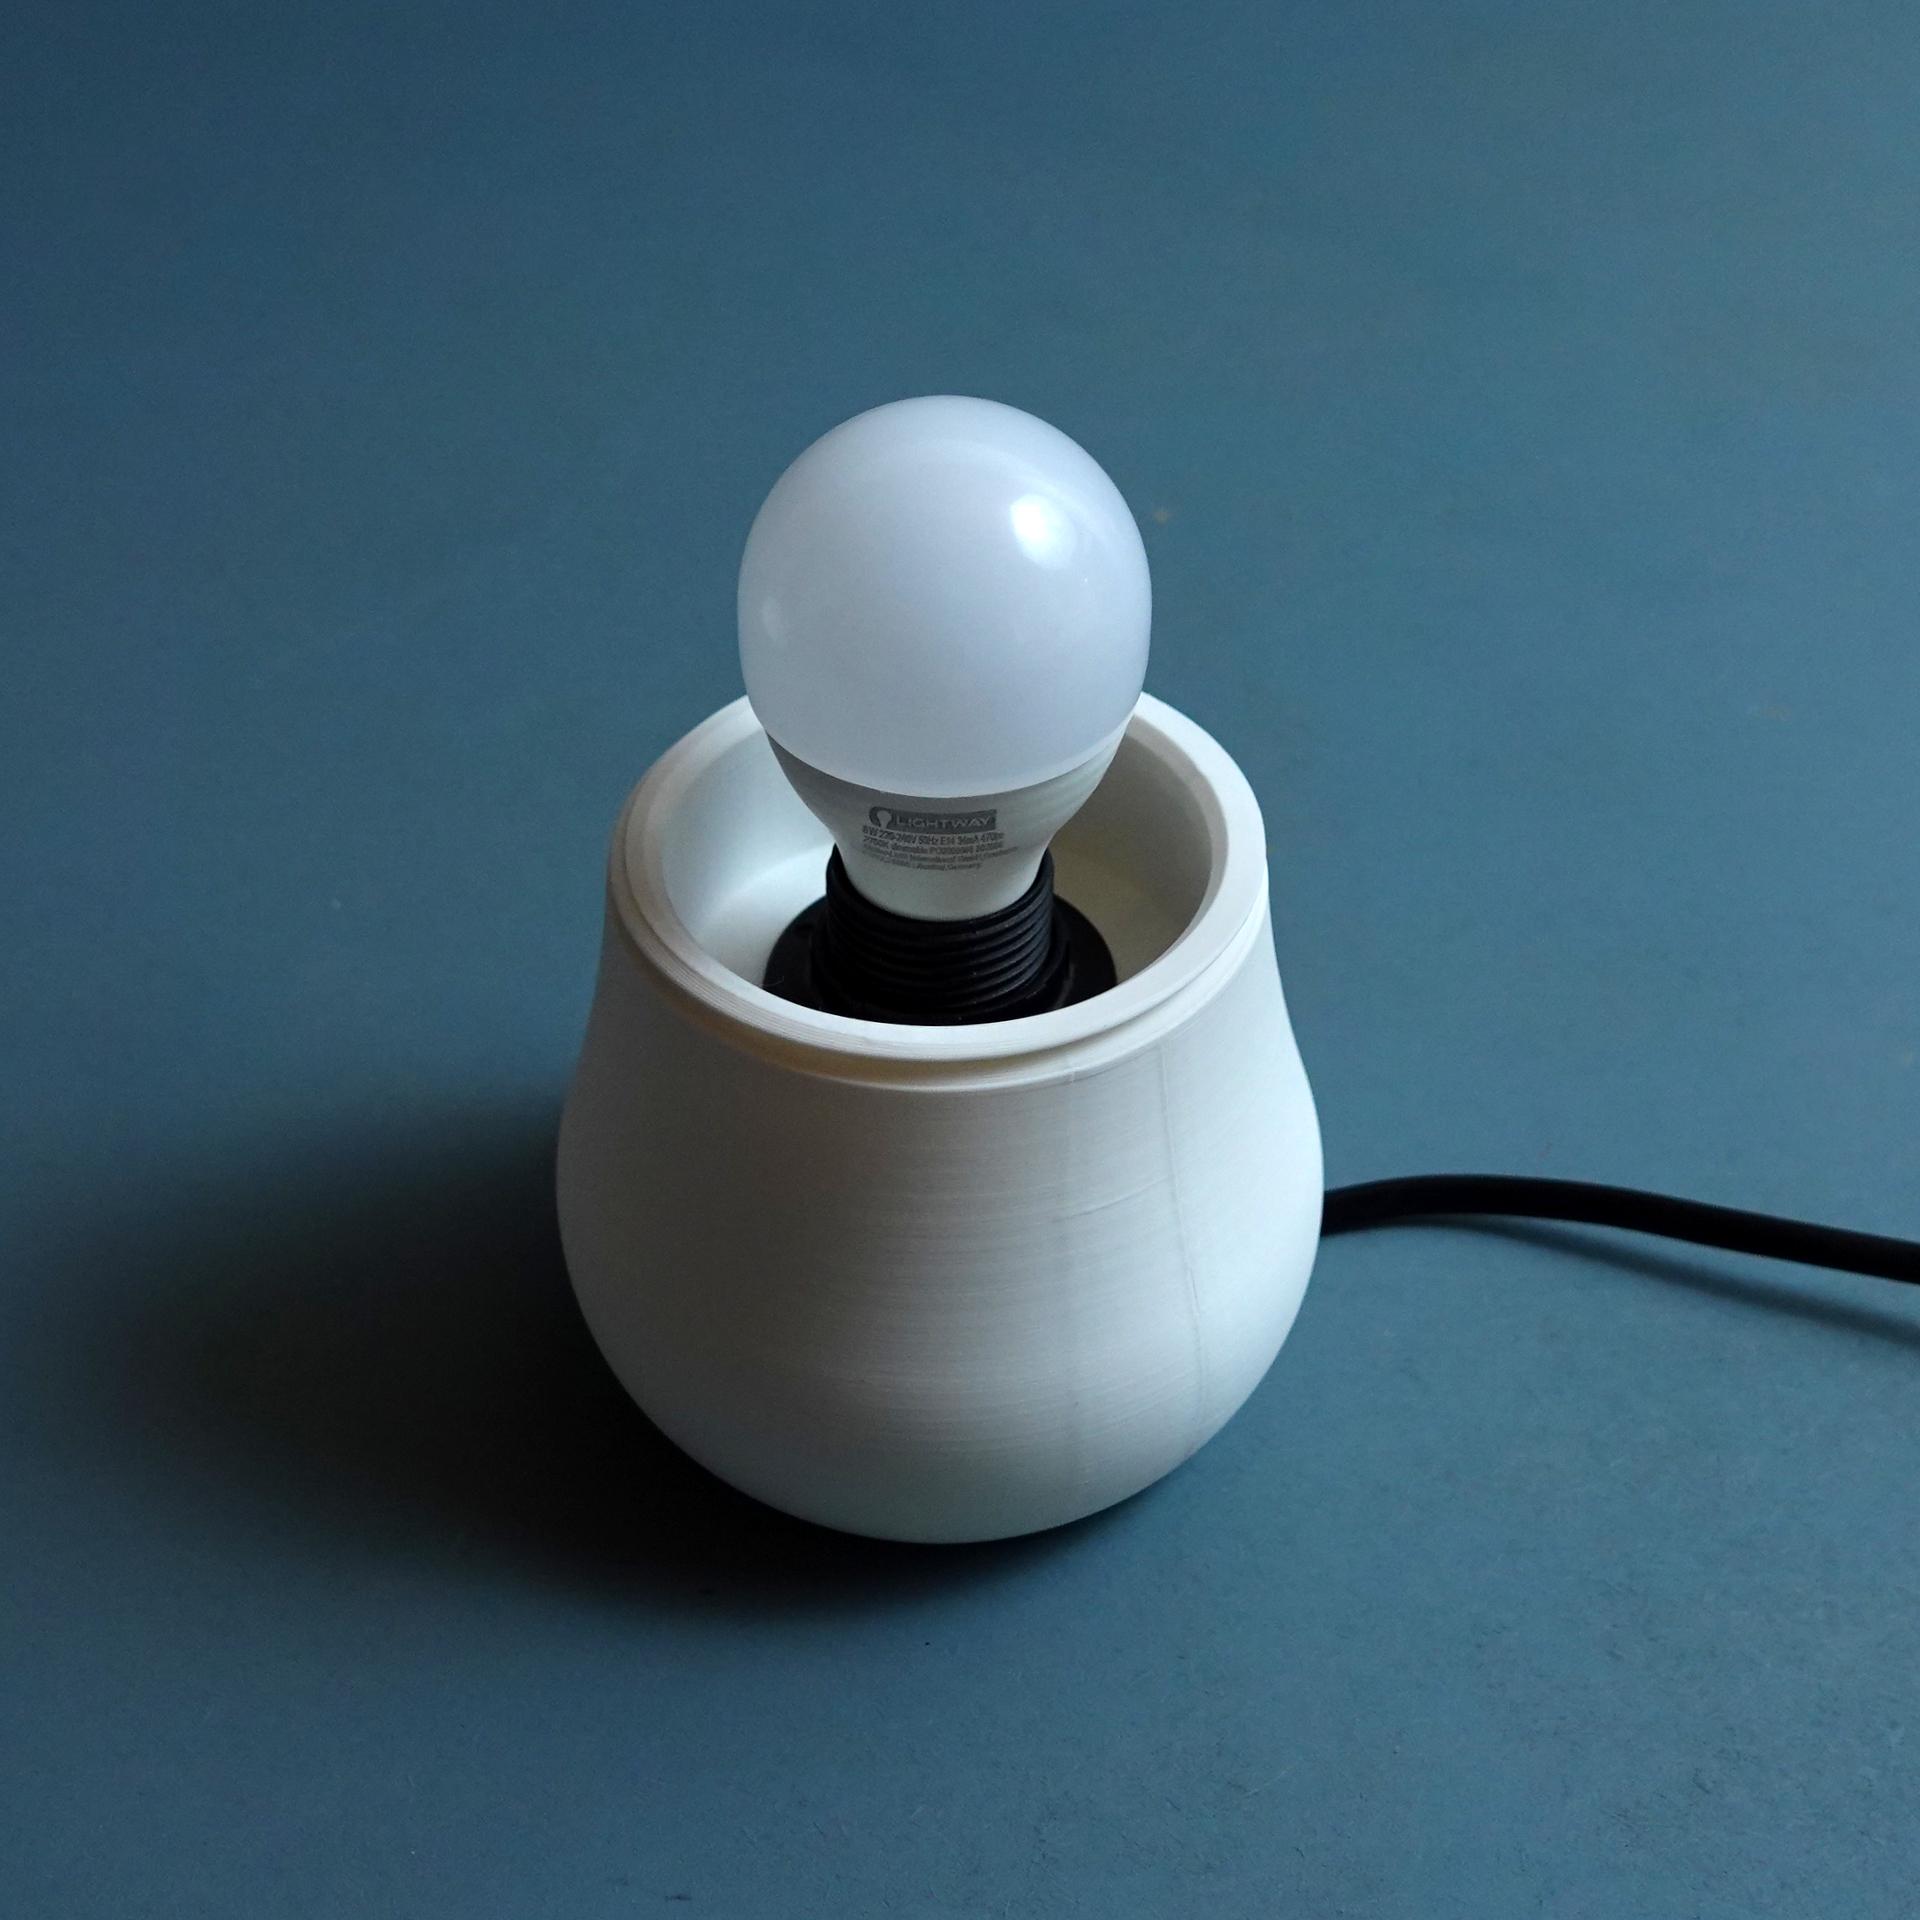
- Insert the bulb.
- Screw on the head.
- Enjoy your new lamp!
Size assembled ca 160 x 160 x 160 mm
Print settings Important: You cannot use any other bulb type than LED! LEDs still give off a little heat. Depending on the strength of your bulb the design might warm up slightly. The material you use has a certain heat deflection temperature before deformation. Make sure to build a safe product by verifying that the print is not affected by the amount of heat that your bulb emits! If you are uncertain or have little experience in building electrified products, please consult a professional!
Usually, a strong LED bulb does not get hotter than 50 degrees Celsius while regular PLA does not deform under 58 degrees Celsius. Those are approximate numbers, and you need to verify that for own product selection.
Required build volume: 170 x 170 x 100 mm Material usage: 250 g Material: PLA that can handle the heat that your bulb emits. Print direction: stls are rotated correctly Nozzle size: 0,4 mm Line width: 0,4 mm Layer height 0,2 mm Outer walls: 3
Support Base_screw_socket: none Base_spring_socket: none head_open: none Head closed_presupported: none – the support is already there Head_closed: Yes, only “touching build plate”, 20 degree “threshold angle”. (in Cura the number is calcuted 90-20 – so put 70 in “Support overhang angle”)