


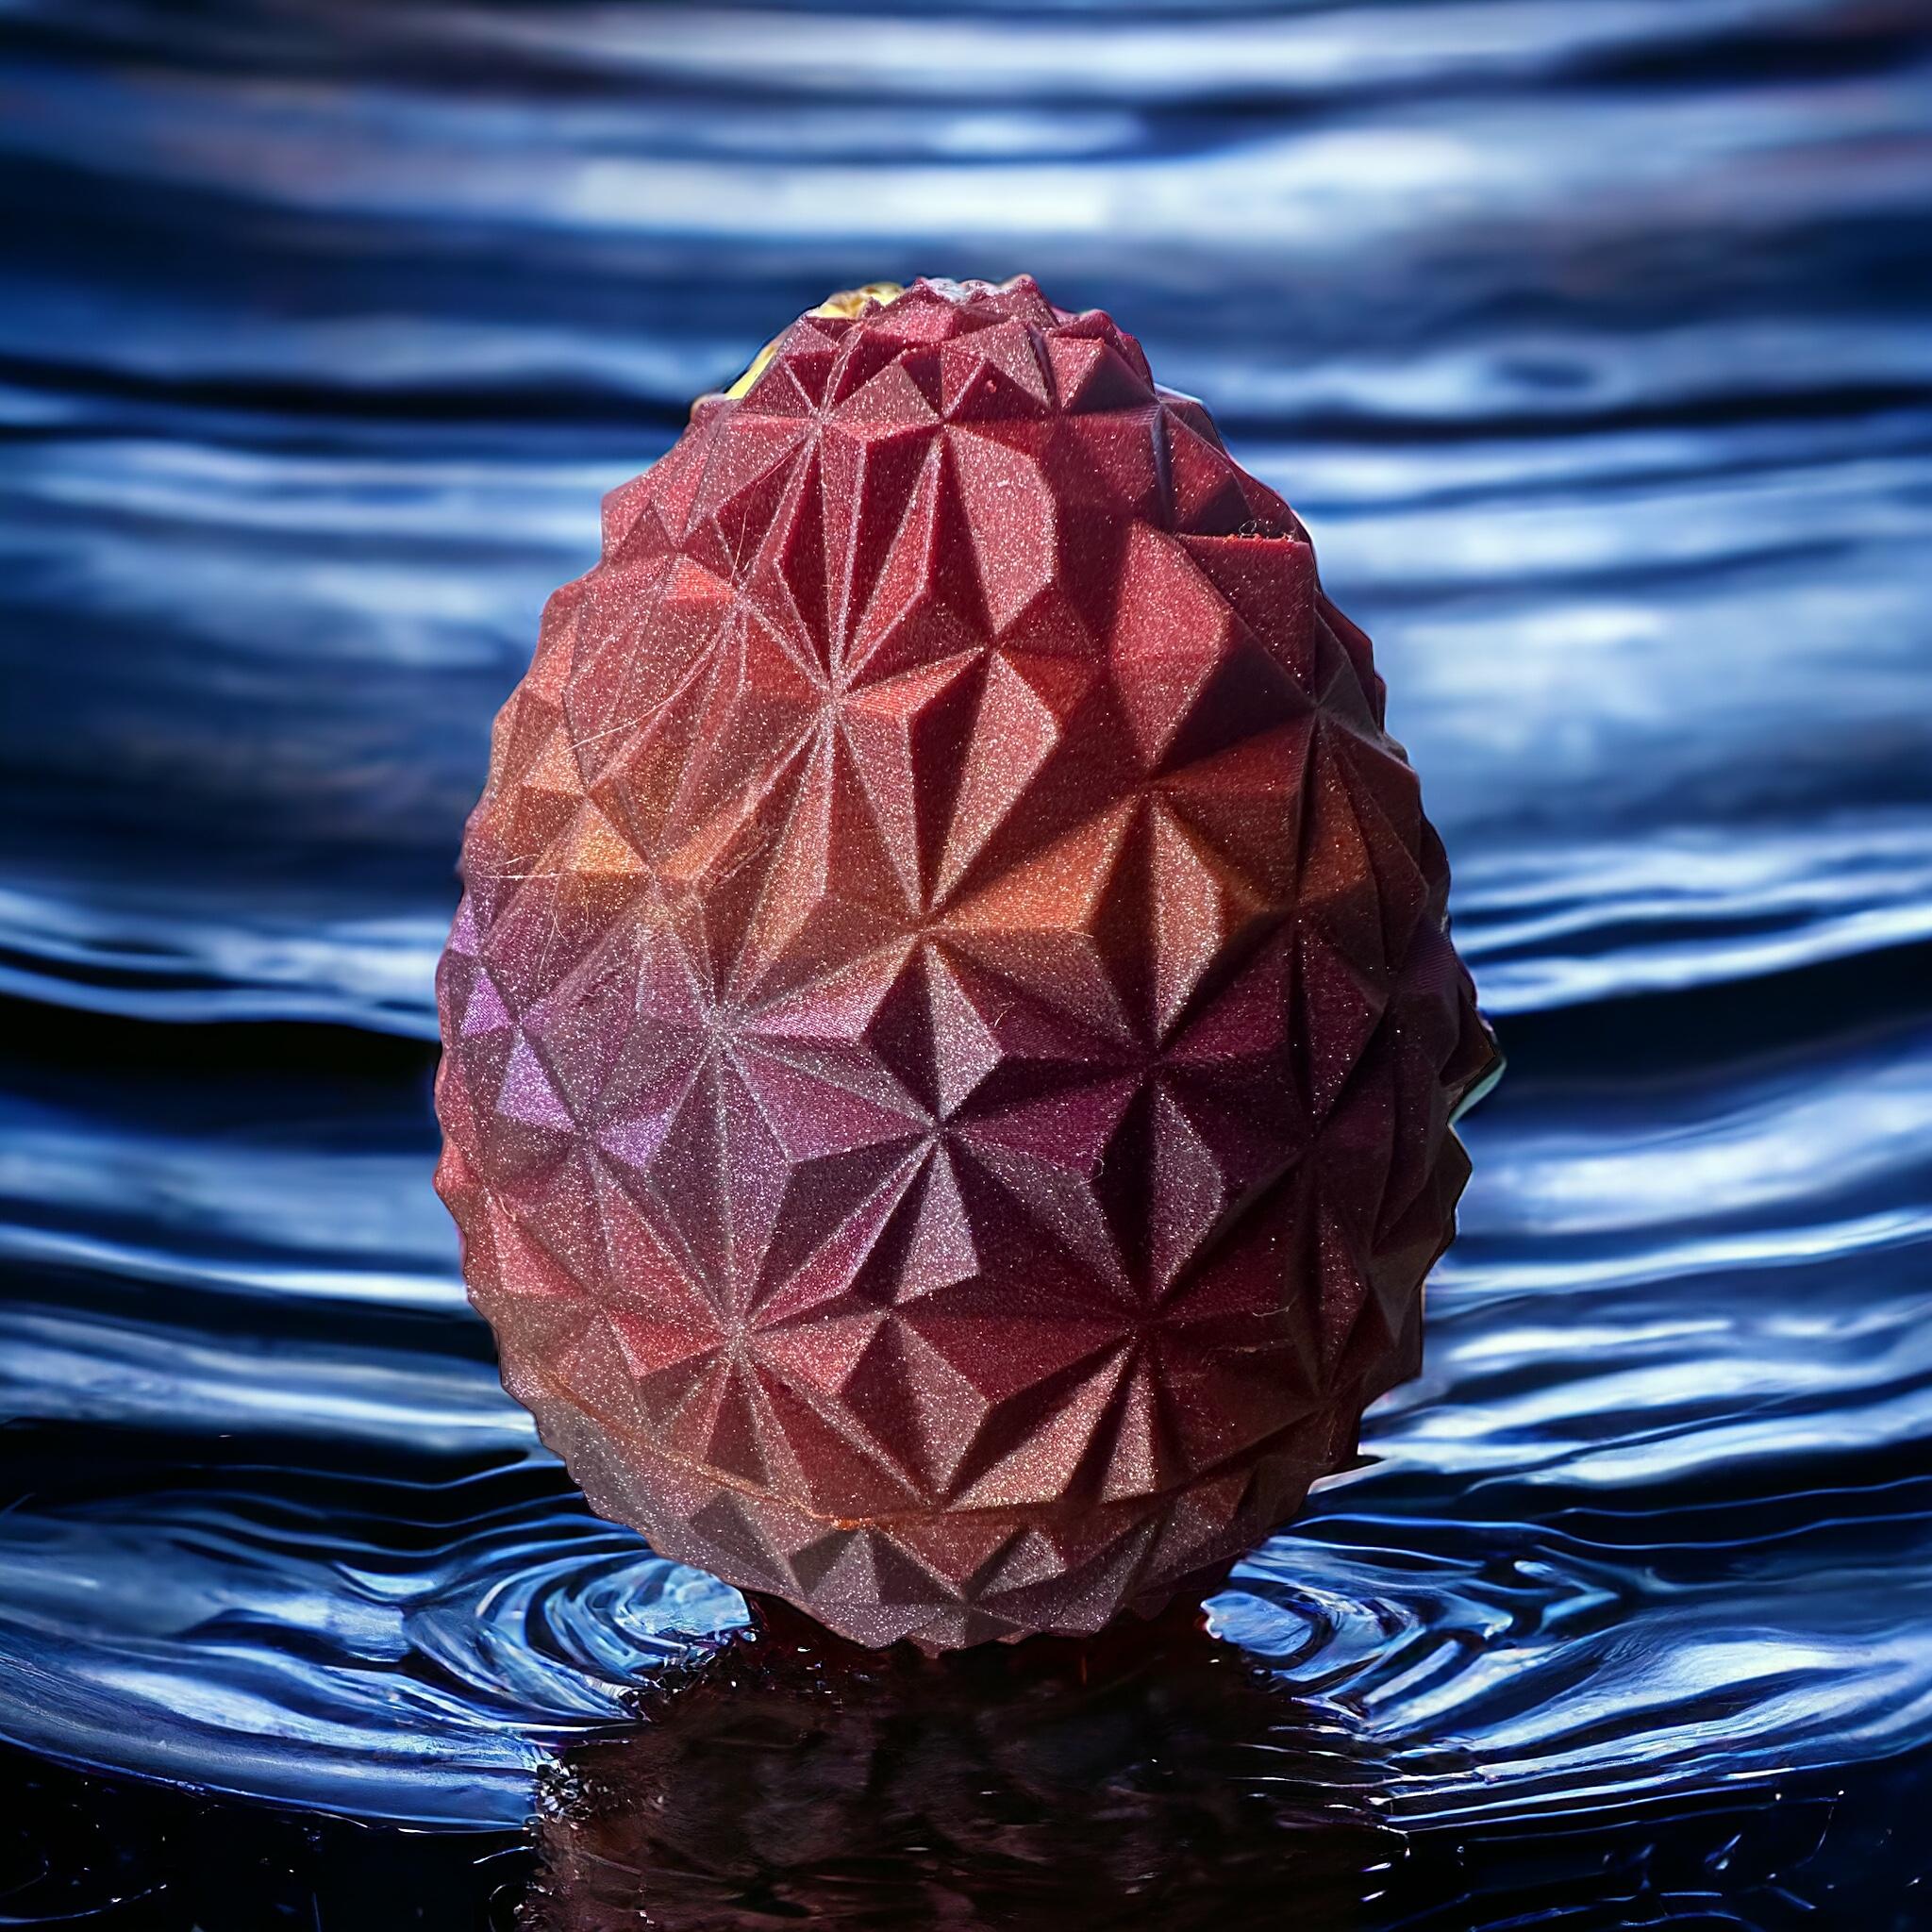
ZigZag Easter Egg
KEEP MAGNETS AWAY FROM SMALL CHILDREN. Magnets can come loose. If swallowed, magnets can be FATAL.
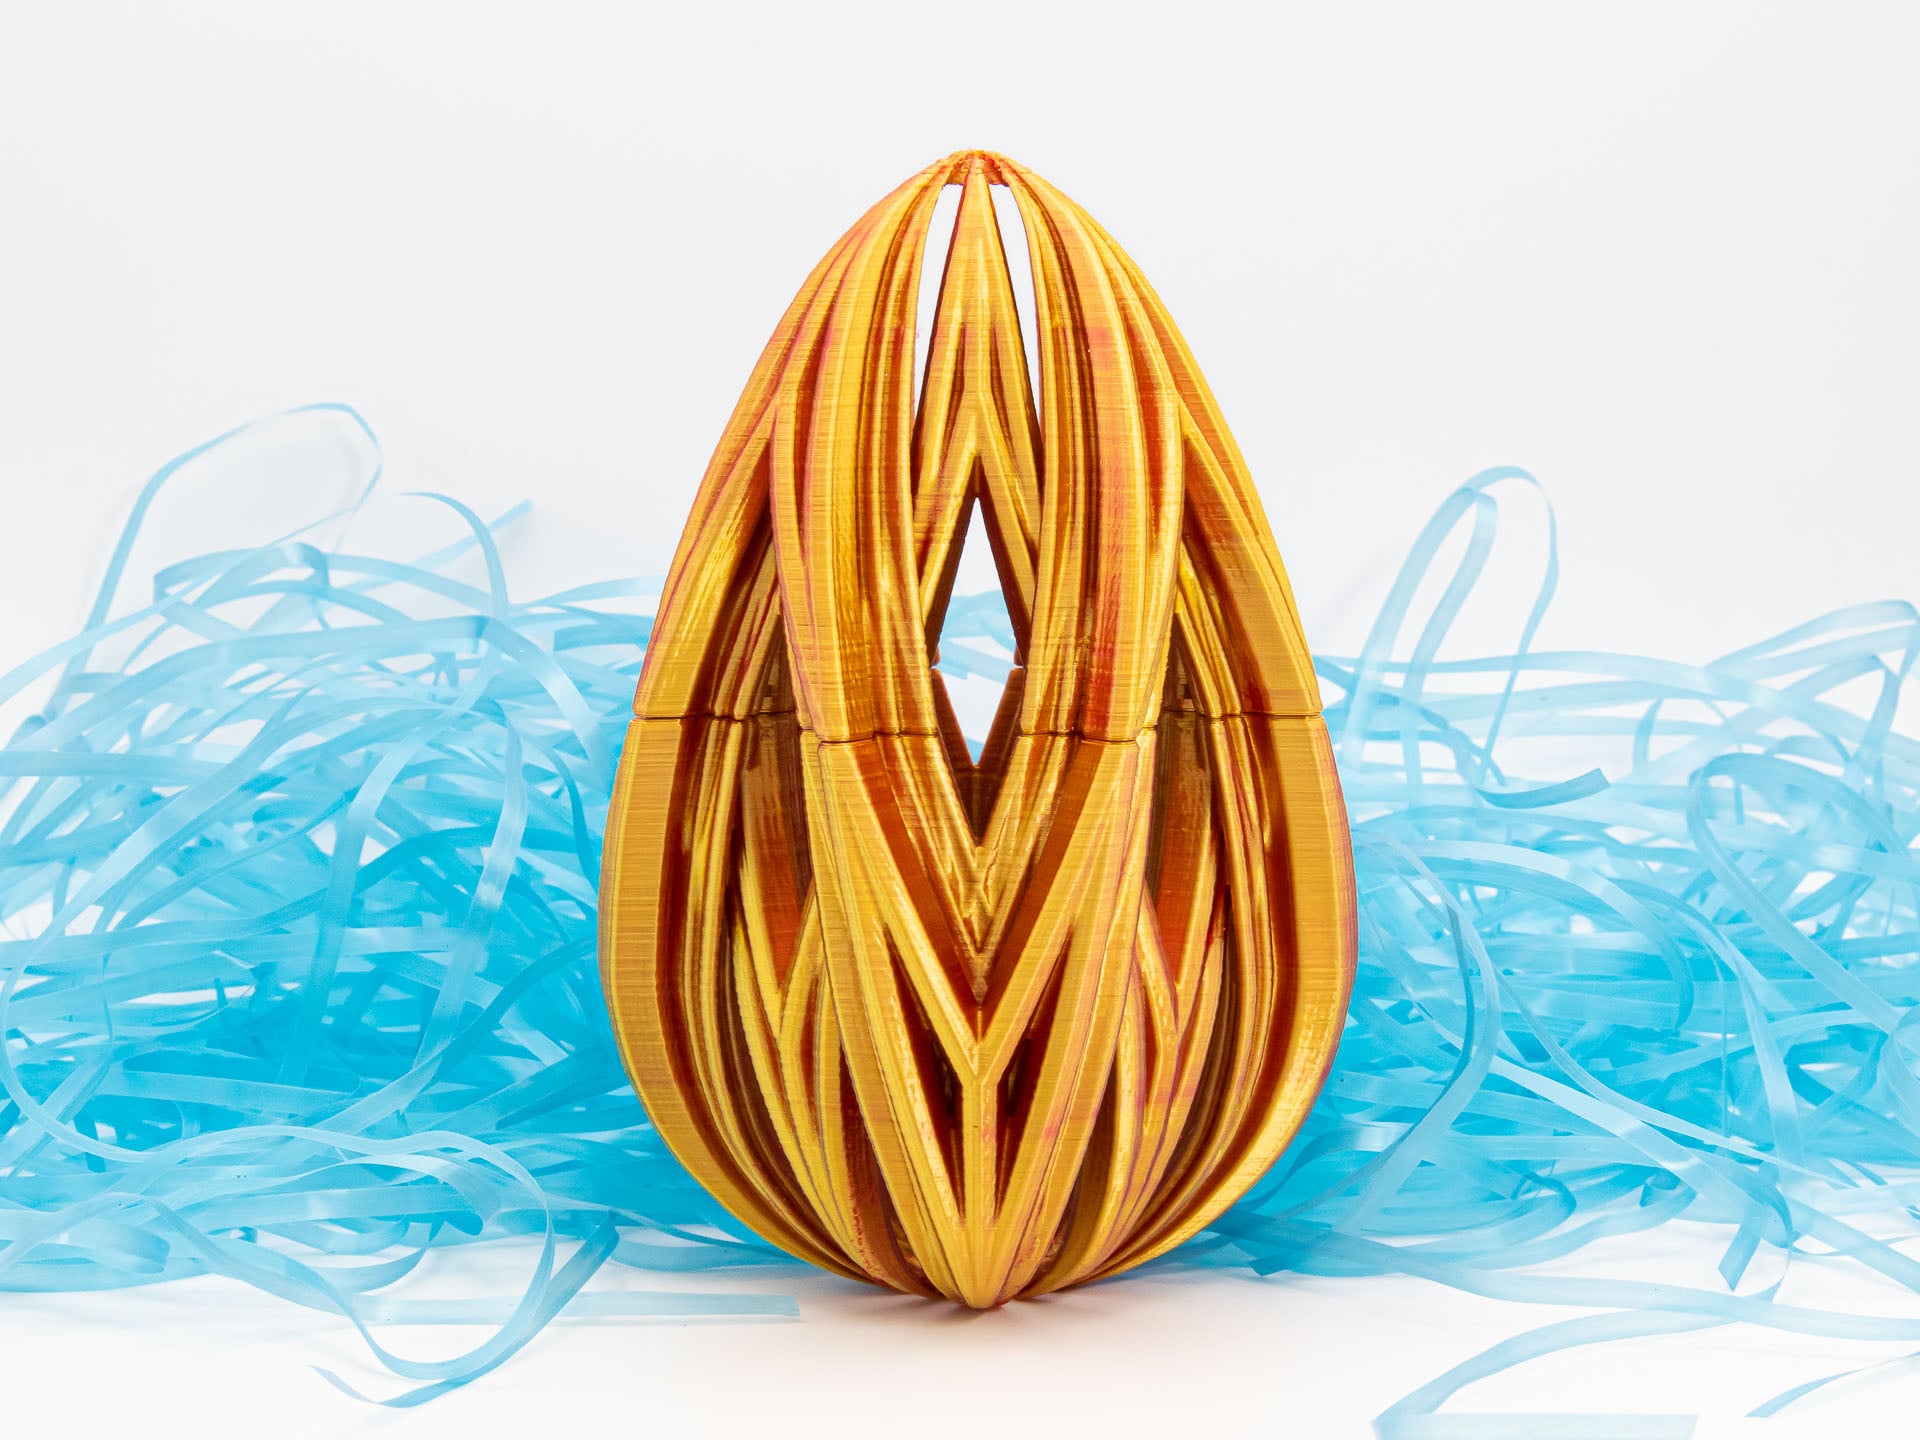
Another fun Easter Egg design.
Not for commercial use. Please see license agreement.
This design uses 3x2mm magnets to told the two pieces together. 4 magnets on each half are more than enough, but I put 8 holes in so you could change the pattern up by rotating the top 45 degrees relative to the bottom.
Quick Tips: The easiest way I've found to install the magnets is to get a larger rod-shaped magnet (some magnet sets come with them) and place a 3x2 magnet on the end. Put a drop of CA glue in the hole in the egg. Put a drop of kicker (aka “insta-cure” or “activator”) on the magnet, then use the larger magnet to install the smaller one in the egg and slide the pushed magnet sideways off the egg. The 3x2 magnets are deep enough they usually stay put even before the glue sets.
If you're going to print using dichromatic (or trichromatic) filament, you can download MatterHacker's Quantum Calibration Coin for free. The coin is used to determine how the filament pattern is aligned relative to the print bed. You then rotate the objects in your slicer so they align to the filament pattern.
PRINT TIME About 9.5 hours
SAVE TIME I've included my PrusaSlicer 3MF file for the 100% version so those who use PrusaSlicer don't have to work out all the settings.
PRINT SETTINGS A lot of factors will impact exactly how large the holes print. Therefore, I would suggest you do a test print of the first 3mm of one half of the egg. Then, try to insert a magnet. Adjust your print settings or scale the egg up or down from there and try another test until you get it to fit just right. Once you know what works for you, print the whole egg.
If you're not using PrusaSlicer, I recommend 2 perimeters (walls), infill just below unsupported areas using 25% rectilinear (lines) or 15% infill everywhere. I generally used default settings for .15mm high quality settings in PrusaSlicer. I did adjust the temp and retraction slightly for the PLA. I also printed the last few millimeters at 0.1 mm layer height to get better detail. I used MatterHackers Quantum Raspberry Gold.
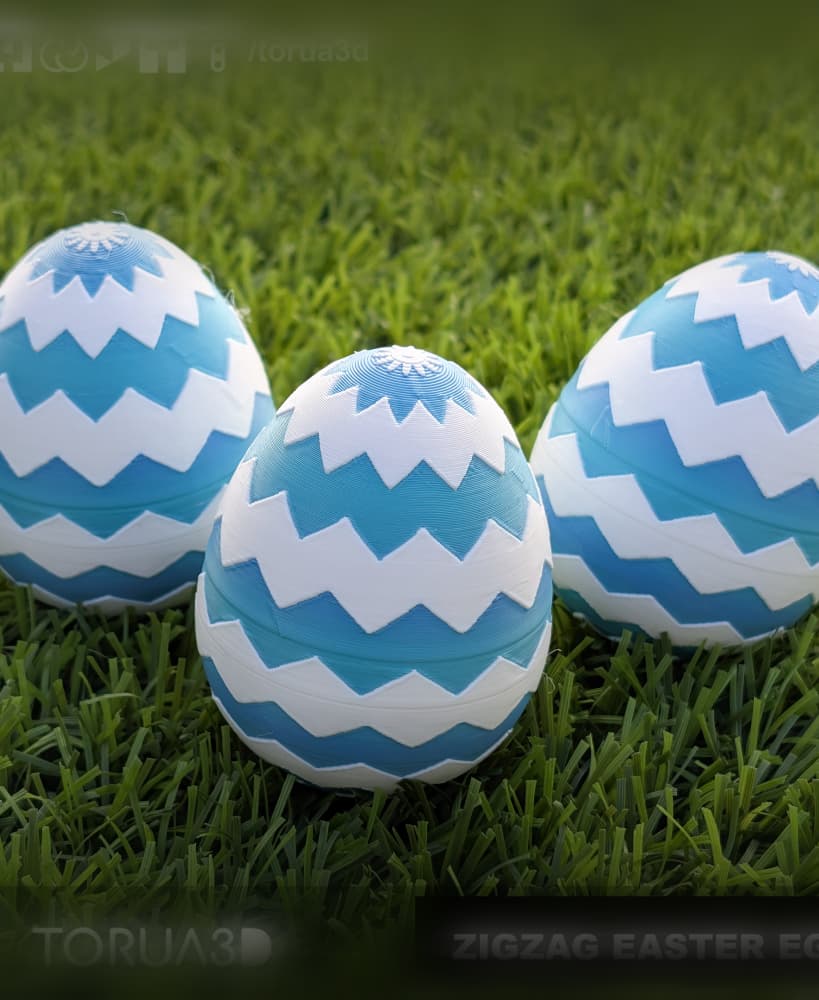
ZigZag Easter Egg - Free

Zigzag Easter Egg 2025

ZigZag Easter Egg Spiral Twist Fidget

Pokeball Easter Egg Festive Box

Bunny Storage Container - Decorative Organizer

SURPRISE EGG HOLDER / EGG HOLDER / EASTER SUPRISE EGG BUNNY / EASTER GIFT / LITTLE GIFT FOR EASTER

SURPRISE EGG HOLDER / EGG HOLDER / EASTER SUPRISE EGG BUNNY / EASTER GIFT / LITTLE GIFT FOR EASTER

Easter Matryoshka Eggs, 5 Eggs - 10 pcs. Set, Easter Egg Gift, Matryoshka Nesting, Blank Matryoshka

JAPANDI DECOR EGGS / CUTE EASTER DECOR / EASTER EGGS / JAPANDI DECOR / MINIMAL EASTER DECOR

Easter Egg STL Bundle – Lace Egg, Smooth Egg & Low Poly Egg | Candy Holder Easter Egg | 3D Printable

Standing Easter Egg with Feet STL | Spring Easter Decor | Funny Easter Egg Figurine | 3D Printable F
Easter Eggs 10 pcs. Set, Easter Egg Gift, 3D Printing for Decoration, 3D Dragon Eggs, 3D Home Decor

Easter Bunny Egg Holder, Easter Egg Gift, 3D Printing for Decor, Rabbit Holder, 3D Home Decor

Dragon Easter Eggs 5 pcs. Set, Easter Egg Gift, 3D Printing for Decoration, 3D Dragon Eggs

3D Bunny Egg Holder, Surprise Egg Bunny Ears Egg Holder, Candy Holder, Egg Hunt, Easter Egg Gifts

Dragon Egg Box, Easter Egg, Fascinating Dragon 3D Egg, Mystery Egg, Realistic Egg
Egg Jail: Festive Easter egg lock box with a Maze Challenge
ANNOYING EGG - DRAGON GLASS EGG - 57 BOLTS - EASTER EGG - DRAGON SURPRISE EGG

ANNOYING EGG - FIN EGG - EASTER EGG - 57 BOLTS, GIFT BOX
