Model originally uploaded to Thingiverse at https://www.thingiverse.com/thing:5149605.
DescriptionI wanted to try a Direct Drive setup on the Flsun Q5 and came across the Mellow NF Sunrise v1.1 Dual Drive Extruder. It took some time to get the effector plate and the 5015 fan right so that overhangs were printing correctly.
This effector is ONLY designed for the Volcano option. For the Q5 you will also need the 24v option: https://www.aliexpress.com/item/1005002562058108.html
This effector should work for any 40mm spaced Delta printer, including the Flsun QQS-Pro.
The Effector PlateThis has been designed to take M3x5mm thread inserts (6 in total) to connect to the delta arms. As this is the part nearest the heat block and in contact with the heat sink, it needs to be printed in a heat tolerant filament. Testing has shown Heat Tolerant PLA, ABS and ASA are probably the minimum you will be able to print it with. It can be printed without supports.
The plate has been tested to 280C with only minor glazing of the surface. To go hotter will require a more heat tolerant filament.
Magnet HolderYou can either re-use the magnetic mount for the Z-Probe, or use the included Magnet Holder which uses 2 flat top M3x8mm screws to screw the magnet onto the holder.
The included magnet holder uses a 20x10x3mm magnet. This needs to be a North pull magnet with countersunk screw holes. This is the one used here: https://www.first4magnets.com/rectangular-c35/20-x-10-x-3mm-thick-x-3-5mm-c-s-n42-neodymium-magnets-4-2kg-pull-p3651#ab_1_1|ps_2_3391
As with the effector, the fan duct and the magnet holder need to be printed from a heat tolerant filament such as ABS, ASA, HT PLA, etc.
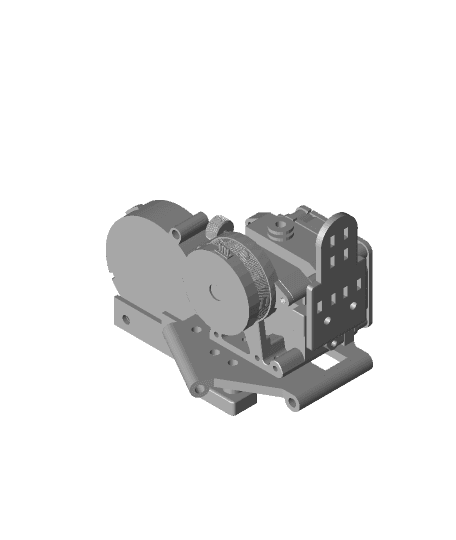
ConstructionReferencing the screw hole image and the stl of the whole unit:
-
Screw the magnet holder to the plate using 2 x button cap M3x8mm screws (A)
-
Position the plate onto the bottom of the NF Sunrise over the top of the Volcano hotend the flat top of the plate should go against the bottom of the hotend. The hotend wires should be routed through the top notch of the hole.
-
Screw the plate onto the hotend using 2 x button cap M3x8mm screws (C)
-
Screw the fan shim against the hotend making sure the 3 holes correspond between the shim and the hotend using 3 x button cap M3x20mm screws (not shown)
-
Screw through the plate into the fan shim using 2 x button cap M3x8mm screws (D)
-
Screw the cable tidy to the side of the hotend and cable tie the wires from the heater, thermistor hotend fan and extruder motor to the cable tide
-
Mount the effector onto the printer arms with the fan notch pointing to the front
-
Screw the fan mount to the effector with 2 x button cap M3x8mm screws from the top (B)
-
Fit the 5015 fan into the fan mount and pass a button cap M3x20mm screw through from the left and fix with a nut to the right
-
Route the extruder motor cable up along the length of the main cable using cable ties and push sideways through a hexagon into the upper section of the printer. Remove the existing stepper cable (the one connected nearest the front of the printer) and replace with the cable from the new extruder cable
The following steps must be performed after switching on the printer:
-
Set E-steps to 725
-
PID tune
-
Delta Calibration
-
Z-Offset
-
Bed Levelling UBL
-
Load filament and print an XYZ cube to make sure it is properly configured
If you find that the extruder motor doesn't seem to be working or is making an odd noise, it's likely that it needs to be reversed. This can either be done in the firmware or by carefully switching the two outermost cable connectors.
If you want to try and tackle ringing that you may see on some prints you can usually mitigate it by slowing down the print speed. Additionally, you may want to play with reducing the Jerk and/or Acceleration settings either on the printer or through your slicer.
Slicer Settings- Set retraction to 1mm @ 25mm/s
- Set extruder nozzle offset X to -7.0mm. In Cura: Settings > Printers > Manage Printers > Select your printer > Machine Settings > Extruder > Nozzle Offset X
1 x Mellow NF Sunrise v1.1 Dual Drive Extruder, 24v, Volcano option: https://www.aliexpress.com/item/1005002562058108.html
10 x Button top M3x8mm screws 3 x Button top M3x20mm screws 1 x Button top M4x20mm screw with nut 6 x M3 Brass inserts
Either:
1 x Stock magnet holder
Or:
2 x Flat top M3x8mm screws 1 x 20mmx10mmx3mm North Pull magnet with countersunk screw holes:
NotesThe Mellow_NF_Sunrise_v3_5015.stl file is for reference only. You can't print it!
You will need to re-orientate the STL files before printing. The effector plate and magnet holder (if you use it) needs to be turned upside down. The fan shim and cable tidy should lay down flat. The fan mount can be printed as it is. The fan mount and the magnet holder should be printed with supports.