Thanks for checking out my Ender 3 fan shroud design! If you've done any searching before I'm sure you've seen many other designs. Here is one more to check out, and I hope it works well for you.
Introducing…. Madduck!
Why make this new design when there are so many others out there? I started thinking about the original fan shroud as soon as I unpacked my Ender 3 Pro and started printing. It worked good, but I thought it could be better. Then I started reviewing and printing other popular fan shroud designs and of tried printing with a few of them. Each has their own set of good features and drawbacks. I don't want to specifically list them here as I am not motivated by saying 'mine is better than this one'. I just want to provide another option.
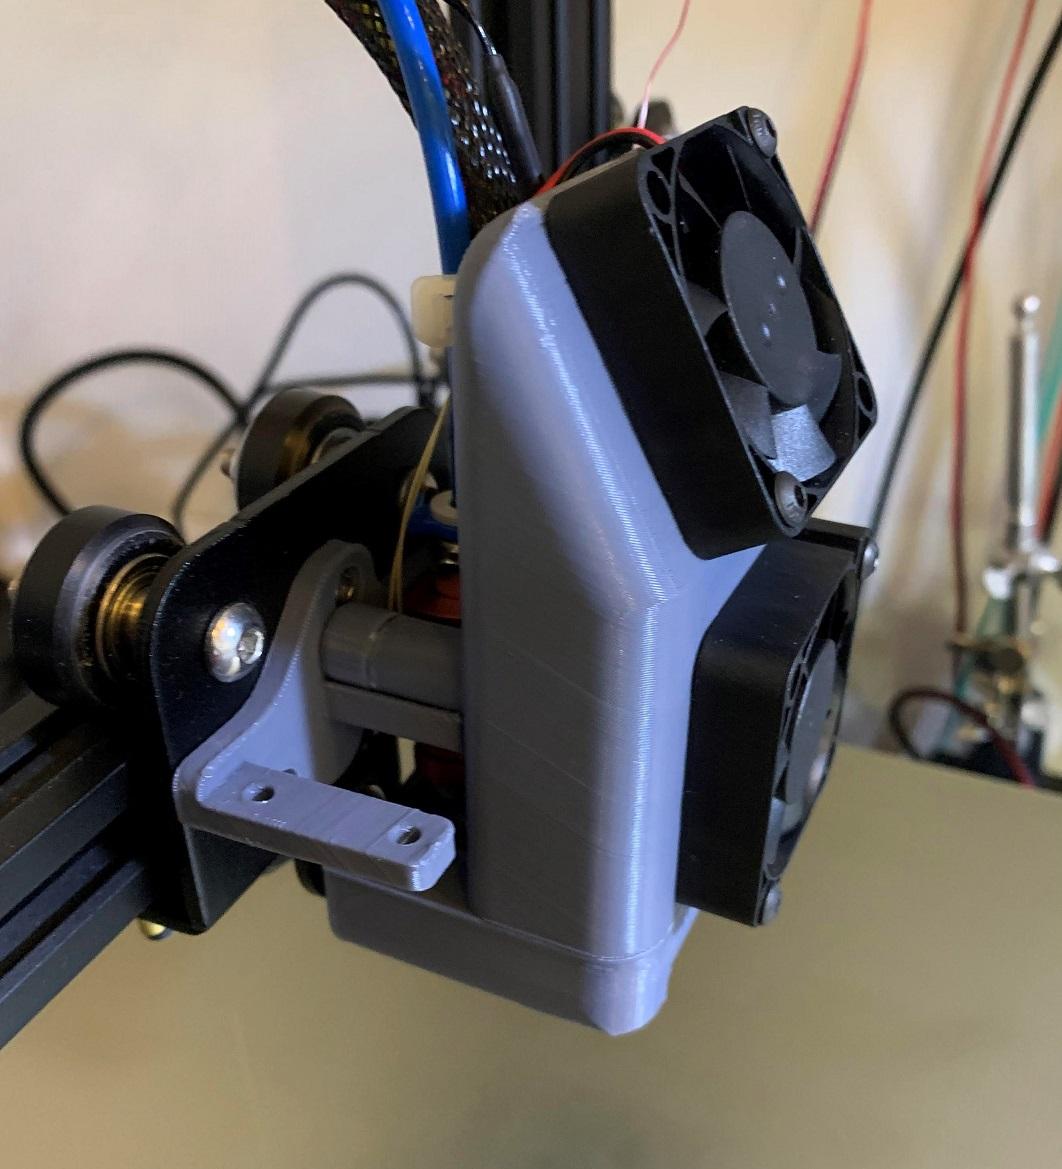
This design is attempting to accomplish 3 main things. First, provide as good or better cooling than the stock design. Second, noise reduction. And third, be easy to remove for hotend maintenance.
I think I accomplished all of these goals. Airflow is good based on many hours of testing, including direct measurement of hotend temperature. My background is power supply design, and we need to use fans very effectively and efficiently to keep critical components cool. To get the data on how effective the airflow was, I monitored the temperature of the hotend using a thermocouple. With a design goal of keeping the heatsink under 45C, I was able to evaluate how each iteration was doing. I was also able to test and pick a hotend fan that would keep hotend temp under 45 (more fan details below) while also being as quiet as possible.
For the last goal I came up with a unique magnetically-clamped system to allow for swift removal of the fan shroud. Magnets embedded inside the bracket and fan shroud hold the whole assembly together while printing. But for hotend maintenance one just needs to pop the fan shroud off and hang it aside. No need to unscrew anything. With one further step of adding wire-to-wire connectors one can completely disconnect the fan shroud. Imagine also the ability to use different fans for different applications.
Now, how to print and assemble…
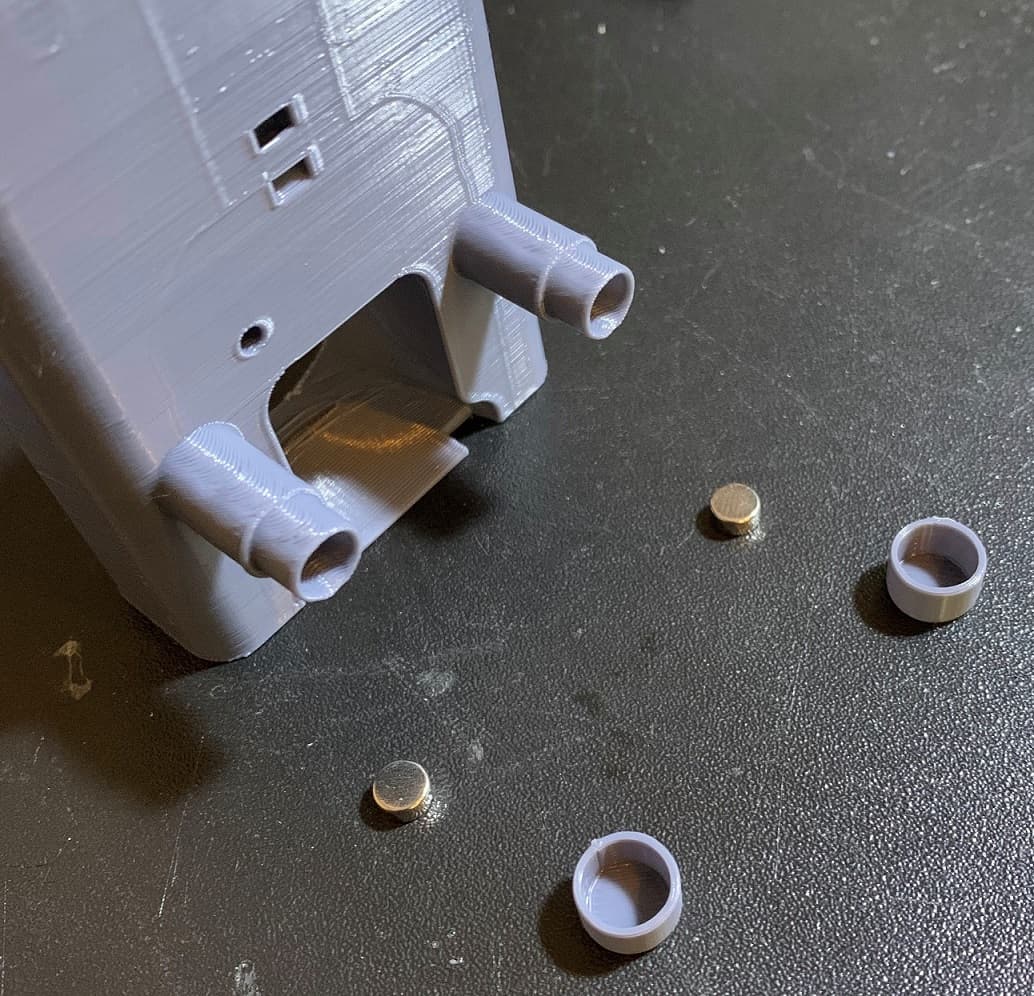
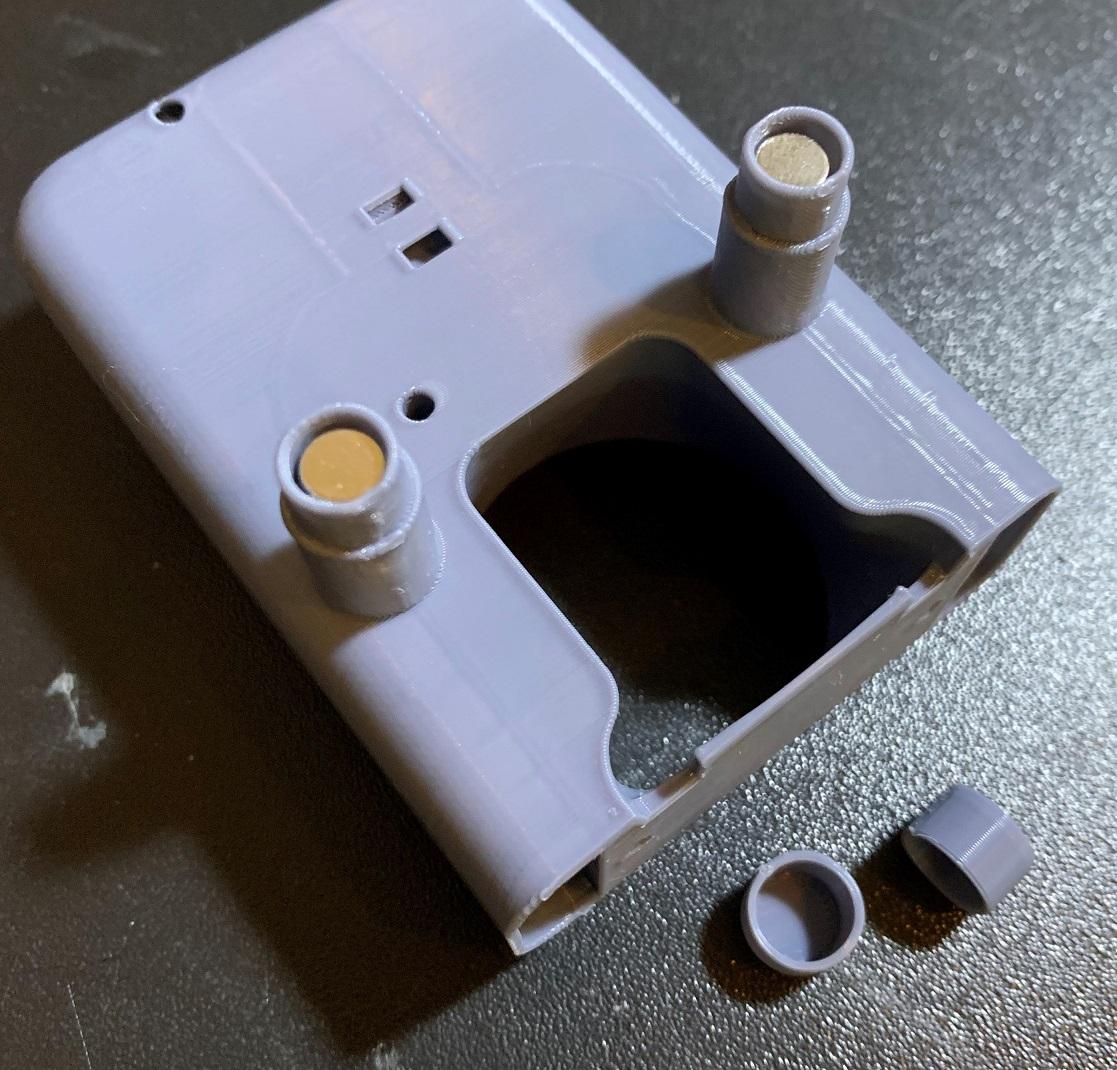
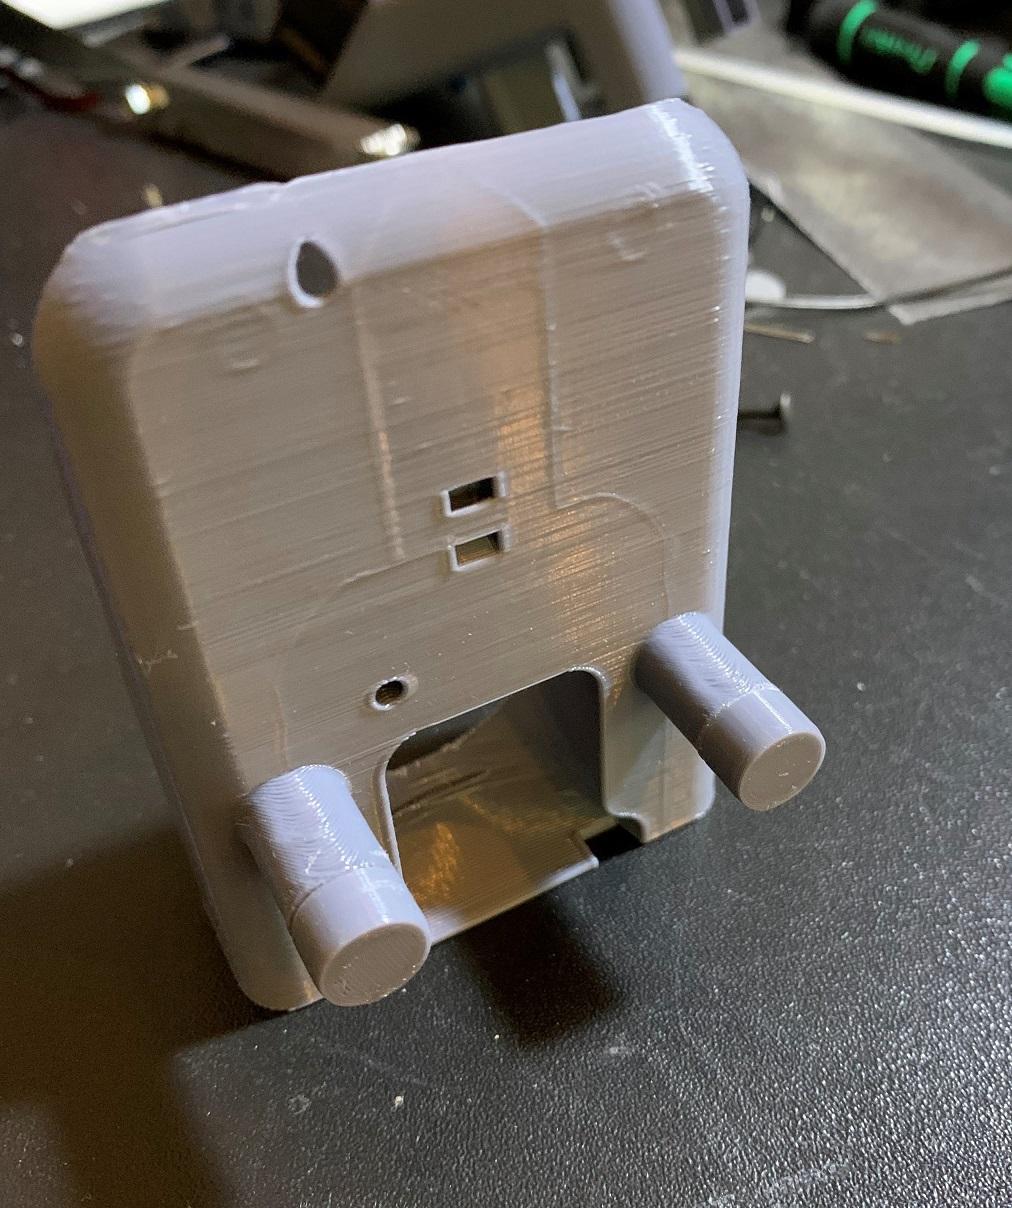
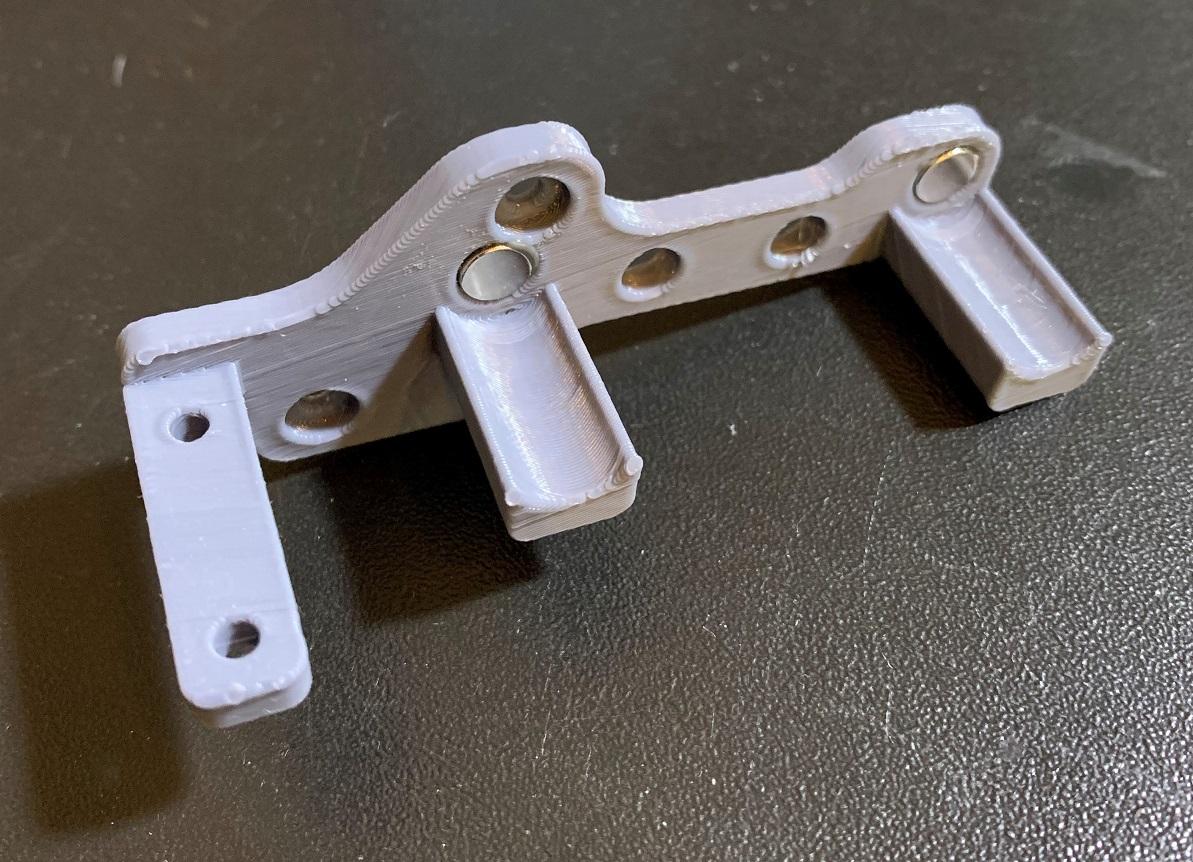
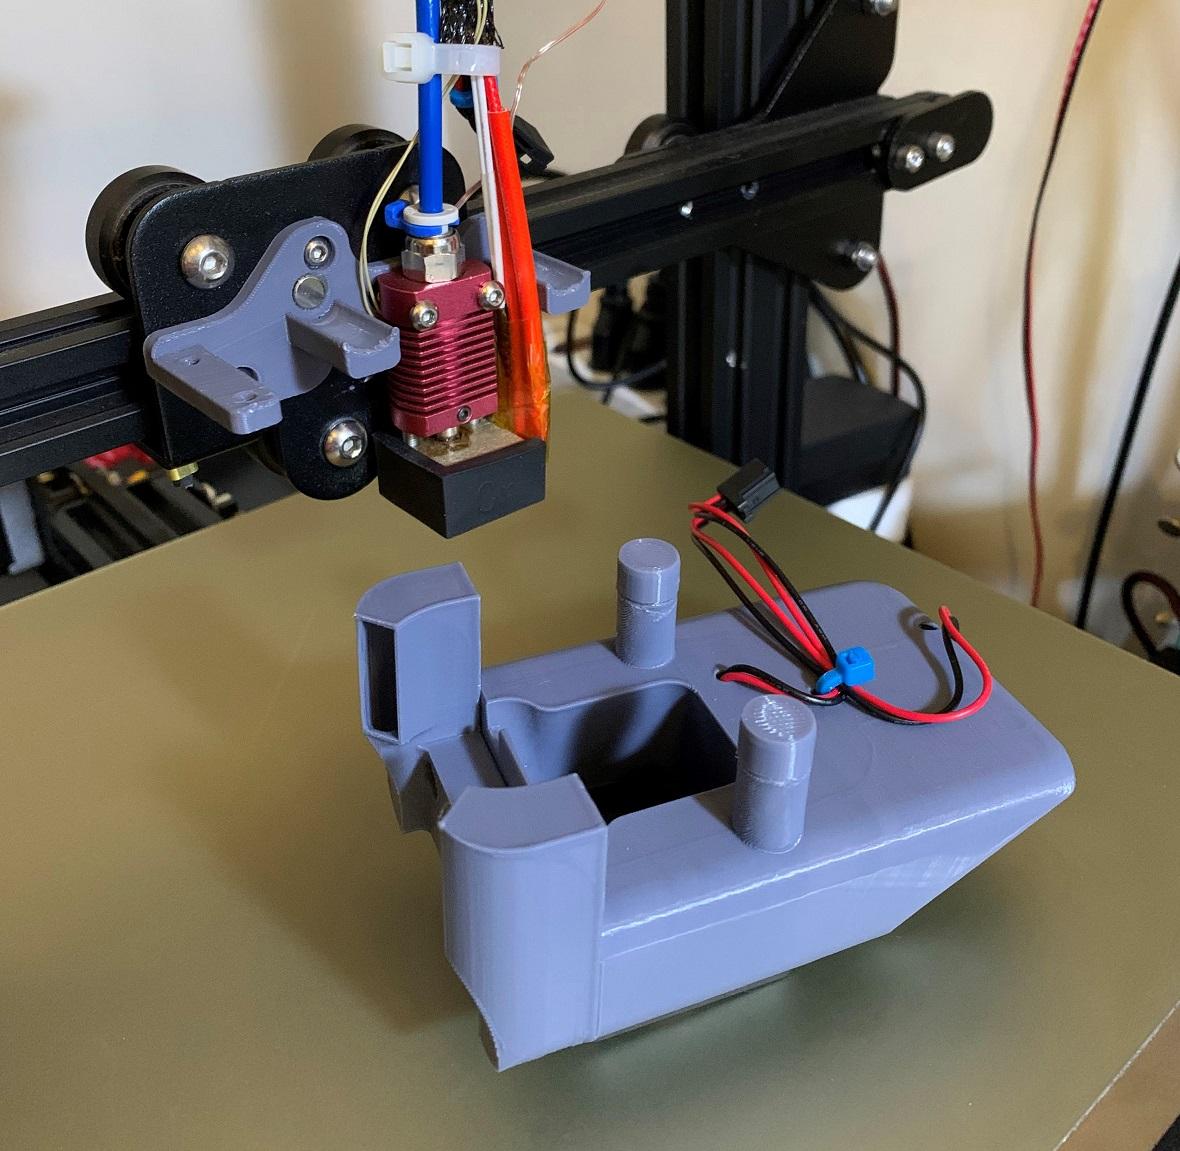
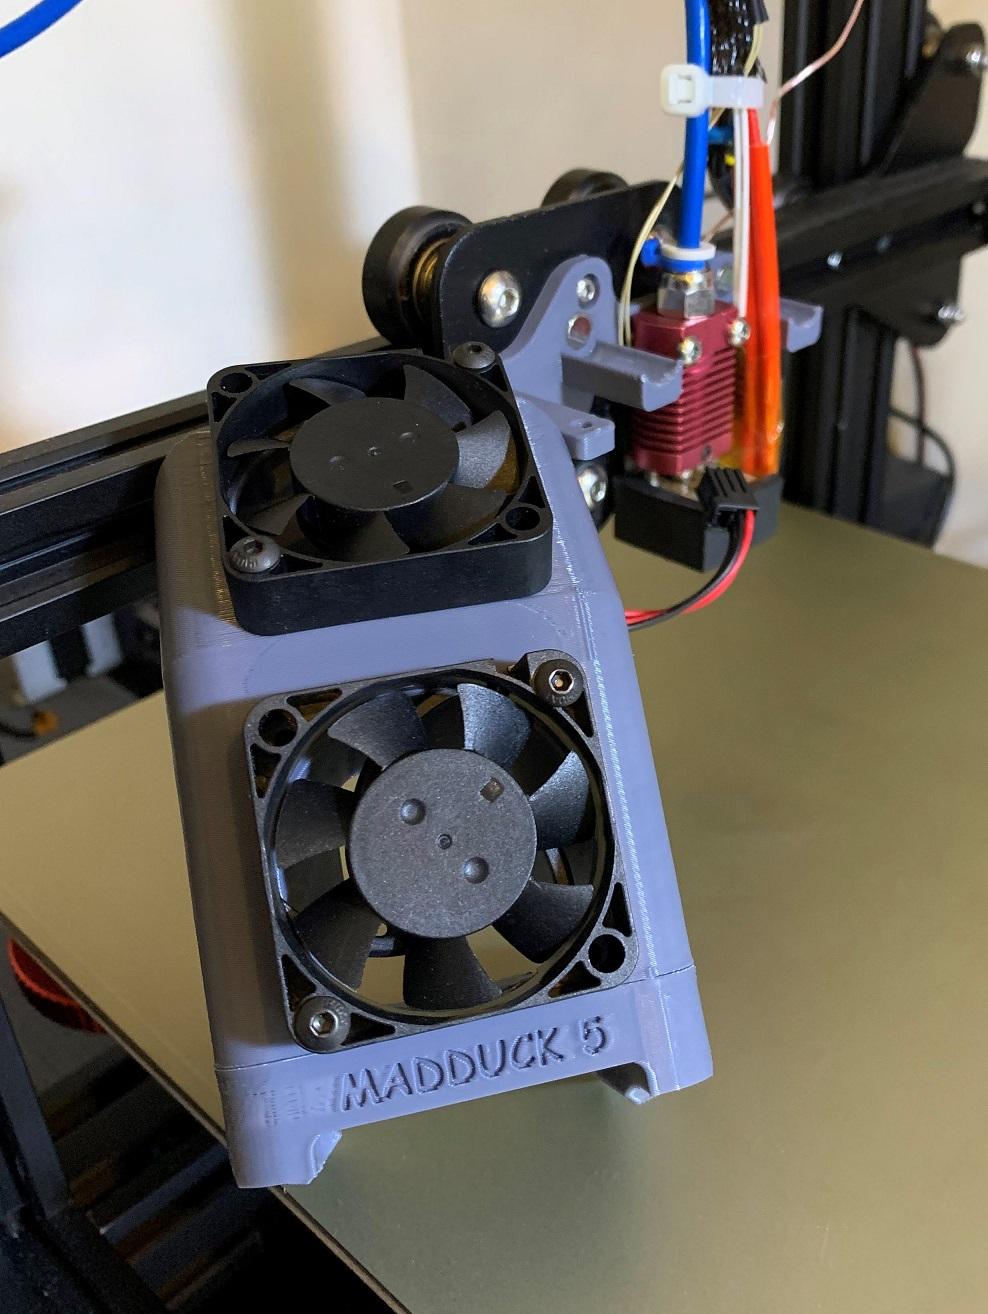
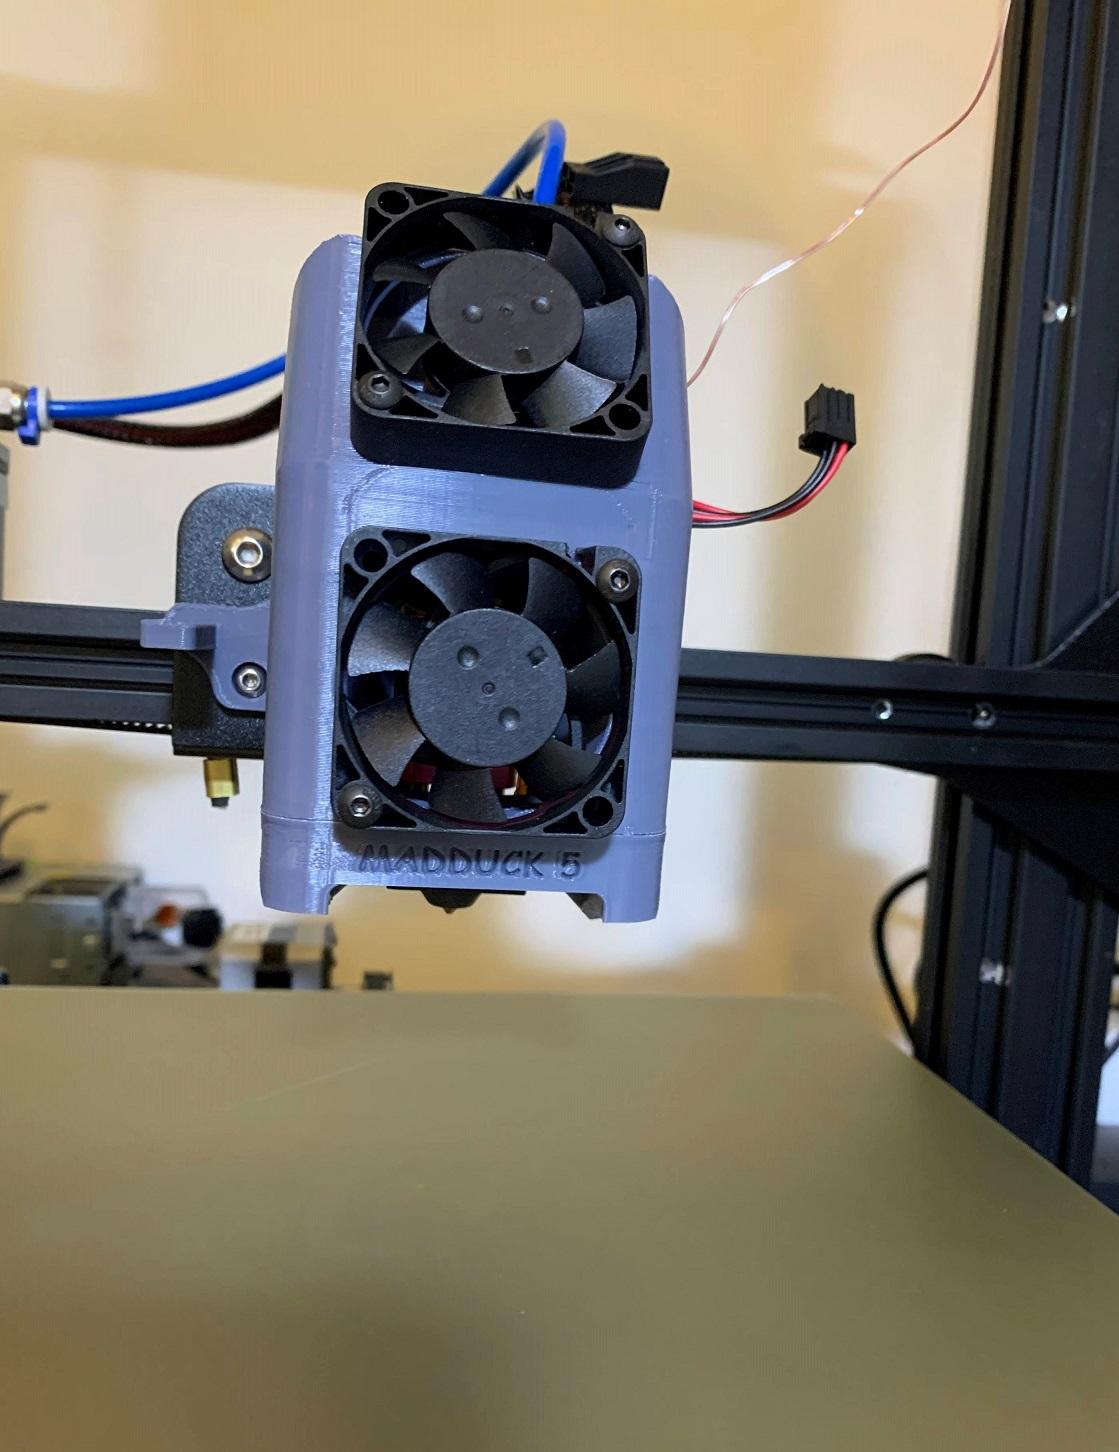
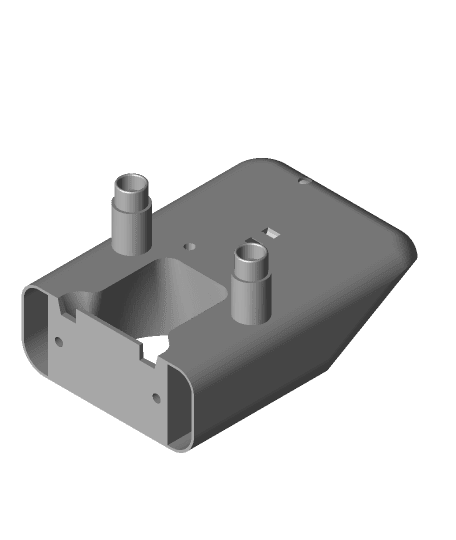
There are 4 parts, one each of the fan mount (upper part), mounting bracket, and lower part. There are also 2 pieces of a small cap that will be used to secure magnets inside the fan housing.
All parts you see in the pictures were printed with eSun PLA+, 210C nozzle temp, 60C bed.
If you are wondering why the upper part and lower part are separate pieces, I did this for easier printing and with the thought that there would be more flexibility in the way these are oriented on the print bed. There is also the ability for future redesign of either part without needing to redesign everything.
The upper part I printed standing upright as it would appear on the print head. I recommend a brim and supports.
The lower part prints best upside down and with no supports. By printing the upper and lower parts this way, it also makes it easy to glue together if you choose. There are also screw holes for M3x8 hex-head screws. I used wide thread screws good for digging into plastic.
I printed the mounting plate at an angle but it should also be good printed flat side down.
After printing you will need to prepare the bracket and fan mount by adding magnets to the round openings. These are 6mm diameter X 3mm thick discs that can be found on Amazon and other online stores. (Search for 6x3mm magnet).
On the bracket, the magnet fit should be snug. But you'll still need to secure the magnets. I have used these types of magnets before and used super glue, 2-part epoxy, and 3D pen (to add a little plastic on the edges) with varying degrees of success. For the bracket I used 5-min, 2-part epoxy. I sanded one side of the magnet, placed a dab of epoxy in the hole, and pushed the magnet inside.
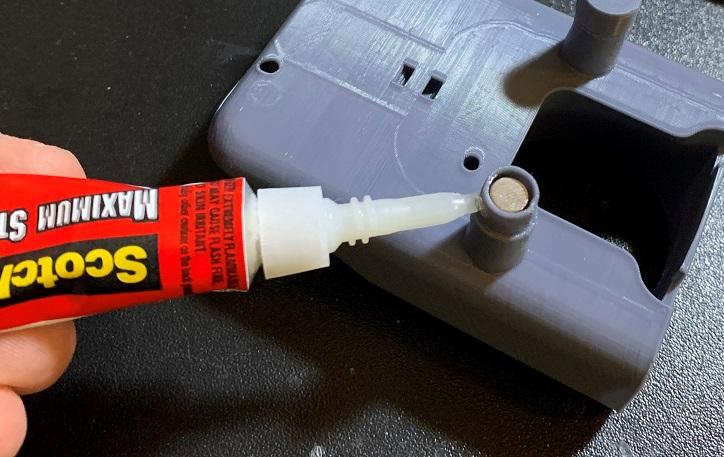
On the fan mount part, the magnets should loosely sit inside the openings. This is by design so the magnets are floating inside. The small caps are then super-glued on the end. You should hear the rattle of magnets inside the tubes when finished. Why are the magnets floating? Some magnets are diametric and some are axial. I happened to buy diametric magnets, meaning the north and south poles are split across the diameter of the magnet. Axial magnets would have north on one side of the disc, south on the other. Either kind will work but if you use axial, you must make sure the polarity is correct (needs to line up with the magnets inside the bracket). Floating diametric magnets will self-align inside the fan mount.
Let's talk about fans.
I am recommending 24V 4010 fans as found at Digikey (DK p/n 1053-1210-ND) for both locations. These fans have a decent amount of airflow and generate pretty good static pressure. I had decent results printing a cooling fan torture test (https://www.thingiverse.com/thing:3167063). More powerful fans are available that can generate 2-3 times the static pressure, but at the cost of much higher noise. Ultimately the fan choice is up to the user and the tradeoffs you want to make between performance and noise.
Of course 12V fans would work as well, if you have a voltage 24V-to12V regulator.
The last part is to wire up the fans. Not too much instruction here, just make sure polarity and voltage applied is correct. I used a quick-connect wire-to-wire connector system called Dynamic D1000 Slim Tab made by TE Connectivity, but many wiring mechanisms can be used, even just straight soldering/shrink tubing. To help with wire management, there is a loop embedded in the back of the fan shroud where a small tie wrap can loop thru and hold the wires together.
Again, thanks for taking a look at the Madduck fan shroud! Hope it works for you, and let me know your comments.
Enjoy the Madduck 5 and happy printing!