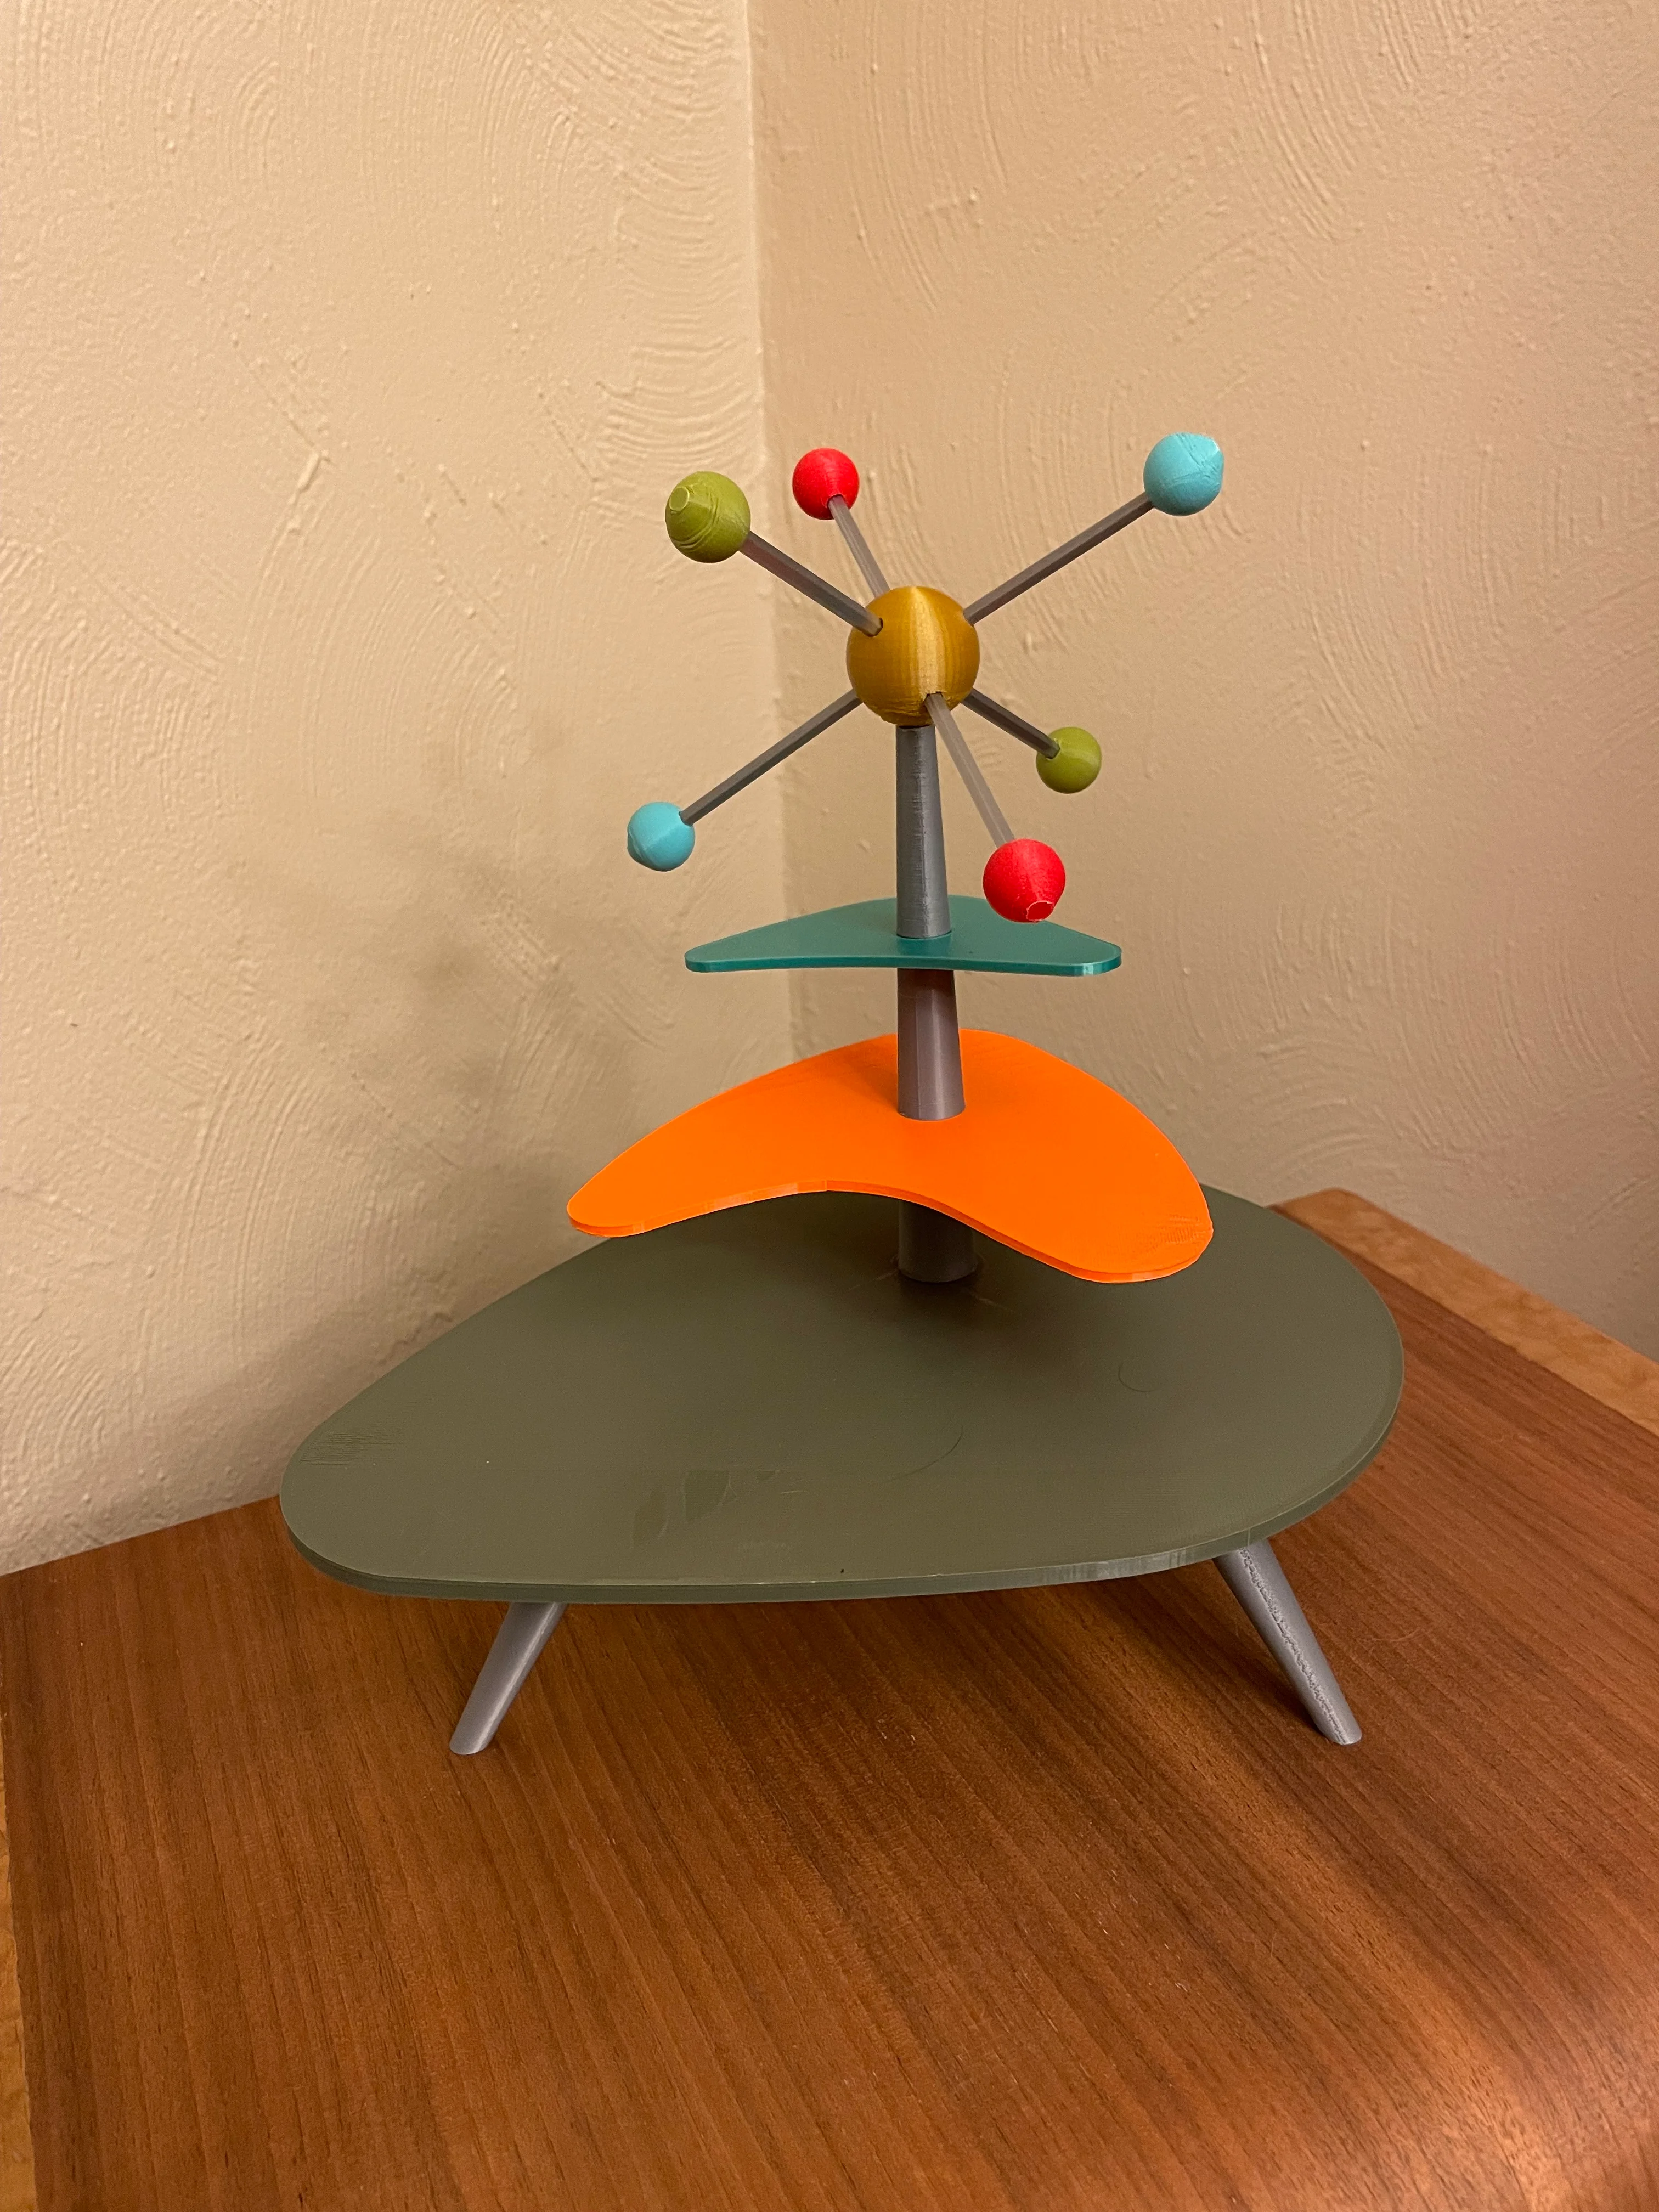


Mid Century Tiered Mini Table
This unique minature display table is designed in a Mid Century Modern, Atomic Age, Jetson's Retro Style and can be customized in unlimited color combinations. You can use this three tiered table to display small objects and retro minatures. Print at smaller scale for dollhouse or mini dioramas. Base Table only option is also available here. #FunctionalArt
The kit consists of a base table with attached legs, a center set of poles to support a middle and top tier table section. The top is capped off with a classic atomic style burst that you can customize in a variety of colors.
Print Instructions Baselegs - print with grid supports for only 20% overhang (recessed hole needs supports only, legs do not.) Baselegs can be 2 or 3 color filament swapped at the legs (optional 3rd color foot). Depending on your nozzle size and layer height you will have to figure out that layer position in the slicer.
Retrotable_mid - print with grid supports for the recessed hole.
Retrotable_top - print with grid supports for the recessed hole.
Retrotable_centersupport - print with grid supports and brims. print at .2 layer height or less. 20% infill
Retrotable_midsupport - print at .2 layer height, no supports. 20% infill
Retrotable_topsupport - print at .2 layer height, no supports. 20% infill
Retrotable_nut - no supports. print at .2 layer height or less.
Retrotable_atomiccenterball - print with grid supports for 20% overhang and brim. 15% infill
Retrotable_atomicrod - no supports, print 6 copies.
Retrotable_atomicball - print with grid supports for 20% overhang and brim. 15% infill. Print 6 copies (whatever colors)
Assembly Instructions
- Print all the parts.
- Insert largest center support in the baselegs table hole, threaded side down. Use the nut to secure the support in place.
- Insert mid table piece to center support.
- Insert middle support.
- Insert top table into middle support.
- Insert top support.
- Insert Atomic balls into atomic rods, then insert into center ball.
- Insert Atomic burst into top support.
Creative Commons License 4.0 BY-NC-ND
Mid Century Tiered Mini Table
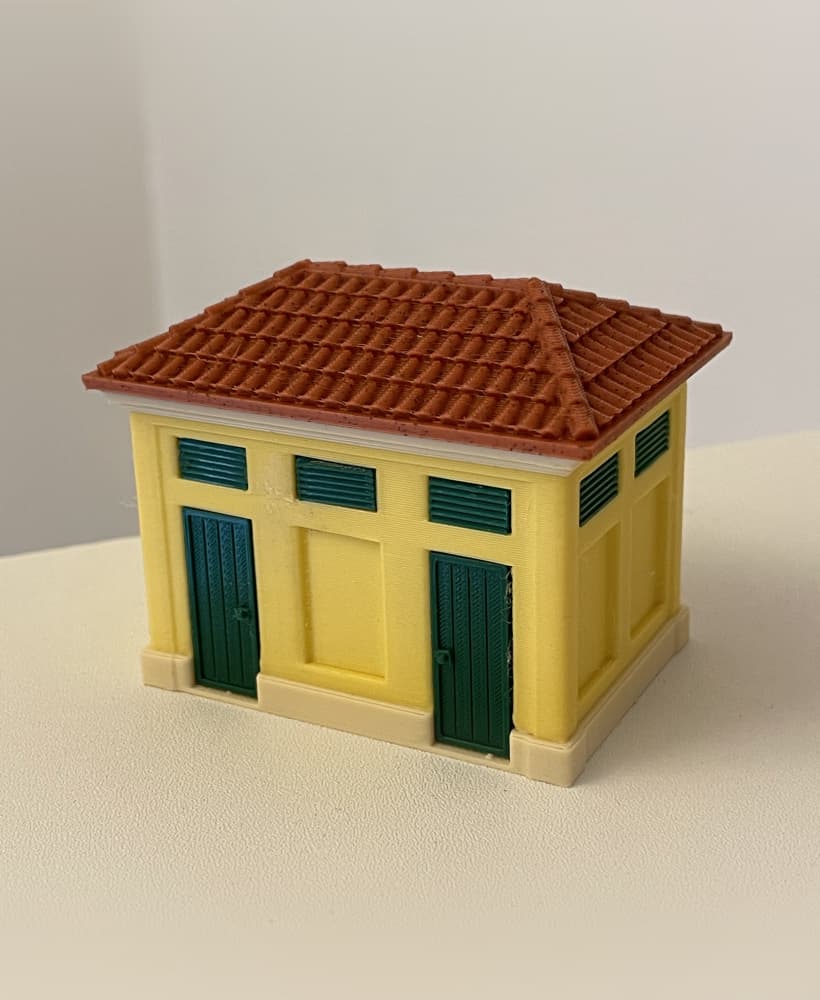
HO Scale - Gabinetti Building

HO Scale - Water Tower

HO scale - Shepherd's Carriage

HO Scale - Gypsy Caravan
HO Scale - Cabina di Telefonica

HO Scale - Water Column

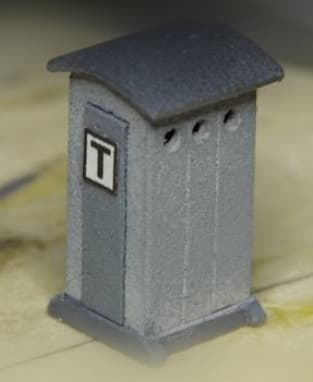
HO Scale - Kiosk

HO Scale - Piaggio L'Ape 125A - Cargo Set

HO Scale - Piaggio L'Ape 125A Open Cargo Truck

Italian Stone Villa 3x2x2 - HO Scale

Art Deco Gas Station - HO Scale

1/6 Scale Keyboard with Adjustable Stand

Mini DJ Mixer - 1/6 Scale
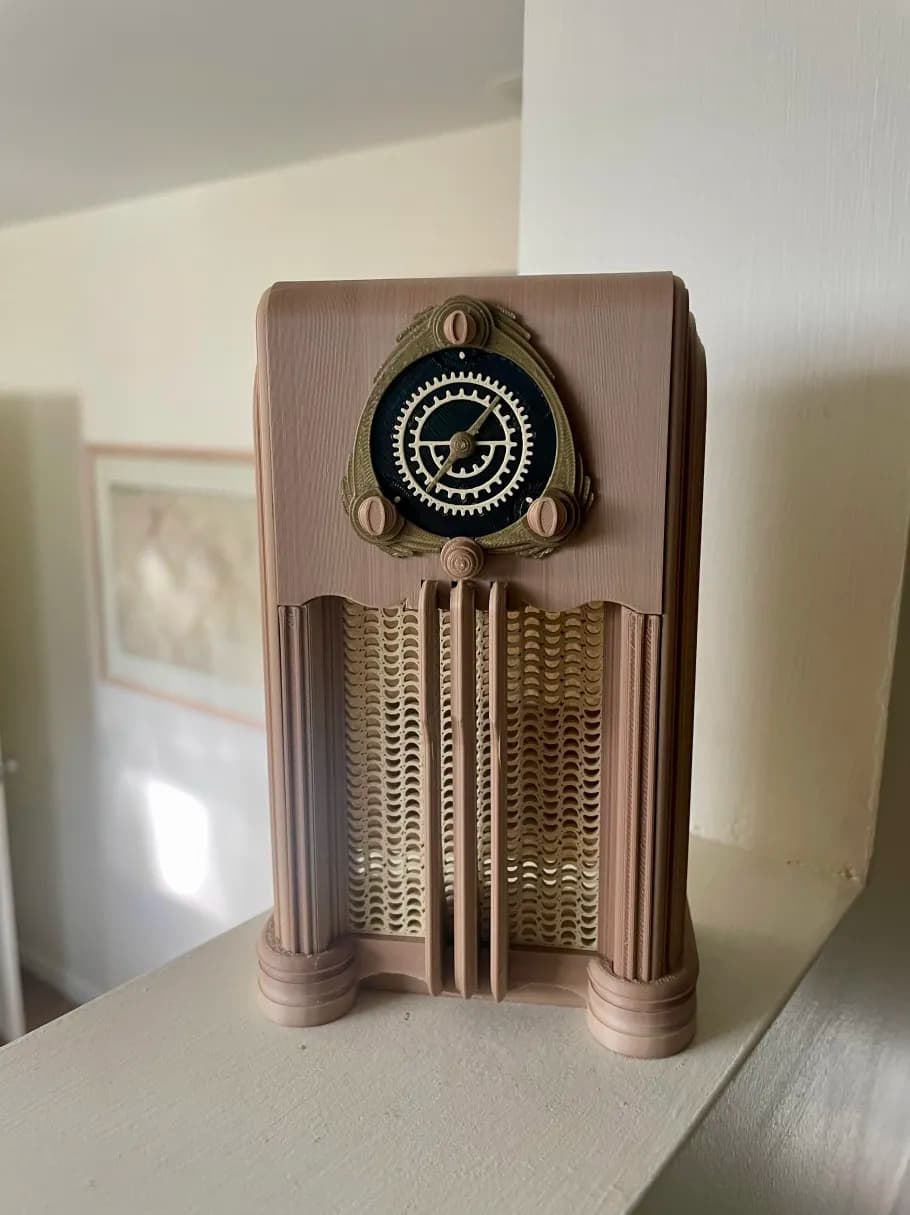
1939 Bluetooth Radio
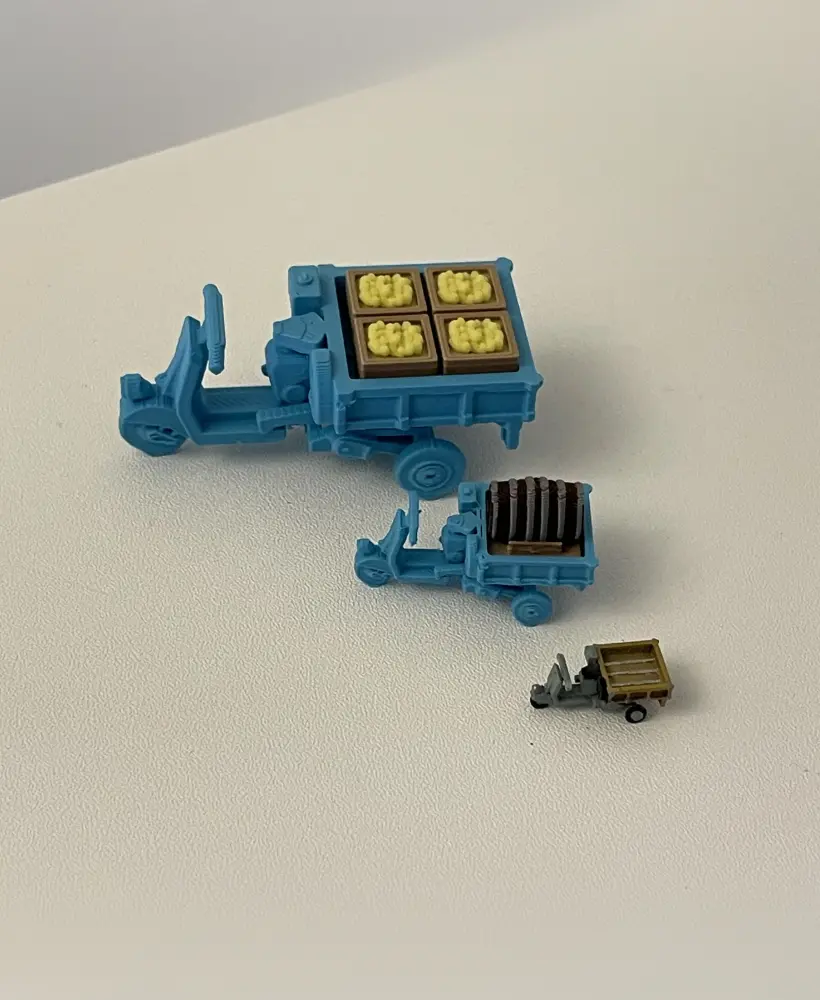
Piaggio Ape A125 Scale Models

Italian Kiosk Scale Models

T-Shirt - Keep on Truckin'

Showcase Podium - The Price is Right

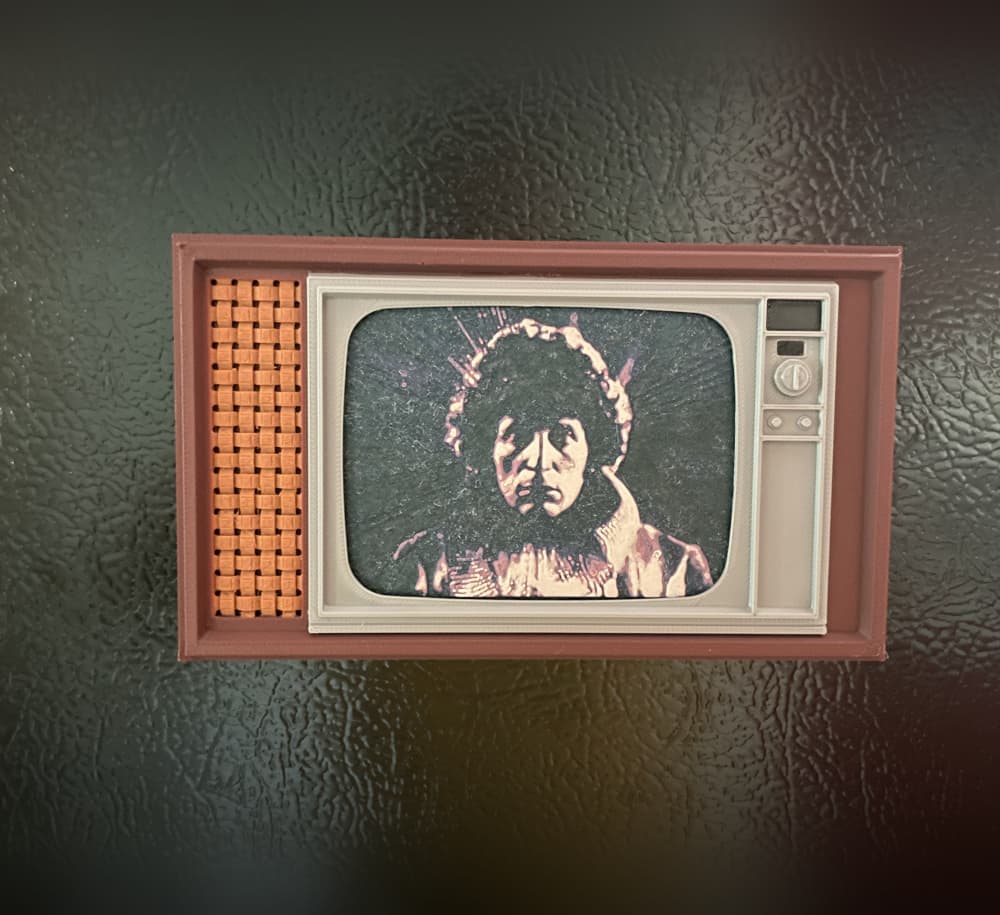
4th Dr. Who HueForge 1967 Retro TV Screen