EmuPi RetroPie Mini Arcade Cabinet v2
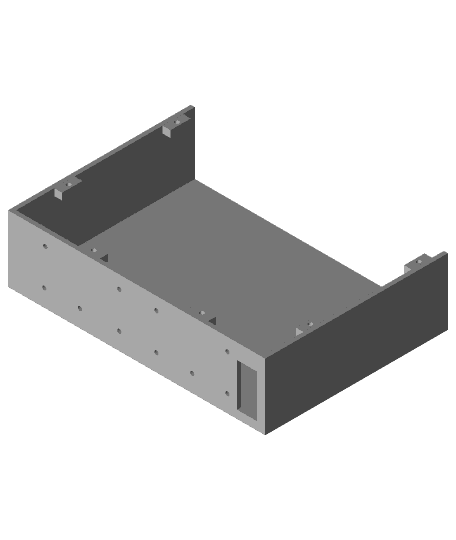
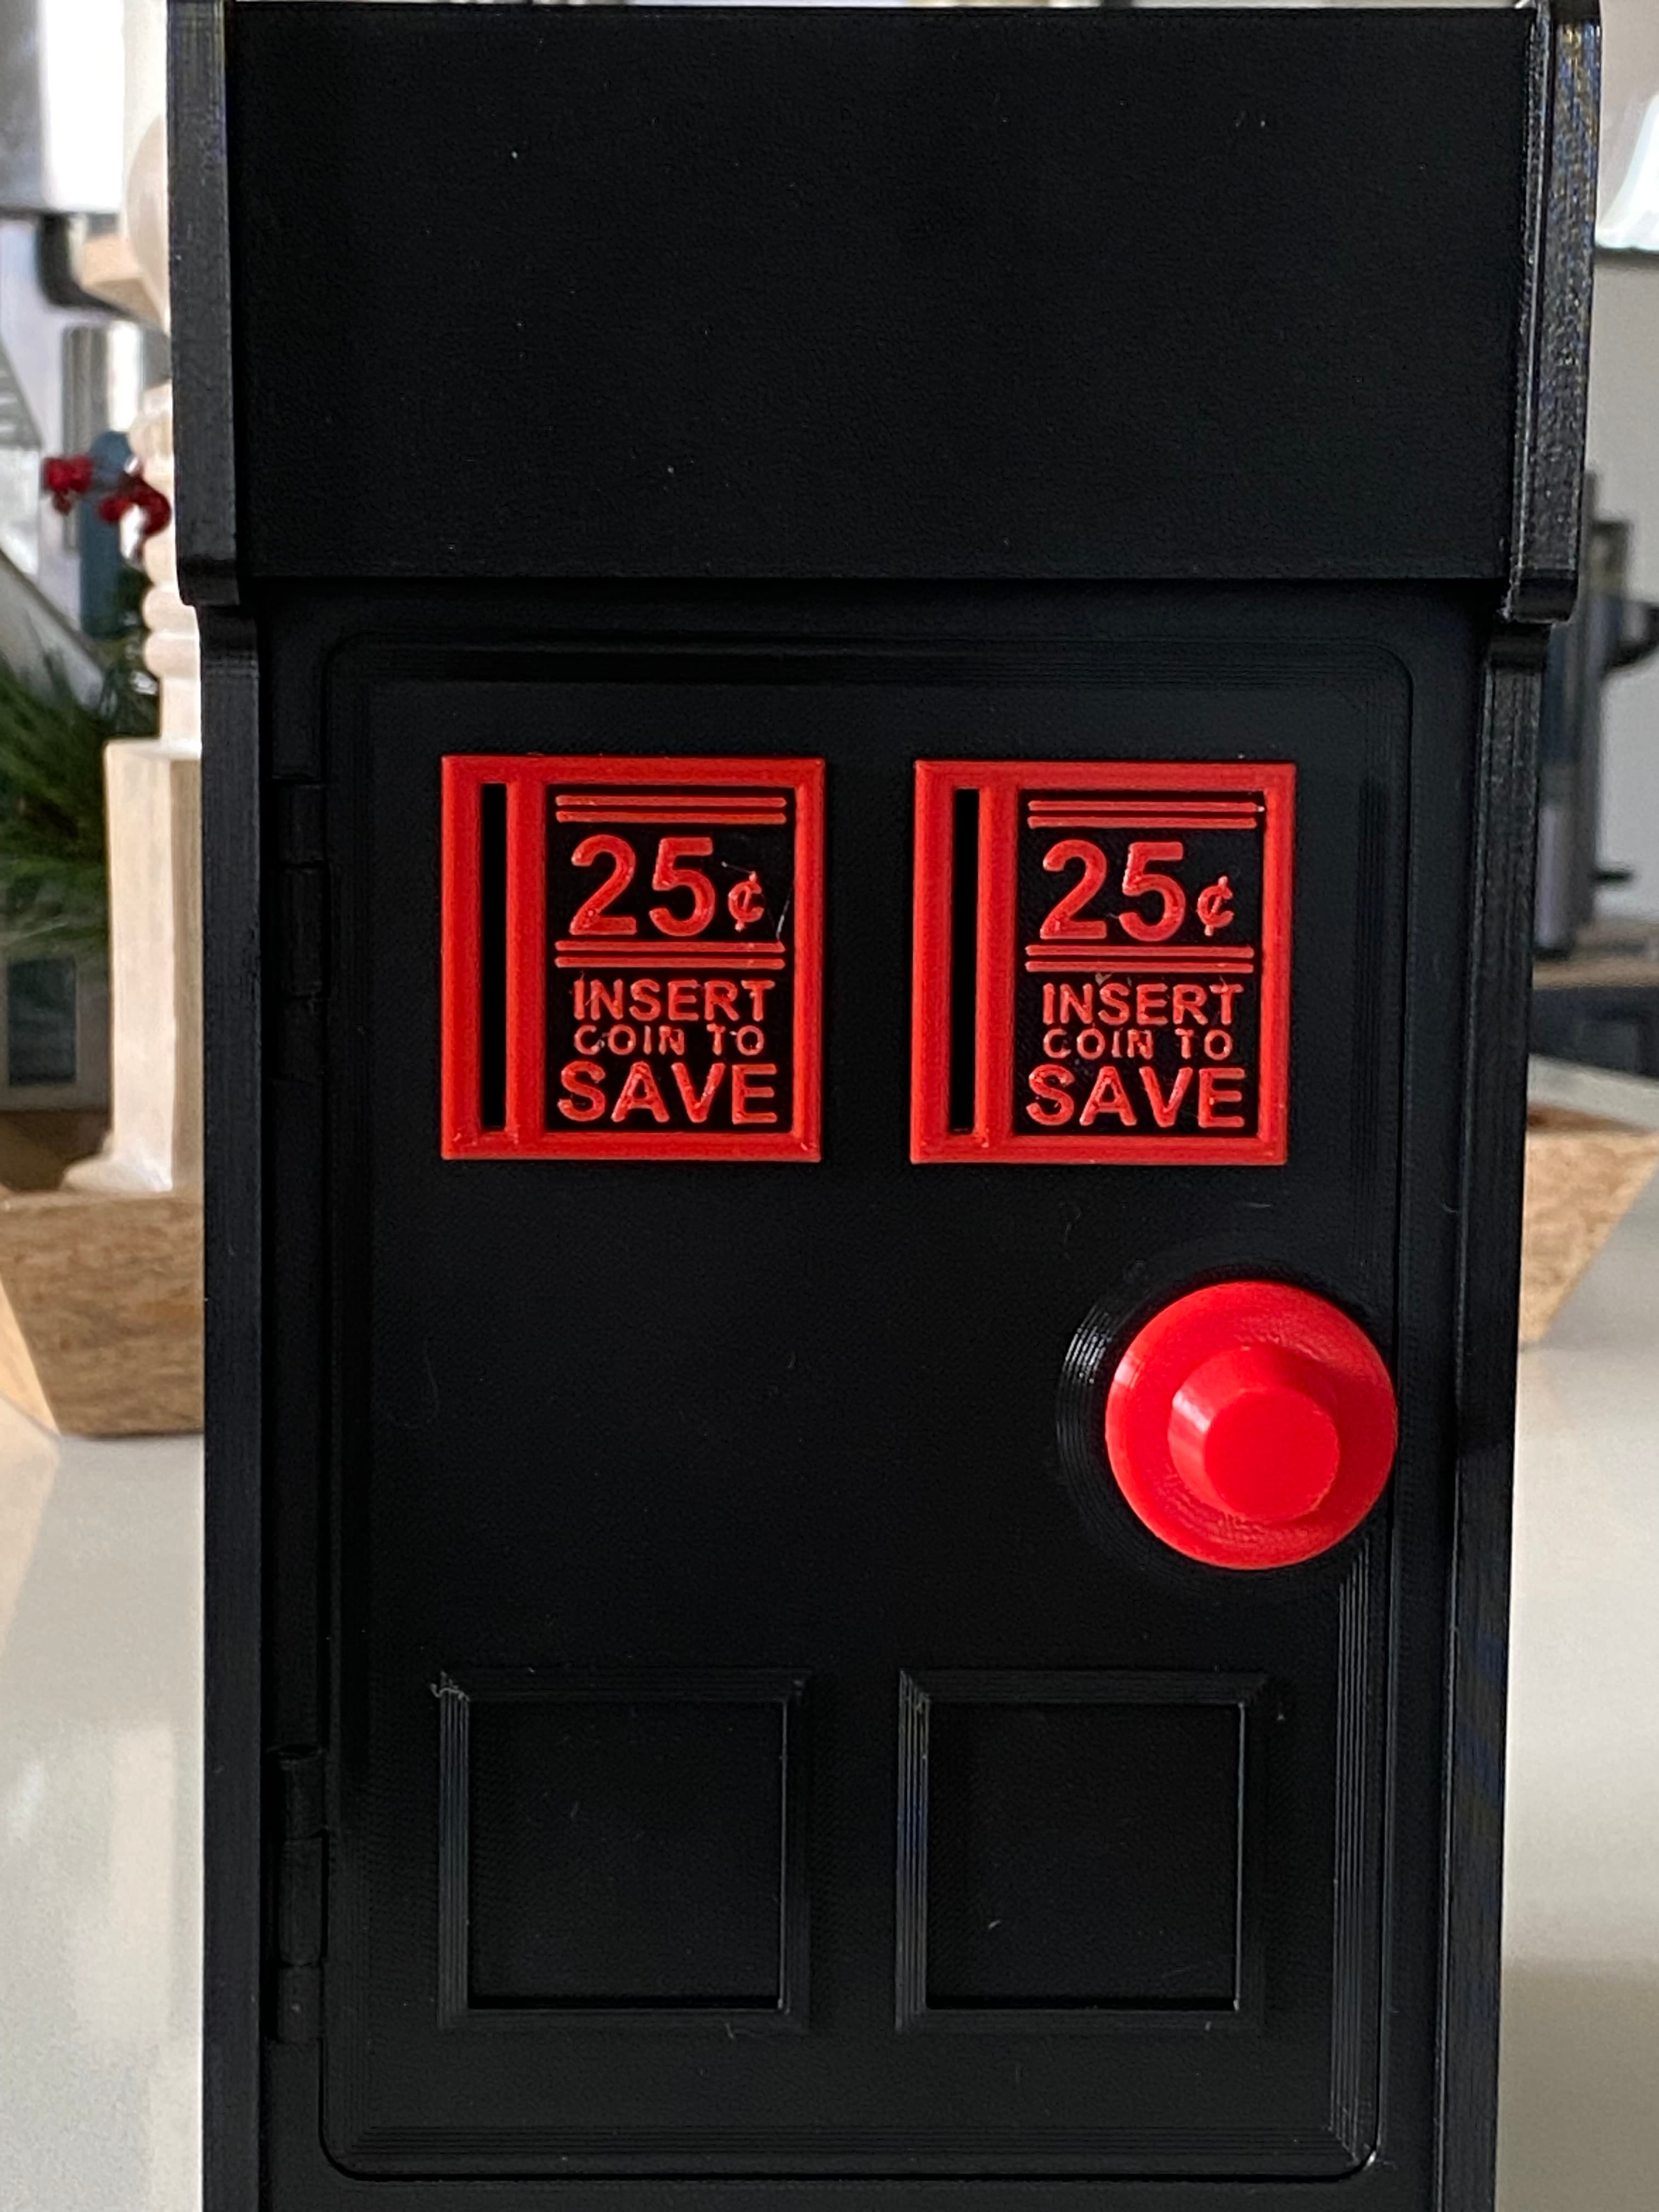
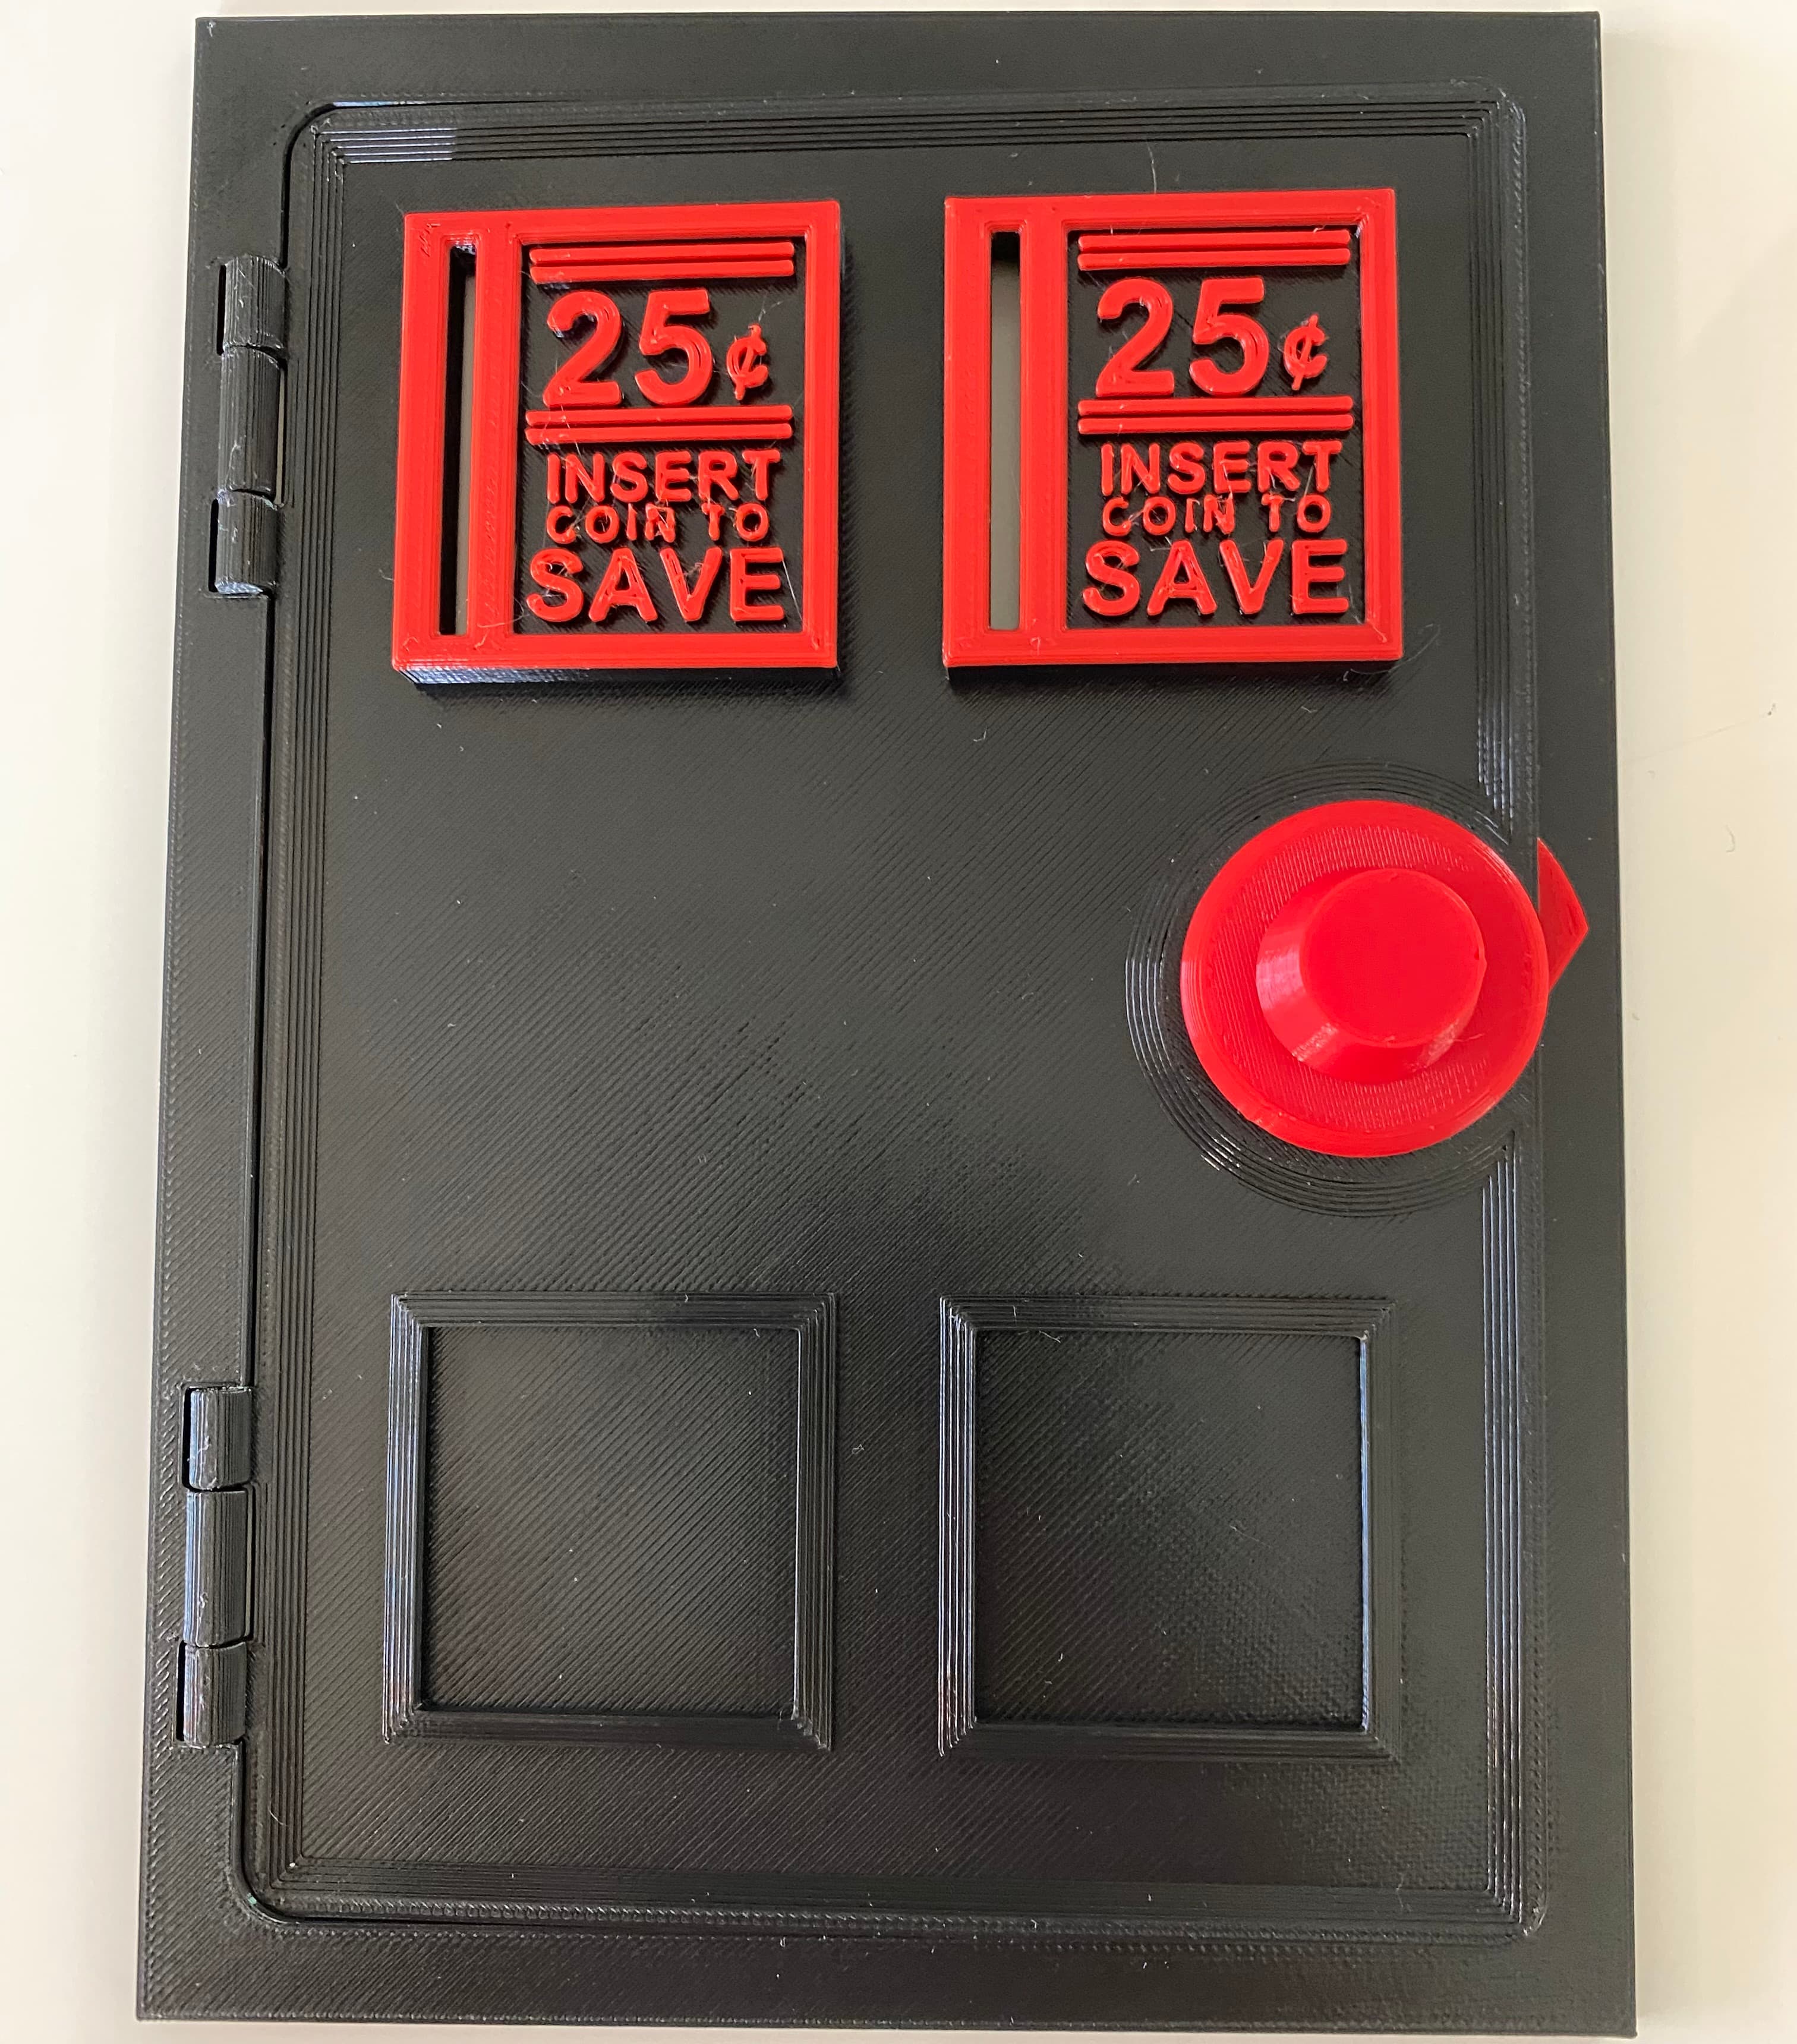
This is the second version of my Emu Pi Mini Arcade that improves upon the first design. This Arcade requires less printing than v1, has a better back door design, adjustable feet, external USB port, and arched arcade button to give more clearance between the joystick and screen.
For the print settings you will need supports mostly just for the parts that connect the shell pieces together since they print in the air. Infill 100 percent I do think you could get away with less than that but I did it to be certain. Printed in PLA with a .2 layer height. This will print on a standard 200x200x200 printer I made sure to model it that way so that many people could use and print it.
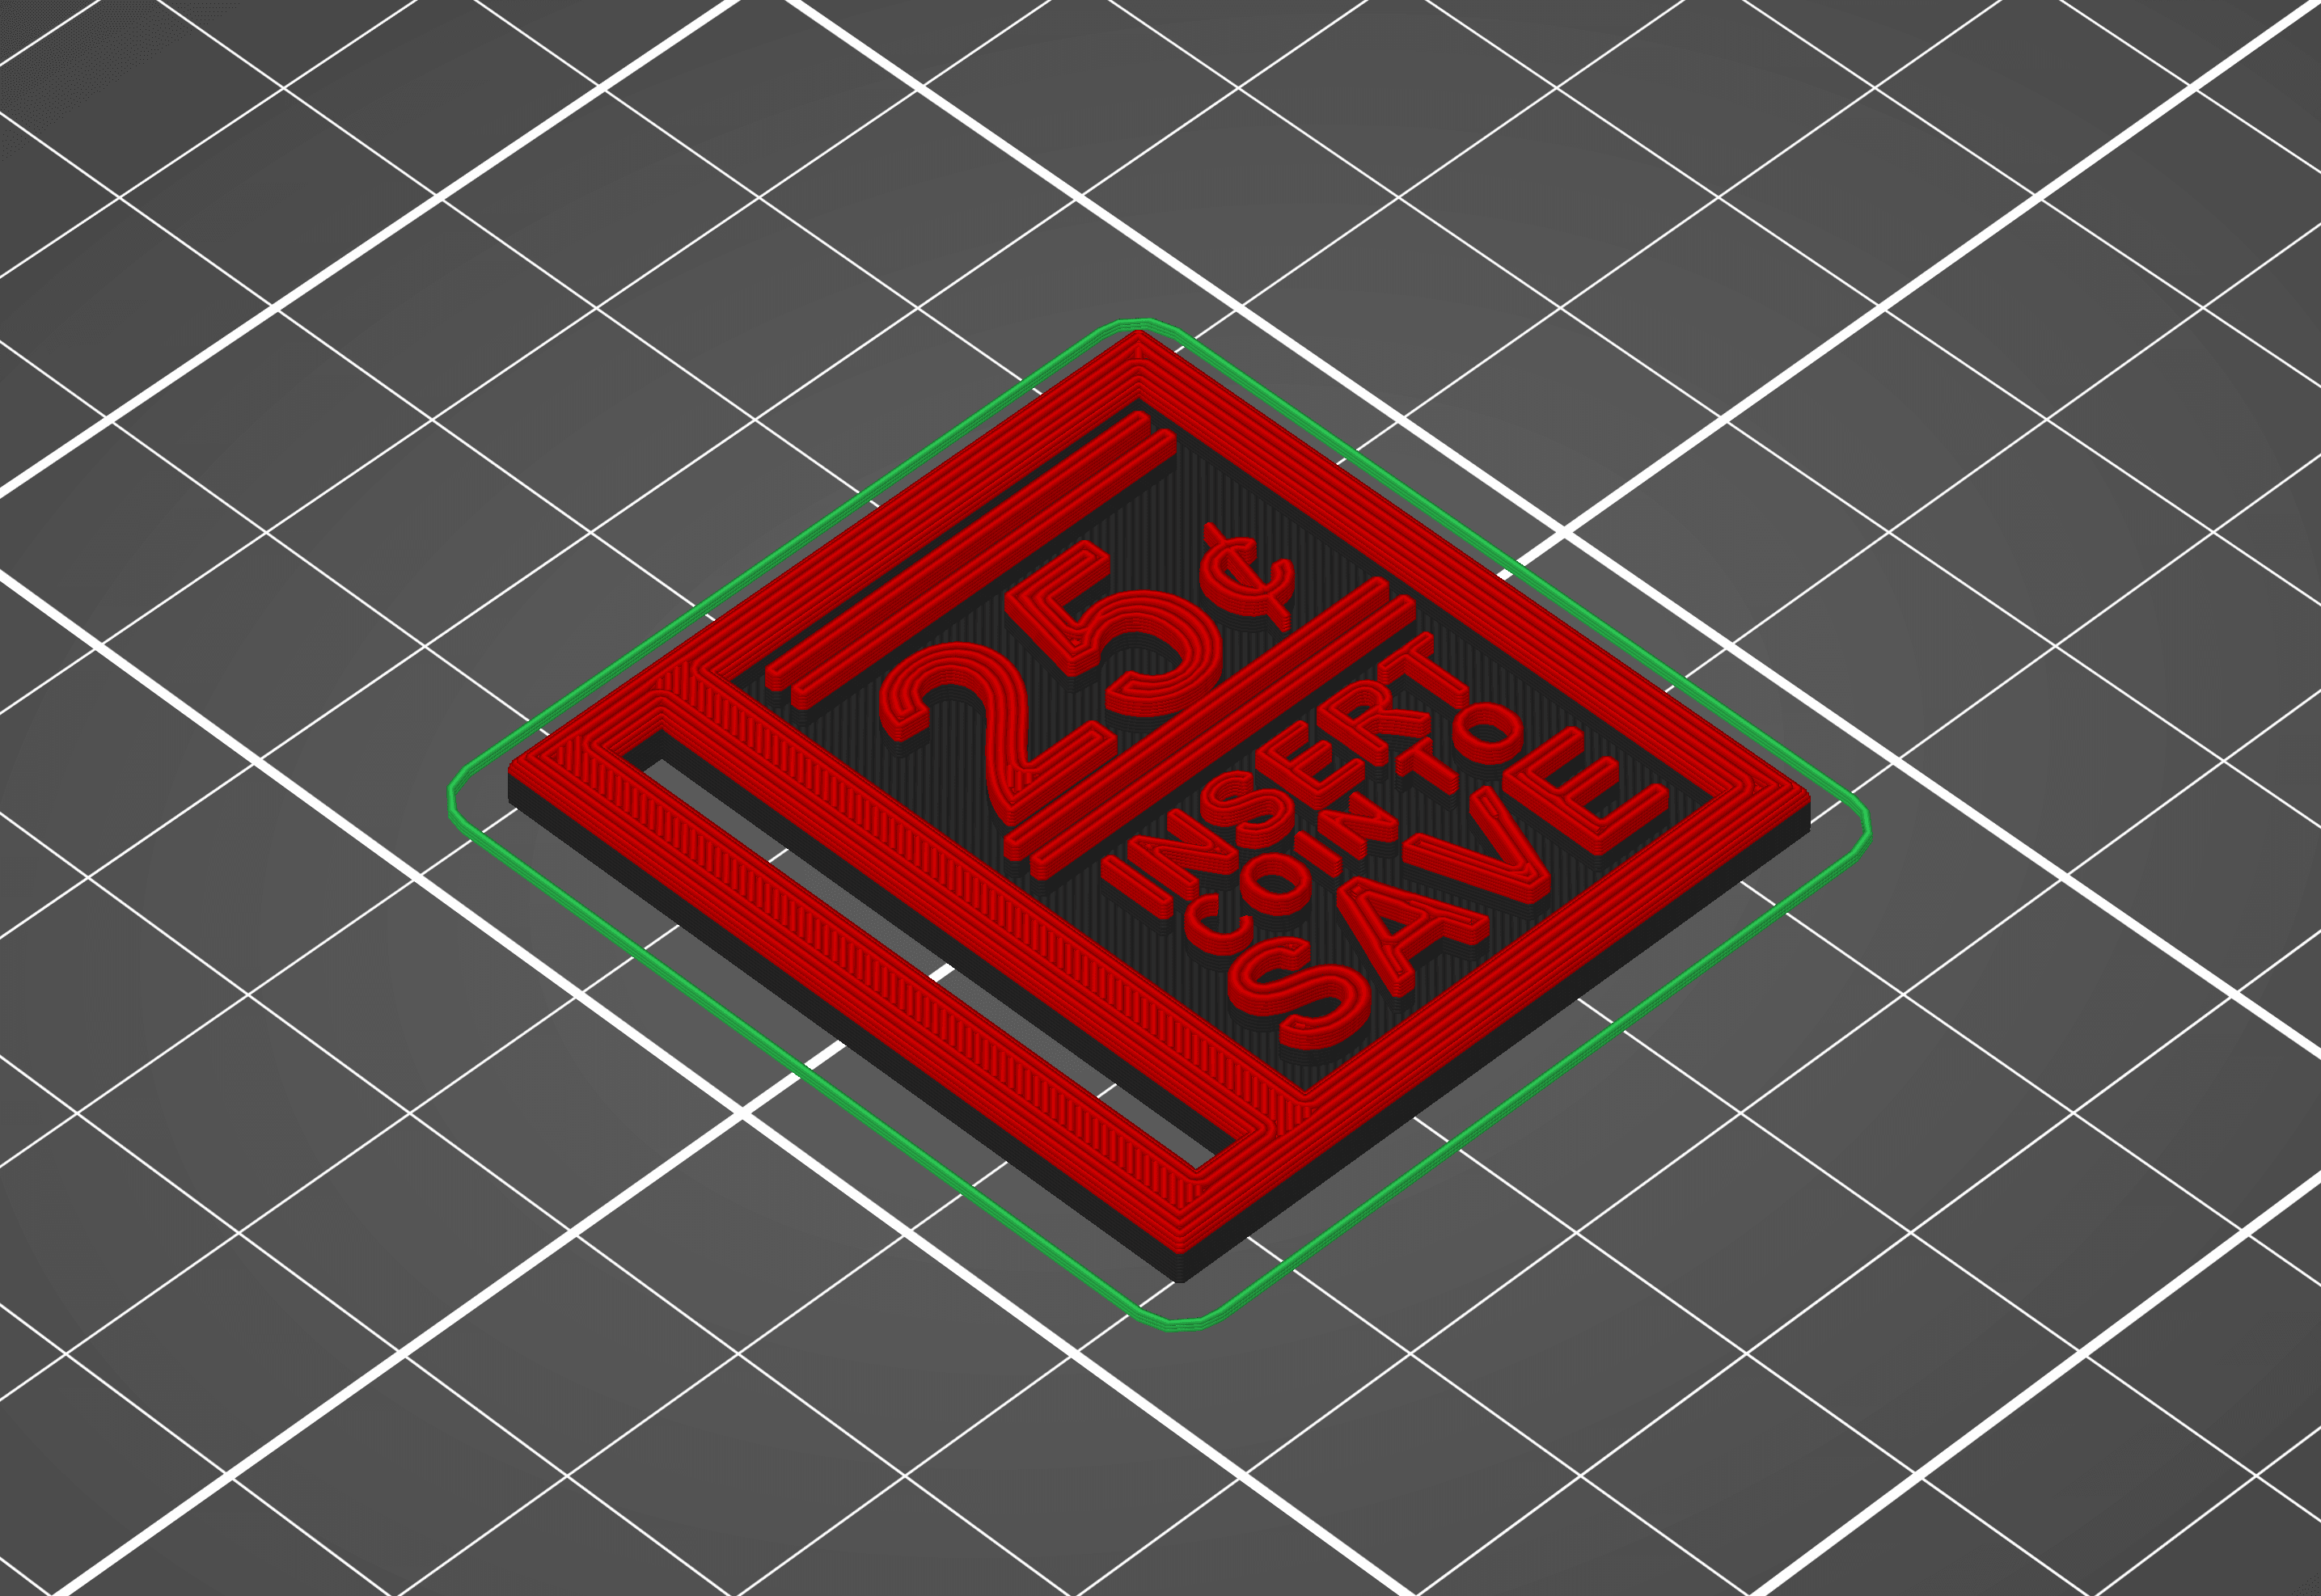
Parts used for the build: Raspberry Pi 3: http://amzn.to/2DIXkTc 7" LCD Screen: https://goo.gl/75PsiF Arcade button and joystick kit: https://goo.gl/1YAxg8 Speaker bonnet kit: (requires soldering) I may offer an install service http://amzn.to/2Fafbje Speakers used: http://amzn.to/2rCheuu Double sided adhesive (for speaker mounting & lcd screen): http://amzn.to/2F7EW3F Velcrow:(used to mount pi board in case I wanted to remove it) http://amzn.to/2DFBqQL You will also need some m3 screws I suggest x 12 and x 20 along with an even longer set of 4 for securing the button and joystick face to the bottom 1 ft USB extension cable: https://amzn.to/2LXEOqS
Assembly should be pretty explanatory just secure the parts to each other using the m3 screws I did not need any nuts other than on the hinges the plastic was extremely solid and connected to each other without the need. If the m3 screws wont grip into the holes use a screwdriver to twist back and forth with some pressure on the holes which will allow the screws to grip. You will also need a set of m4 screws to connect the arcade joystick and button top to the bottom.
As far as setting up retropie just refer to: https://retropie.org.uk/docs/First-Installation/
Good luck! If you have any questions let me know I will do my best to help!
EmuPi RetroPie Mini Arcade Cabinet v1

Arcade Wall Cabinet DIY

The Modern Mimic: Zombie-Breached Arcade Cabinet (32mm & 150mm)
Arcade Cabinet Piggy Bank
Arcade Cabinet Door with Lock and Coin Slots

Arcade Cabinet Cookie Cutter STL File - 4 inches

Mount T300 wheel to arcade cabinets, better gameplay on spinner racing games, 3d printed
.png&w=3840&q=75)
RetroMaker Arcade Cabinet
.png&w=3840&q=75)
Miniature Replica 03. LIXHULT Cabinet V2 for Miniature Dollhouse - IKEA (1:12,24,48) - 3D Print Inst

Miniature Replica 07. EKET Cabinet V2 for Miniature Dollhouse - IKEA - 3D Print Instant Download

Miniature Replica 21. STOCKHOLM Cabinet V2 for Miniature Dollhouse - IKEA - 3D Print Instant Downlo

Miniature Replica GRILLSKAR Kitchen Sink Unit and Cabinet V2 for Miniature Dollhouse - IKEA (1:12,24

Miniature Replica 06. BROR Cabinet V2 for Miniature Dollhouse - IKEA - 3D Print Instant Download
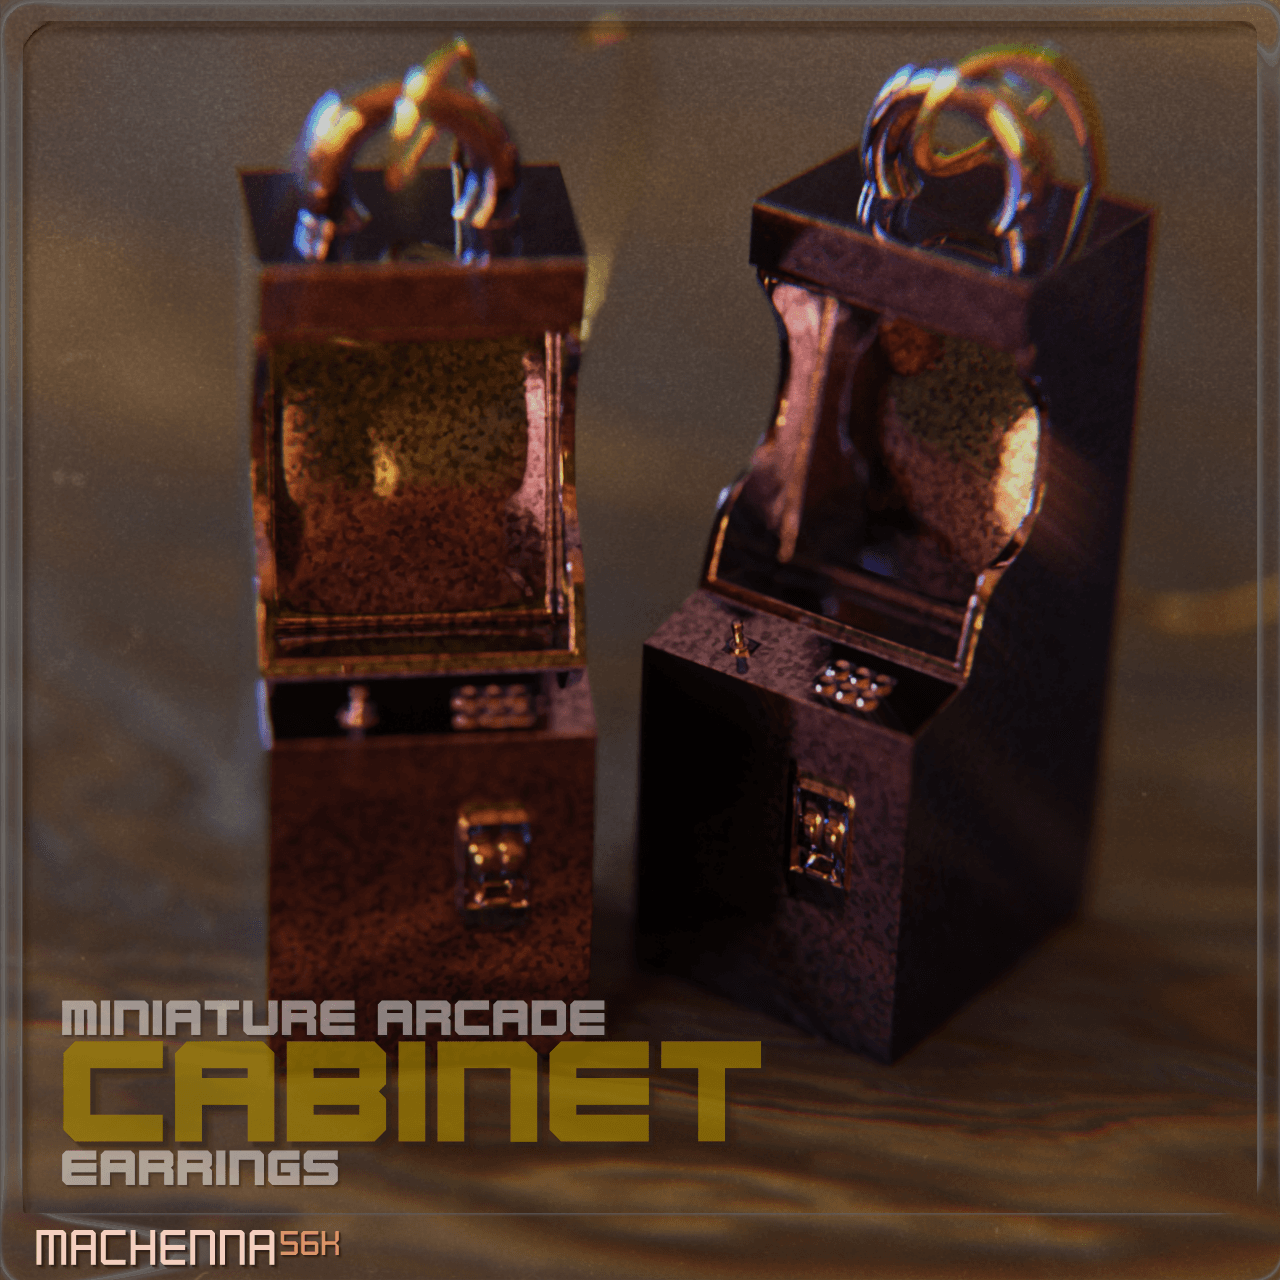
Miniature Arcade Cabinet Earrings

Miniature Replica GALANT File Cabinet Combination V2 for Miniature Dollhouse - IKEA (1:12,24,48) - 3

Miniature Replica 19. IDANAS Cabinet with Doors V2 for Miniature Dollhouse - IKEA (1:12,24,48) - 3D

Miniature Replica SKRUVBY Cabinet 35 3_8 In V2 for Miniature Dollhouse - IKEA - 3D Print Instant Dow

Miniature Replica SKRUVBY Bookcase 35 3_8 In with Drawer and Cabinet 35 3_8 In V2 for Miniature Doll

Retro Arcade Clicker Keychain Fidget Toy Bundle