
Bambu X1 Electronics Box Seals - Hotter Chamber / Cooler Electronics!
Heat Out / Cool In
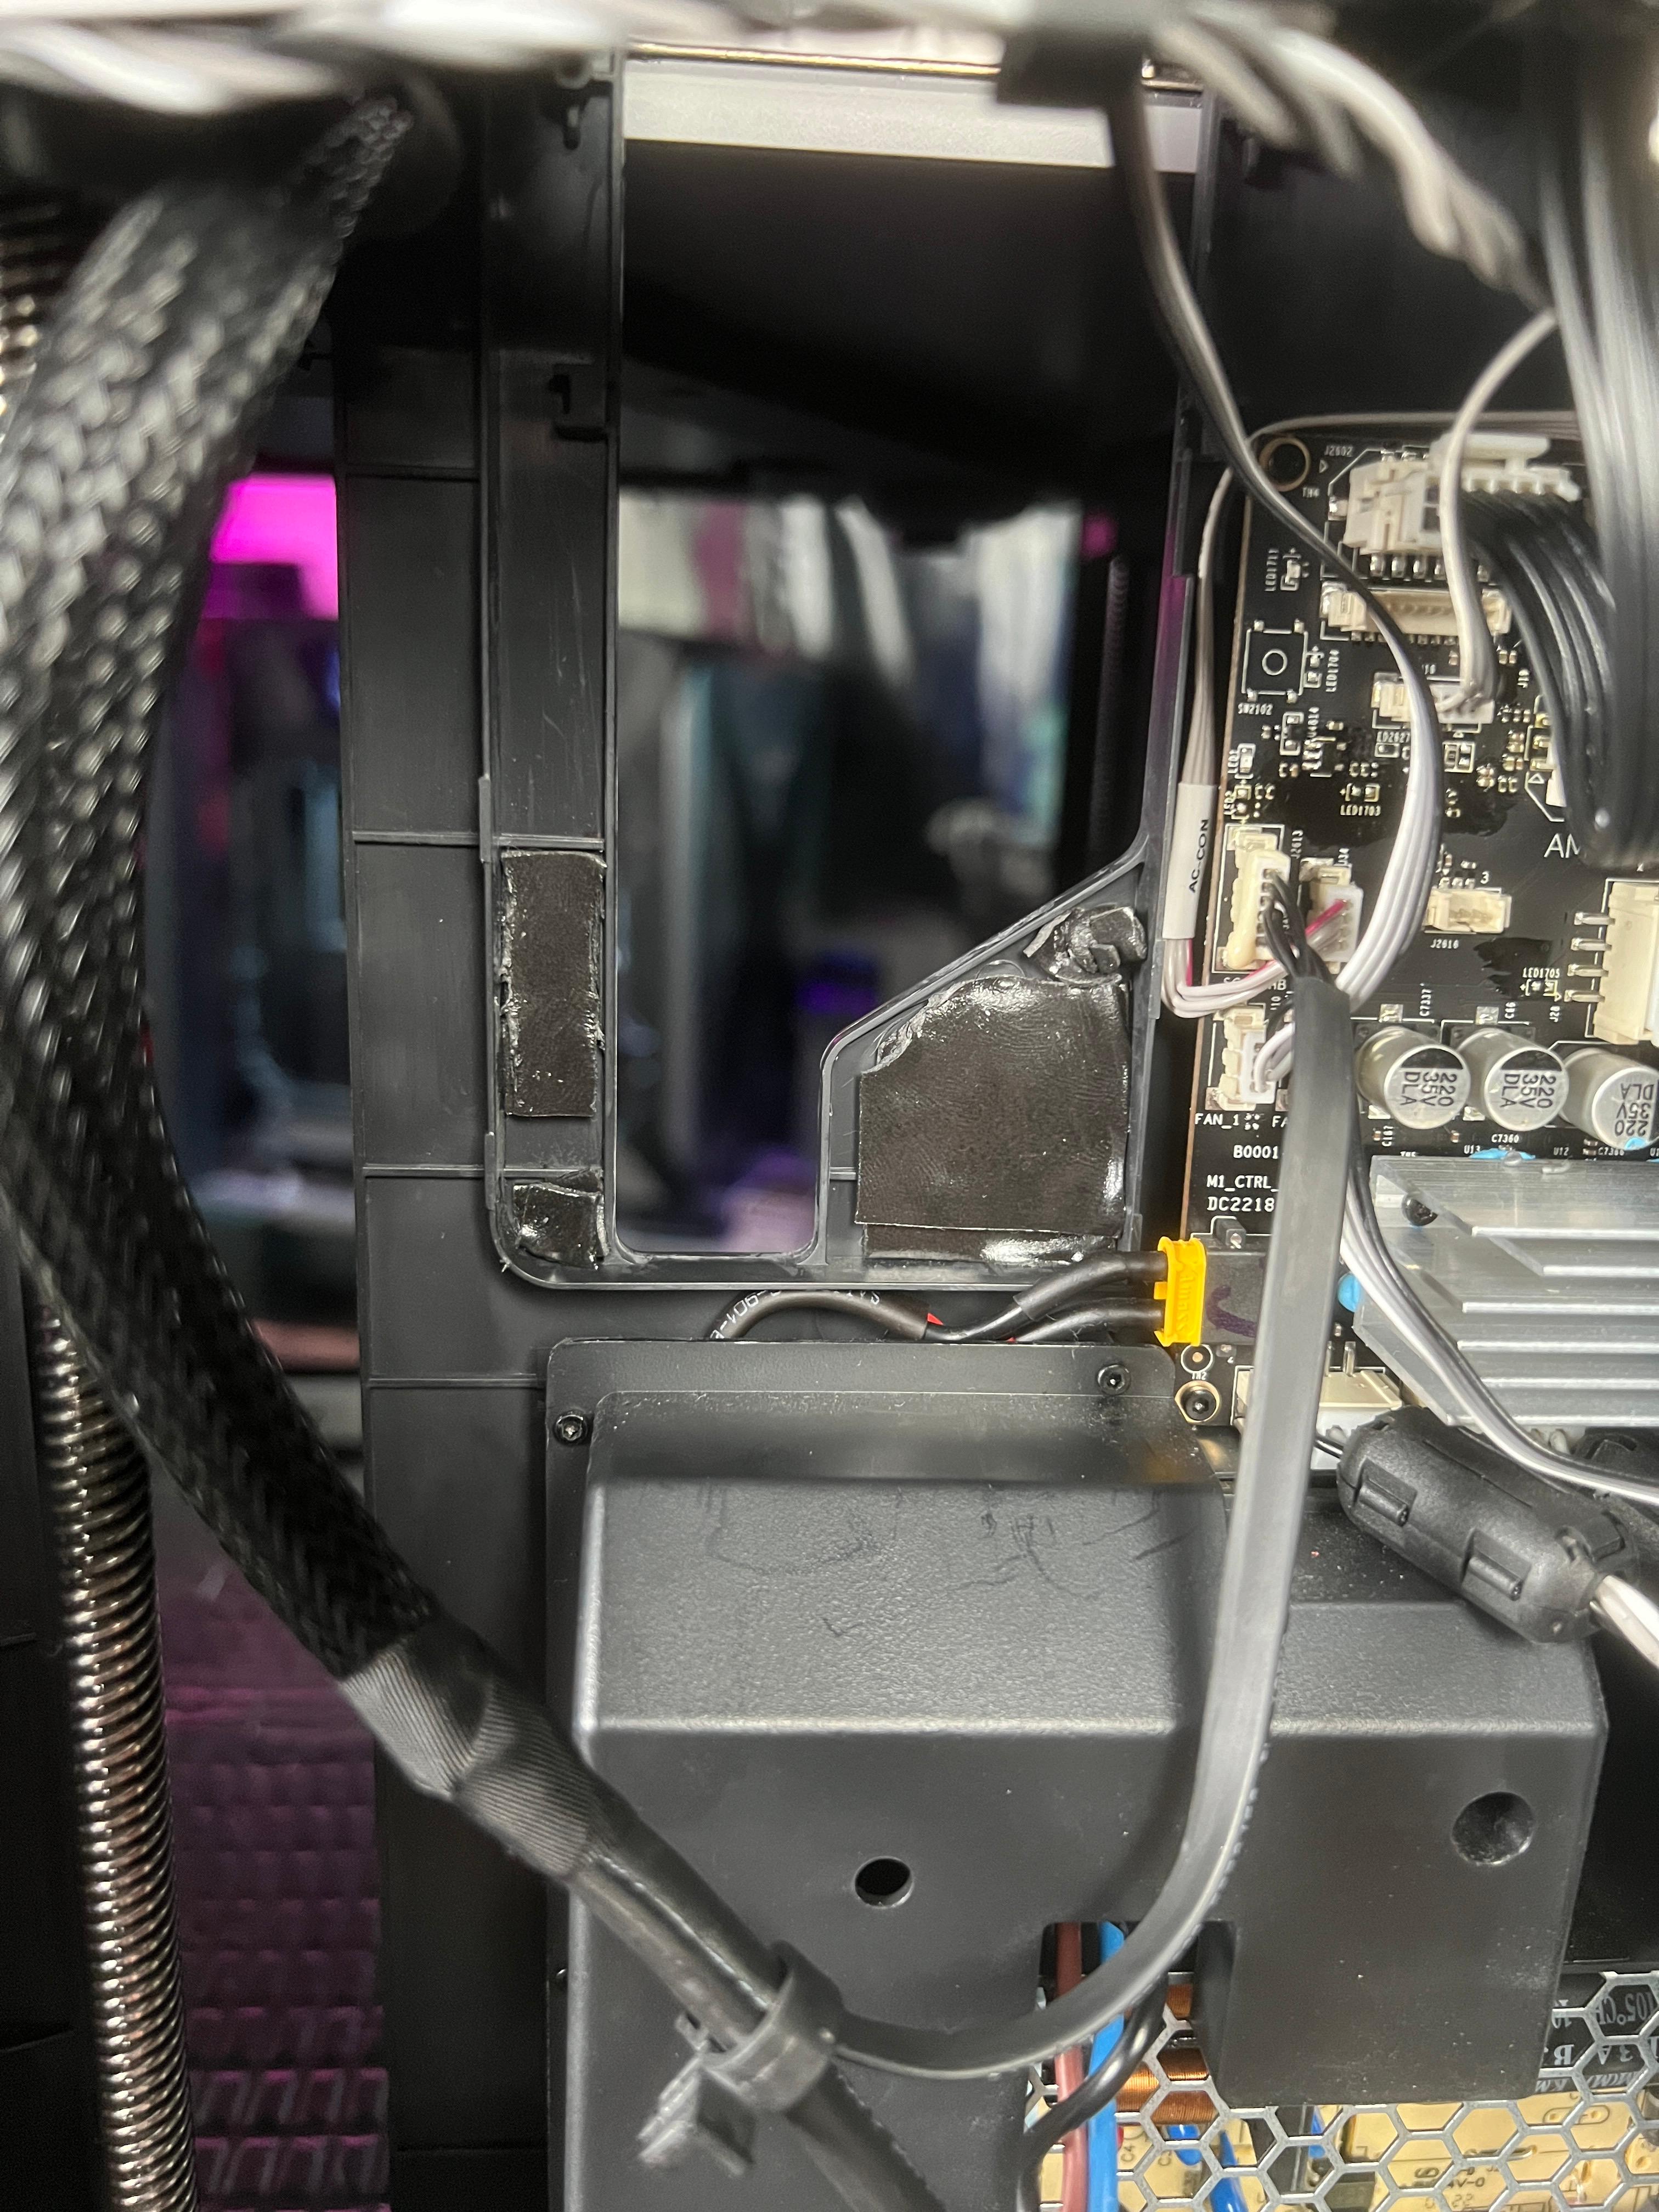
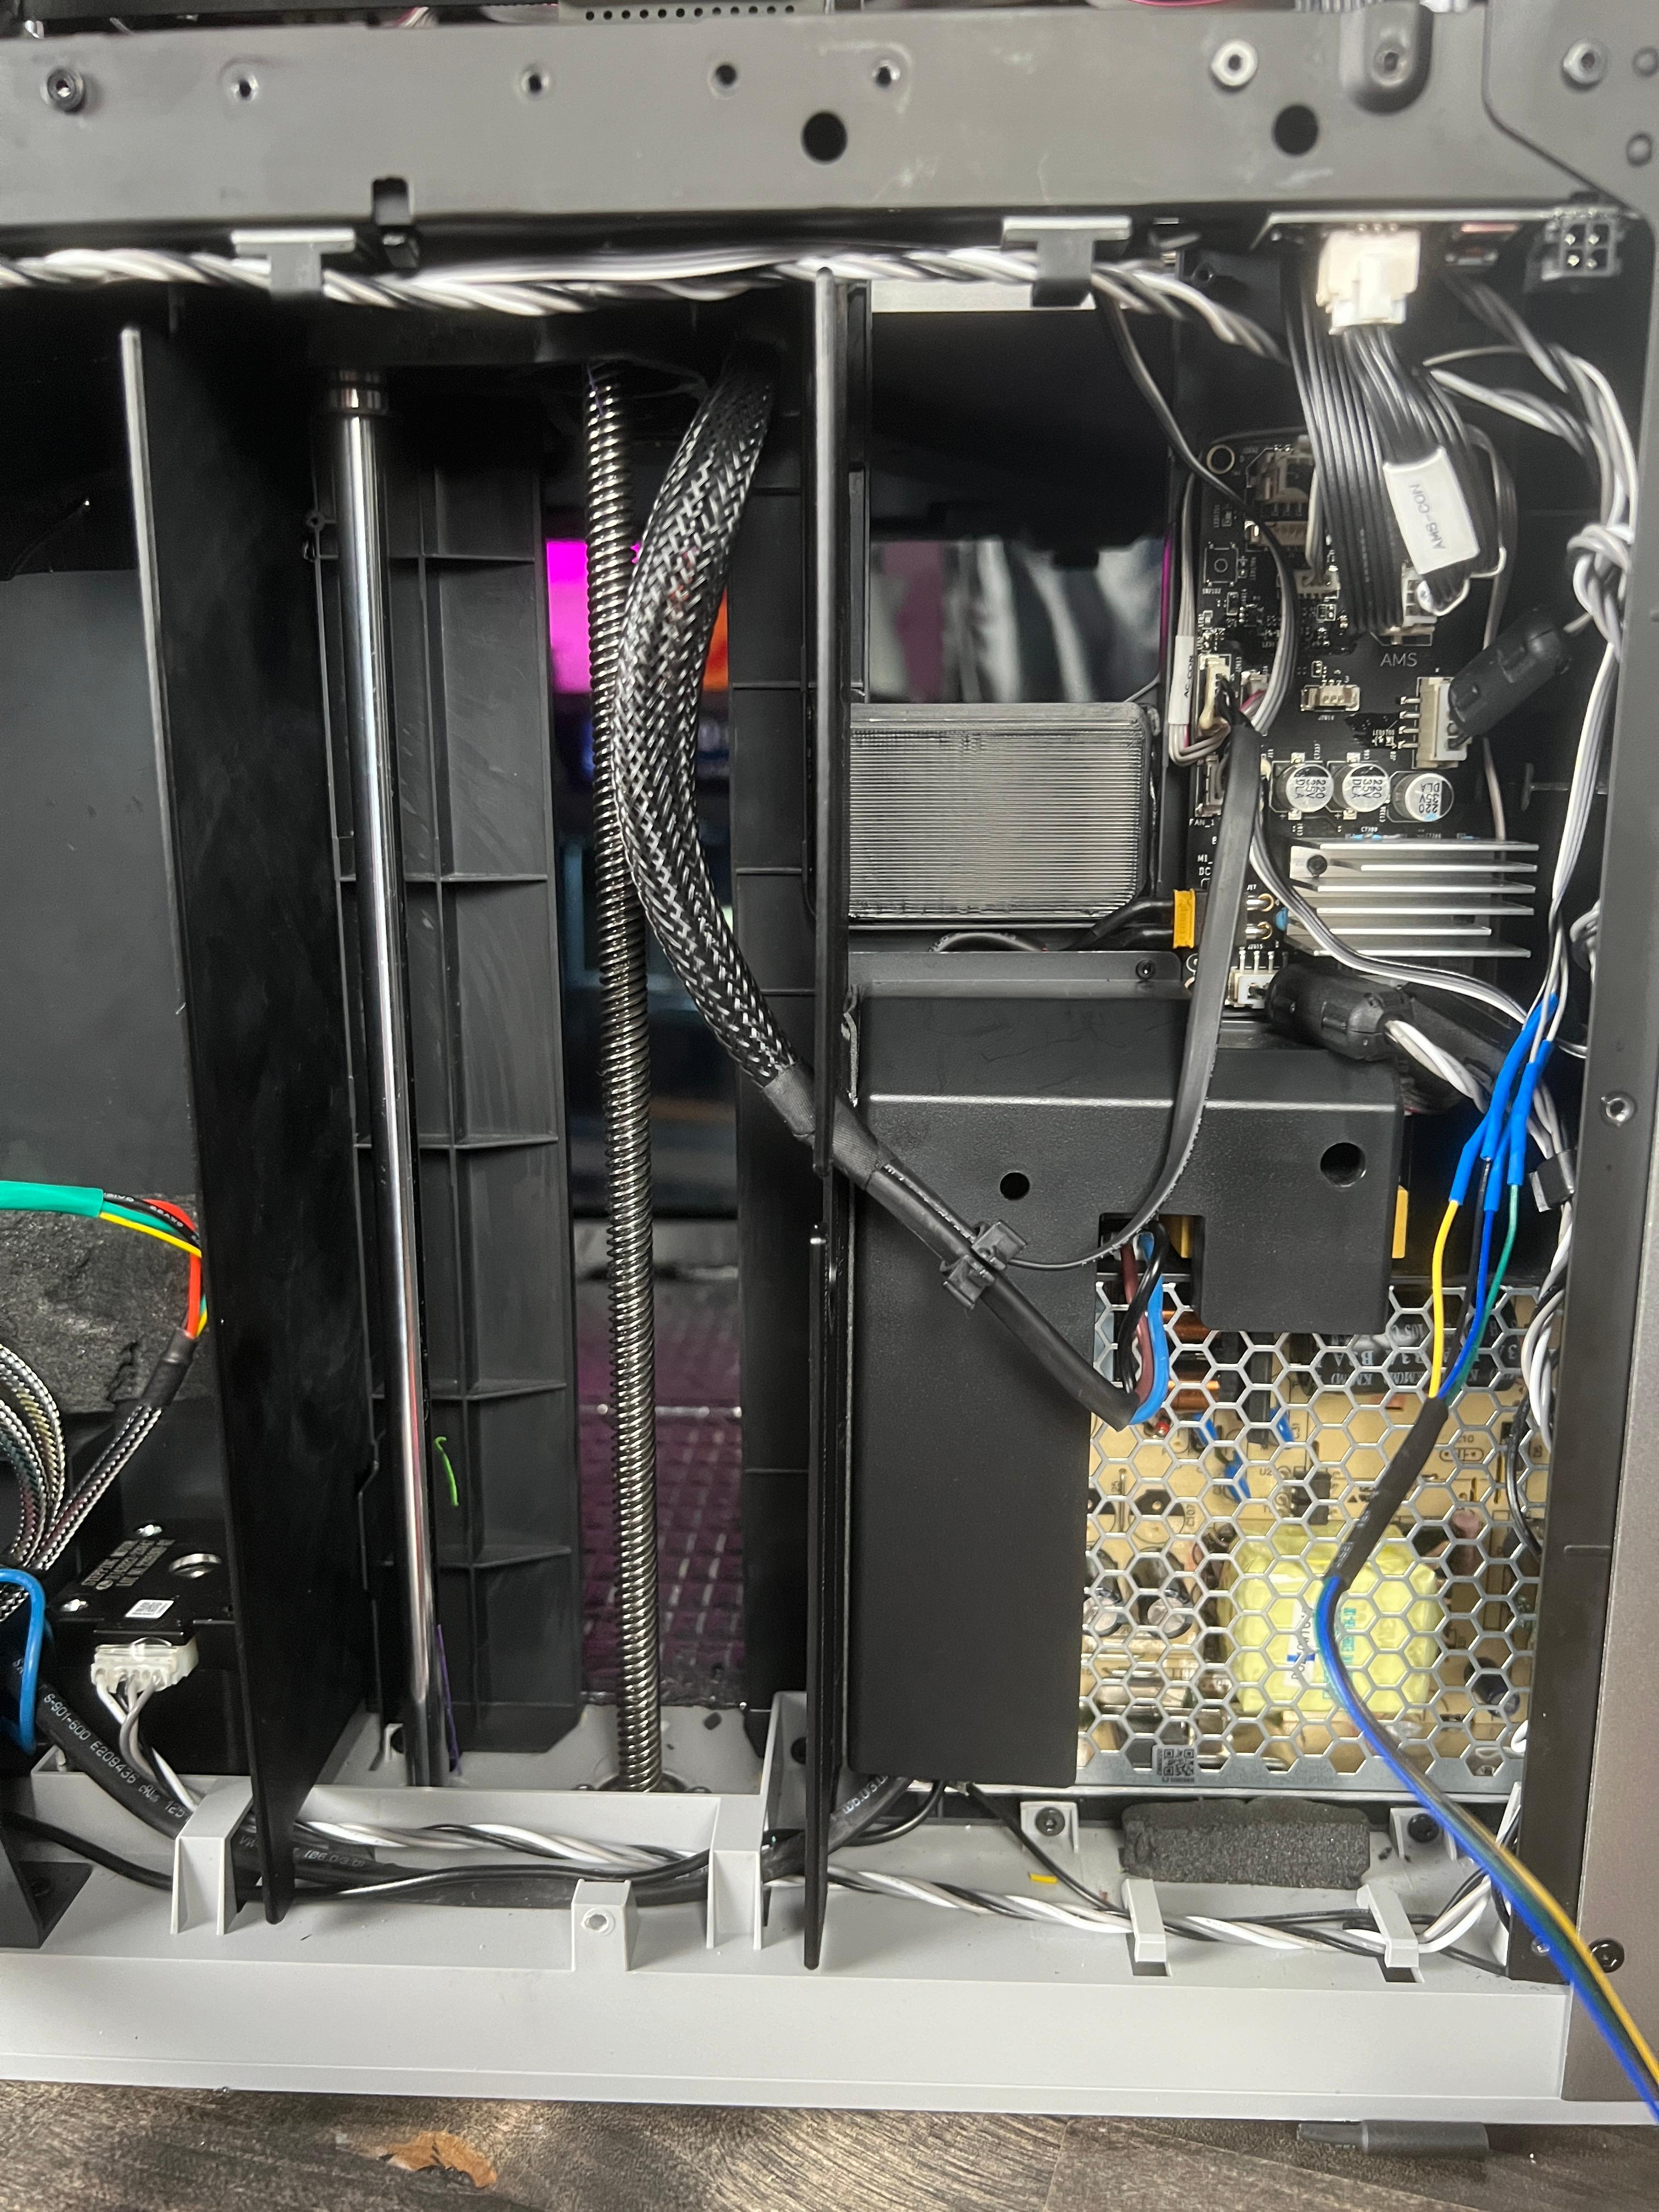
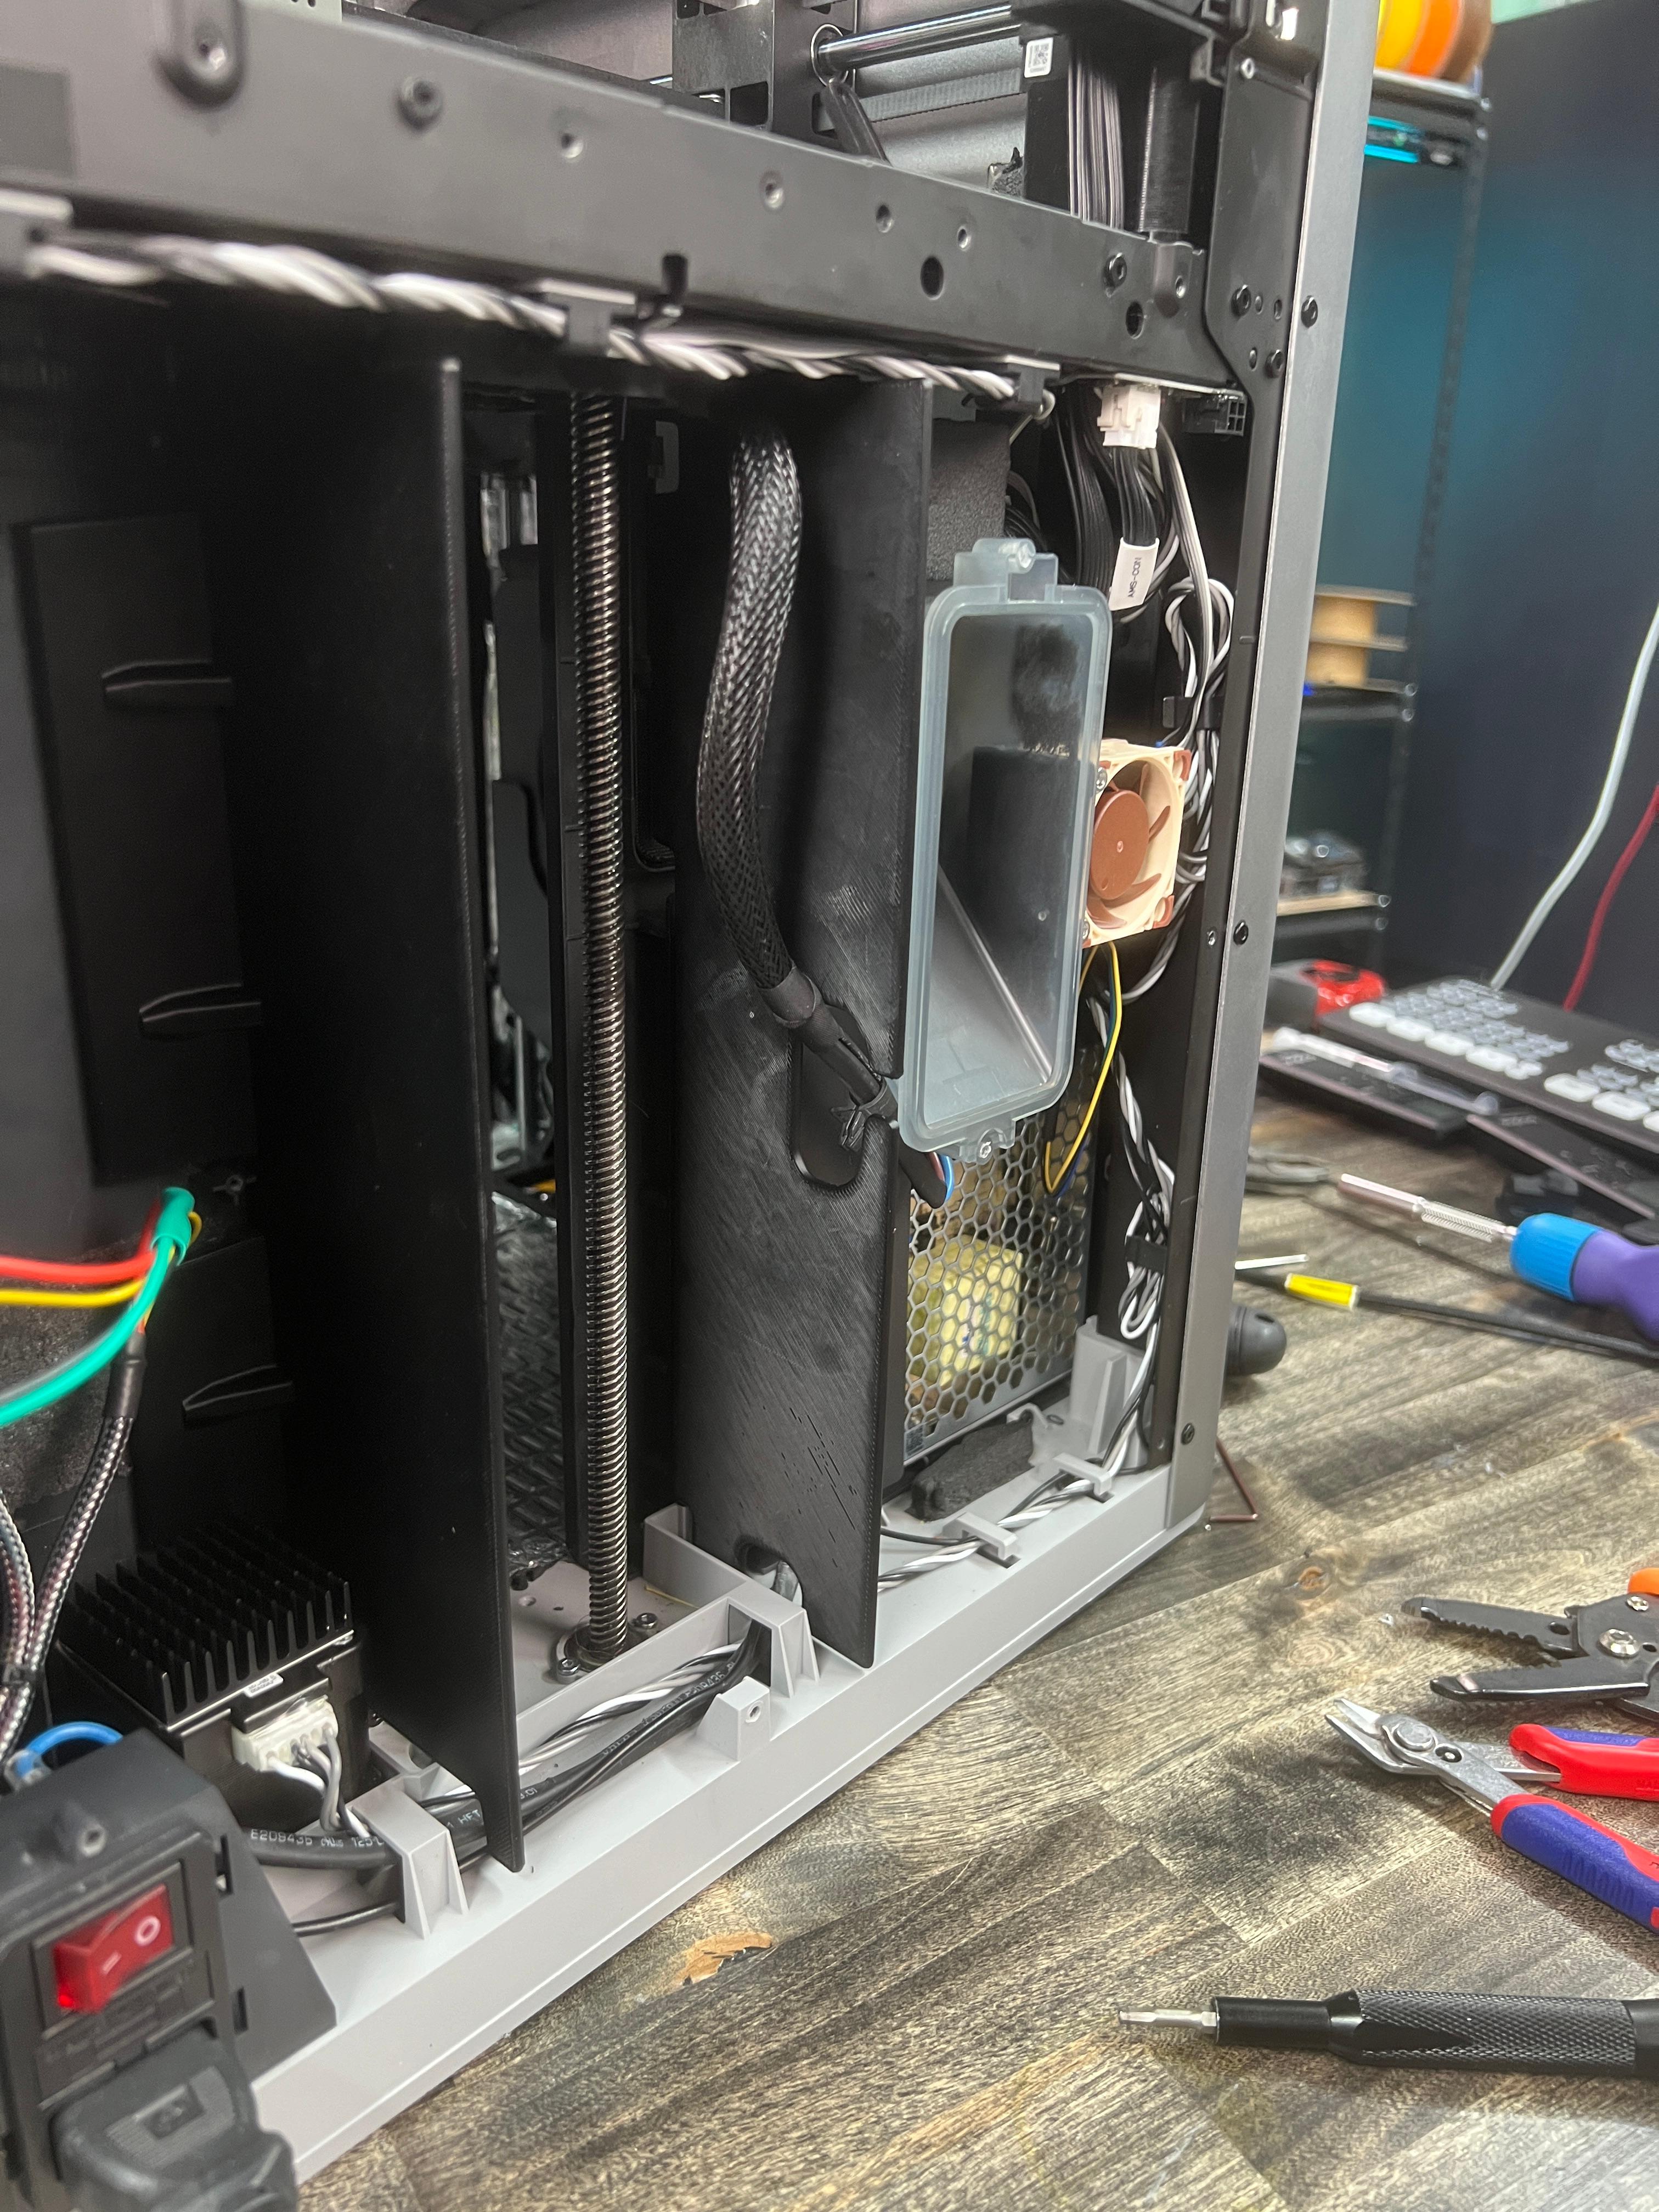
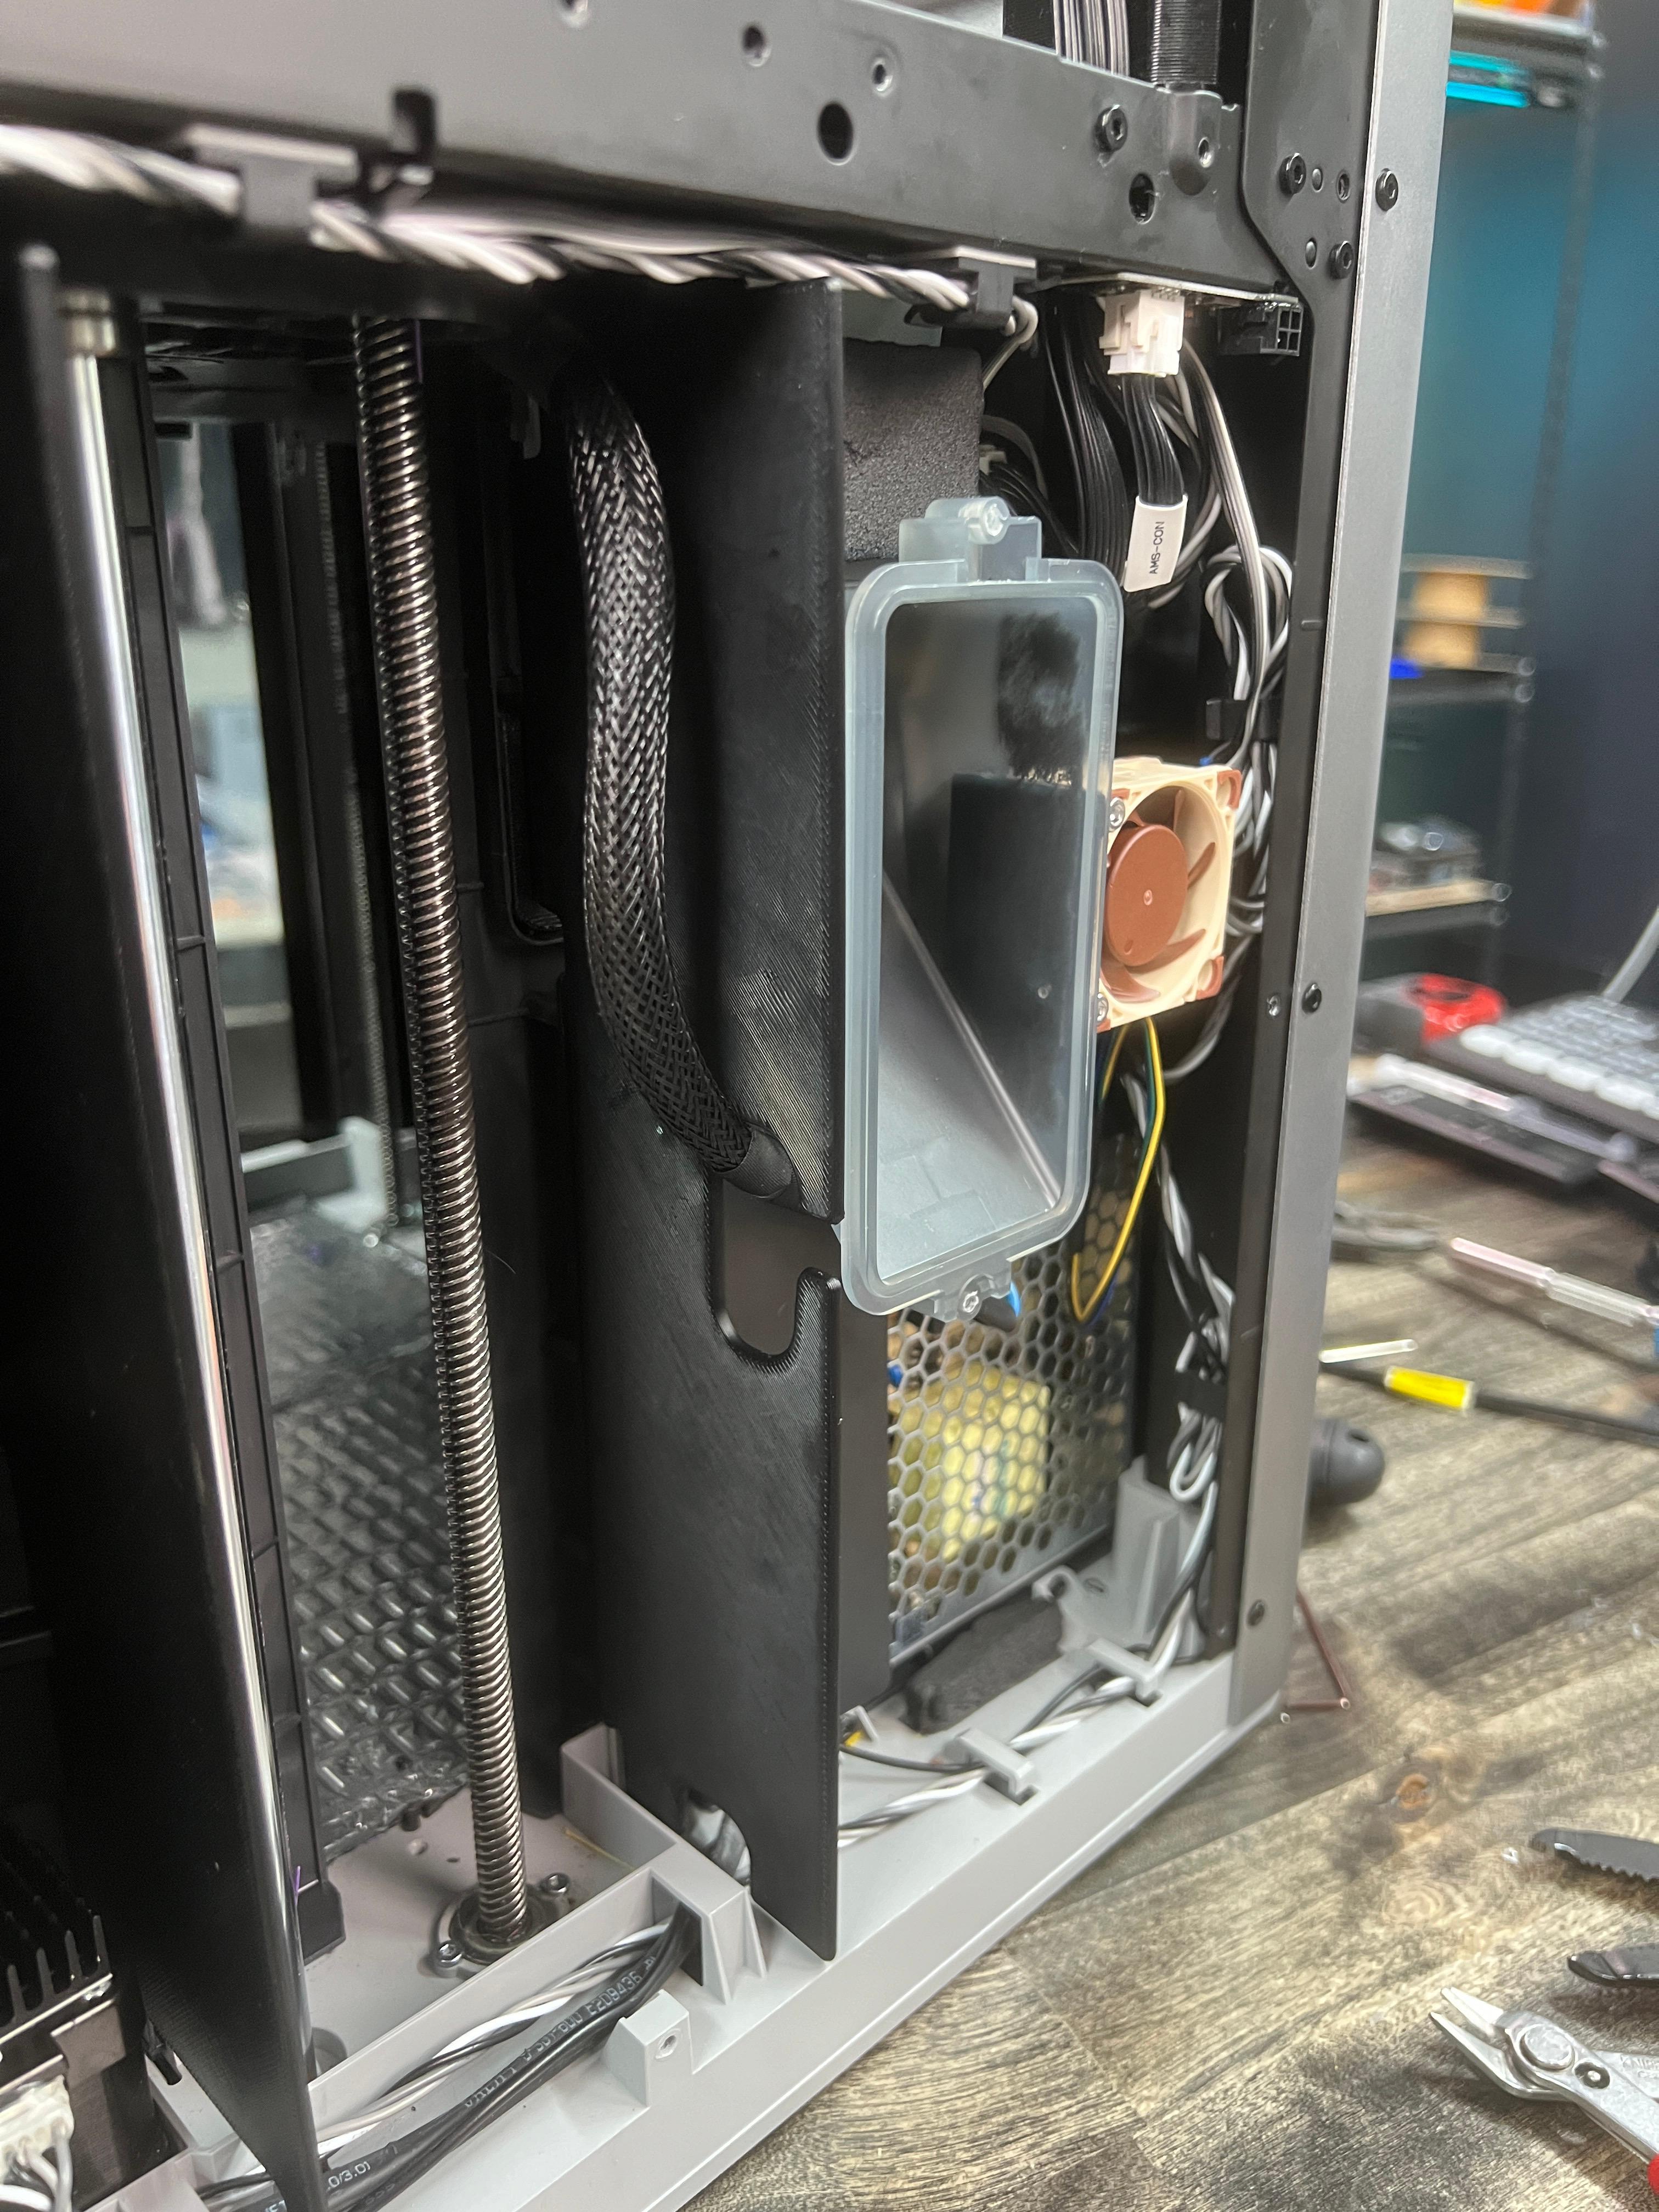
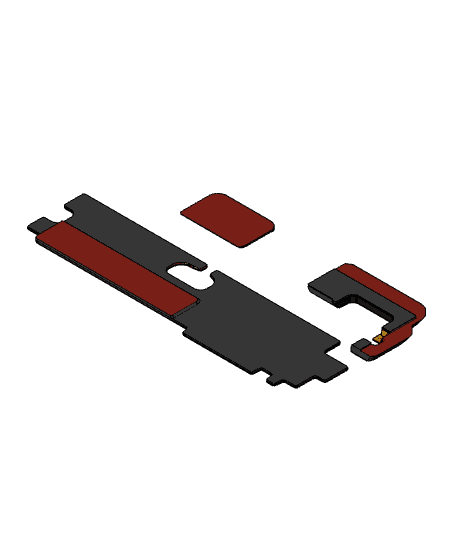
These seals were designed to try and increase my Bambu X1 Carbon's chamber temperature while keeping the electronics cooler. They use 3M VHB tape to mount (anywhere on the Render that is Red is meant to have tape) and stick in place to separate the electronics box from the main print chamber. There is a vent at the top of the in front of the Left Motor, a gap under the poop chute, and a massive gap inside the electronics box next to the Z Axis lead screw. These block-offs... block-off all of those.
Use in conjunction with my “Fresh Air Fan Mount” to draw in fresh air to the electronics from the rear panel: https://than.gs/m/991489
Installation (See Photos for Reference):
- Remove Rear Panel
- Remove Poop Chute
- Apply VHB Tape around lower Poop Chute Opening (See photos)
- Stick Poop Chute Seal with Chamfer facing back toward the Electronics area.
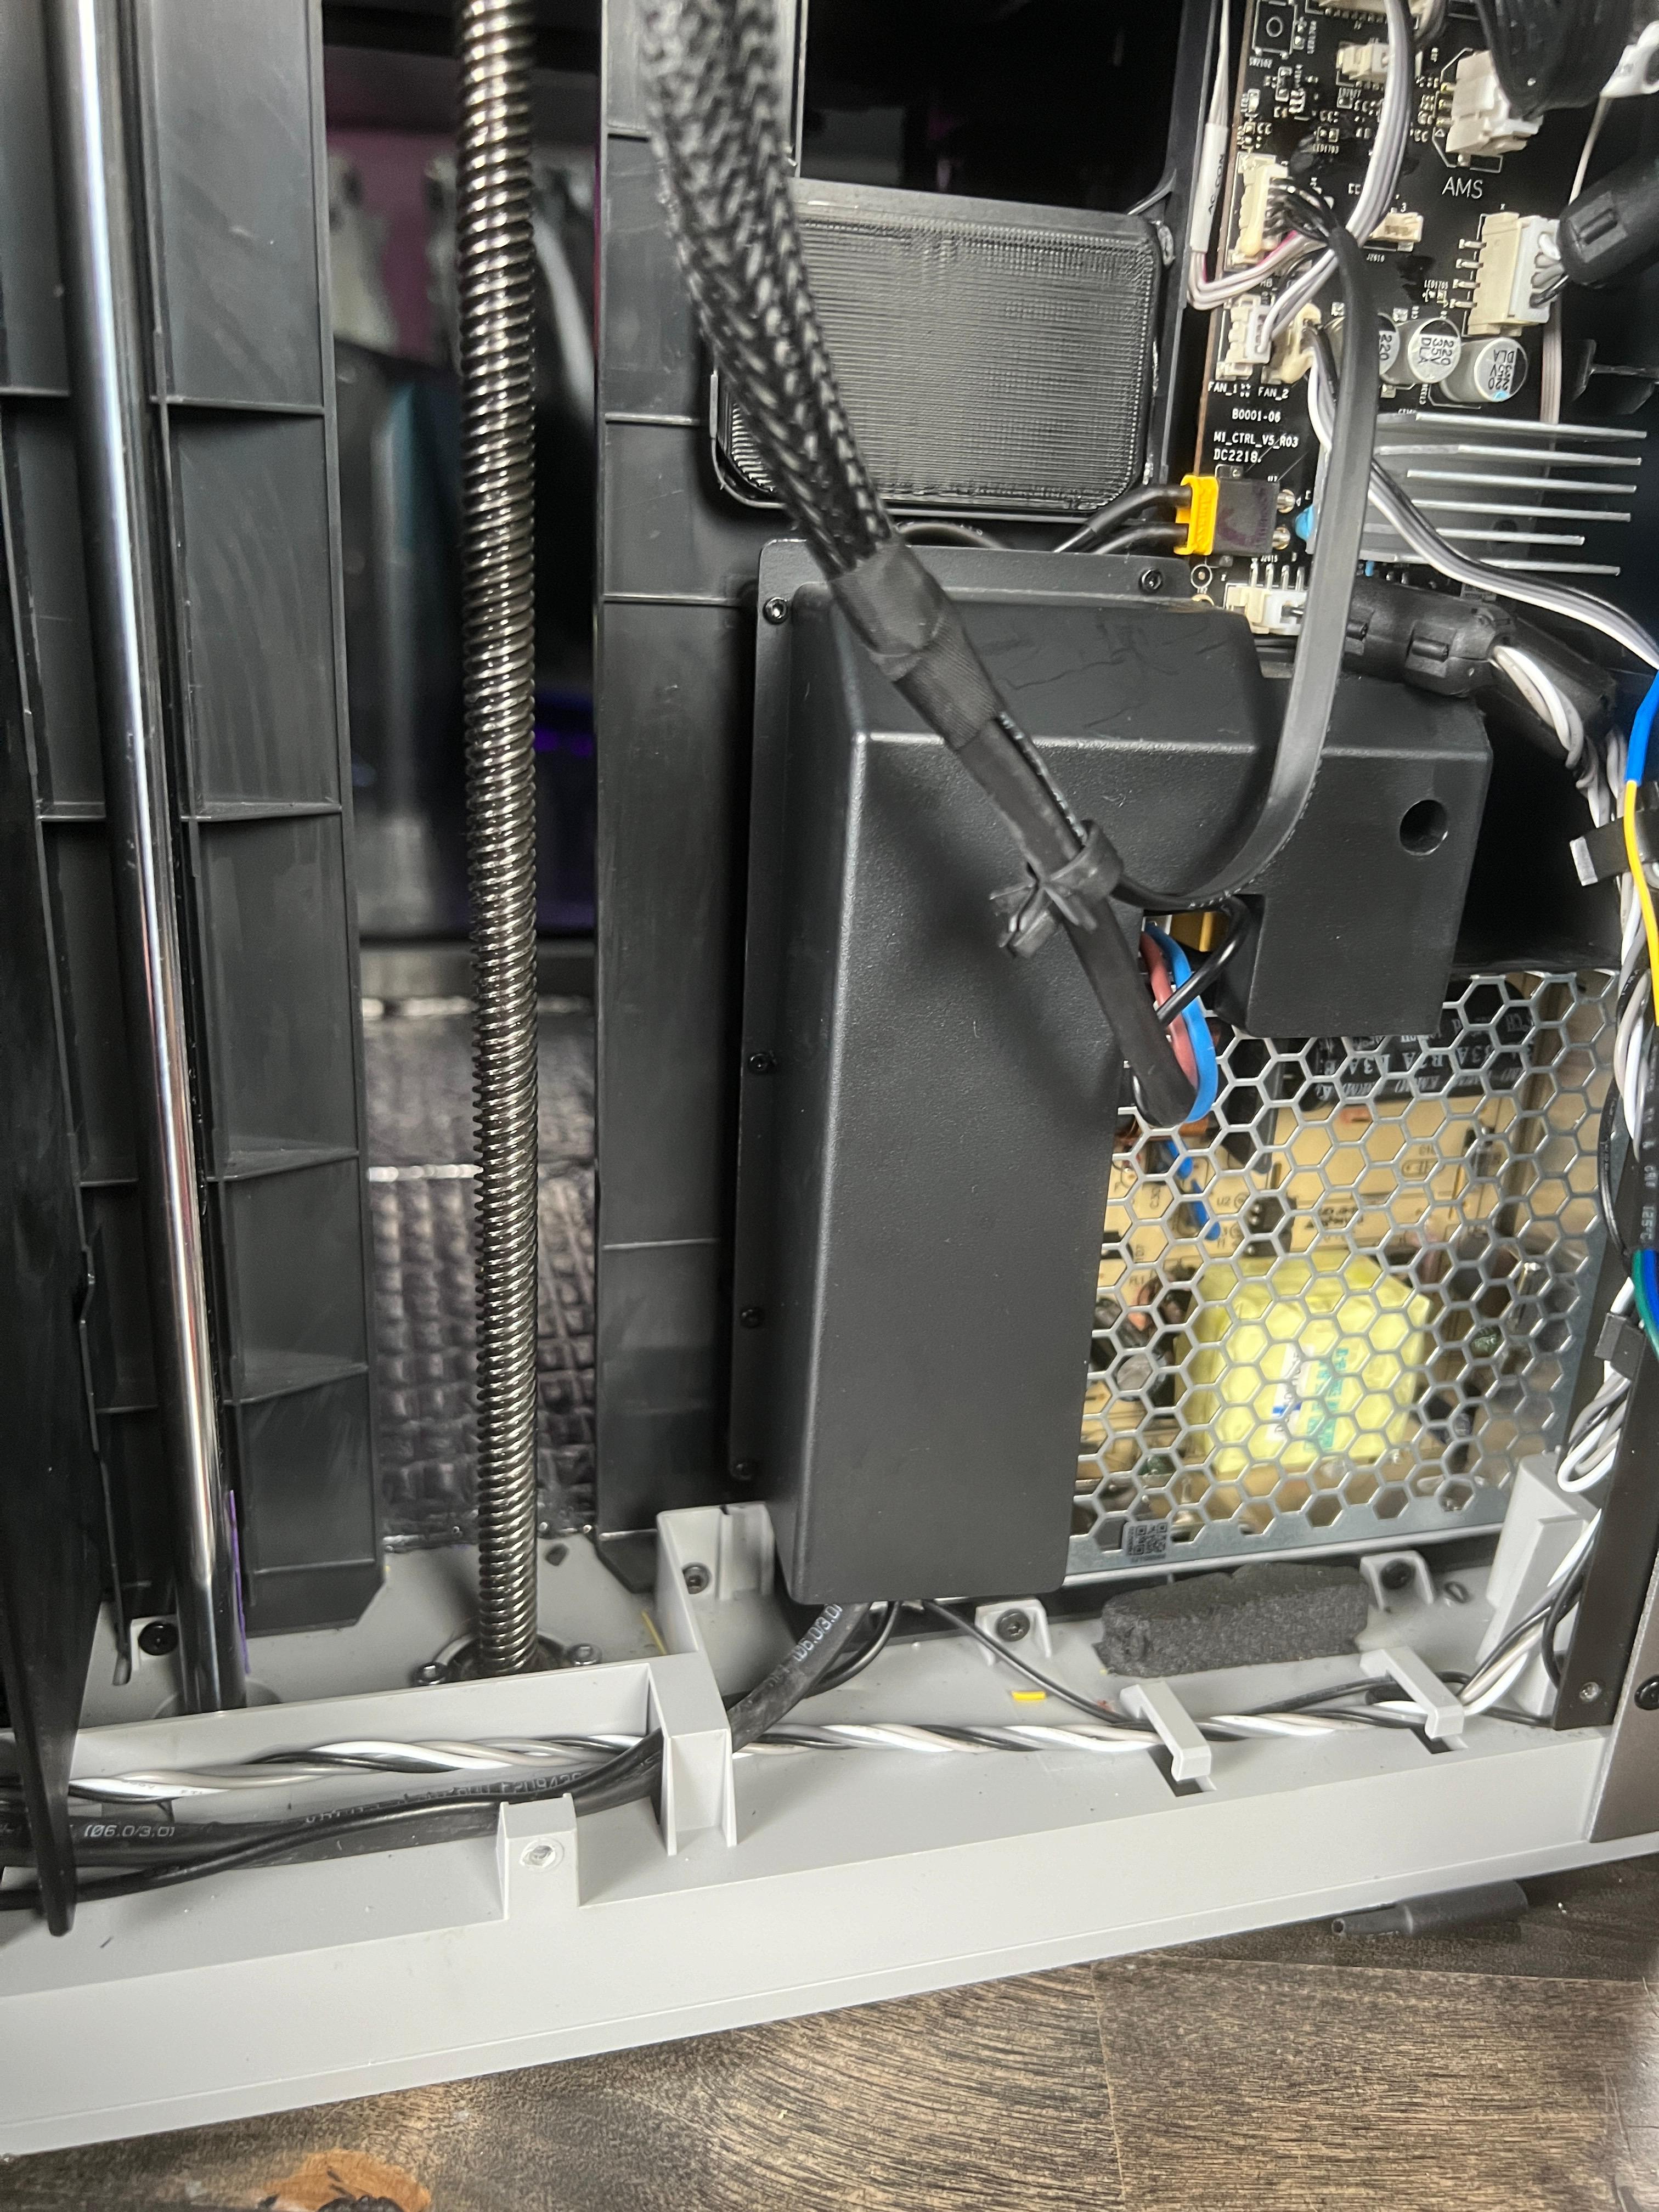
- Apply VHB Tape to the Large Box Seal on the raised step.
- Shoehorn the Electronics Box Seal in (see photos)
- Stick Large seal to the shield for the Power Supply Unit
- Reinstall Poop Chute & Rear Panel
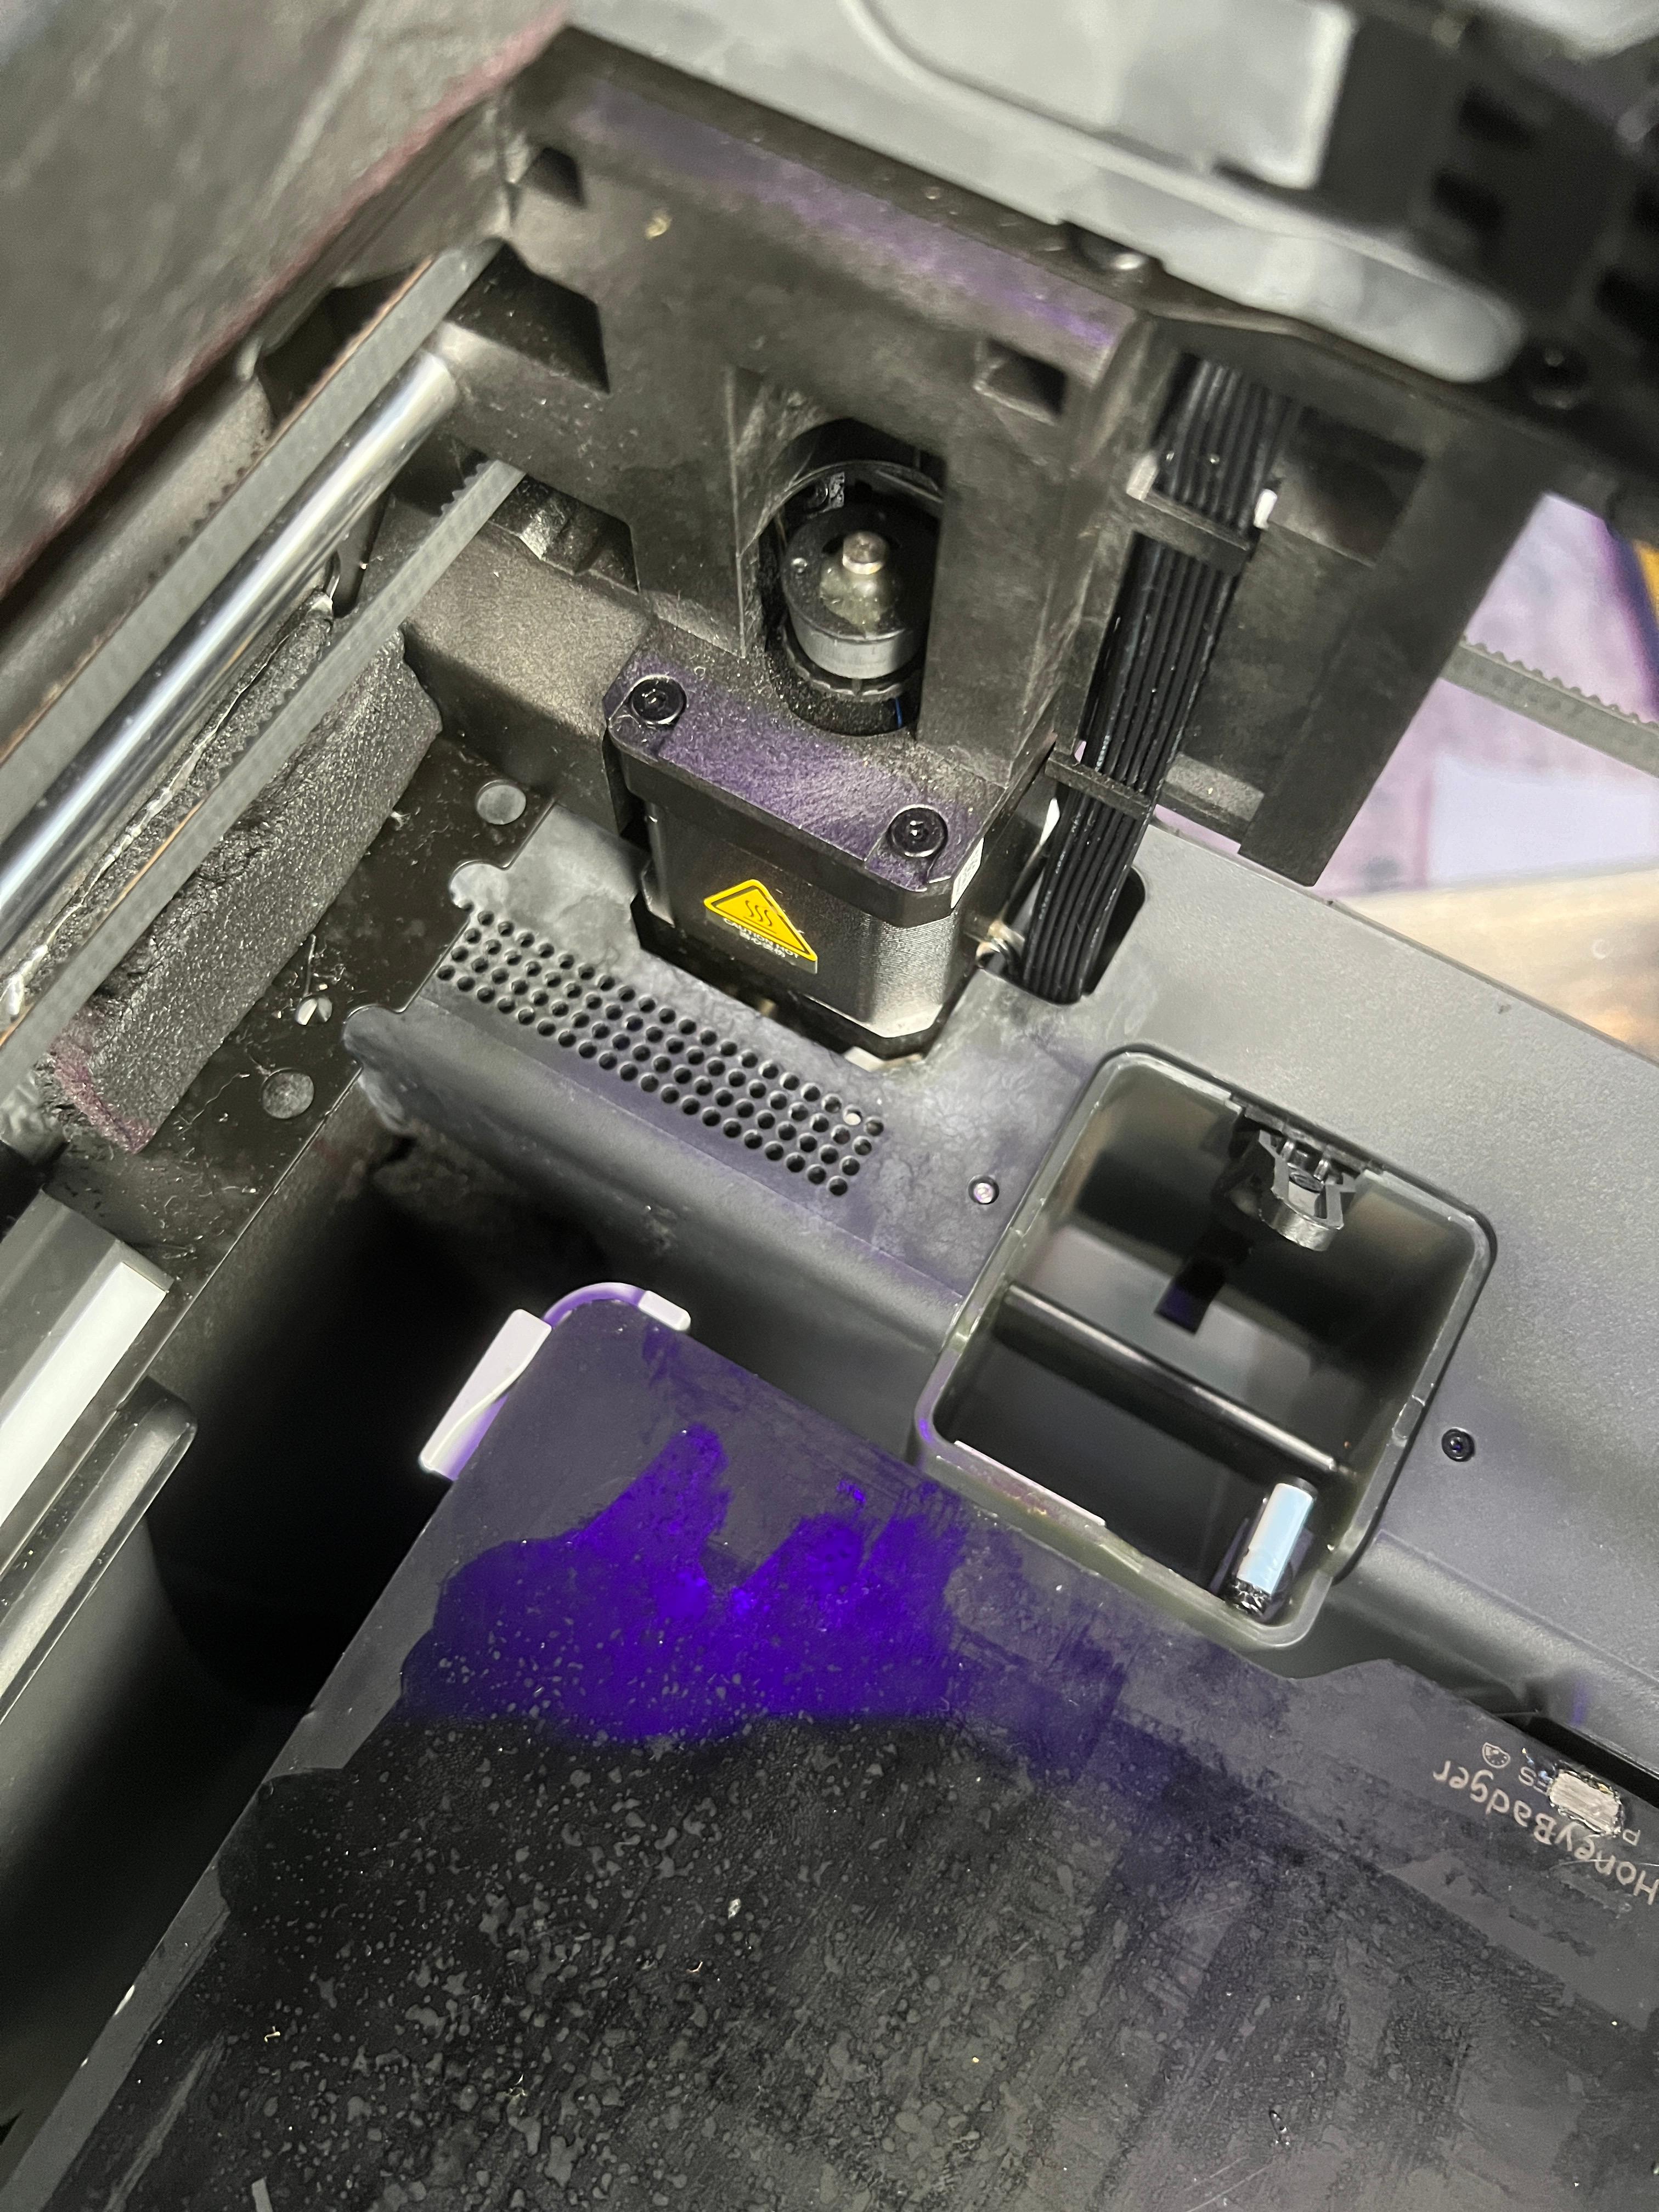
- Apply VHB Tape to Motor Seal & Stick to Top of the Panel around the motor.
- Be sure to get the motor seal as tight to the motor as you can, and check clearance to the toolhead after installation. (It is close).
NOTE: This modification is not long term tested. Initial tests show a 1-2C increase in chamber temps while printing ASA, but I have not tested the electronics bay temperatures. Use at your own risk. If you aren't happy you just have to peel off the VHB tape.
Parts Needed (Affiliate Links):
Files Included:
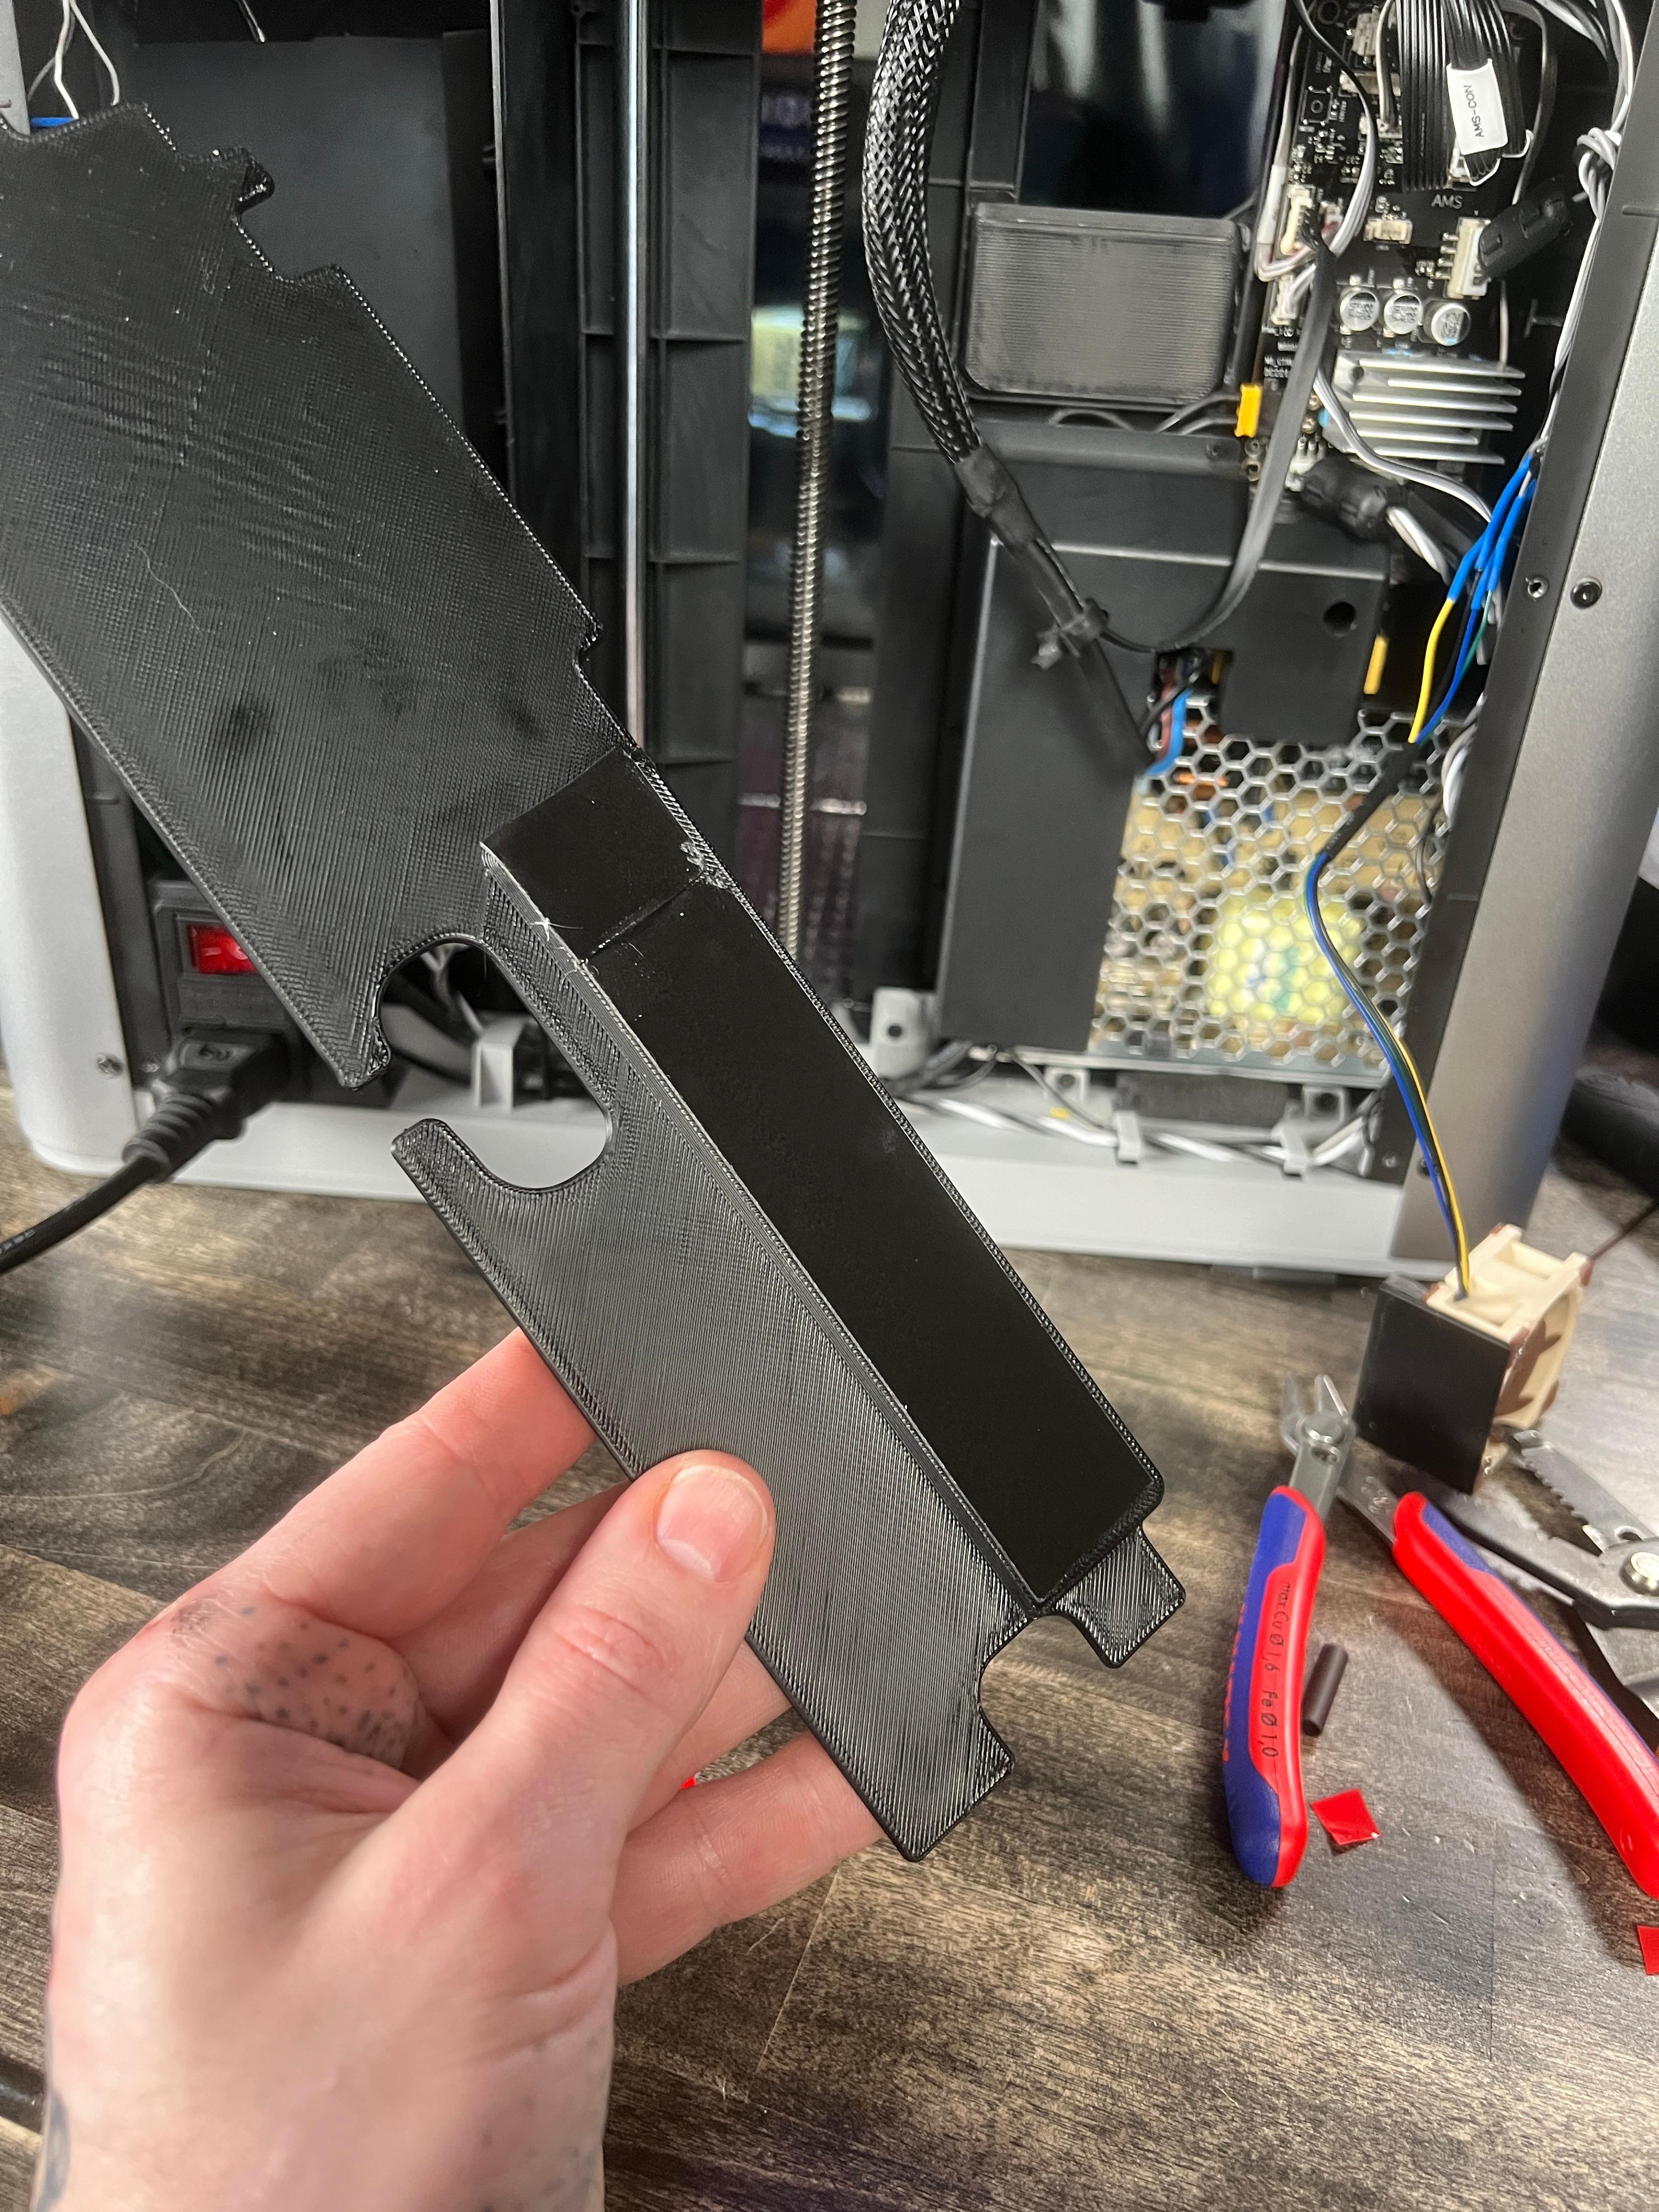
- Bambu Electronics Box Seal STEP File
- Large Electronics Box Seal STL
- Poop Chute Seal STL
- Left Motor Vent Seal STL
Recommended Print Settings:
- 3 Perimeters
- 20% Infill
- No Supports Required
- ABS/ASA Filament recommeneded.
Want to Support what I do? Check out my social medias please!
Link Tree: http://www.MandicReally.com/linksDesigns covered by a Creative Commons Non-Commercial Share-Alike License. Commercial resale is never authorized without written permission. Want to become an Authorized Reseller? Become a Patron on the “Merchant” Tier on my Patreon to begin selling today: https://www.Patreon.com/MandicReally