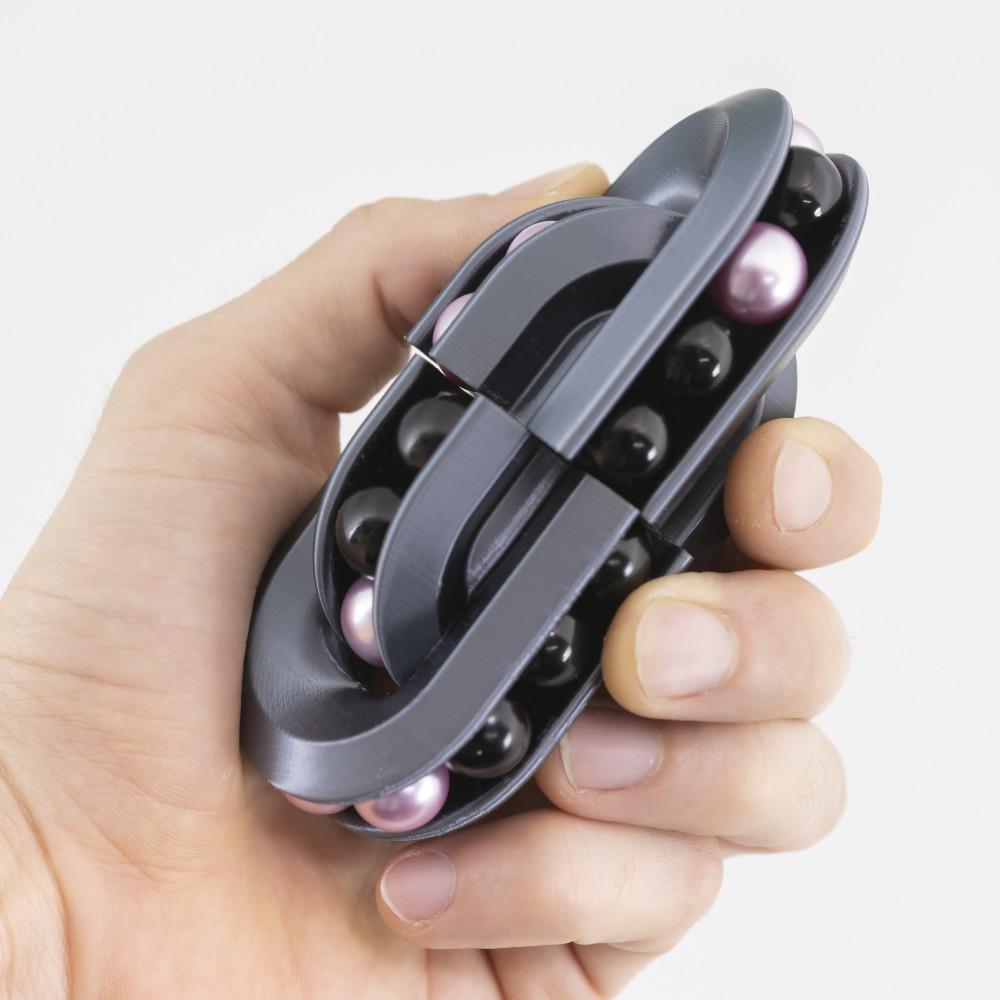
Who wants another twisting, sliding, satisfyingly snapping puzzle? Well it's here, and it's the CHAIN! This Razor variation has a sleek and sharp design.
Two interlooping tracks hold 30 marbles that mix up when you twist the halves into alternating positions. Sometimes you have a large 18 marble track looping around a smaller 12 marble track, while in another position you'll have two 15 marble tracks locked together.
Rotate the two halves of this twisting CHAIN and move the marbles along the shifting tracks until all like colors touch. For a simplified version of the puzzle use 15 marbles of two colors. For the true CHAIN challenge, use 5 marbles of 6 different colors. This puzzle is designed for use with these 14mm ABS or Acrylic no hole beads (actual diameter is ~13.6mm). For quick shipping these Chinese Checkers Beads on Amazon work great!
Use the included clip to snap the two Chain halves together to securely join the puzzle. You will also need 8 6mmx3mm (1/4"x1/8") neodymium magnets for a smooth and satisfying snap between positions. I use E6000 craft adhesive to make sure the magnets are absolutely fixed in place. I like to use ABS filament for the clips for longevity, but I've also used PLA clips with no issues yet.
This download also includes an assembler.stl part, which makes it easier to snap the two halves of the puzzle together, since it can be a bit tricky to close without losing your marbles.
Support material isn't necessarily required, though a small pillar of support under the arch of the larger loop may help achieve the cleanest print.
Sources for non-printed parts:
14mm no hole ABS beads • eBay
or these Chinese Checkers Beads on • Amazon
6mmx3mm Neodymium magnets
E6000 Craft Adhesive • Amazon
Which version to print:
To compensate for size variance in bead sourcing, there are two versions of theChain.stl. Use the theChain-v2.stl if your beads are on average larger than 13.6mm diameter. Otherwise use the original version. To quickly check ball diameter, I've included a MarbleChecker.stl. If the ball fits through with little force, it is smaller than 13.6mm (given the checker is printed accurately. I recommend checking the checker with calipers o.O)
Please feel free to ask questions in the comments and share your experiences and insights. Enjoy the puzzle and leave a tip if you'd like to support my ongoing work :)
A really well tuned printer will be able to print this entirely without supports, even though there are some tricky overhangs. If you do decide to print with support material, block supports for the center hole and magnet holes, as those areas bridge just fine.
Default print settings:
• _thechain.stl _- 0.1 to 0.2mm layer height*, 2-4 perimeters/shells, 8 top/bottom layers, 10% infill (print 2)
• clip.stl - 0.2 mm layer height, print solid
• assembler.stl - 0.2 mm layer height, 3 perimeters/shells, 8 top/bottom layers, 10% infill
*Lower layer height tends to help with printing support free. I use 0.12-.15mm
Adjust settings based on your own printers capabilities.


