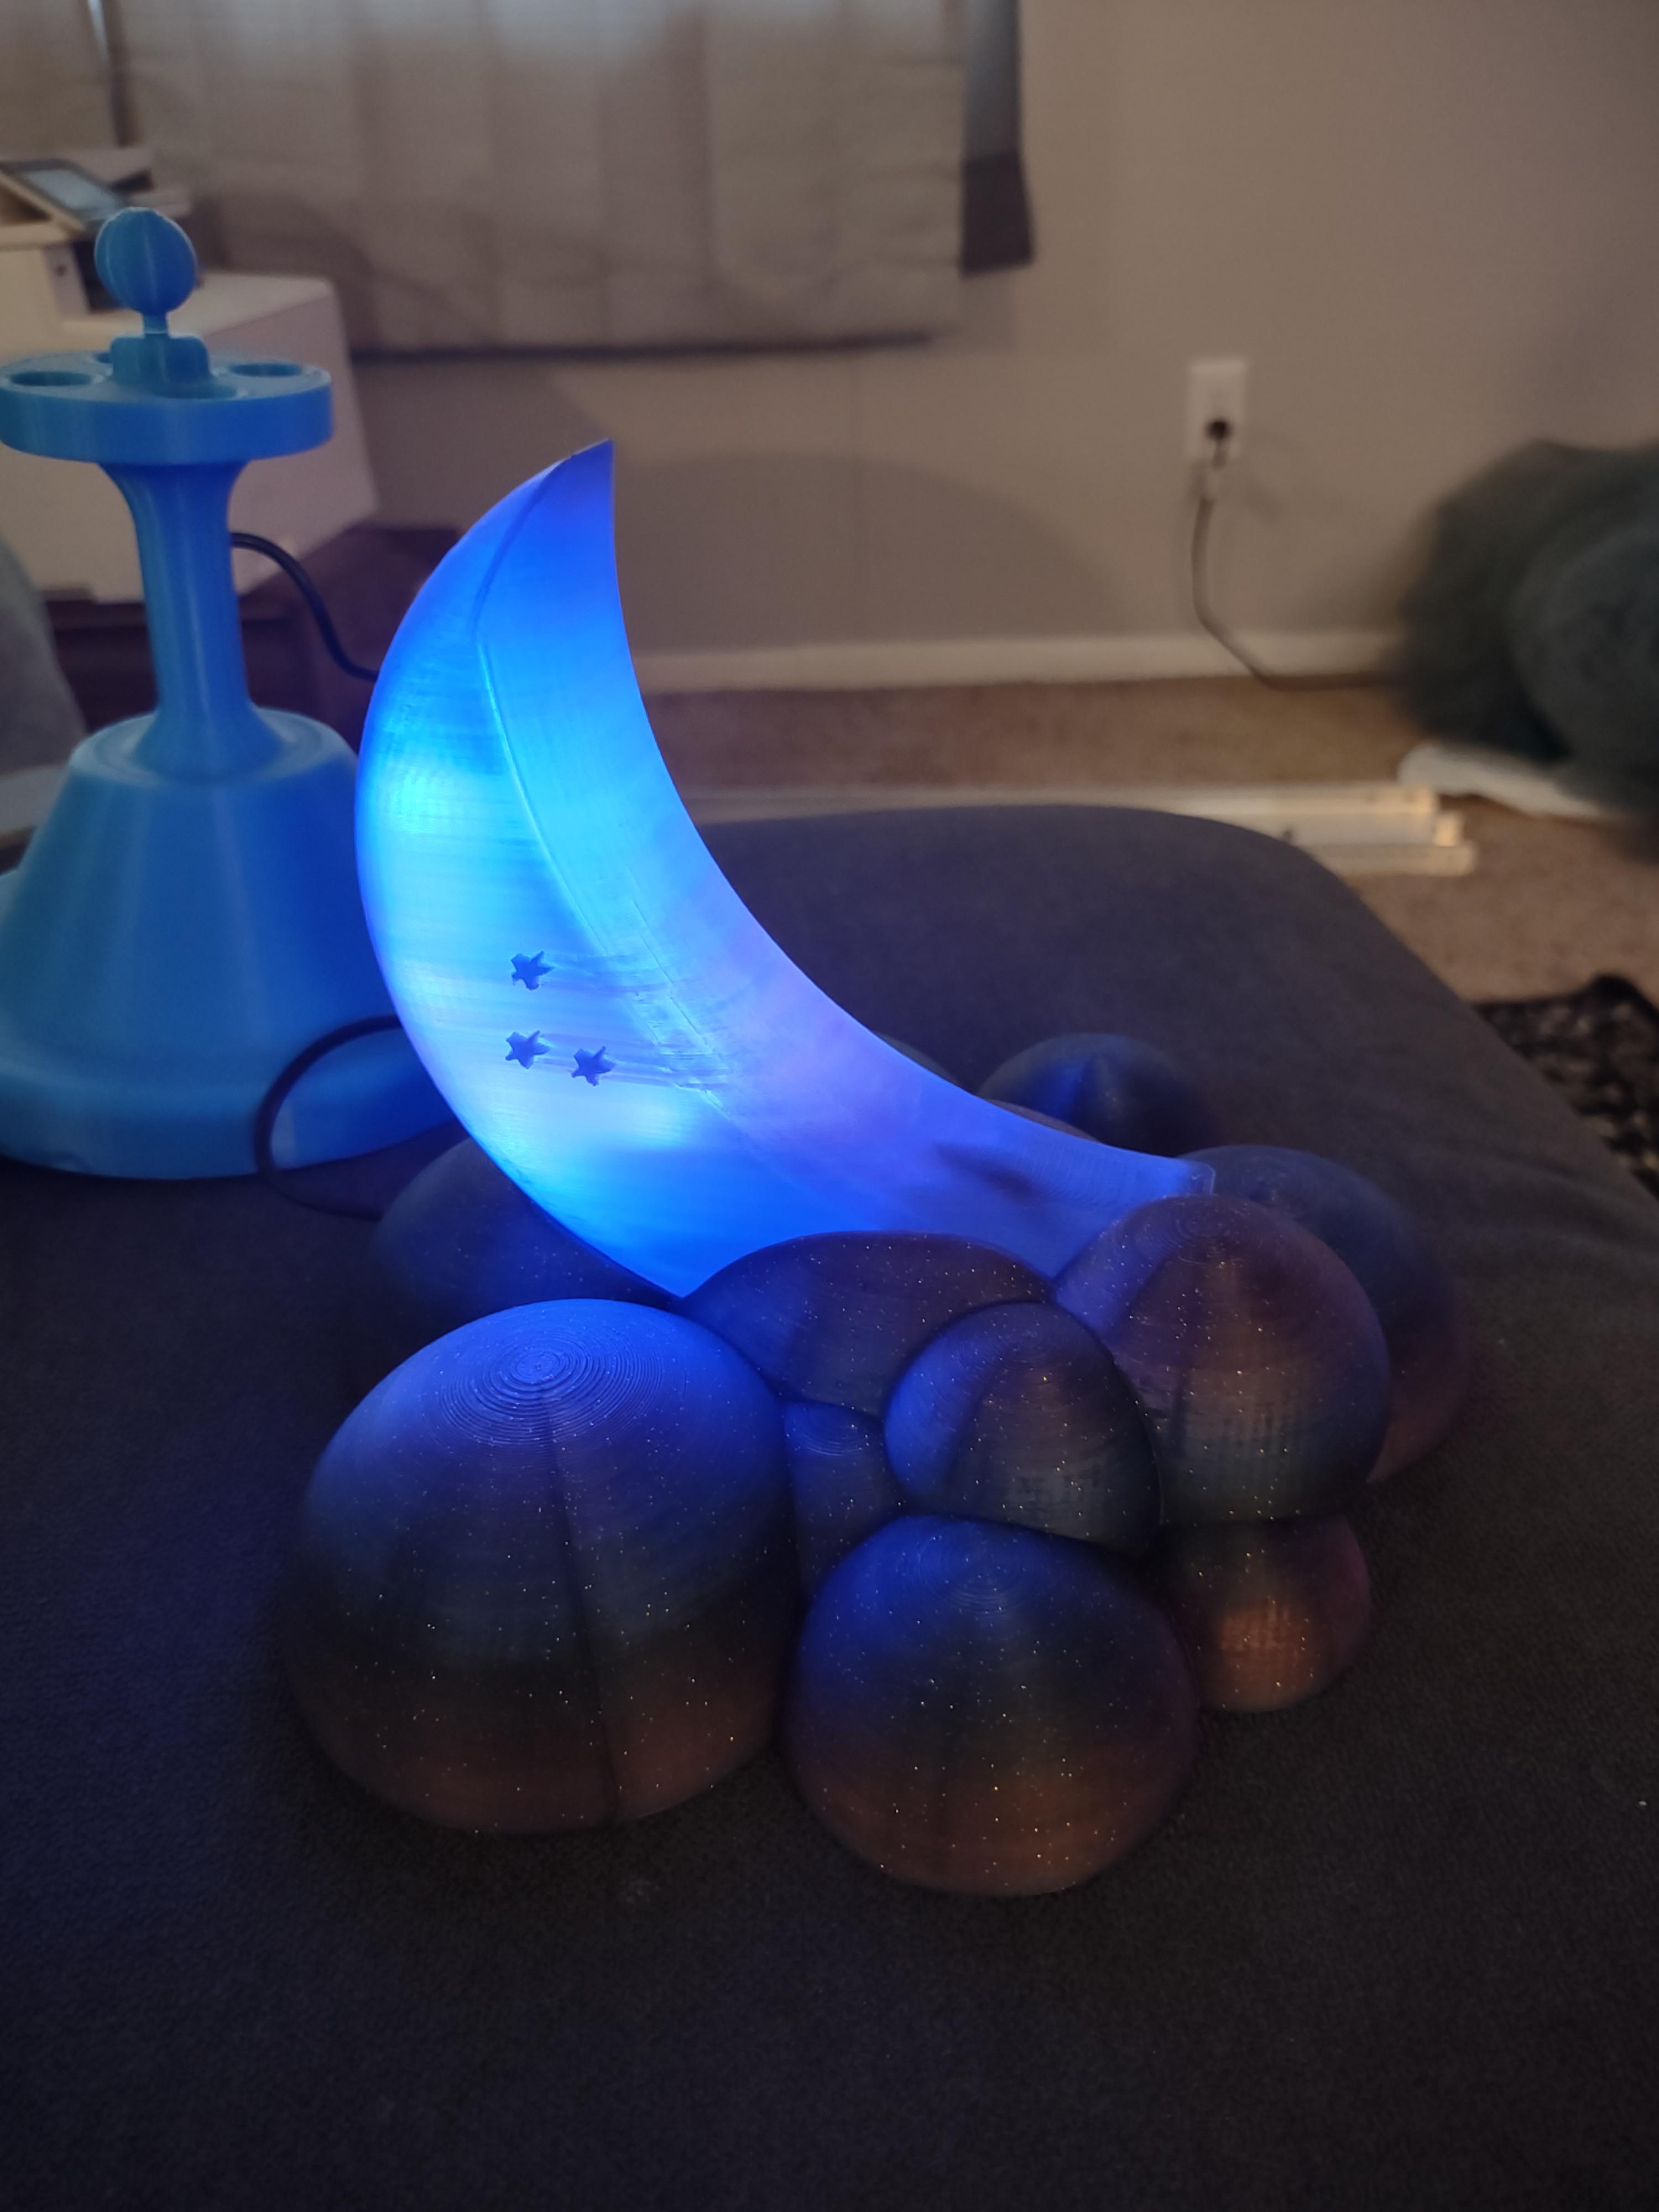


Introduce a touch of celestial wonder to your child’s bedtime with an enchanting Moon in the Clouds Night Light. Designed to soothe and inspire, this two-part night light features:
Luminous Crescent Moon: A hollow crescent moon that glows from within, creating a gentle illumination that guides your child to dreamland.
Cloudy Base: The moon elegantly slides into a cloud-like base, which softly diffuses the light, mimicking a moonlit sky.
Shooting Stars: Three shooting stars adorn the moon’s surface, adding a dynamic and whimsical element to the design.
Customizable Lighting: Equipped with an LED strip and a versatile light controller, the night light offers a spectrum of colors and effects to match your child’s mood or room decor.
Quality Materials: The moon is crafted from a gradient blue to purple light-transmitting PLA plastic, while the base boasts a Midnight Twinkle PLA.
Perfect for any child’s room, this Moon in the Clouds Night Light promises to be a comforting presence, turning bedtime into a magical experience.
I built this originally as a Christmas present for my daughter.
3D printing settings
The moon will require light transmission filament. The cloud base can be any filament of your choice. I will first list assembly instructions then the print instructions will follow. Assembly is relatively simple. You will need to purchase a LED strip and cut it down to only a few of the LEDs with adhesive backing; about four or five LEDs long . You will need a light controller that has a remote that preferably uses radio signal, although, an infrared controller will work fine. A higher grade IC will allow higher functionality of the light. You will need to remove the USB connector leaving enough wire on the end to solder back together. Feed the IC USB cable through the hole of the cloud base so that it goes out the back of the cloud base to be soldered back to the USB connector. Remove the adhesive backing from the LED strip cut to four or five LEDs long to the inside of the bottom of the crescent moon. Try not to go too far up into the tip of the moon sticking up and out of the cloud base so the LED lights are not visible. the IC controller should fit up inside the moon but more toward the end the moon in the cloud base, so that it doesn't block the LEDs or cast a shadow inside the moon. Gently pull the power cable of the IC toward the outside of the base while sliding the crescent moon into the cloud base. Leave a bit of slack so that you can hot glue between the moon and the cloud base then pull the power cord taught and hold the moon into place. After the glue sets, you will want to use a hot glue gun to inject hot glue into the hole of the cloud base where the power cable is coming out to seal it and stop it from being pulled out. Use heat shrink tube to cover where the USB connector is soldered back on. Make sure you have sufficient power cable coming out of the base to reach an outlet with a USB power block or to another USB power source. It can run days on just one of those portable USB battery packs.
Printing Instructions:
The cloud base requires no supports. A brim shouldn't be needed either as it has a good amount of surface area in contact with the bed. You may need bed adhesive.
The crescent moon will require organic/tree supports on build plate only. You will need a brim and position the model so it sits on the hole. This part of the moon will be hidden inside the cloud base when you slide the moon into place.
You can probably print the moon using resin as well. I have not tested this.