Model originally uploaded to Thingiverse at https://www.thingiverse.com/thing:3243260.
Pill Box with AM PM Apertures V3 - It's Personal!
There is a newer version of this thing: https://www.thingiverse.com/thing:3445696
This beast is getting more complicated but hopefully, it ticks more boxes. In this remix I have:
-
Integrated a series of removable trims to allow the personalisation of the Pill Box lid and body with either 2D or 3D printed decals. In addition to the uploaded 3D print decals I have included a jpeg template and a multiple layered Photoshop fiile (PSD) within the files to be used to overlay your own 2D printed decals. The separate clips and 3D Decals also offer a greater variation to colour palette options when 3D printing without the need for a dual extrusion printer.
-
Included a much more robust and hopefully longer lasting Ratchet assembly. If you like whizzing the thing around with an enjoyable click like Mr Tantrum this is the Pill Box for you!
-
Included an XL body which is 10 mm deeper than the standard or V2. For users with a lot of daily meds.
Assembly Notes
-
I have still included 2 apertures in the ratchet collar\body to allow for spring tension if preferred ( In V2 I used 2 x springs from standard Biro pens). The revised Ratchet assembly does perform much better and therefore the springs are not absolutely necessary but tension from a single spring does improve the tactile feel.. The receiving holes for the springs are now more regular and retaining spring insertion is much easier than V2. I have included 2 spring apertures but a single spring is sufficient and much easier to assemble. The Ratchet works better if the fixing nut is not set too tight.
-
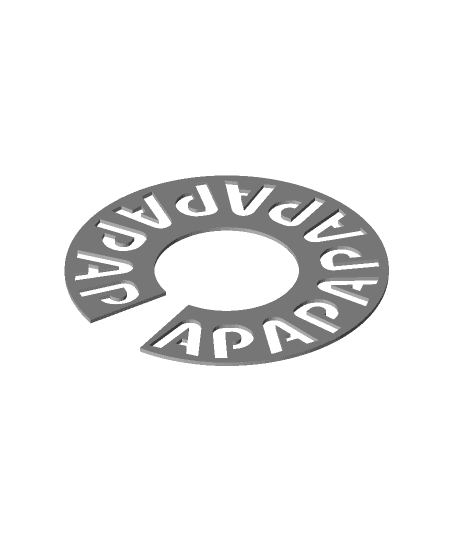
Although I have included a 3D printed decal for the AM-PM apertures it is very hard to achieve a satisfactory print at this level of detail and would recommend using a 2D printed decal and glue or use double sided tape to adhere within the provided recess in the top of the base\body. This option will provide a much more clean and professional looking result.
-
Please see the exploded render for a guide to the general assembly of the components. I may upload an assembly video at a later date.
-
Please note all threads are left-handed (Day Decal Clip and the fixing bolt threads).
-
The Day Decal threaded trim works fine but due to it being a 150mm 3D printed thread there is a tendency to bind a little on first application. I would suggest using a little vaseline on the inside of the trim thread to help to thread the first time. After the thread is naturally cut by its opposite counterpart the assembly is much easier.
-
To reduce the play in the lid and ratchet the tolerance between the Fixing Bolt Base and Ratchet Collar has to be quite tight. Therefore I have included various ribs and tabs that can be sanded or shaved if there is any larger variation in printer tolerances.
-
In the example images, I have used a gloss photo paper and inserted a transparent binder cover in front to protect the artwork\decals. I basically taped the acrylic to the back of the gloss paper and carefully cut both of them out at the same time with a scalpel.
-
Important - The Ratchet Collar can be positioned in 2 ways. To make the Ratchet work in alignment with the base the collar should be positioned so the Ratchet Prong is near the Clasp aperture (see uploaded image). I will modify the Collar to be asymmetrical in a later revision.
Print\Slicer Settings
-
Where required I have included custom supports which break away after printing to provide a better finish (Body, Day Decal Trim, Clasp & Fixing Bolt. Therefore you do not need to select\click support in your slicing software.
-
I printed the Fixing Bolt, Nut, Clasp, Ratchet Collar and Ratchet in PETG to provide greater resilience. Although the components perform fine in PLA I also found that the PETG Ratchet Prong flexed much better than in PLA which was much more rigid. I also printed these components with 4 perimeters and 30% infill. In my tests the PLA version appeared to work fine so PETG may only be required for extra longevity.
-
The 3D printed decals were printed at 0.1 resolution @100% infill to provide some visual density in a fairly thin component. Decal layer thickness is based on multiples of 0.4 mm.
-
All other comps were printed at 0.2 resolution @15% infill. I did however partially print the lid with 0.1 resolution on the angled finger grips to reduce any terracing effect.
-
To achieve the ratchet assembly configuration I have had to rationalise printing angles which have resulted in the integration of some custom supports. This is, unfortunately, a percentage waste of plastic and does partially increase print times compared to V2 - perhaps I will look at this in V4!
Clearly more complicated than V2 but again hopefully ticks a lot more boxes. It will be great to see some personalised makes.
Update:29\11\18 Uploaded an additional Ratchet Collar with a slightly thicker arm to improve the clicking sound when rotating ratchet.
Update:21\12\18 Uploaded Day Insert Trim without supports
Update:29\12\18 Uploaded Revised Lid (V3_1) which includes rotation direction arrows.
Update:19\02\19 Included Pets Pills Top Decal