
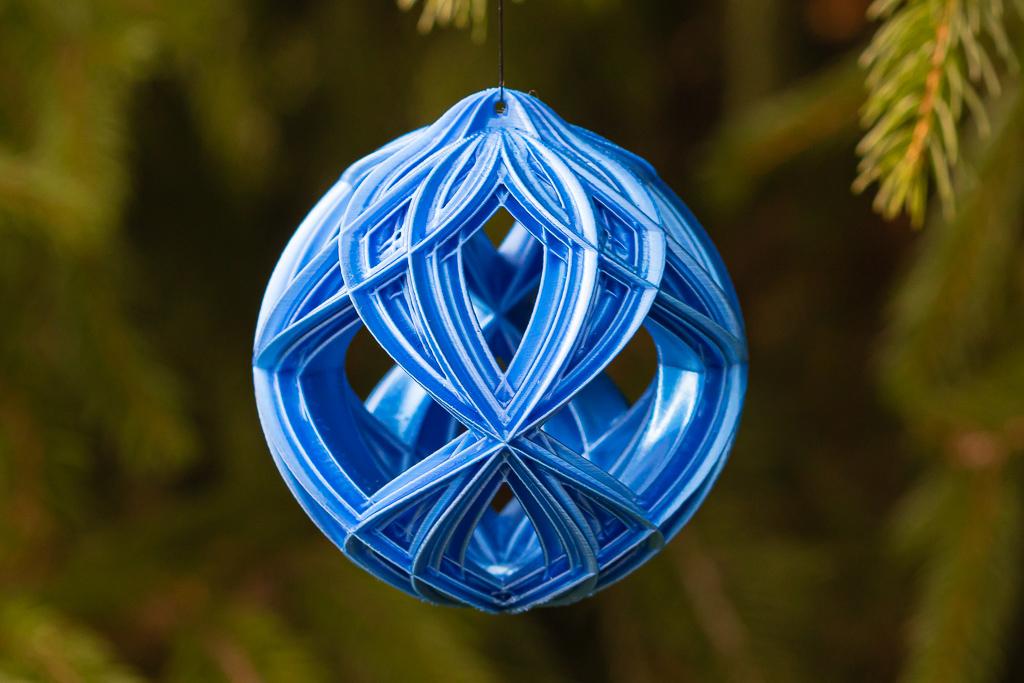
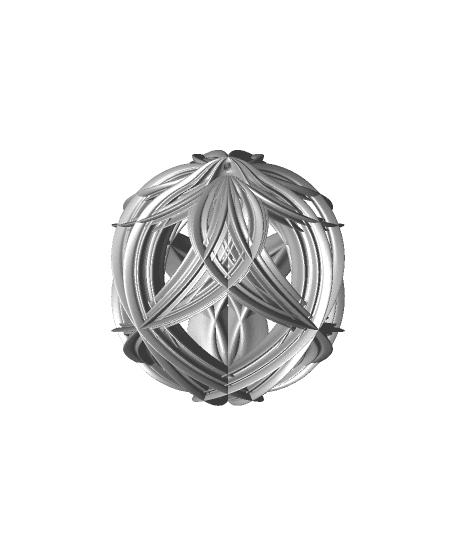
Kaleidoscope Christmas Ball 2
Both versions of the design are equally good. The only difference is the loop, which I rotated 45 degrees to have a different part of the pattern face forward.
Not for commercial use. Please see license agreement.
I designed this using Affinity Designer to create cross-sections and then did everything else in Blender.
I designed theis to print easily, to be light, and to look elegant when printed in one color. I recommend using a metallic or silky filament (or spray paint the final print with a metallic paint). The metallic or silky highlights will catch the light and show off the complex geometry of the ornaments.
At 100%, this is 80mm wide, which is a nice size for trees 1.5 meter and larger. However, I scaled it to 60% and it looks great. At that size, it will work well on trees as small as 0.5 meter high. You may be able to scale this down slightly smaller than 60%, but I haven't tried it. If you do and it works, please post a comment.
PRINT SETTINGS
To make the print as light as possible, I printed at just 0.4mm walls and 0.45mm top/bottom thickness. I also used Cura's Support Blocker and Per Model Setting's "Modify Settings for Overlaps" to add 20% infill - but just for the bottom 6mm of the ornament. I recommend a layer height of 0.15mm.
You won't need a raft, but I recommend using a brim.
There are other parts of the ornaments that appear to need infill, but they are self-healing and do not show in the final print if you leave out the infill. Infill is really only needed to the bottom of the inside of the ornament. Adding infill everywhere will really increase the weight, which means it may not work on all Christmas trees.
For supports, I used:
- Support Placement: Touching Buildplate
- Support Overhang Angle: 65 degrees
- Support Pattern: Concentric
- Support Density: 15%
- Enable Support Brim: Yes
- Support Brim: 3mm
- Support Roof Density: 75%
- Support Floor Density: 50%
Originally, I placed supports everywhere, but I found it printed cleaner without the supports on the inside of the ball and it eliminated the possibility that the supports would break in the middle of the print. It also makes it print faster and makes clean-up much easier. I've also changed the overhang angle frmo 60 to 65 degrees.
If you print with 0.4mm walls and you wind up with holes in your print, I recommend increasing the flow rate slightly and maybe reduce travel and print speeds.