

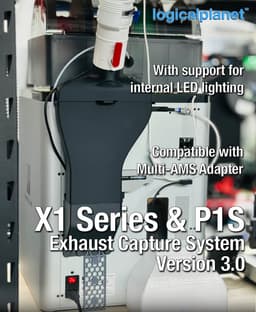


BambuLab X1 Series and P1S Exhaust Capture System (with LED support) ECS3
X1 Series & P1S Exhaust Capture System Version 3.0
If you're running a Bambu Lab X1 Series or P1S and want to actually deal with VOCs instead of just hoping for the best, this is the system. The Exhaust Capture System (ECS) captures exhaust from both the machine's built-in exhaust fan port and from the top of the machine simultaneously, combining both airstreams and routing them out through a single exhaust hose.
Version 3.0 is designed to accommodate the Multi-AMS Adapter, with additional clearance behind the funnel that earlier versions didn't have. If you're running a previous version and want Multi-AMS compatibility, this is the upgrade.
The frame sits on top of the machine under the glass, lifting it 20mm to create the exhaust port space. The funnel connects the upper vent with the lower exhaust fan output. The whole system is removable at any time — nothing is permanent.
This package also includes the optional large poop bin from the previous release.
Previous version (for reference): https://than.gs/m/1125125
How It Works
The top frame rests on the printer's frame under the glass. It lifts the glass 20mm and seals the top of the machine. The funnel connects the upper opening to the lower exhaust fan vent on the back of the machine. Both airstreams combine and exit through the port on the top frame, where you connect your exhaust hose. Add the Quick Release Head for easy hose disconnect, and the Variable Flow Valve to control or block airflow when you don't need it.
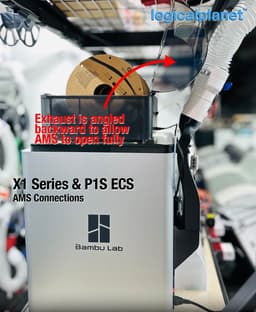
AMS PTFE connections pass behind the system in their natural positions — no rerouting required.
The exhaust port is angled backward so the AMS lid can still open fully.
Components
Top Frame (4 pieces)
- Back Right Corner — vented, with flow-through exhaust port
- Back Left Corner
- Front Right Corner
- Front Left Corner
Other Printed Parts
- Funnel — connects upper vent to lower exhaust fan output
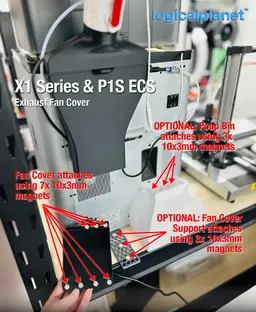
- Exhaust Vent Cover — attaches magnetically (requires 8x 10x3mm magnets)
- Fan Cover — attaches magnetically (requires 7x 10x3mm magnets)
- Poop Bin — optional, attaches magnetically (requires 3x 10x3mm magnets)
- Fan Cover Support — optional, attaches magnetically (requires 3x 10x3mm magnets)
- LED Bars — optional, drop-in bars for adhesive-backed LED strips (4 bars, includes electrical cord exits and exit plugs)
Hardware Required
- 10x3mm magnets:
- 8x for Exhaust Vent Cover
- 7x for Fan Cover
- 3x for Poop Bin (optional)
- 3x for Fan Cover Support (optional)
Compatible Exhaust Components (sold separately)
- LPE25-H00 Quick Release Head — optional, for tool-free hose disconnect
- LPE25-V61 Variable Flow Valve — optional, for flow control
- LPE25-E11 End Ring — required if using Variable Flow Valve or direct connection
- LPE25-X80 Internal Connector — for Variable Flow Valve attachment
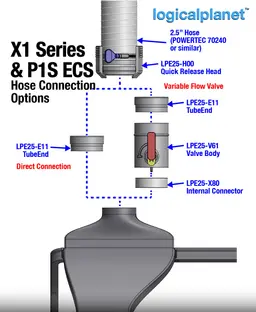
- 2.5" exhaust hose — POWERTEC 70240 or similar
Port Head Assembly Options
Option 1 — Direct Connection Glue one LPE25-E11 Tube End directly to the exhaust port on the funnel.
Option 2 — With Variable Flow Valve Stack LPE25-E11 + LPE25-V61 Valve Body + LPE25-X80 Internal Connector and glue at the indicated locations. Apply adhesive at the dotted ring locations shown in the Port Head Gluing diagram image.
Optional LED Lighting
The LED bars drop into the frame and accept standard adhesive-backed LED strips. Flex the strip around the corners — small zip tie slots are included in case the adhesive fails over time.
Recommended LED strip: USA: https://www.amazon.com/dp/B09YRCZ3WR Canada: https://www.amazon.ca/dp/B09YRCZ3WR
Print Settings
- Recommended material: PETG for exhaust-side components, PLA for parts that contact the printer — or all PETG, or all PLA
- Nozzle: 0.4mm
- Layer height: 0.2mm
- Line width: 0.4mm
- Wall count: 4 (1.6mm)
- Infill: 40% Cubic
- Support: No — all parts designed to print without support
- Bed size required: 250mm minimum
Assembly Notes
The frame rests on the top of the printer under the glass and can be removed at any time. No permanent modifications to your printer are required. Press 10x3mm magnets into the recesses in the Fan Cover, Exhaust Vent Cover, Poop Bin, and Fan Cover Support before installing.
Revisions
- 2025-03-31: Added Riser Compatible versions of the Front Left and Front Right corners for use with the AMS Riser V2. Only these two corners are different — all other parts remain the same. AMS Riser V2: https://makerworld.com/en/models/133452-ams-riser-v2
- 2024-11-24: Modified Front Left and Front Right corners to recess around the glass handle screw heads, allowing the glass to sit flatter and seal better.
Related Components
Quick Connect Exhaust System (LPE25 series) https://than.gs/m/1008664
Thru Wall Venting System https://than.gs/m/1206813
Variable Flow Valve https://www.logicalplanet.com/2024/03/05/variable_flow_valve/
Full Exhaust System Blog Post https://www.logicalplanet.com/2024/02/11/quick-connect-exhaust/
Commercial Licensing Commercial licensing is available through LogicalPlanet Memberships here on Thangs. Members can request customization and commercial support.
Related Links
Join the LogicalPlanet Discord https://linktr.ee/logicalplanet
Visit my blog for more details and other designs https://www.logicalplanet.com/
Revisions and Updates I occasionally update and revise my designs. When I do, I'll document the changes here. Check back periodically for the latest revision notes or if you're experiencing any issues with a model. Please email me at logicalplanet3d@gmail.com if you would like me to make a revision or have comments about this design.


BambuLab X1 Series and P1S Exhaust Capture System (with LED support) ECS3

Logical Wall Bin – Auto-Opening Wall & Cabinet-Door Trash Bin

Logical Lock Box — 4-Digit Programmable Combination Box

Logical Modular Planters
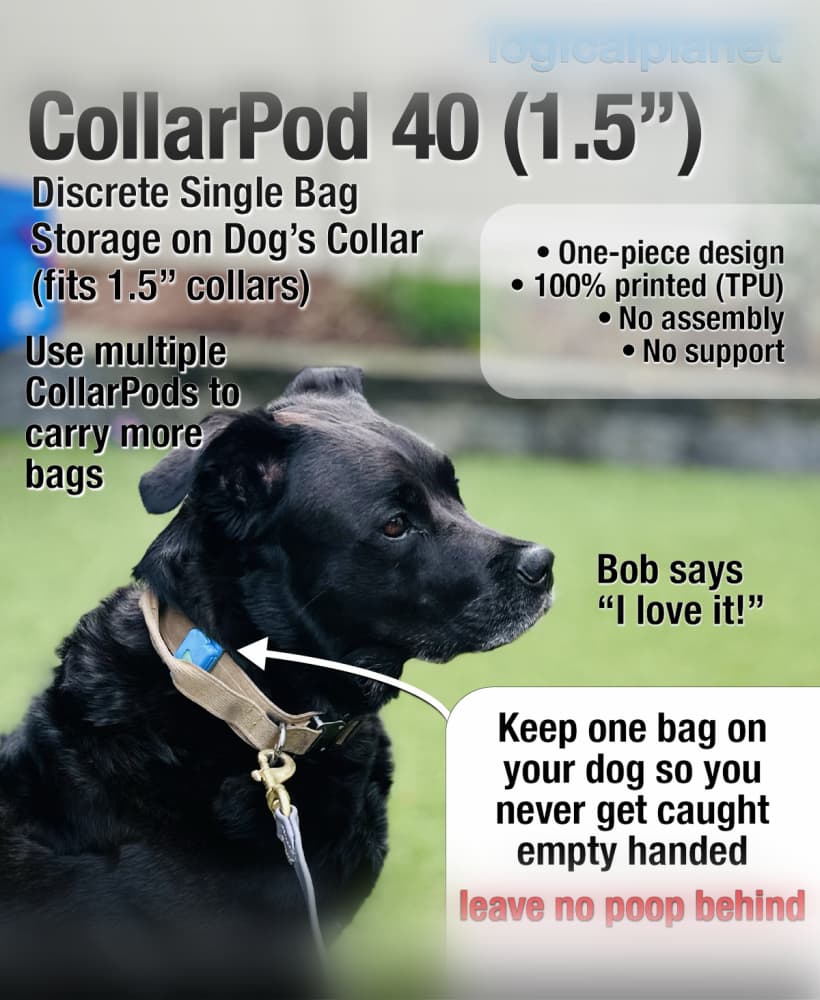
CollarPod 40 - Poop Bag Holder for Dog Collars - 1.5 Inch Collar - Single Piece TPU - No Assembly
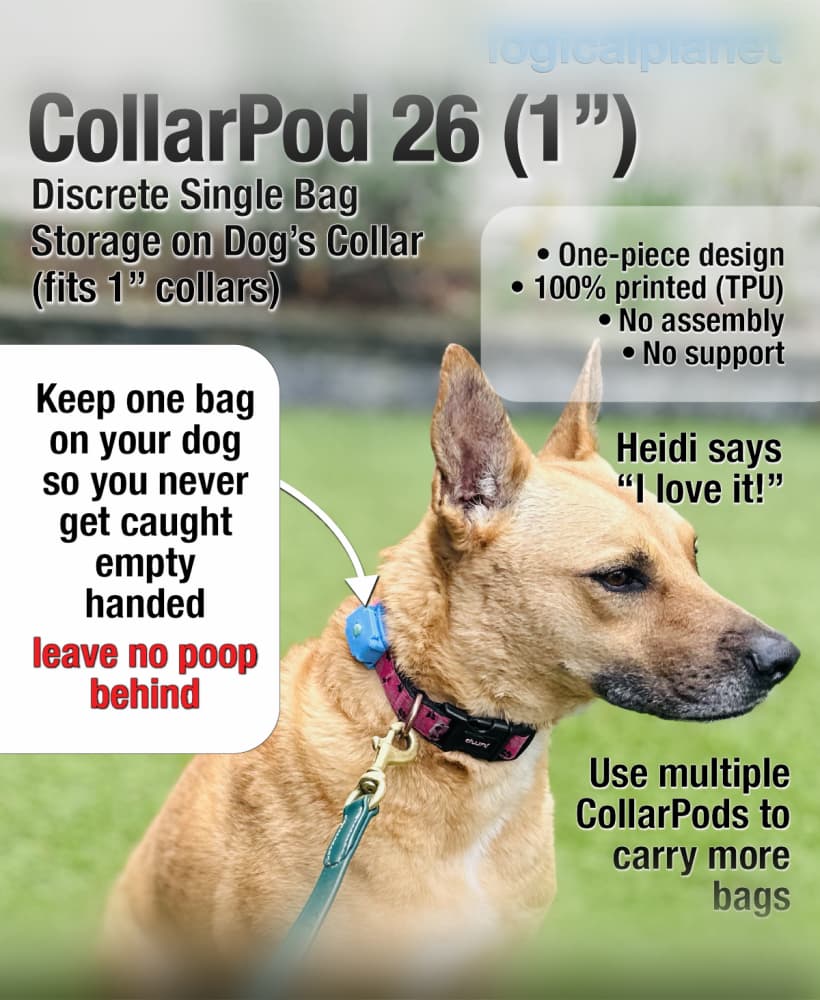
CollarPod 26 - Poop Bag Holder for Dog Collars - 1 Inch Collar - Single Piece TPU - No Assembly
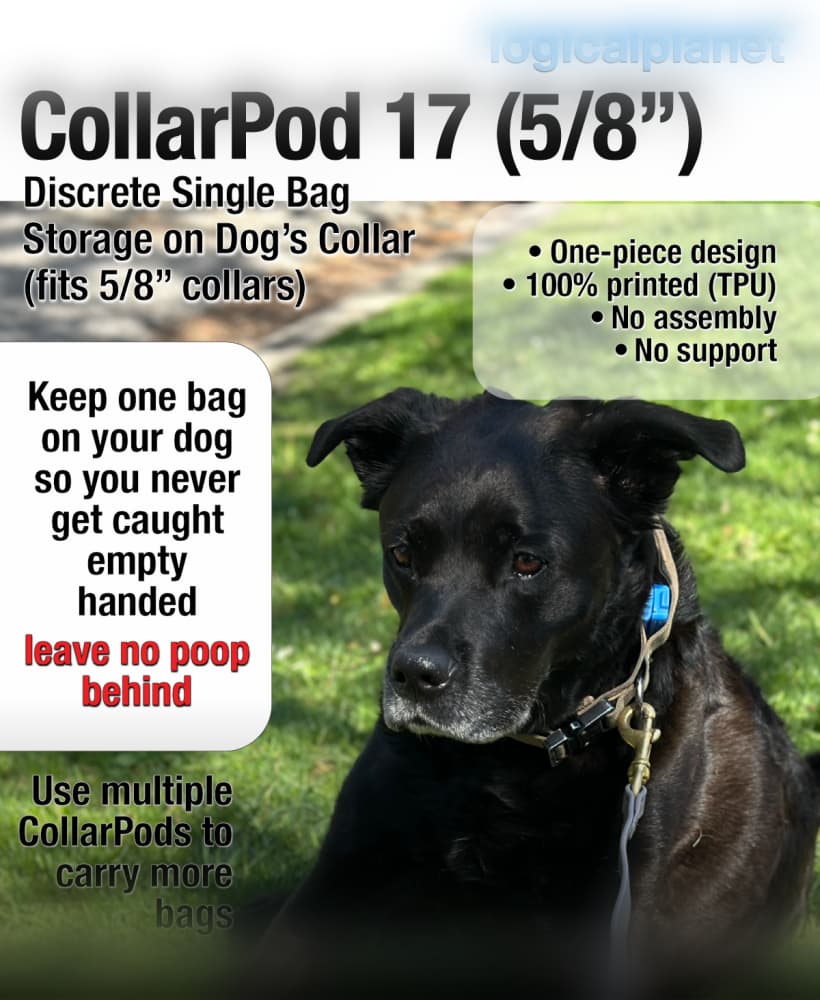
CollarPod 17 - Poop Bag Holder for Dog Collars - 5/8 Inch Collar - Single Piece TPU - No Assembly
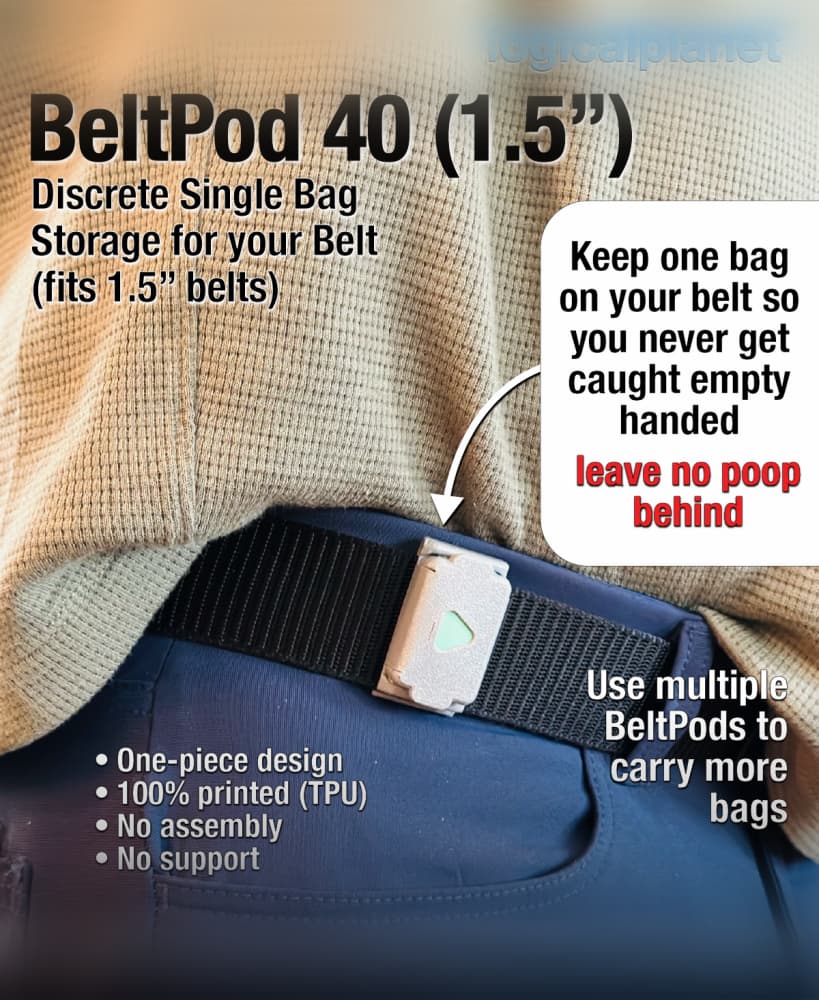
BeltPod 40 - Poop Bag Holder for Your Belt - Single Piece TPU - No Assembly
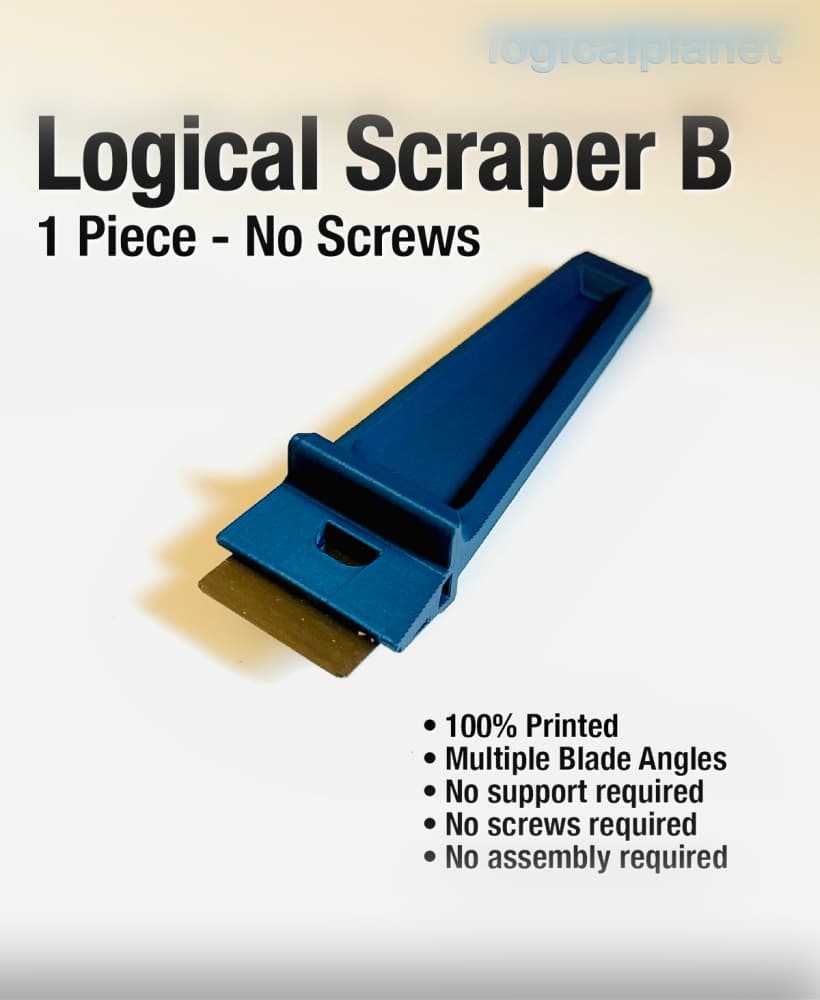
Logical Scraper B - 1 Piece No Screws No Assembly

Logical Scraper A — 2 Piece, No Screws
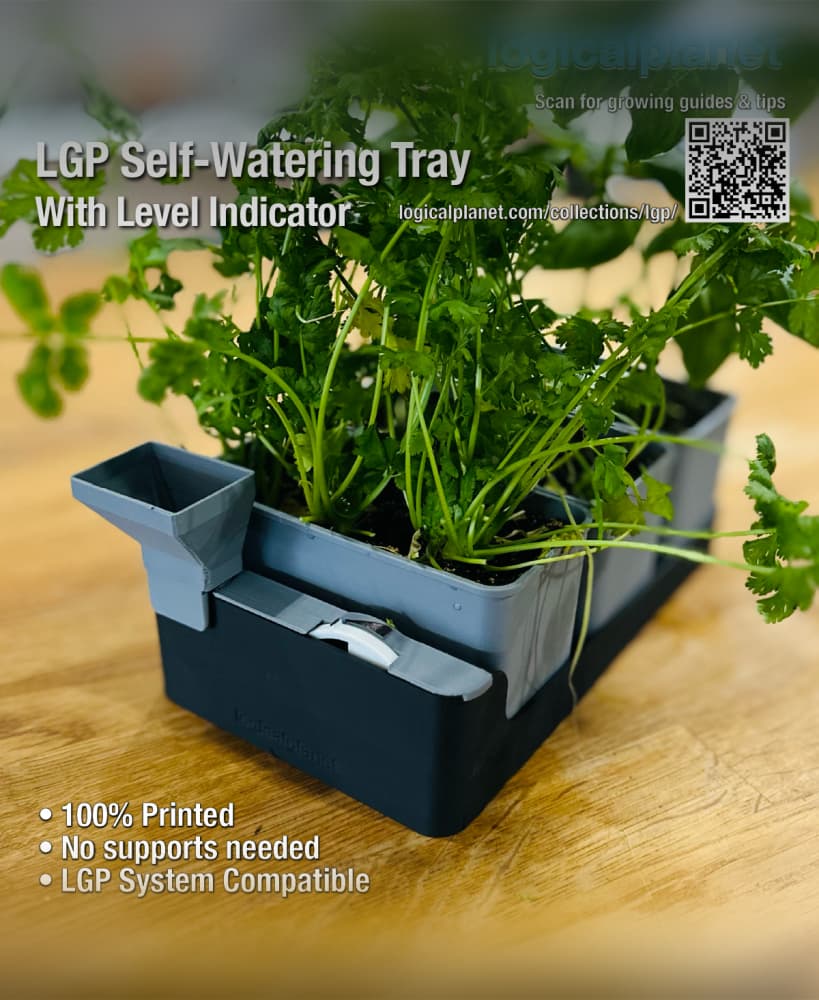
LGP Self-Watering Tray — Modular Bottom Watering Reservoir for the Logical Grow Platform
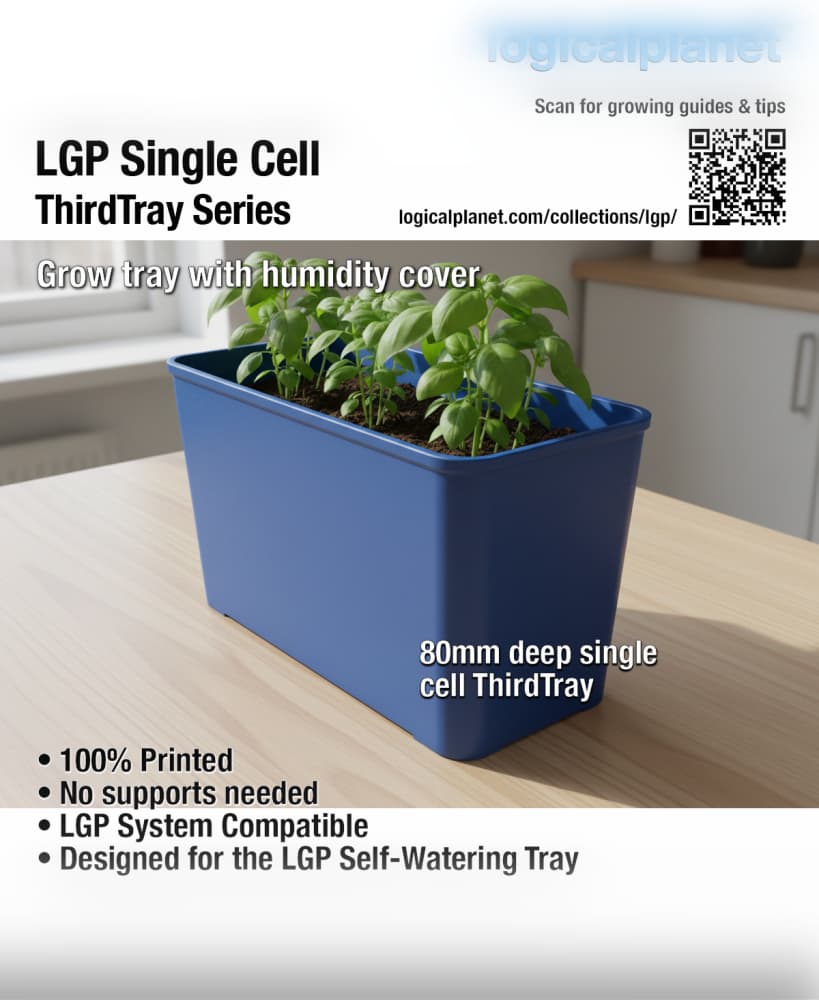
LGP Single Cell ThirdTray — Modular Grow Cell for the Logical Grow Platform
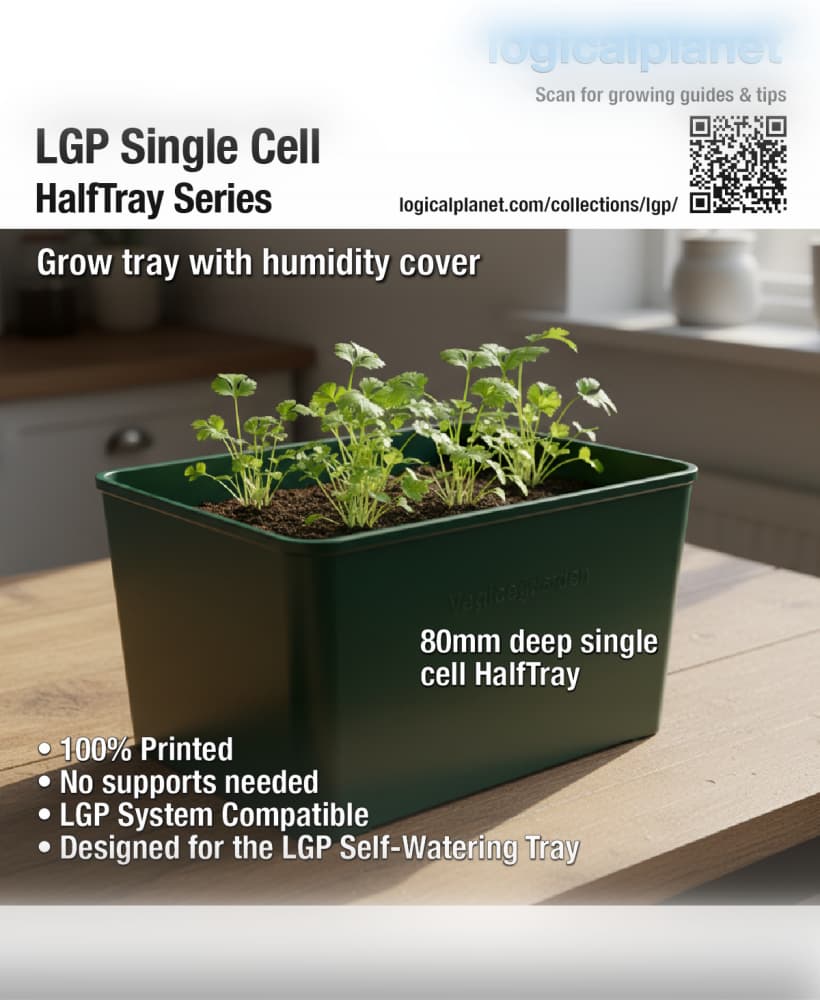
LGP Single Cell HalfTray — Modular Grow Cell for the Logical Grow Platform
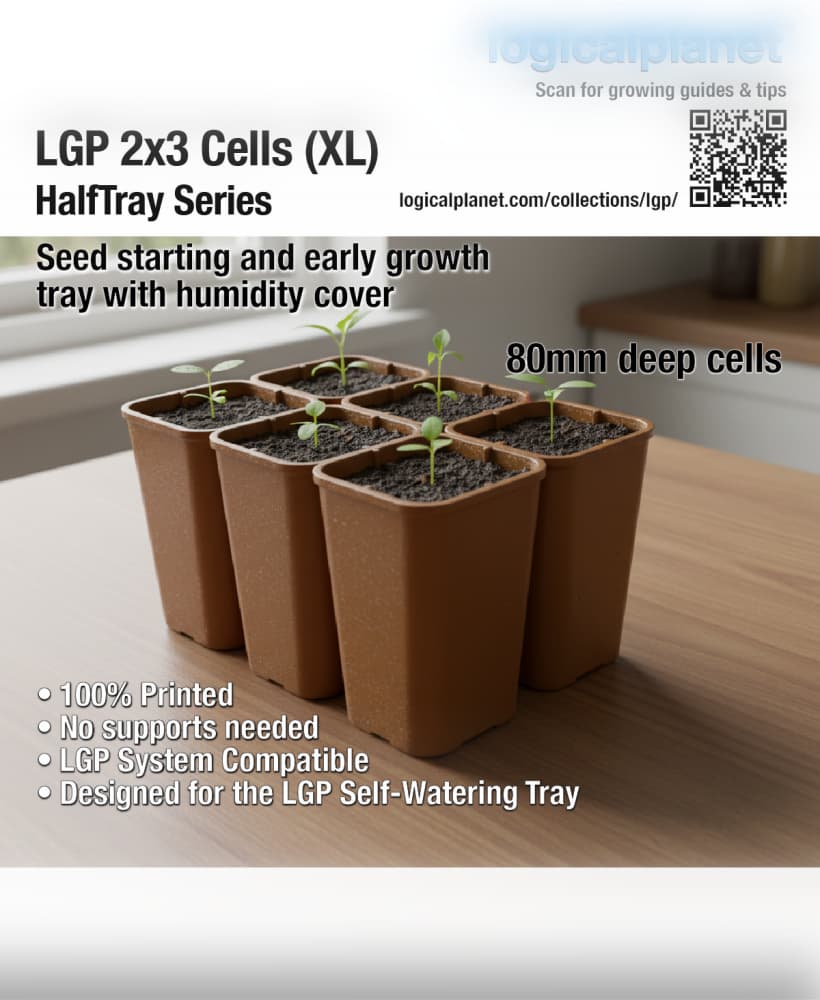
LGP 2×3 Cells XL HalfTray — Modular Seed Starting Tray for the Logical Grow Platform
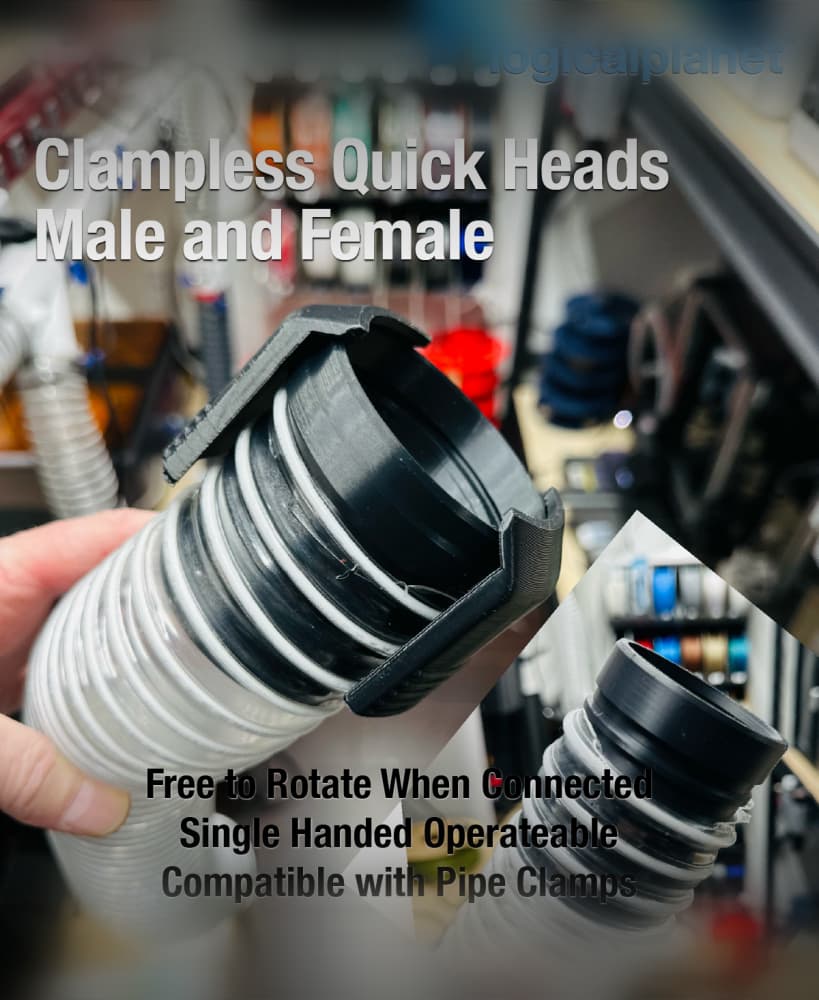
LPE25 Clampless Quick Connect
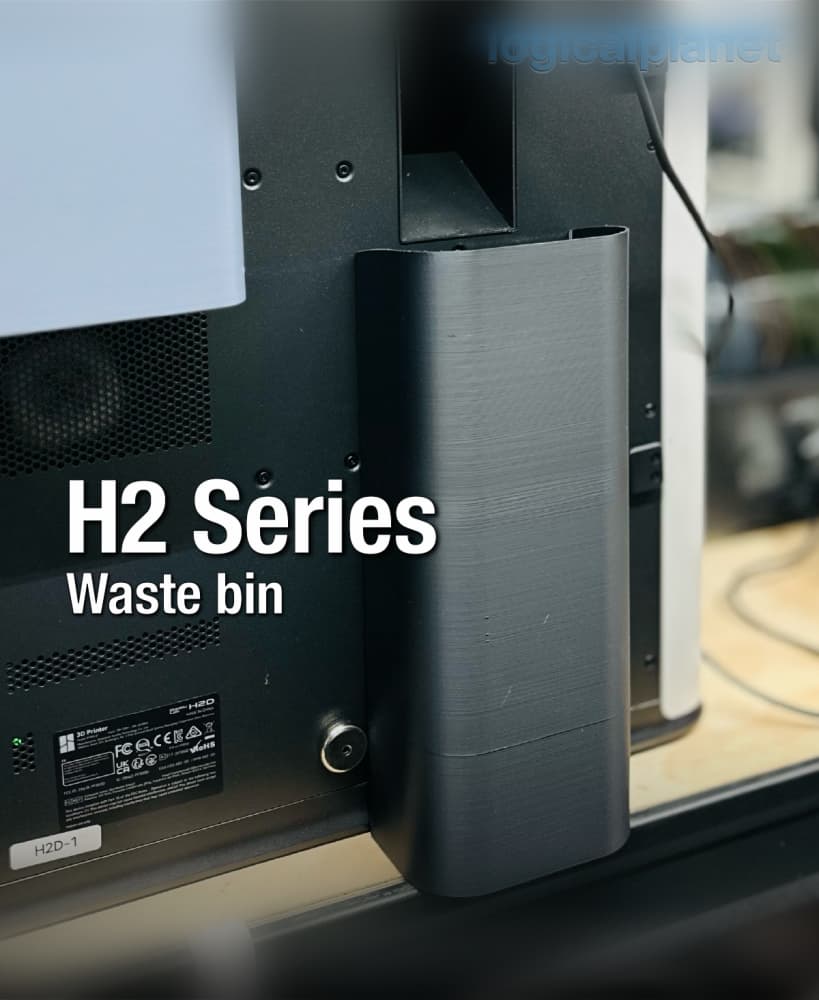
H2 Series Waste Bin
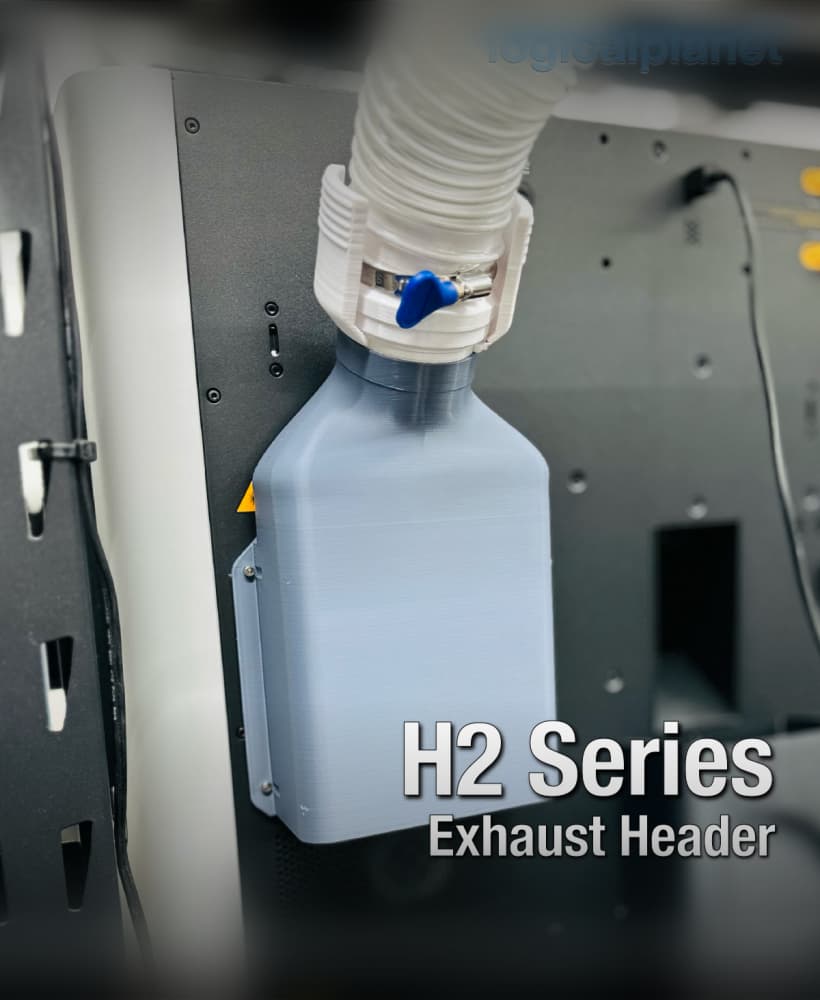
Exhaust Header for Bambu Lab H2 Series Printers

Lazy Susan 120 v3.0
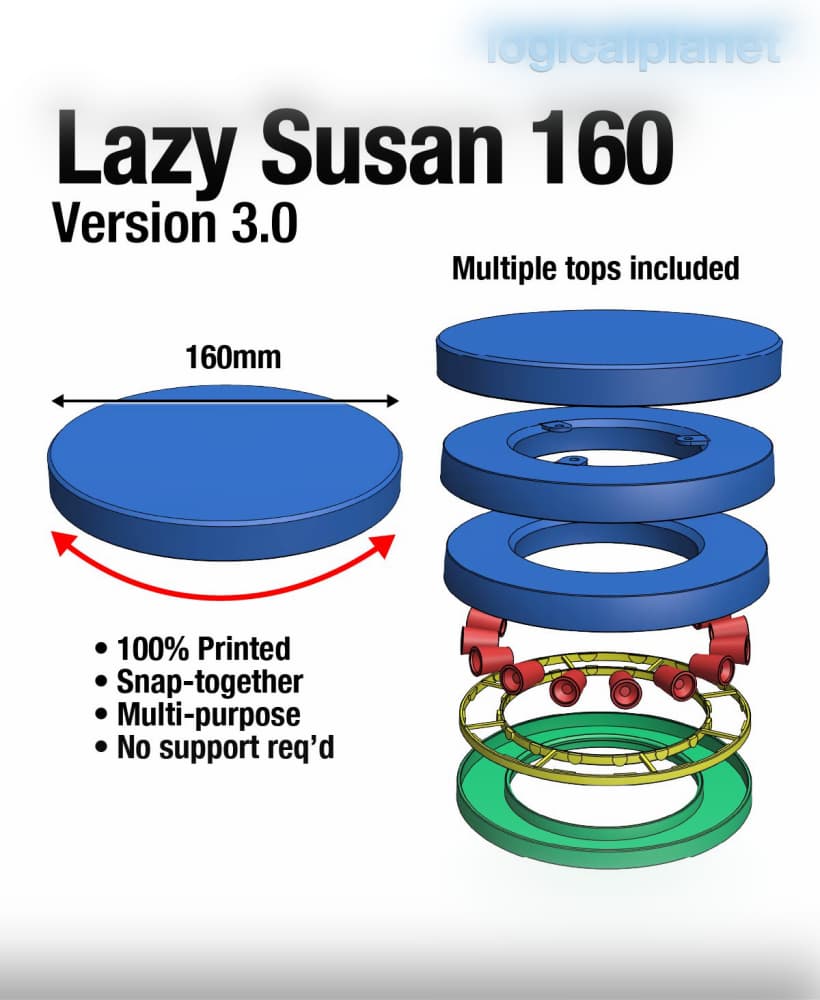
Lazy Susan 160 v3.0
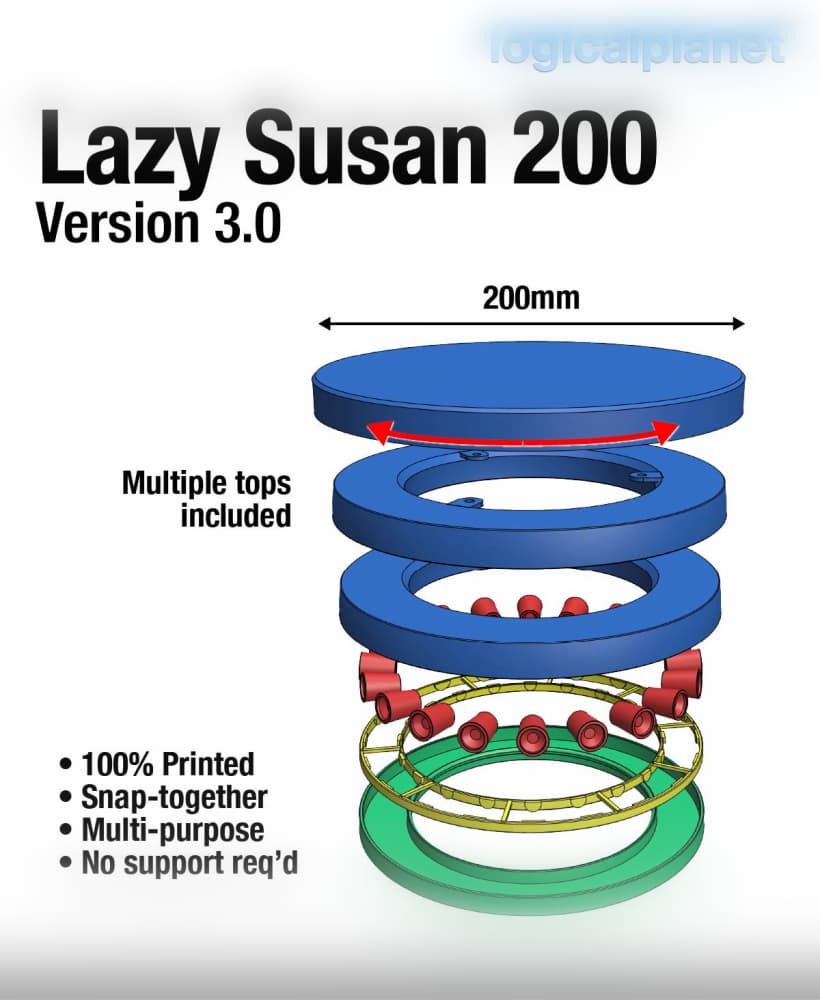
Lazy Susan 200 v3.0

First huge thanks for the designs, these are amazing!
Just a heads up for anyone printing this version, the inbuilt support needs "detect thin walls" turned on.
Oh yes. Hank for pointing that out. That is for the fan cover. Much appreciated.
Printed this out and got it connected up. One of the first prints I did with my Bambu Labs X1C. Took some thermal image shots. Using a Noctua 120mm fan for PCs. Looks like it seals up well and focuses the hot and hopefully harmful gases out based on the high thermals at the vent.
https://imgur.com/a/rg6lRdT
Dude…. That is cool. I have no idea how to interpret the images but very cool. Nice work!
Hi! Where do you get your hoses from? I'm printing everything and was just curious.
I ordered them off Amazon. Probably not the best source depending where you are but convenient.
Great design - really like this and your other ventilation designs too, thx for sharing. In your thru-wall video you reference a computer fan to allow for negative pressure - I realize this could have been for illustration purposes, but would you mind explaining your overall ventilation design? I plan on using an AC Infinity (4") and daisy chain hoses to my various printers (and small paint booth), but I am not sure how much negative pressure I should go for. Can you share your perspective?
For sure. I used a variable speed controller to adjust the fan speed In my case I had my exhaust connected to multiple machines. So my goal was to create the path of least resistance with the negative pressure. I didn’t want one machine pushing fumes into another machine. So by trial and error I adjusted the fan to always pull air from the system such that it was the path of least resistance. But not more because then you might be inadvertently cooling your print chamber(s). make Sense?
Where can print files be found for the drop in LED bars?
Thank you so much for sharing your great design!
It is included in this download. The file so called LED Strip (print 3).stl.
Love it. Thankyou for all of the work and genius that went into creating this.
Upon further investigation, the built-in support structures aren't being printed. They show up in Preview as a dark area, but don't print.
After some looking around, I found that changing the Wall generator from Normal to Archane worked. Why? I don't know.
Yes, you are right, you must use the correct wall generator because the are very narrow walls. I did list that in the recommended settings but it is easy to miss. It is good to always use that setting unless you specifically don’t need it for a specific project. If you are still having trouble email me some pictures and your geode file to logicalplanet3d Gmail.com and i can try to help.