


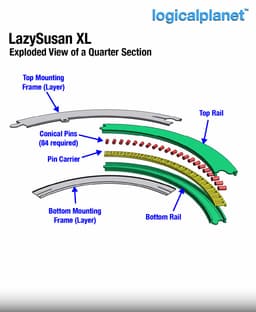


XL Turntable (380mm Lazy Susan), printed on a 220mm bed
I was challenged to design a 380mm outside diameter LazySusan mechanism that could print on a 250mm print bed. And, it came out great!
Pretty straightforward, similar to my other lazy Susan designs using conical bearings… except this one is printed in sections and assembled. No fasteners, hardware or adhesives are required.
100% printed - no hardware, fasteners, or adhesives required. No additional support is required. A very light film of lubricant (I prefer synthetic) applied to the inside of the assembly will help to reduce noise and allow it to spin more freely.
Print Settings:
Material: PLA and ABS are best for the pin bearings. The other parts of the design can be PLA, ABS or PETG.
Material = I recommend PETG but any material should work.
Nozzle = 0.4mm
Layer height = 0.2mm
Line width = 0.4mm
Wall count = 4 (1.6mm)
Infill = 40%
Ironing = ON (recommended but not critical)
Some users have had good success using adaptive layer height. This is a good opportunity to experiment with that.
Commercial Licensing is available through my logicalplanet Memberships here on Thangs. I will customize and provide commercial support to members on request.
Update 2025-01-21: I have revised the top and bottom rail parts to improve the bearing transition from one side to the next. The new parts have the name "wave" in their filename.
See my blog for more details and other product info… https://www.logicalplanet.com/
XL Turntable (380mm Lazy Susan), printed on a 220mm bed

Logical Lock Box — 4-Digit Programmable Combination Box

Logical Modular Planters
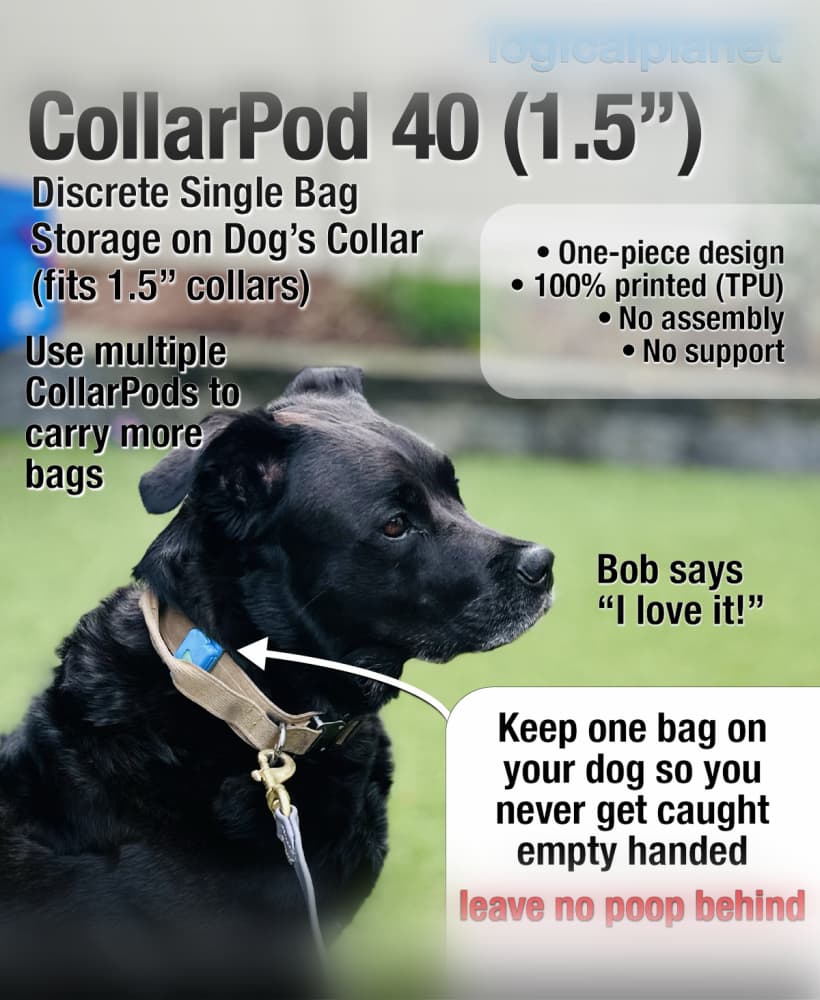
CollarPod 40 - Poop Bag Holder for Dog Collars - 1.5 Inch Collar - Single Piece TPU - No Assembly
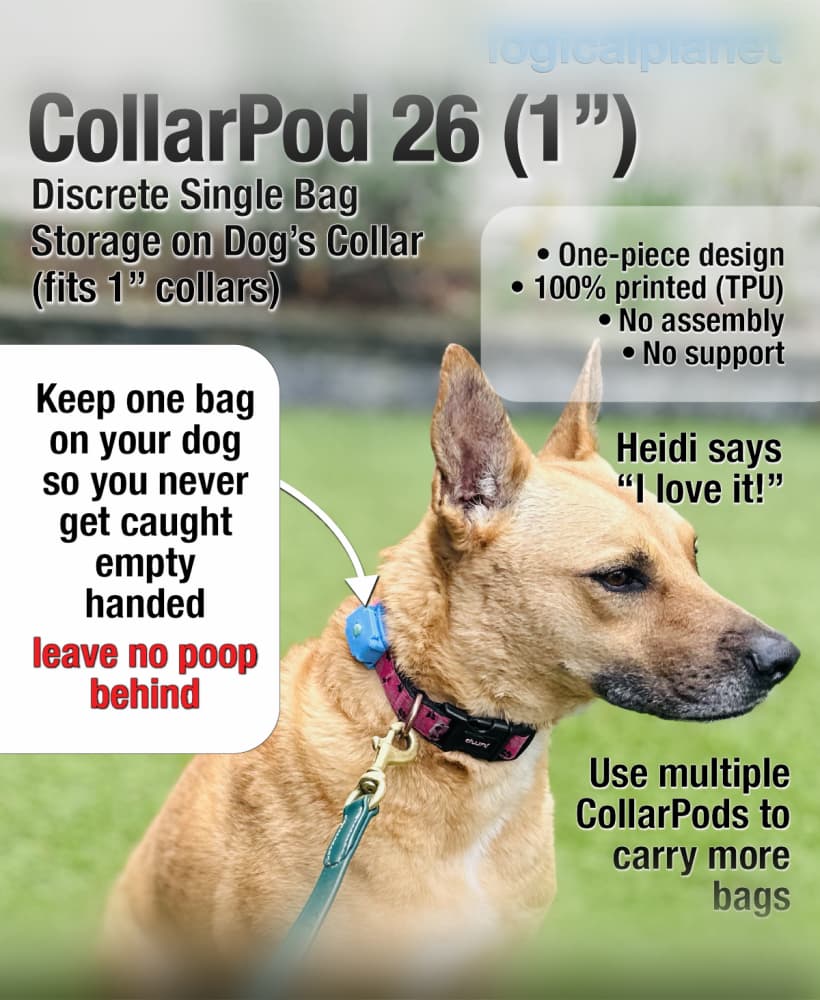
CollarPod 26 - Poop Bag Holder for Dog Collars - 1 Inch Collar - Single Piece TPU - No Assembly

CollarPod 17 - Poop Bag Holder for Dog Collars - 5/8 Inch Collar - Single Piece TPU - No Assembly
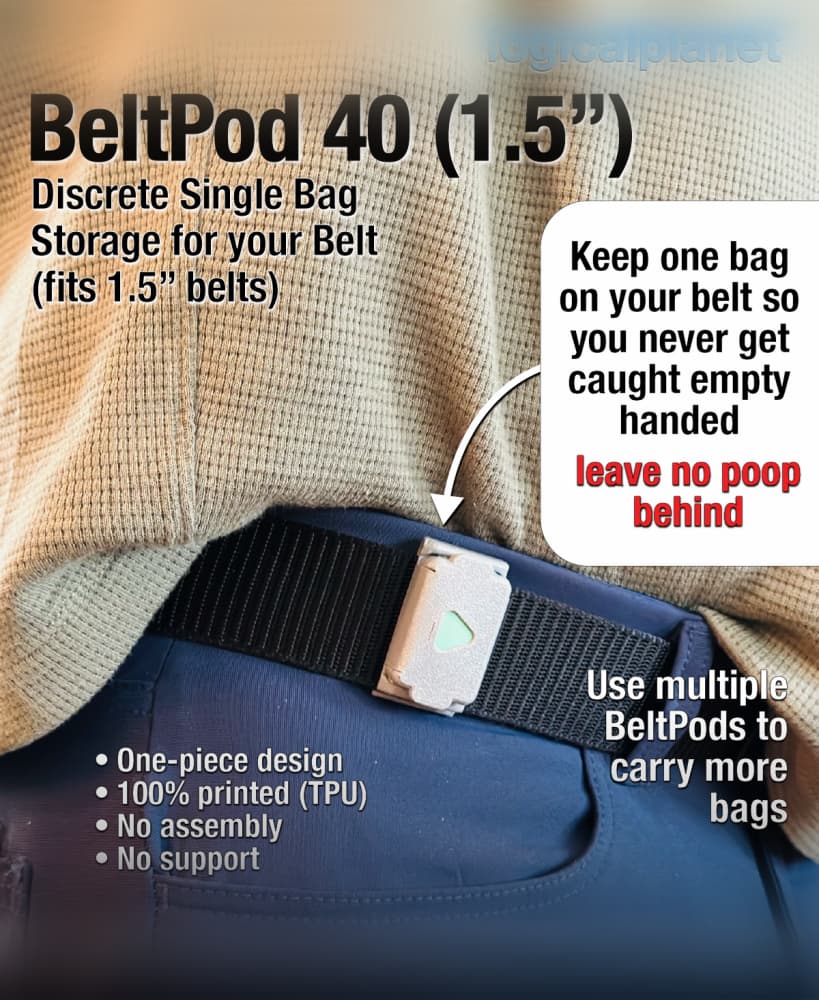
BeltPod 40 - Poop Bag Holder for Your Belt - Single Piece TPU - No Assembly
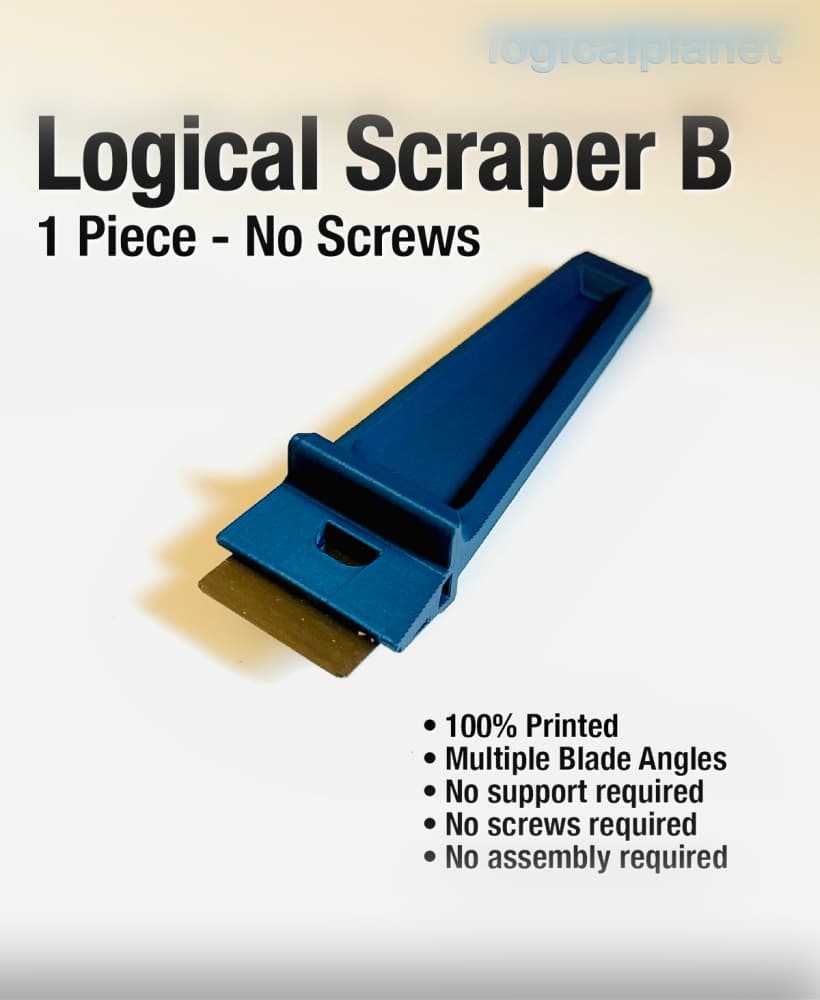
Logical Scraper B - 1 Piece No Screws No Assembly
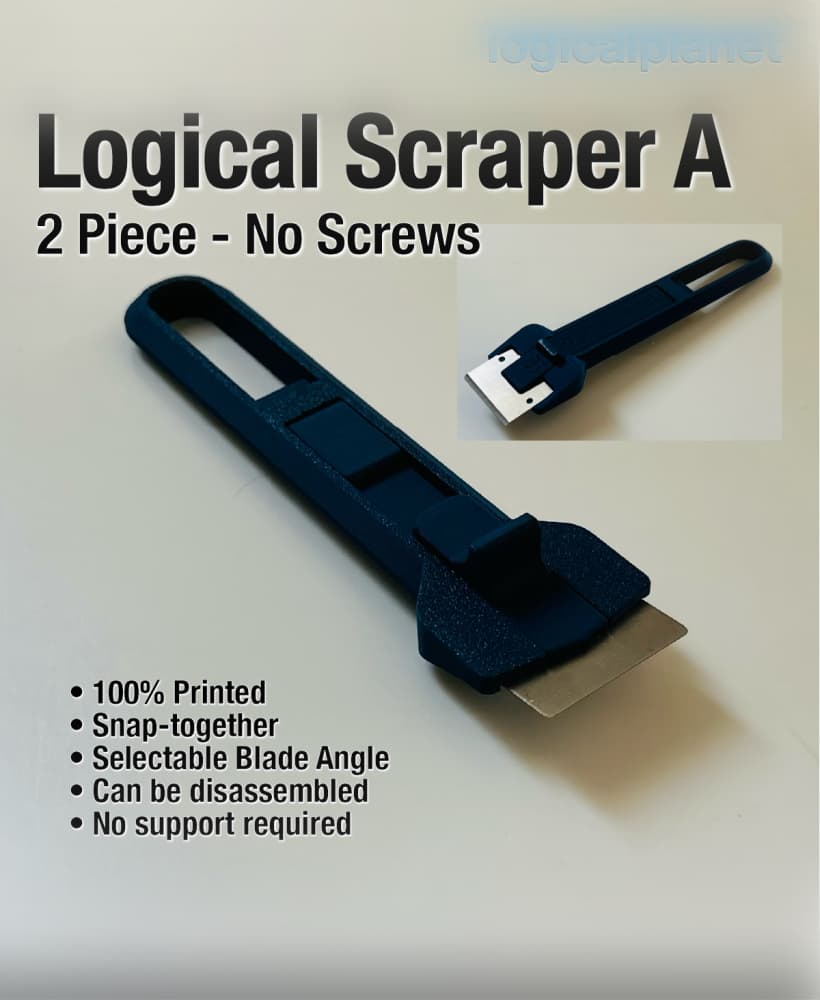
Logical Scraper A — 2 Piece, No Screws

LGP Self-Watering Tray — Modular Bottom Watering Reservoir for the Logical Grow Platform

LGP Single Cell ThirdTray — Modular Grow Cell for the Logical Grow Platform

LGP Single Cell HalfTray — Modular Grow Cell for the Logical Grow Platform
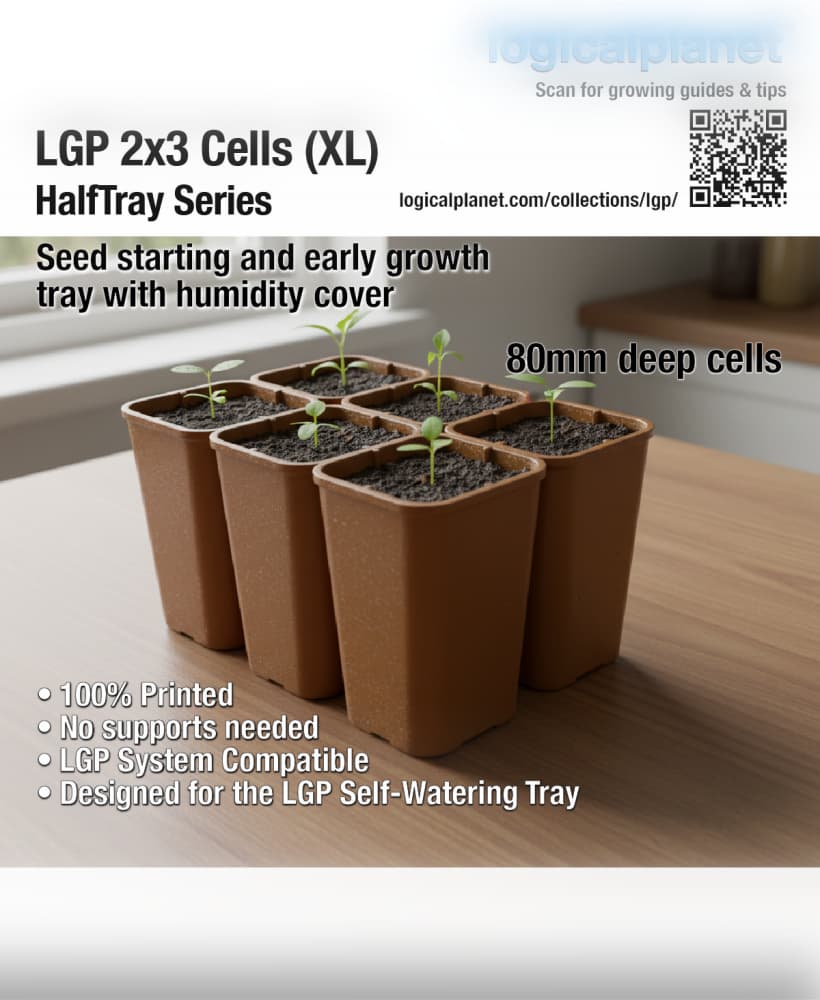
LGP 2×3 Cells XL HalfTray — Modular Seed Starting Tray for the Logical Grow Platform
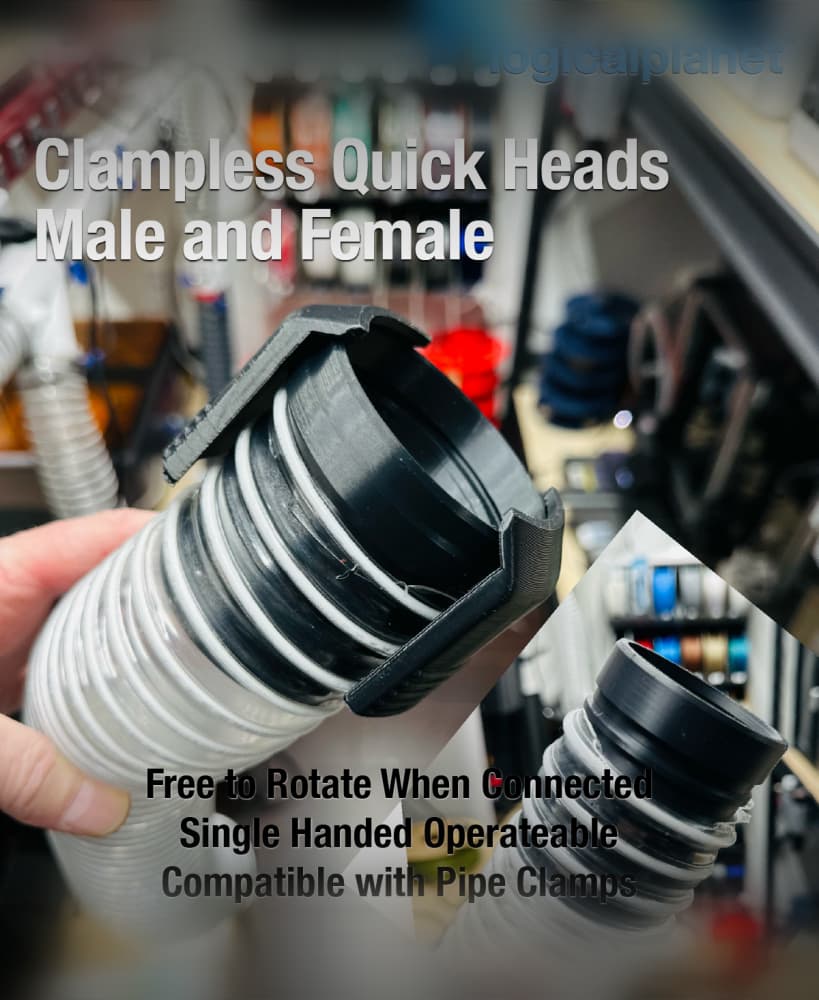
LPE25 Clampless Quick Connect

H2 Series Waste Bin
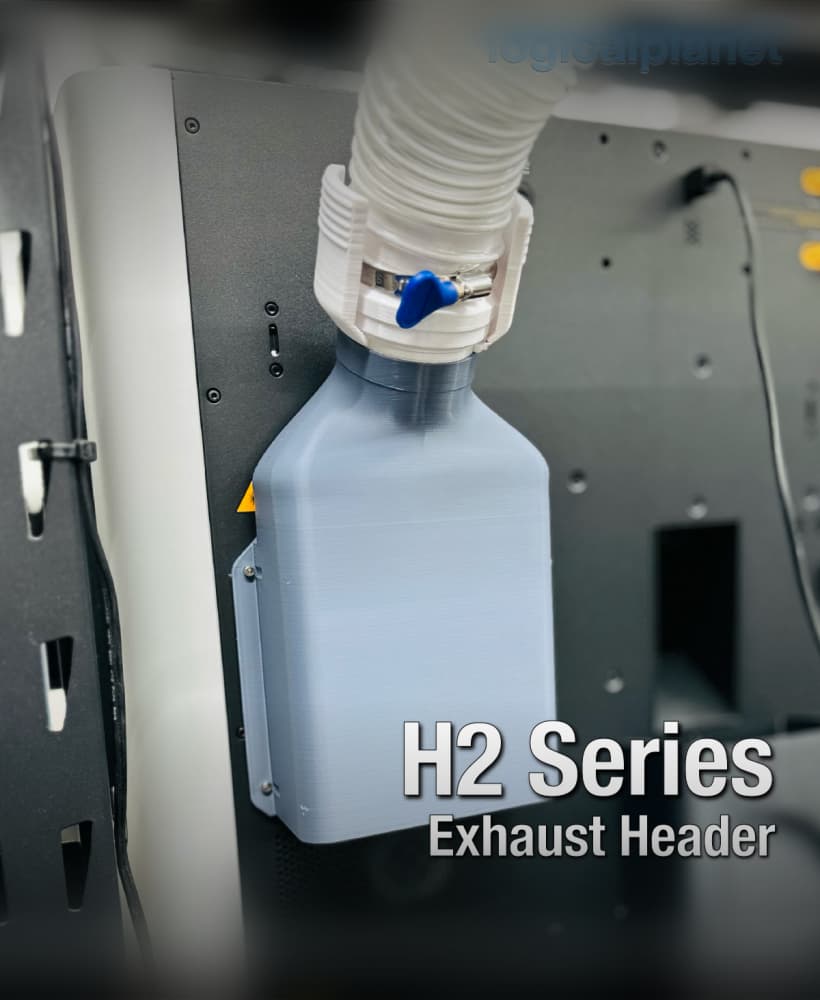
Exhaust Header for Bambu Lab H2 Series Printers

Lazy Susan 120 v3.0
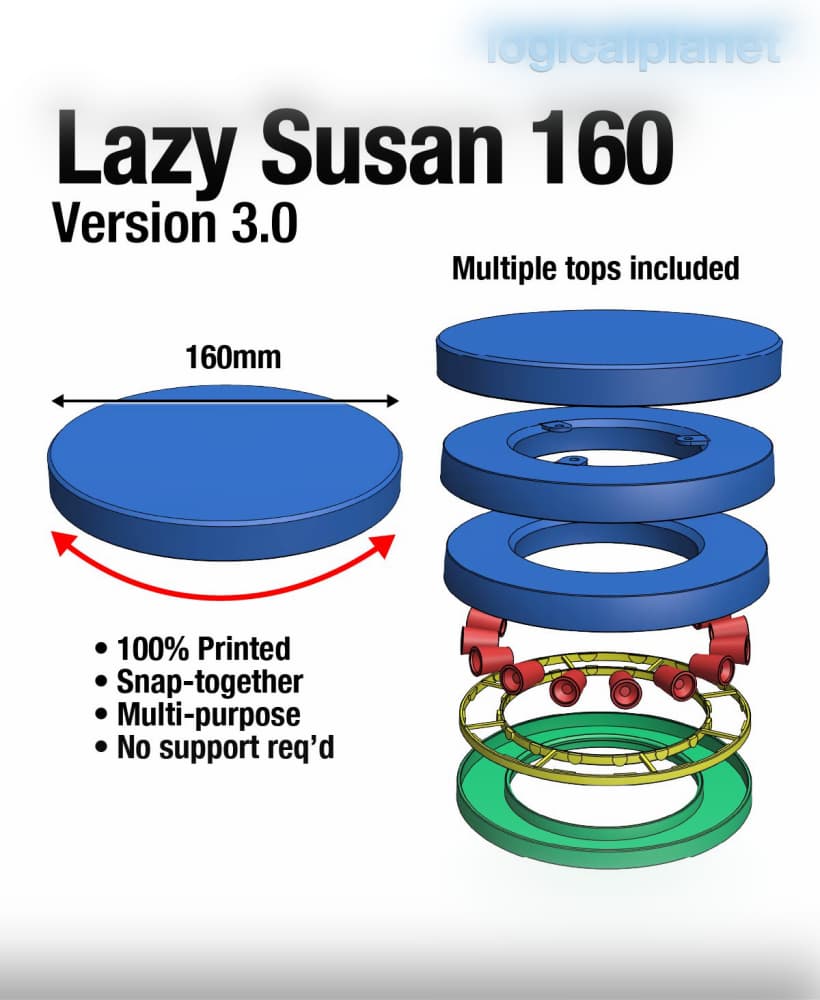
Lazy Susan 160 v3.0
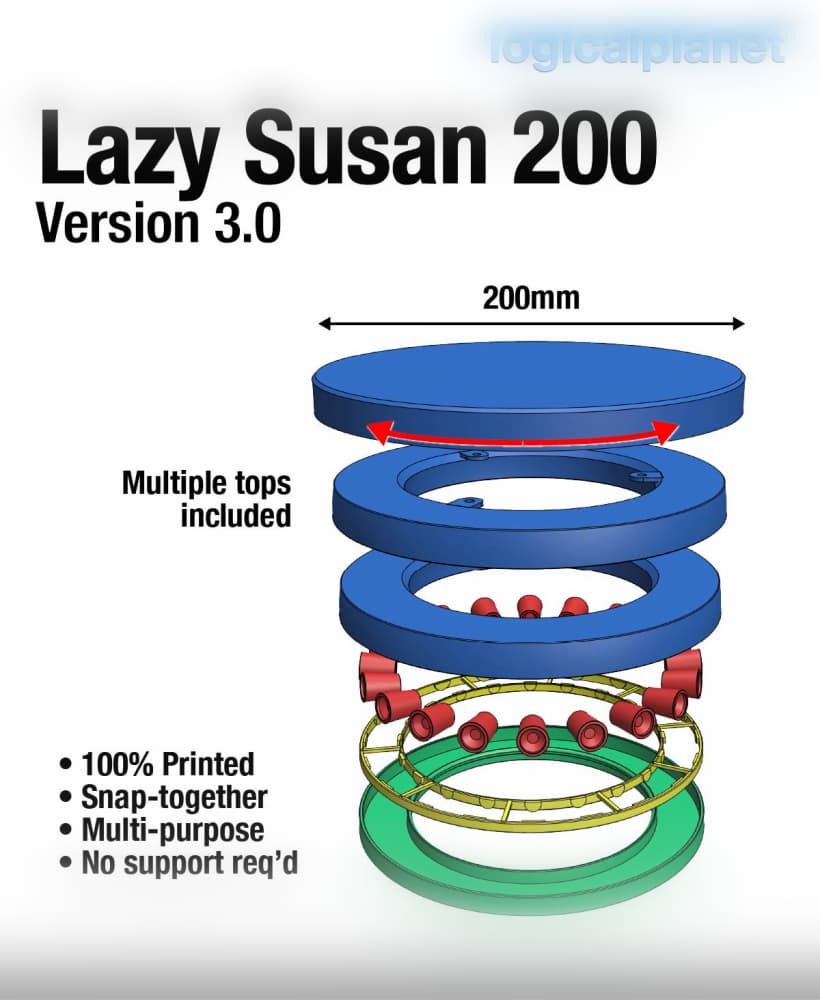
Lazy Susan 200 v3.0

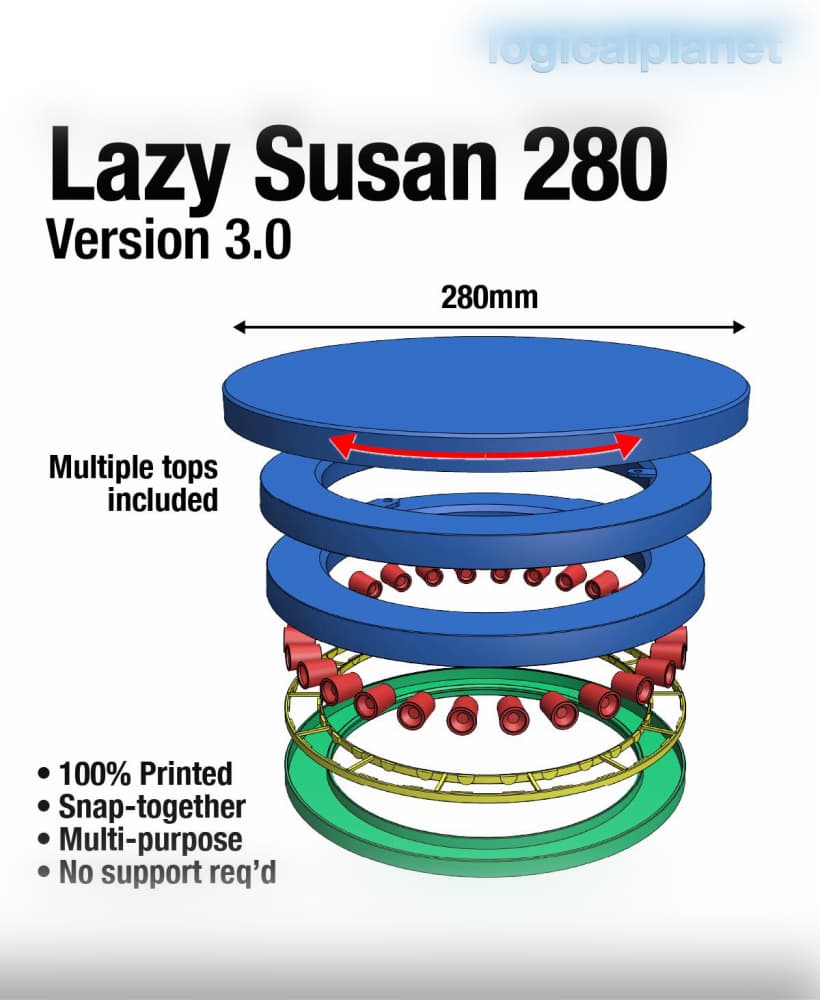
Lazy Susan 240 v3.0
Looking to print an 18 inch lazy susan for a 16-17 inch Star Wars Sabacc Table. Would this be able to be modified to fit this same build space at that size?
Hi, sorry for the slow reply... Can you confirm, you want the outside diameter of the lazy Susan to be 18"? I think that can be done but you will need a 250mm bed (which I guess you have). Please confirm and then I will try to create it for you.
I have now printed this XL LasySusan in quarters, but unfortunately it does not run freely, as the 4 small notches in the parts make the pins get stuck when turned. And when weight is put on, they wedge themselves into these notches.
Thanks for the idea, it looked promising otherwise.
Maybe it would help if you made the 4 rail pieces with a dovetail, so they were stuck together. Both for the top and the bottom?
Sorry, there seems to me something missing, I have (and many others have) printed this countless times without difficulty. Can you perhaps email me and send me a few photos of what you are seeing? I can not visualize the issue you are describing. THank you. pdb6251 gmail.com
I had to resize the pins to 93% so it could press fit inside the carrier and also resize the bottom rail to 90% before it would press fit inside the top rail. All the rest was printed with 89%. So if any body wants to use it on BamBu Studio, they can try with these settings.
I have now printed 4 top frames and 4 bottom frames. And then one of each layer. Plus the pins. And before I print any more, my question is now... _Are they supposed to stay together or do they just rest on each other?
Because mine fell apart, and the pins don't press fit inside the carrier. I have printed them on an A1 Mini in size 89% as i dont have a bigger printer... (My bad maybe 🙈)
Thanks for the upload mate 👍 I would just like to mention that the bearings is not conical as you write 😊 (But would be nice if you could change it to conical)
Br T. M.
Hi, thank you for your comments and post. The bearings are indeed conical but the angle is minute. The readius of the cones declines only 0.1mm over the 10mm length of the cone so it is a very small angle. The angle is defiined by the diameter of the lazy susan and the diameter of the bearings. Thank you.
Thanks for fast reply. Its just when I compare them to the other 2.0 Lazy susan you made, I can clearly see the difference. The 2.0 is clearly conical, but the XL isn't (when viewing the STL in MS 3DViewer from above).
Yes, I understand, it is simply that the angle of the cone is extremely small. But it does improve the roll of the Lazy Susan.
It might be the viewer.... i'll try to print the 🕵️♂️
I got about halfway through printing this until I realized it wasn't going to work. The top and bottom rails are too loose and fall apart from each other. My guess is that the tolerances added into the models to let them slide easily, took into account most printers not being tuned correctly. If your printer is spot on, then that extra tolerance space just makes the top and bottom rails not even hold together.