
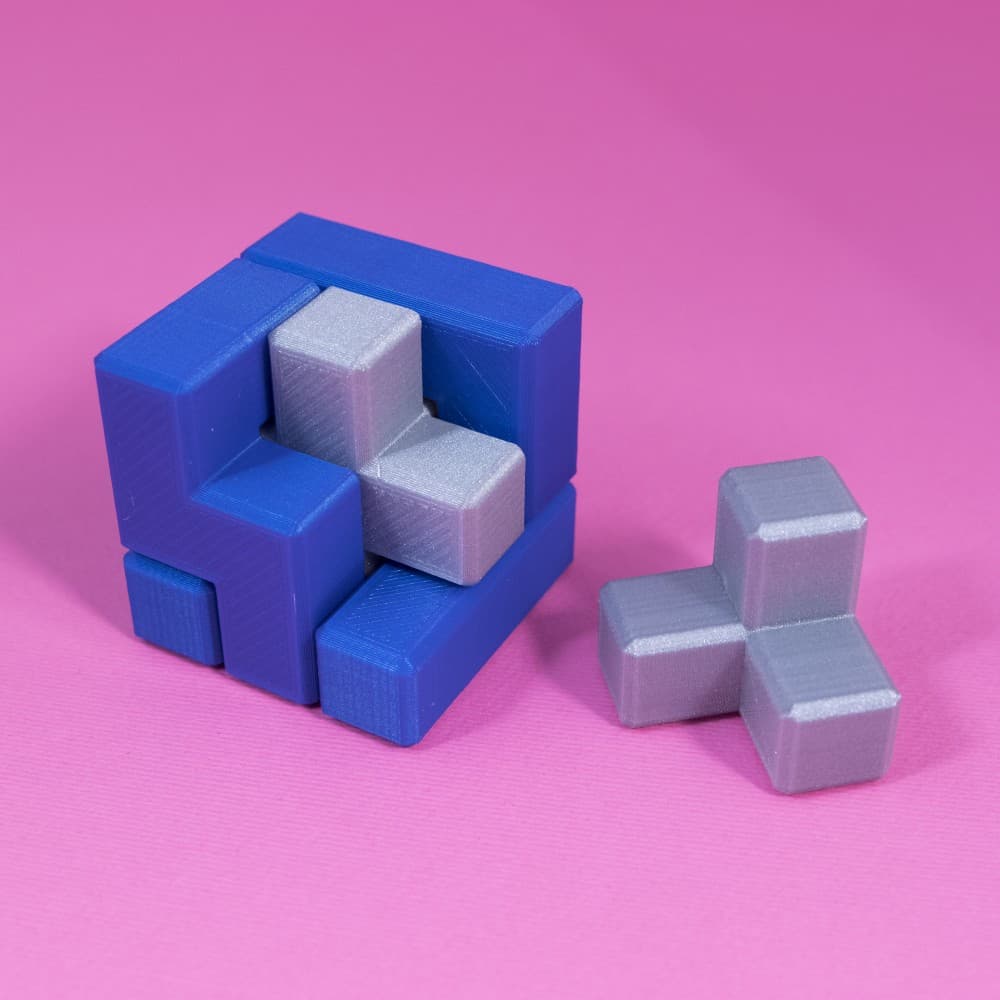
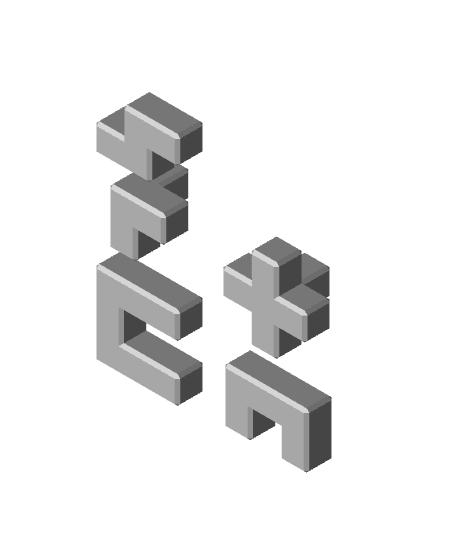
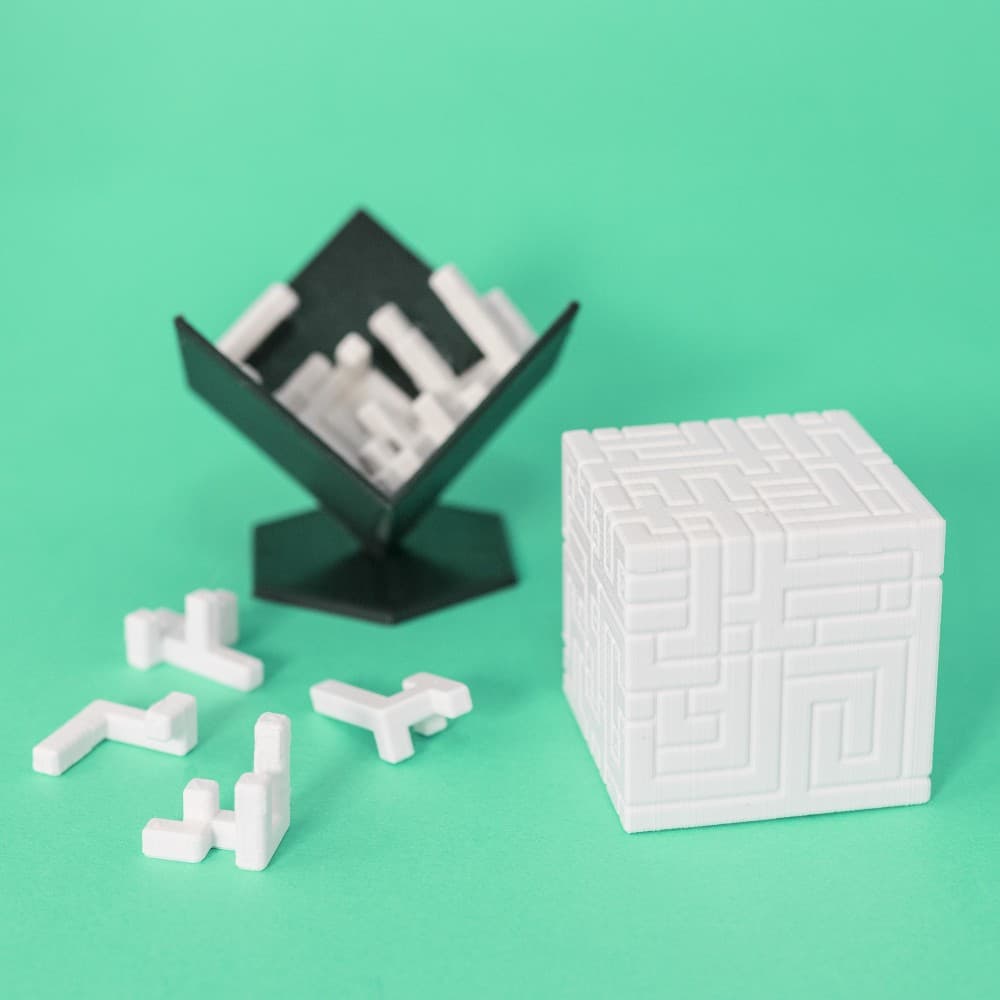
Puzzle Cube - Hard Mode
Model originally uploaded to Thingiverse at https://www.thingiverse.com/thing:4264931.
Functioning Hellraiser inspired puzzle box using my own planetary gearbox core.
Assembly video - Jump to the end to see the finished product in action. "Core" preparation. Now tracking my source code in github to make tracking versions and bugs easier.
The Lament configuration - art by artist064 "The original Lament Configuration was created by Simon Sayce for the original Hellraiser movie".
This is a slight improvement over the previous design which was only solvable by a simplistic brute force method. I have added an extra latch which must be disengaged after aligning the gears. It is also a bit of an experiment in incorporating an internal "clicker" device to indicate when the gears are (partially) aligned. There are also "false gates" which give it away by allowing the core to open slightly when aligned - without these I think it would be near impossible (CH included) unless we incorporate some other indicator (the sound of distant bells, perhaps - there is room for electronics). Also provision for an internal spring to bring the box to "life". If the "clicker" idea works out, it might be worth adding more for effect. Some aluminium strips and magnets could be included in future a future release to provide an inductive braking effect.
Print at 0.2mm (at least the core - it is designed to produce a 1-layer gap between the ring gears and is sensitive to layer height) and separate ring gears with a sharpened spatula, flat razor blade scraper, box cutter or similar. Print parts A and B separately (around 21 hours each, 8 for the core). Ease the core (wider tabs first, careful of orientation and alignment of the narrow tabs) into the end of the "claw", they will need to flex a little.
Enable Support Interface at 100%, Touching Buildplate with overhang of 85 degrees for improved finish. This will give a nice solid disk to support the raised dial for parts A and B which can be pried off. Part C does not require support. (Cura)
I'd also recommend "breaking in" the core by giving it 5 minutes on a drill or Dremel tool to spin the gears. They will be quite stiff at first but soon wear in to move freely. Similarly the sliding parts might need a light sanding or at least operated back and forth a bit to loosen them up. A few people have reported difficulty getting the core to move. This was a much easier when I had a hex hole that fit an allen key, with the new spring holder and internal latch, not so. One trick which may help is supporting the center gears with a piece of 25mm dowel and giving it a few taps from the other end with a rubber mallet. Then thread through an M5 bolt, washer and nut to work it back and forth a bit more to break the seal.
Bitmaps were converted to black and white using Threshold filter in GIMP then traced using InkScape, simplified using "Flatten Bezziers" extension before being exported as SVG for import into OpenSCAD. OpenSCAD struggled importing multiple SVGs, so individual faces were added to separate cubes and combined using MeshLab (more info).
TinkerCad was used for the final intersection (subtract the negative from the artwork cube) as everything else I tried crashed or made a mess of the mesh.
Most versions of this artwork have the gold detail raised, personally I prefer the negative as it preserves most visual detail when slicing for FDM. Painting gold followed by sanding back the raised edges allows for low painting skill required. If you'd like to try other artwork cubes, I have included the negative. Load your own cube in TinkerCad, scale as desired and subtract. The two halves can then be separated in MeshLab or similar for printing (eg. using select connected followed by delete).
I've also just realised all the artwork is in mirror image in previous versions, betrayed by "The Beautiful Woman", "The Crouching Man" et al. The orientation of the faces relative to each other is also incorrect. I have attempted to remain faithful to the original design, however it is apparent that multiple on-screen props were used with differing configurations, even some faces mirrored. To this end I have settled on the widely used HR1 configuration by Xane
The latest upload is also dimensionally accurate with the original. It's exactly 3"x3"x3". There was originally some symbolism behind the measurements (according to the interview with Sayce). I have also included both positive and negative versions of the artwork to cater to different painting/finishing preferences.
UPDATE: Fixed some overlap in the core which was causing it to print the planet gears fused to the ring gears more so than expected. Updated spring mount inside of core.
Puzzle Cube - Hard Mode
Geometric 3D Puzzle, 3D Puzzle Cube, 6 pcs. Puzzle, for Game Lovers, Special Gift, Mind Games
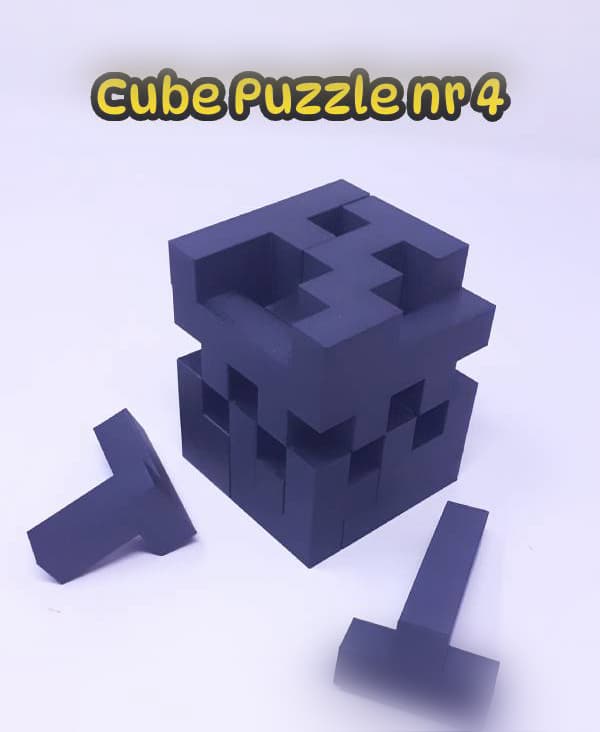
Cube Puzzle nr 4

Cube Puzzle nr 3.

Cube Puzzle nr 2.
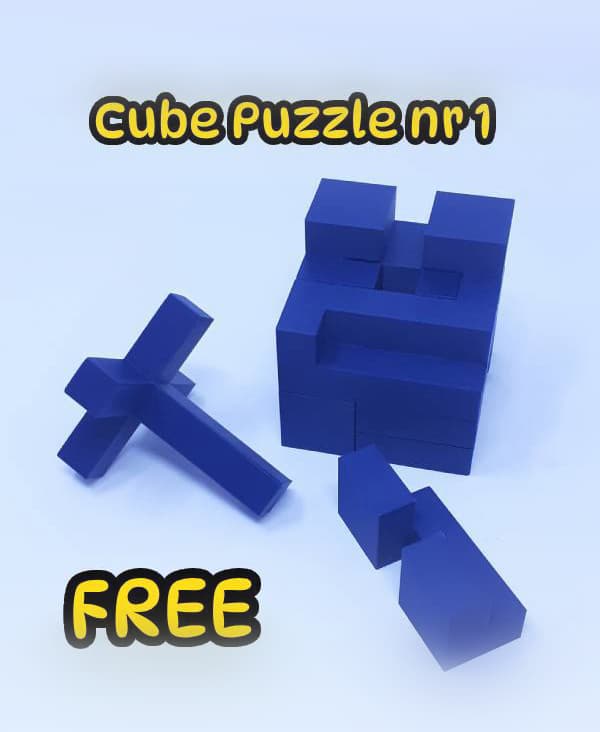
Cube Puzzle Nr 1
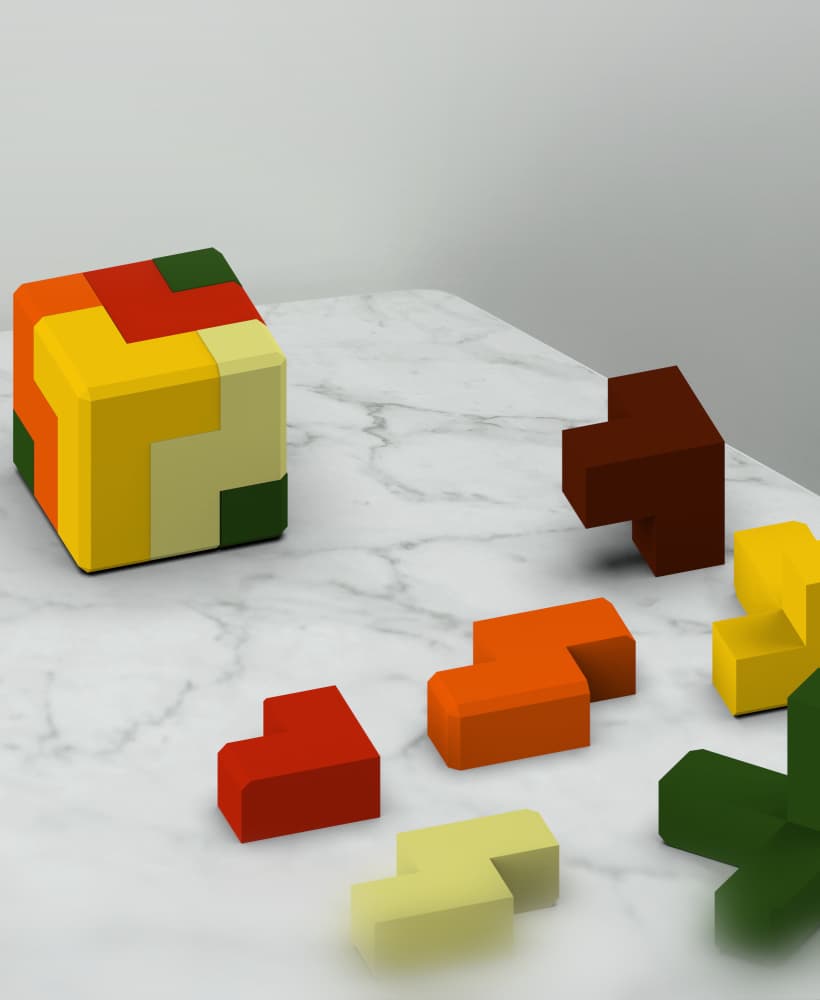
Cube puzzle (x6), create 6 small cubes or combine 4 pieces of each set for 1 big cube

rubkis cube wall art rubix cube puzzle wall decor gameroom decoration
3x3 Puzzle Cube

Montessori Tulip Puzzle, 3-Level Learning Tray, 170mm, Easy to Hard, Progressive Flower Puzzle System, Floral Blossom STL Model PRODUCT_8082

4x4 Puzzle Cube "Bedlam"

Cube Puzzle – 22-Piece Geometric Assembly Challenge

rubiks cube wall art gamer wall decor rubix cube puzzle wall decor
Puzzle Cube

Asymmetry Cube Puzzle
Puzzle cubes 3x3
5x5 Puzzle Cube
S U P E R C U B E // 10x10 Puzzle Cube
.JPG&w=3840&q=75)
Soma 3x3 Puzzle Cube

Donut Factory Puzzle (Deconstructed) // 2x2 Twisty Marble Puzzle (24mm inner cube)
