Model originally uploaded to Thingiverse at https://www.thingiverse.com/thing:4601460.
I bought this building block model to display in my shop. I was really looking forward to this build. That lasted about 30 steps or so. There are several issues with this model that make it near impossible to complete and, even if you do, could be better.
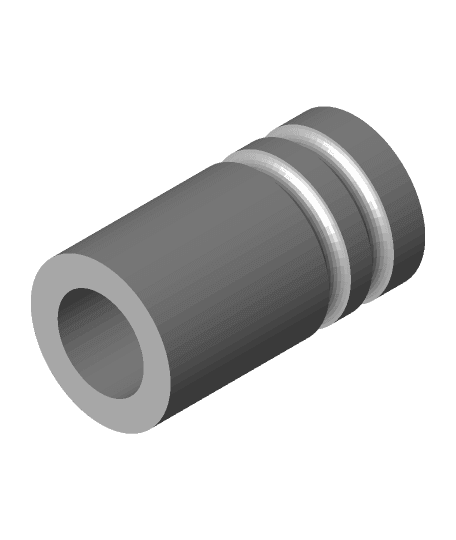
The first modification occurs in steps 29 and 47. The cylindrical pieces that mount in the cylinder head group are a tad too long. You don't really notice this until you go to mount the brace in steps 31 and 49. You can see that the cooling fins don't quite line up while building the block, but when you attach the brace, one of the heads is pulled down away from the rest of the assembly. If you continue on the way it is, nothing ever lines up right after this and the whole model is fiddly as hell. To solve this, I modeled slightly shorted stacks and added rings around the top for a more finished appearance.
The second modification is in step 54. The round spacer in step 54.2 is, again, a tad too tall. You can just leave the spacer out all together, but then you're left with a red section sticking out like a sore thumb. My solution was to 3d print that spacer the proper height.
Nest, in step 79, the spacer that goes on right before the end cone is a tad too short (for a change of pace) and it just spins around the cross piece all willy nilly. I didn't like either problem, so I modeled two different solutions. Both pieces lock into the cross to porevent them from spinning and both are the proper length. One is smooth and the other has a small, oval protrusion along the side to simulate the plate that is used on a lot of exhaust systems. Use which ever you prefer.
In step 118, your supposed to push a short rod into the connector that acts as a kickstand. While it does look good, like a kickstand should, you will find that leaving the rod off and just using the connector functions much better and is far more stable.
Finally, as far as modifications go, the stickers that are supposed to be used on the top and sides of the tank are atrocious. The unique spelling of the name - Herlay Dovidsan - doesn't bother me so much. What does bother me is that instead of supplying the stickers as one piece that spans the blocks, you are given three pieces for each sticker that you have to align just right and even then, they just look bad. To combat that, I designed my own decal sheet that you can print on either sticker stock or decal stock. I plan on printing these on decal sheets on my color laser printer. In addition to the top tank decal, I have supplied two different versions of the tank side decals. One is the traditional Harley Davidson silver emblem and the other is the version originally supplied with the kit. All of the decals feature the name spelled correctly.
If you build this, as long as you incorporate my mods, the model looks great. If you go it on your own with the kit as it is... well... all I can say is good luck :)
For best appearance, print at 0.1mm layer height in a shiny, metallic silver filament. The decals/stickers are printed at 600 dpi to be size accurate.
NOTE Due to either a Thingiverse bug or (more likely) shadowbanning, my models no longer show up under the [Newest] listings. If you want to see more of my models, please be sure to 'follow' me. If you print this, it would really help if you'd post a 'make' so that others could find this model.
