HE3D K200 HotEnd Assembly
Model originally uploaded to Thingiverse at https://www.thingiverse.com/thing:2828627.
NEW VERSION FAN DUCT..............................
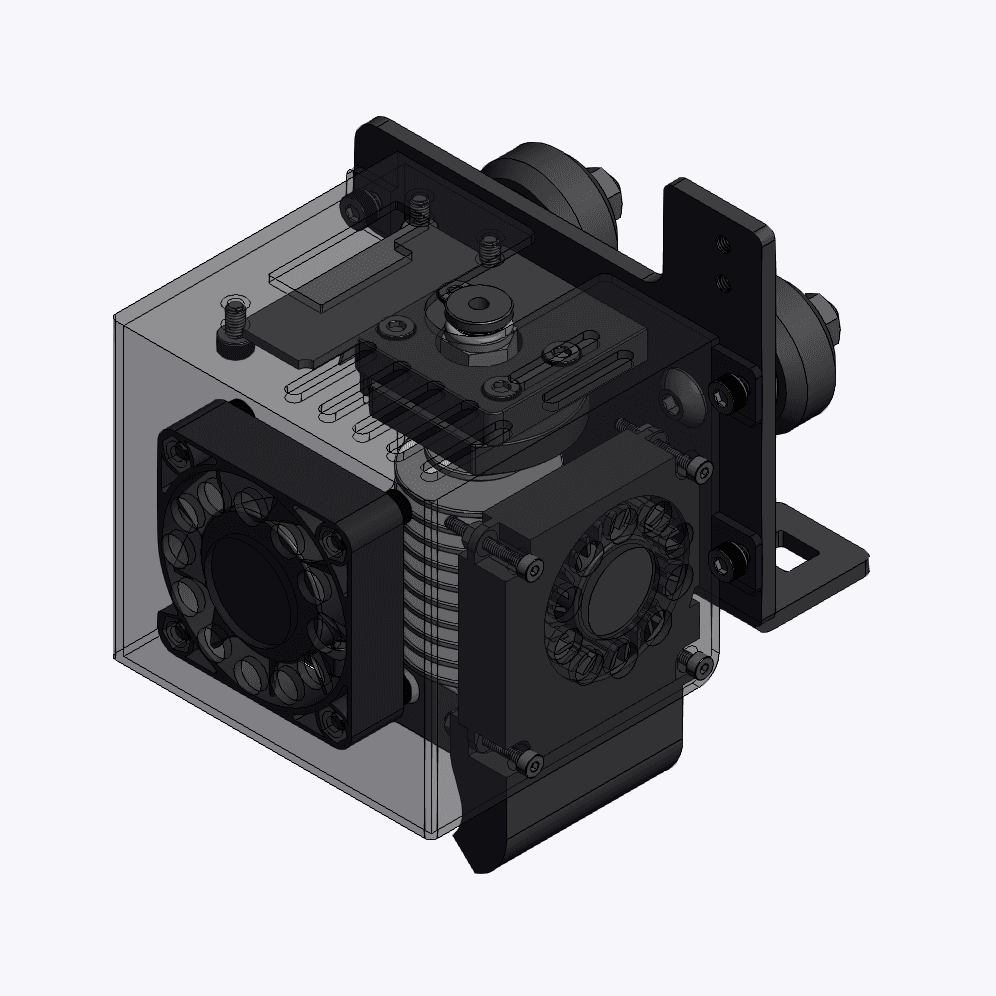
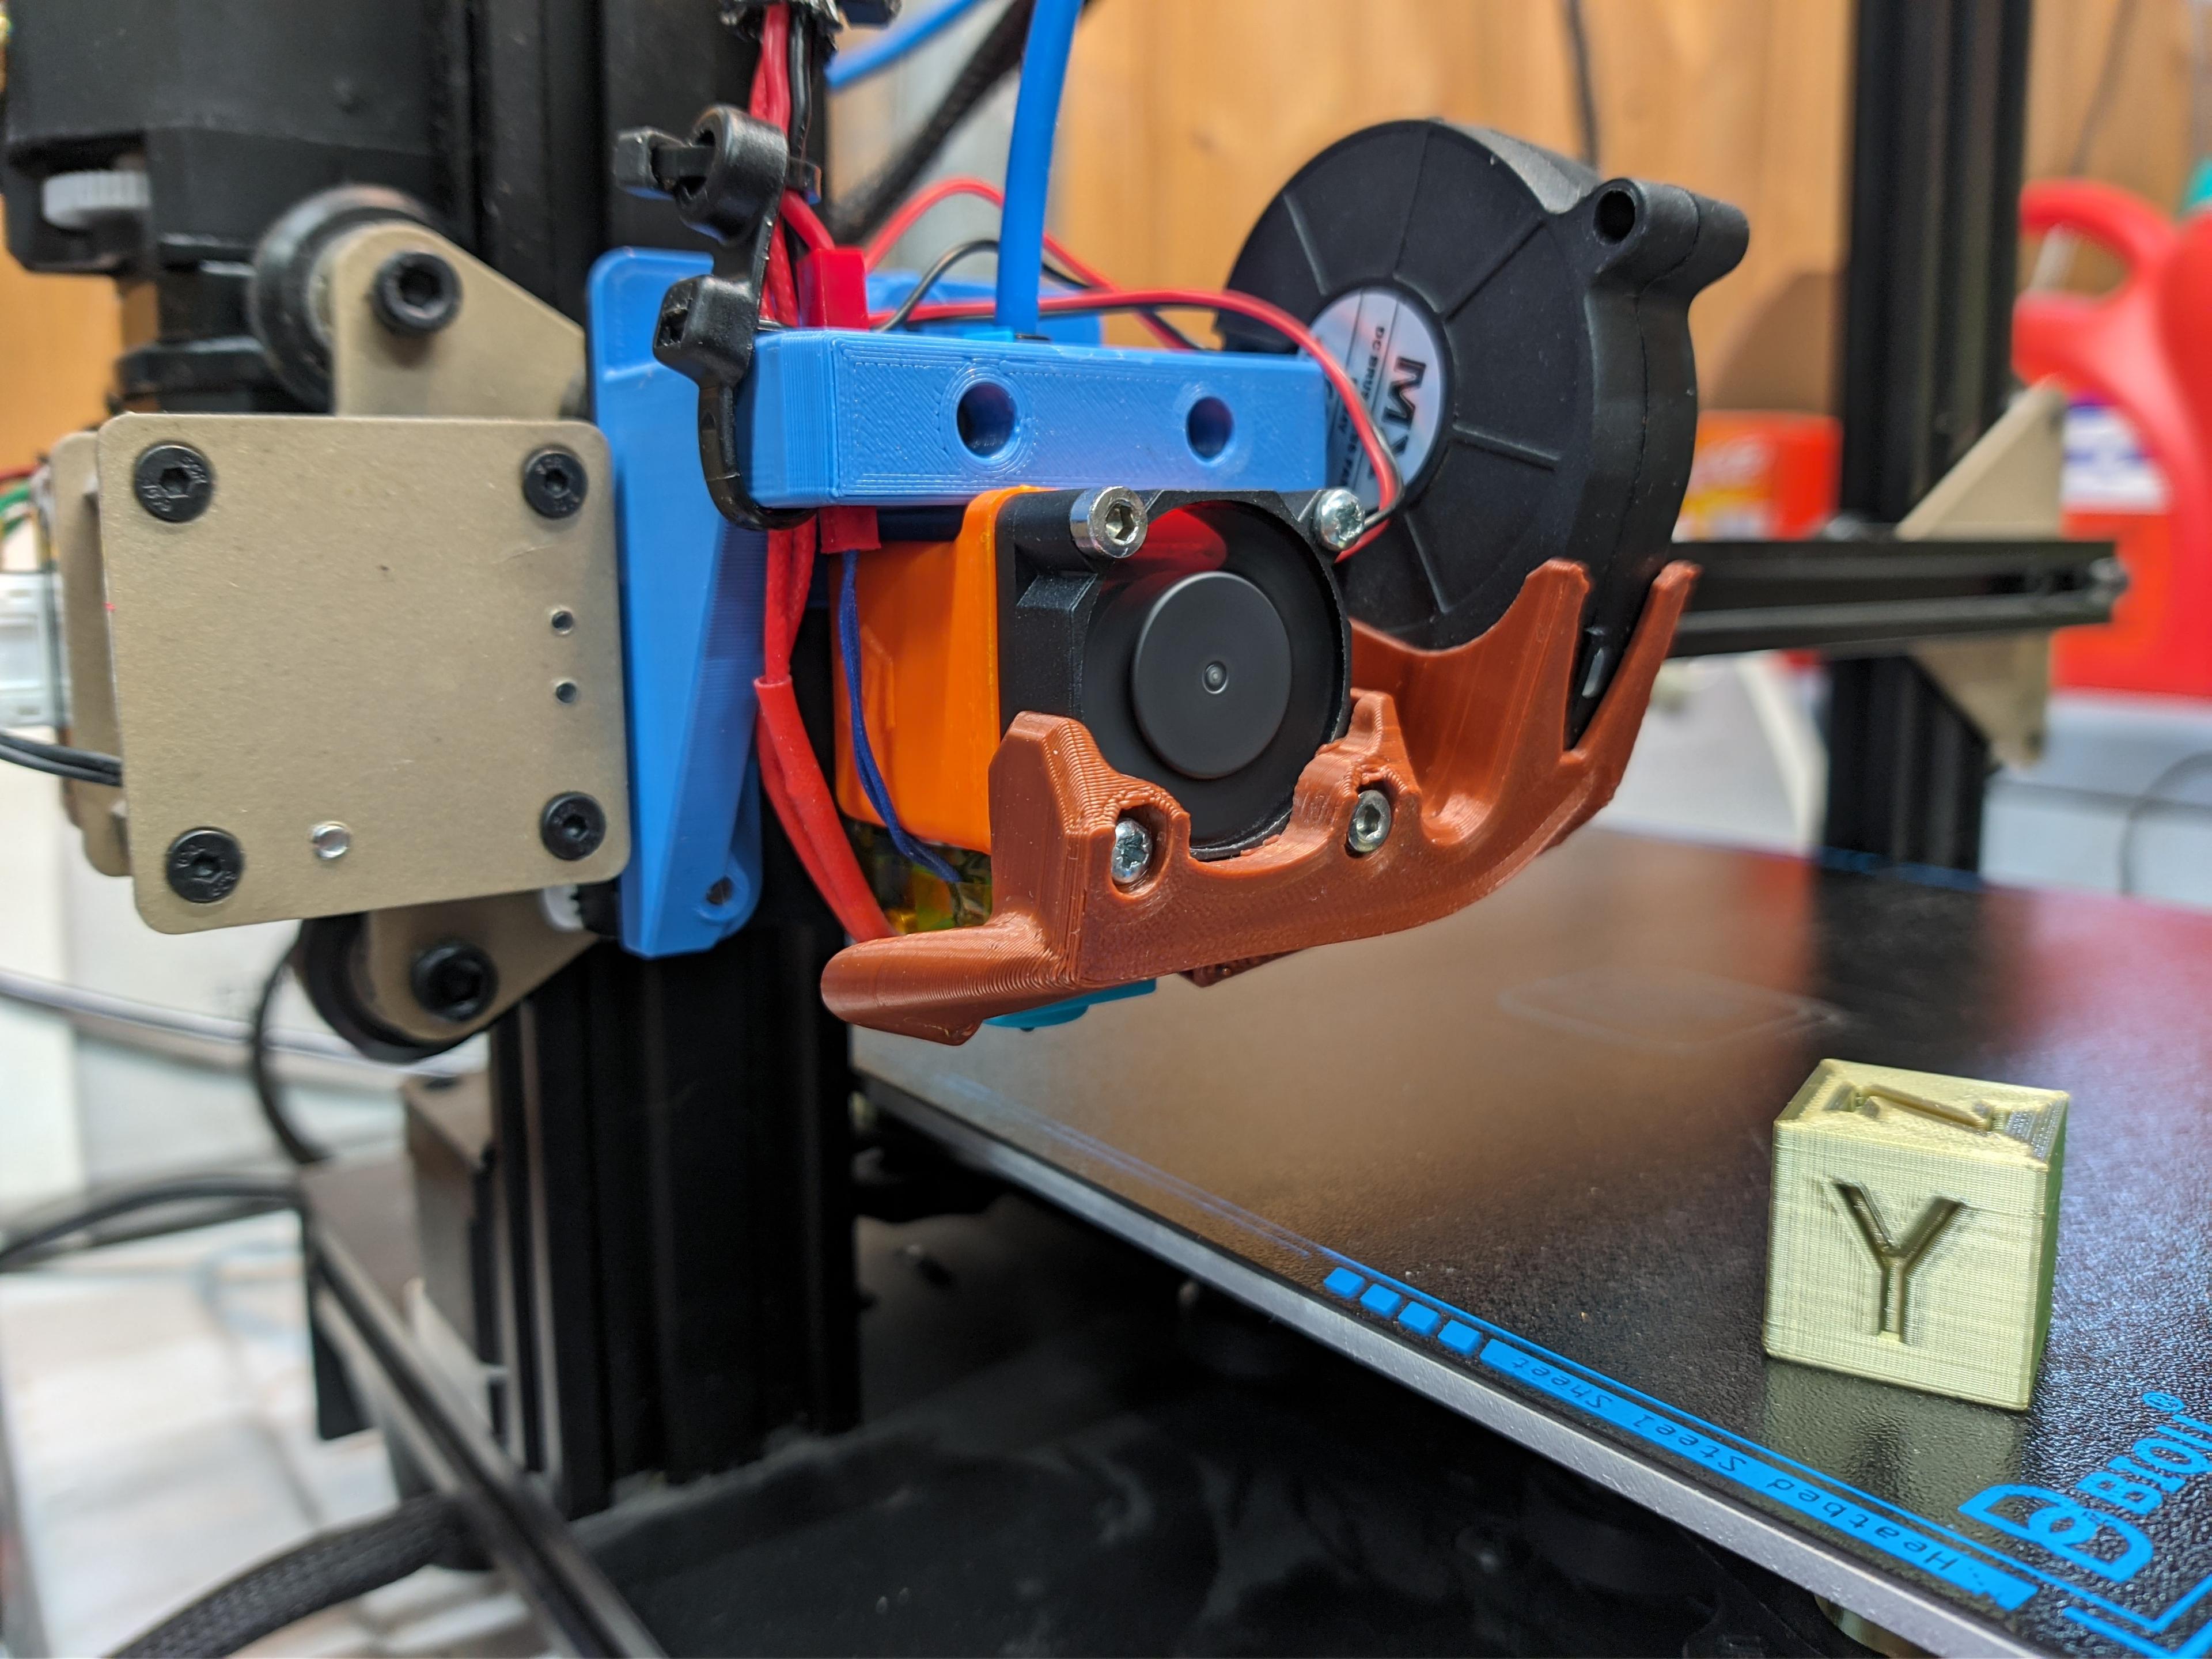
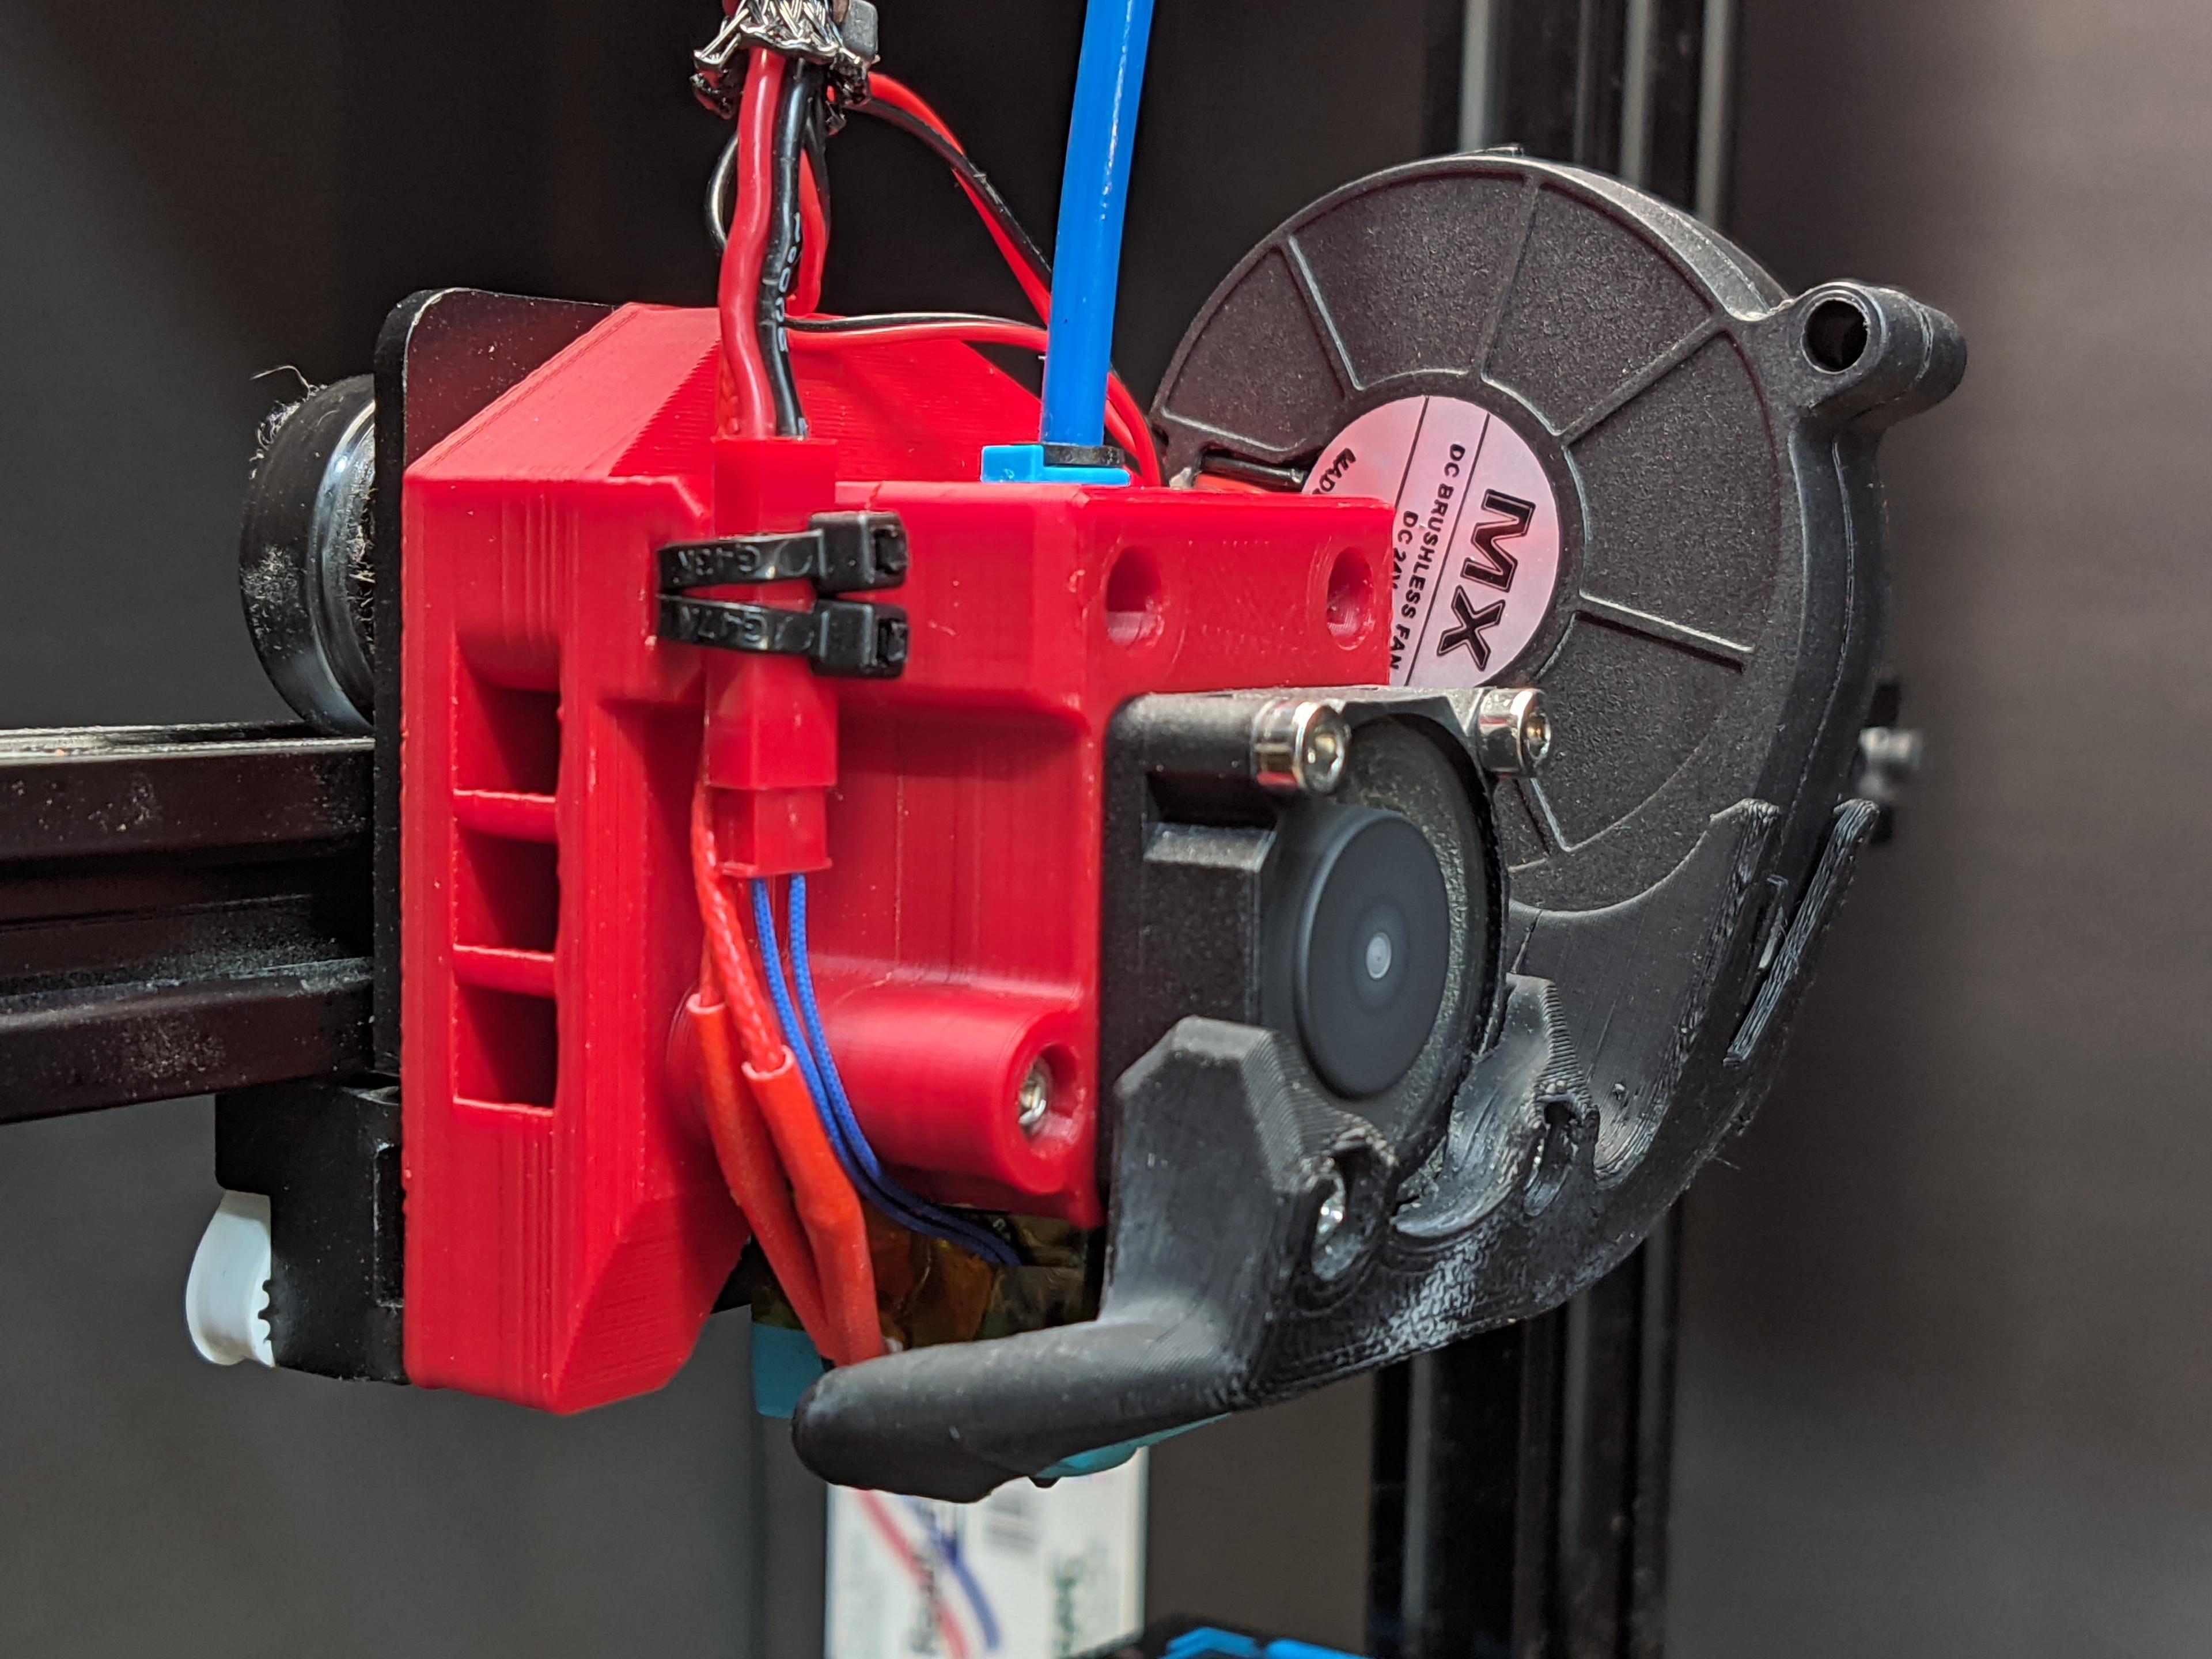
HE3D K200 is a good delta, but is slightly different from the 'standard' kossel based machines. As for the kossel, I am using the mini kossel as defined here ( https://github.com/jcrocholl/kossel ) as the standard reference. First, the distance between the rods is 42 mm ( as opposed to 40 on the kossel ) and the other difference is the distance from the towers to the build platform is small. What his means is you need to keep all hot end accessories as close to the effector as close as possible, else you will limit your max build.
My requirements: 1- E3D V6 hot end 2- Autolevel - Optical Sensor 3- 2 part cooling fans and 1 hot end fan ( for a total of 3 ) 4- Minimum loss of build volume
Credit: I have scoured the entire INTERNET ( and did indeed reach the end ( http://endoftheinternet.com/ )) looking for suitable designs either to use in its entirety or glean ideas from. Since the K200 has that @#!$ 42mm spacing, my selection of use as-is choices are limited. So, I decided to create my own, using existing designs and ideas. Major design influences are listed below, but all designs may have had subtle effects on my thinking process and design.
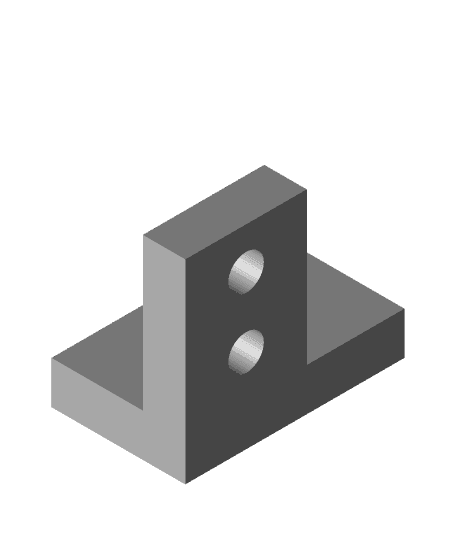
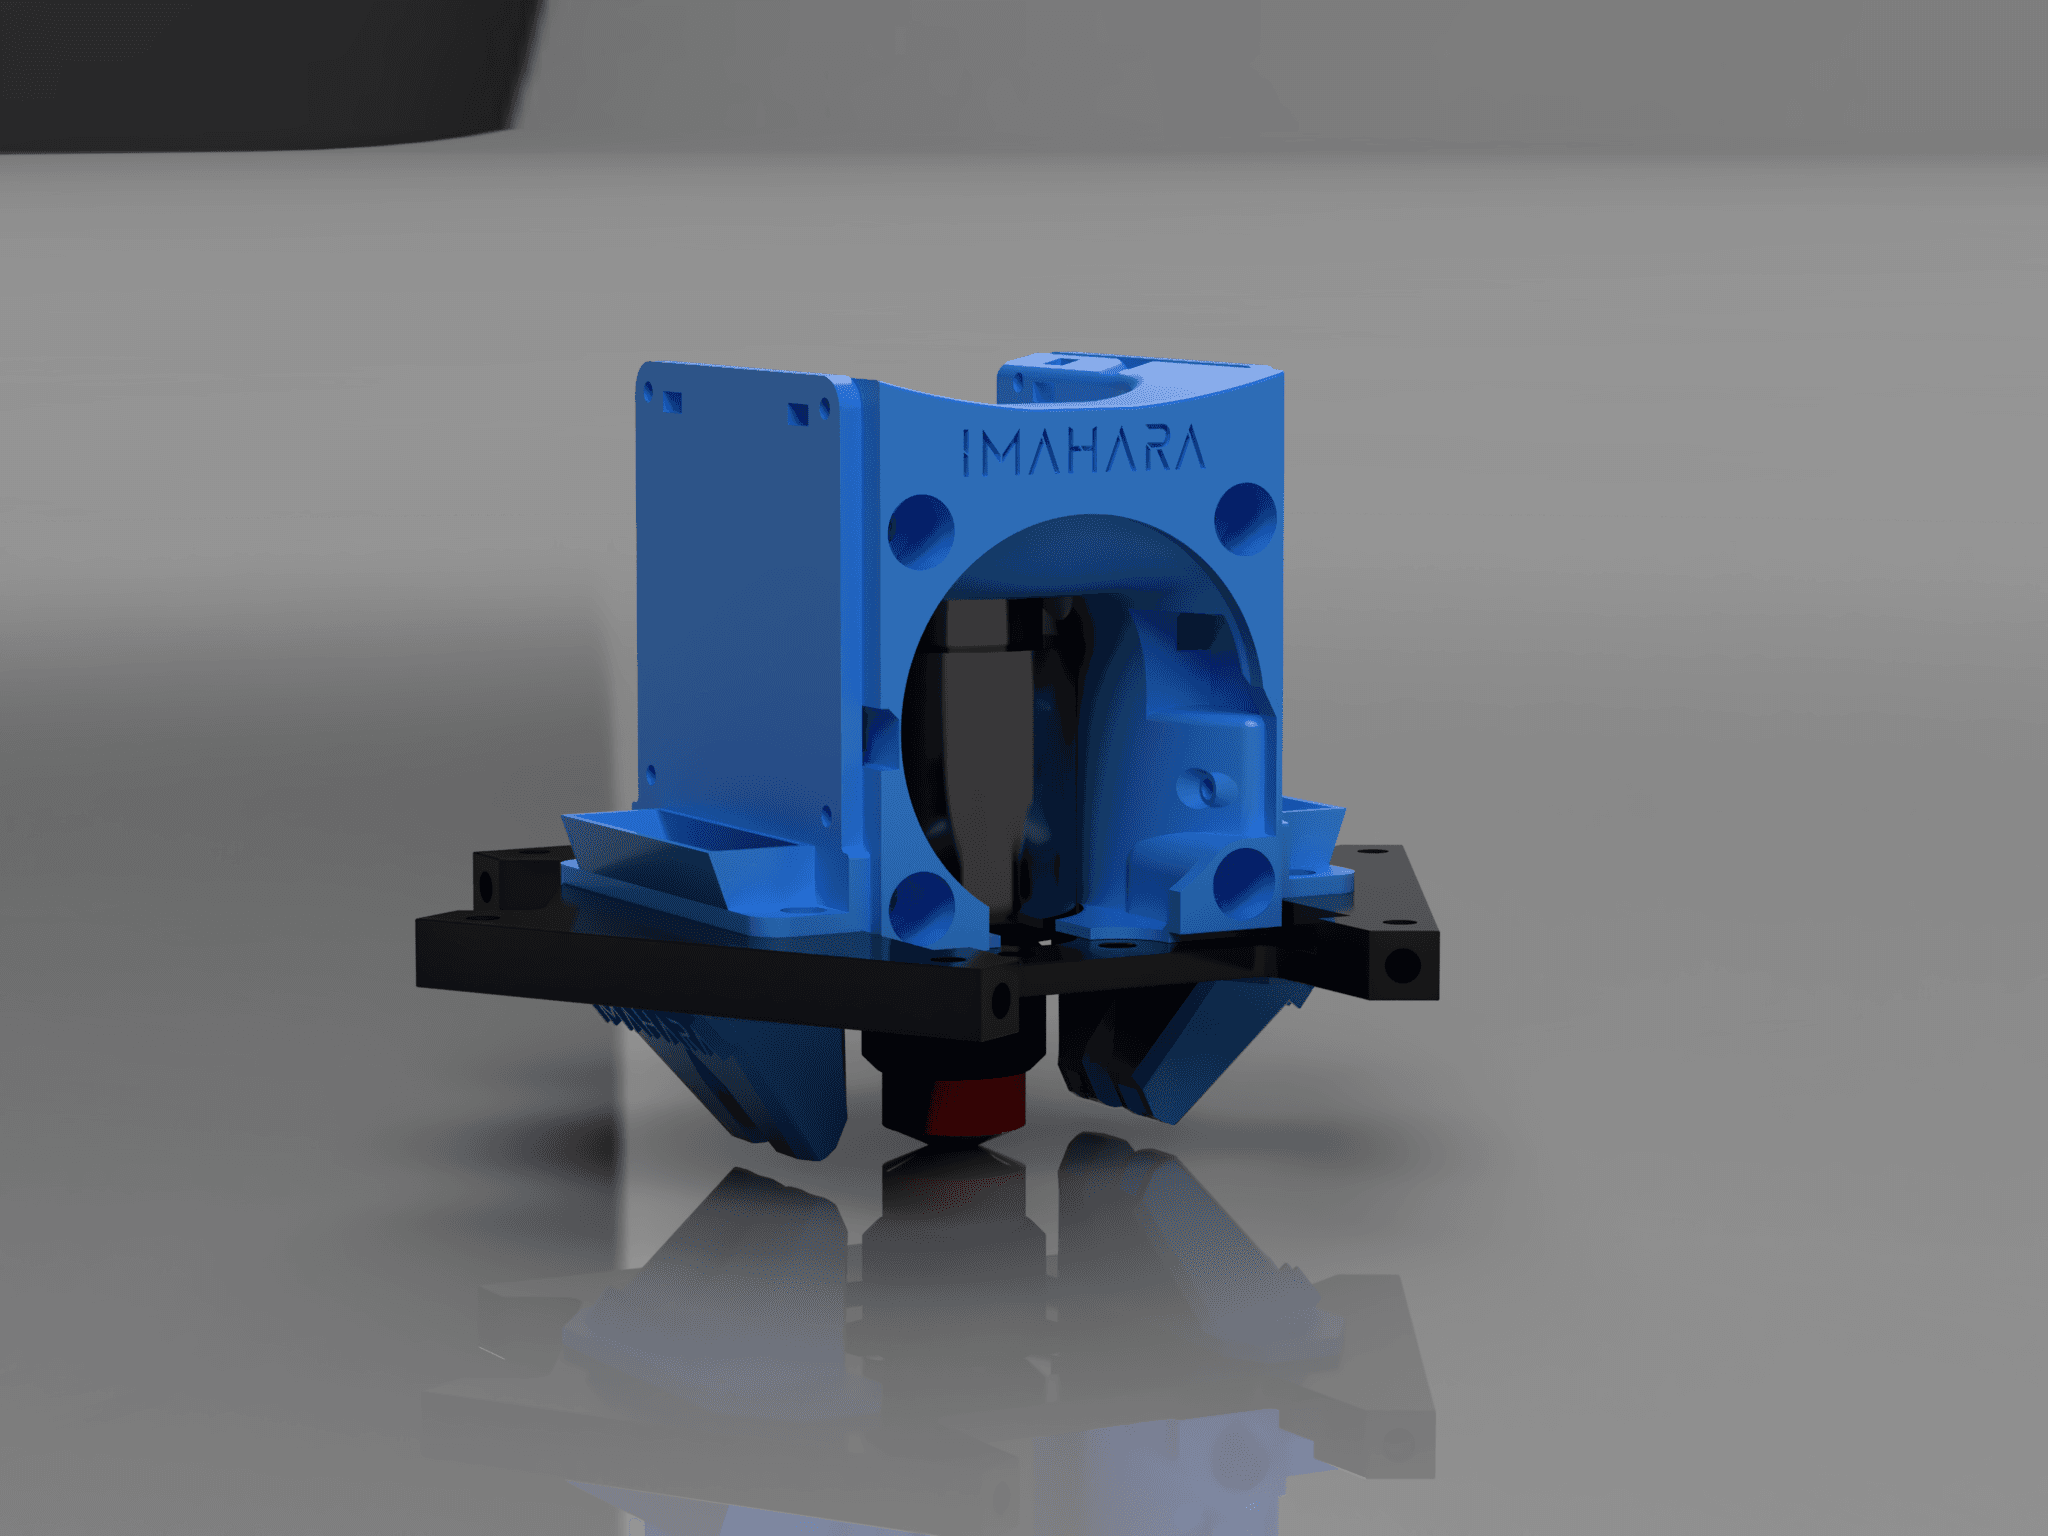
Effector: The E3D V6 Clamp above the effector is extremely common, there is no one person I can point to to thank. So thanks to the entire community. I also put in a 1mm recess for the z-probe ( Autolevel ).
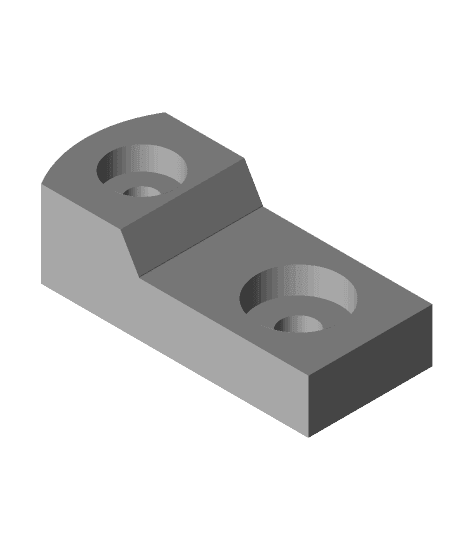
Autolevel: The main design idea cam from Thingiverse user wallie for the Z-probe mount with optical switch located here : https://www.thingiverse.com/thing:605729 I heavily modified it to fit, but the concept is his. I also used the footprint for the retractable ( z-probe ) mount.
Fan Shroud: The basis of the design belongs to Thingiverse user Hatsyflatsy for his Triple fan holder 30mm located here: https://www.thingiverse.com/thing:2459766 . Here I modified it for a closer hotend cooling fan and also added the E3D V6 heatsink clip to the piece.
All parts were designed in SOLIDWORKS and placed in an assembly to verify alignment. SOLIDWORKS is an amazing tool.
Parts Required other than the Effector, Clip, Autolevel mount and fan shroud 3- 30x30x10 fans. 12- #4x5/8 sheetmetal screws to mount the fans. 2- 3mm x 16 Socket Cap Head screws ( E3D Clip ) 2- 3mm x 10 Socket Cap Head screws ( Autolevel mount ) 2- 3mm x Socket Cap Head screws ( Optical Sensor Mounting) 4- 3mm Nuts ( Autolevel mount and E3D Clip ) 1- 2mm x 10 Socket Cap Head screws ( attach fan shroud and effector ) 1- 1.5mm hex ( Allen ) key or similar ( Actual Z-probe )
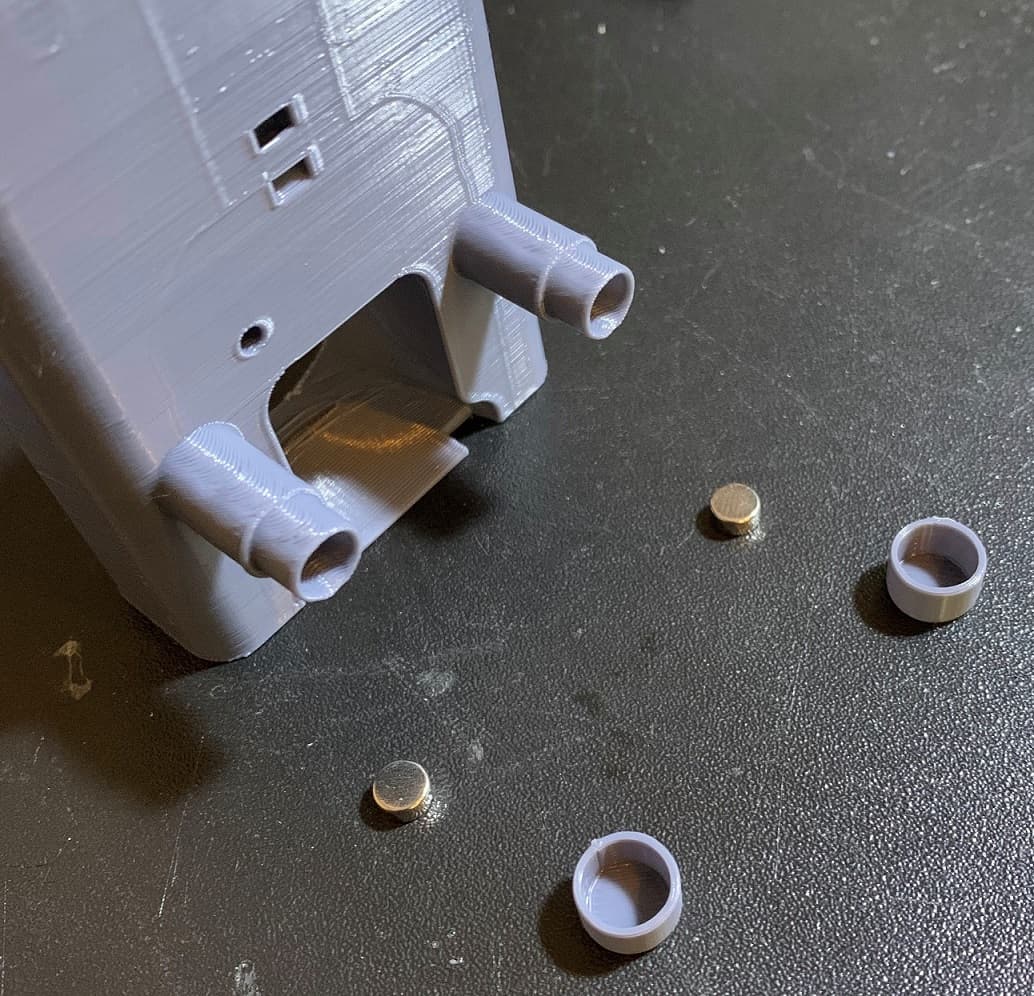
Update 02/06/2019: I have been using it for about a month now and I am very pleased with it. A couple of notes: 1- put a thin washer in between the effector and the fan shroud on the 2mm socket cap screw. This will keep a small separation so that the rod ball joints do not hit the part cooling fans. 2- With the 2 part cooling fans, I now normally run 70% fan speed.. 3- I put on a silicone sock on the E3D heater. This helps stabilize temperatures. It is a good idea anyway. 4- The part cooling fan outlet is close to the same level as the bottom of the nozzle. Just check your installation to make sure it does not go any lower..
UPDATE 02/11/2019 Made the following changes to improve the Fan Shroud Only. All other parts the same. 1- Made the top ( where it meets the effector) 1..5 mm taller so that the washer ( #1 above) is not required, and the Diagonal Rod Ball Joints have clearance. 2- Re enforced the fan outlet duct to the body with larder fillets. One of my outlet ducts snapped to this should correct it. 3- Eliminated the small gap where the heat sink cooling fan was allowing air to hit the heat block.
-I have lowered my standard fan to 50% ( was 70 in the notes above ) but maximum is still 100 ( for bridging.) -Silicone Heat Sock is still recommended. -Double check you installation at z=0 to make sure the fan duct does not hit the bed.
HE3D K200 HotEnd Assembly

Gridfinity Bin for Bambu X1 Hotend Assemblies

HE3D K200 Extruder bushing / filament guide
He3d K200 Heat Bed Adjustable Sprint Mount
AnyCubic CHIRON 3D Printer Hotend Assembly
.png&w=3840&q=75)
TwoTrees SP5 Upgrades
Prusa MK2.5S mods for Wham Bam Mutant V2

Prusa MK2.5S mods for Wham Bam Mutant V2
Simax3D Iron M1 E3D V6 Mount
Imahara - E3D Revo|V6 Assembly for FLSun Super Racer

MakerBot Replicator Core-XY Conversion - Project ReAniMaker

DropEffect NeXt-G UHF Voron StealthBurner Mount

Hero Me Documentation - Details.stl

Caution Hot Mounting clips

Hero Me Gen7 Release 4 ZIP
Mutant V2 Interface Plates for Popular 3D Printers
Main Carrier Plate v5.step
Simax3D IronM1 E3D Mount & Fan Shroud

Ender3-Pro-hummingbirdV3.stl
Citadel - Dual 5015 for EnderXY