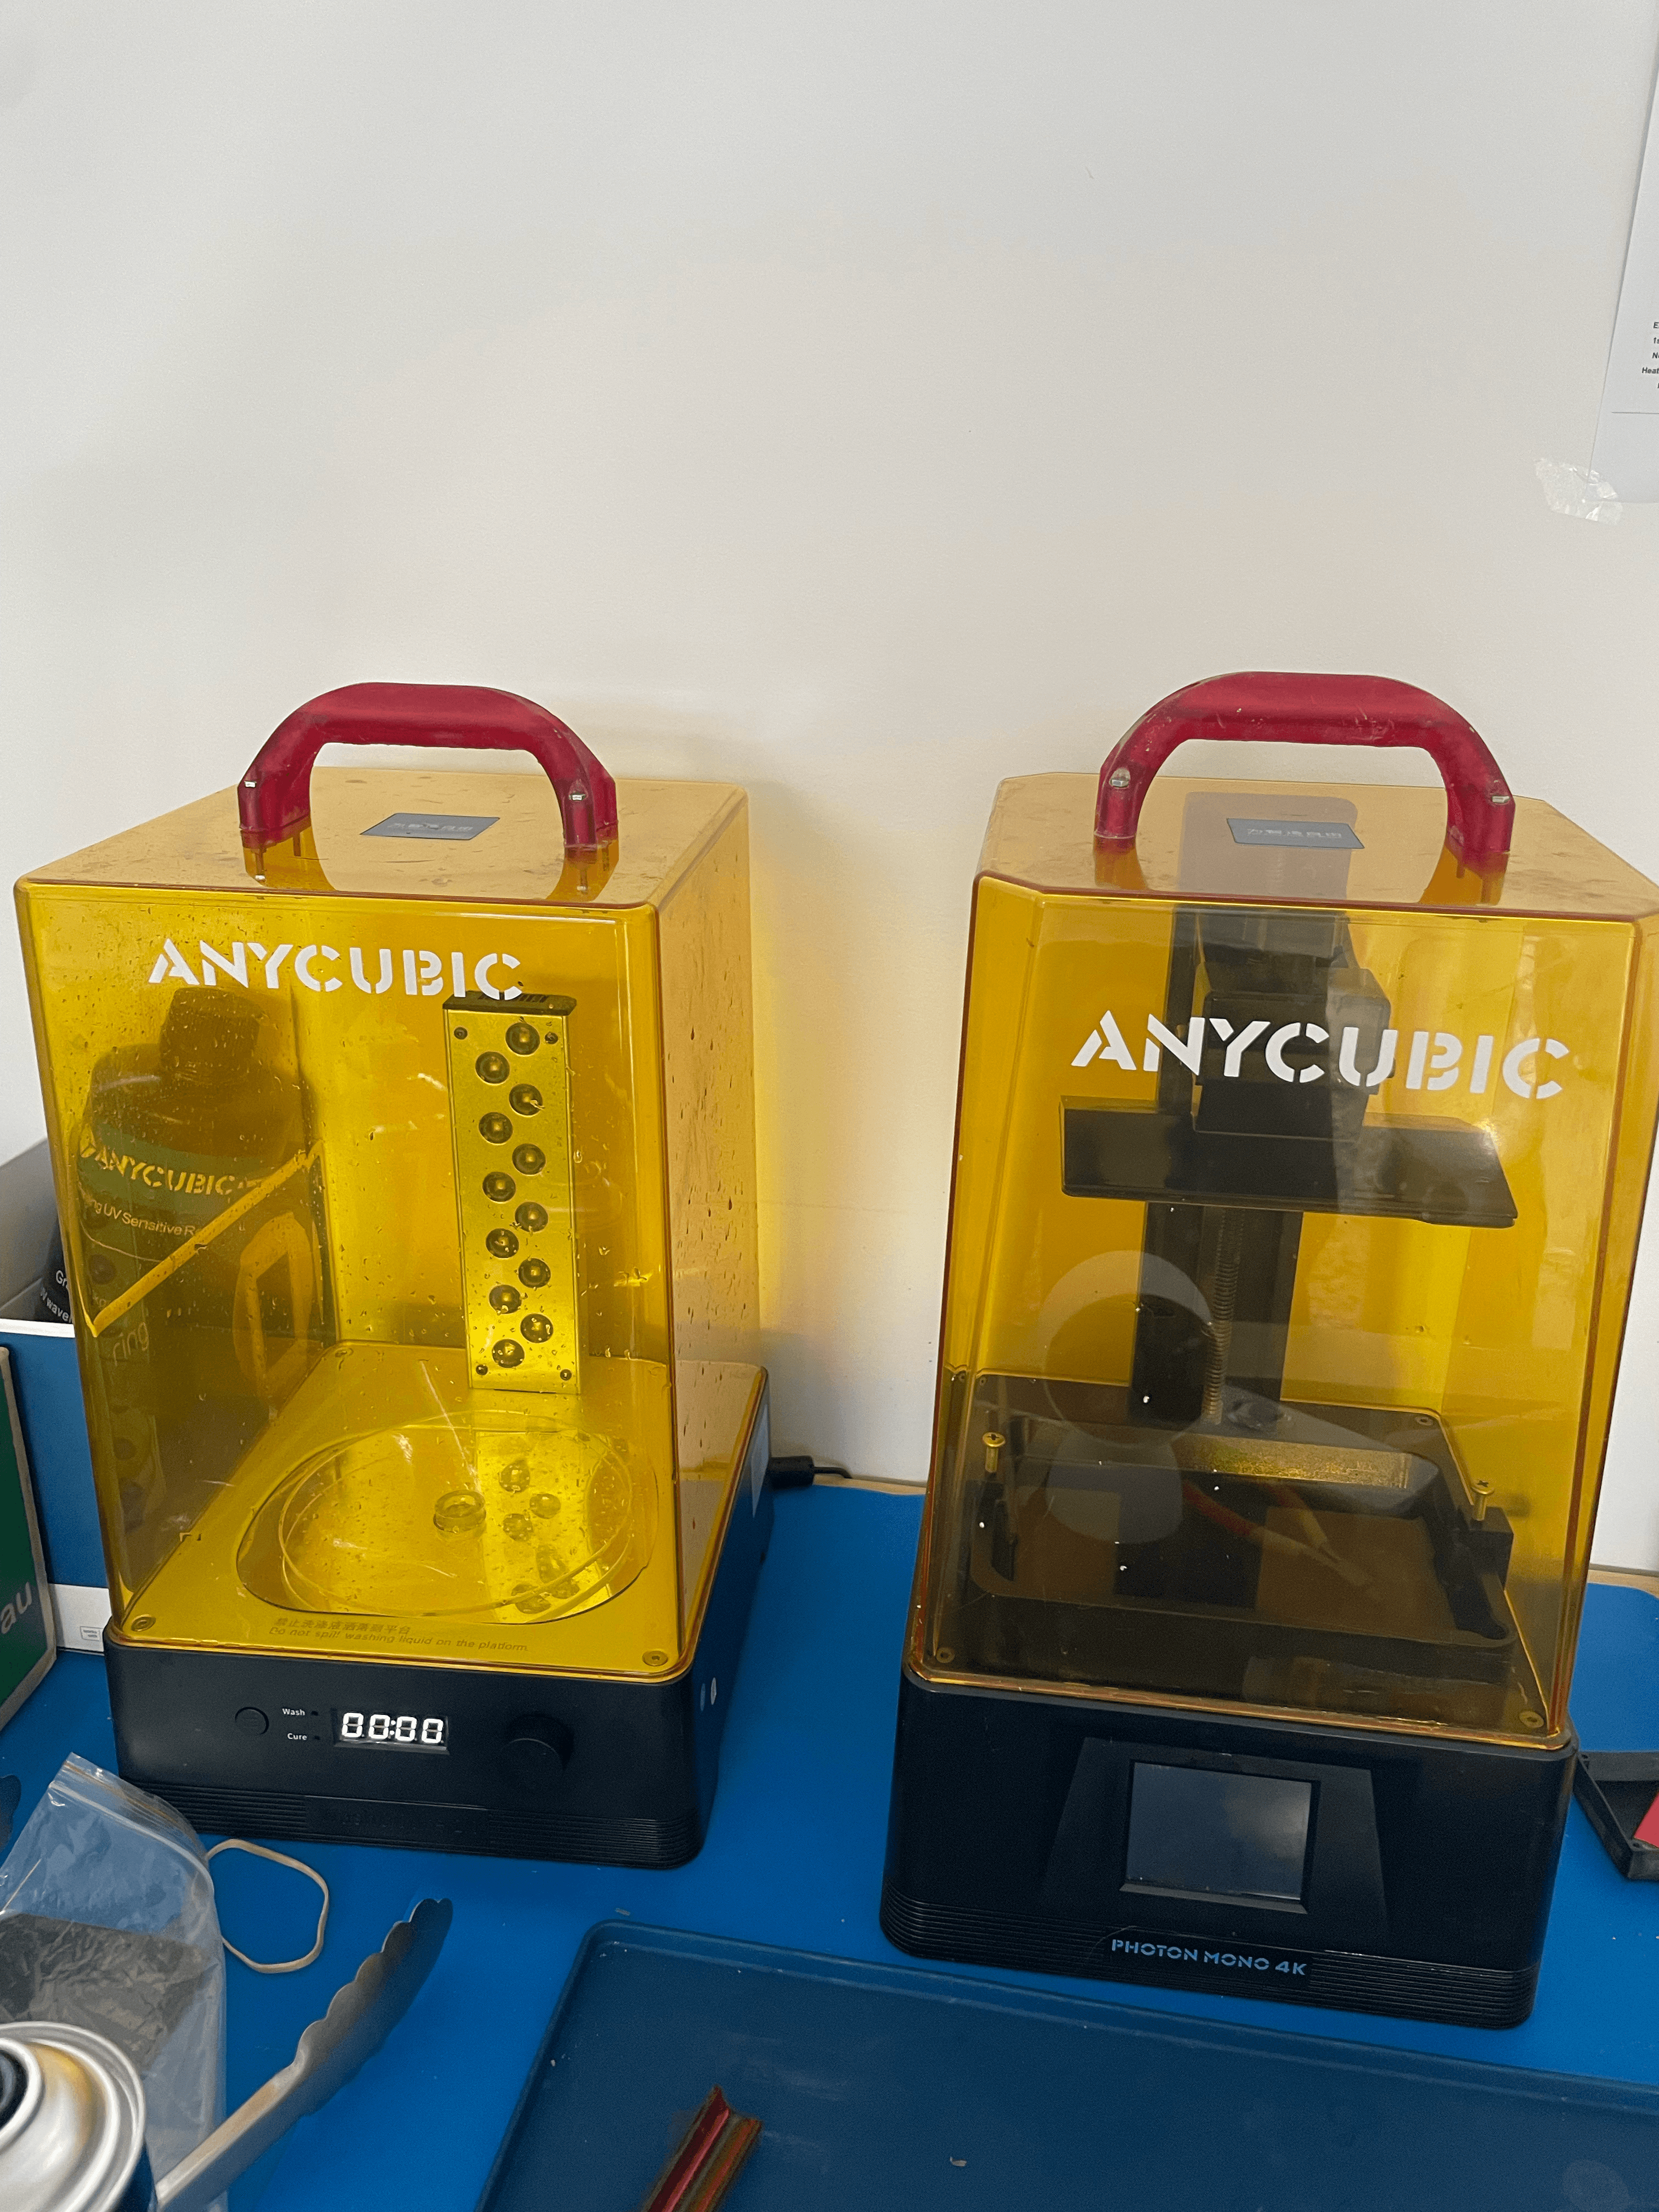
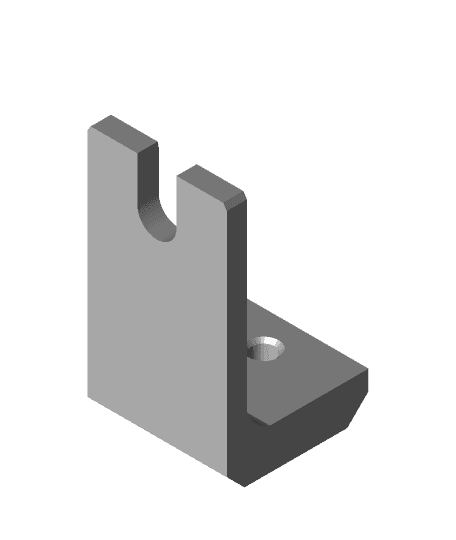
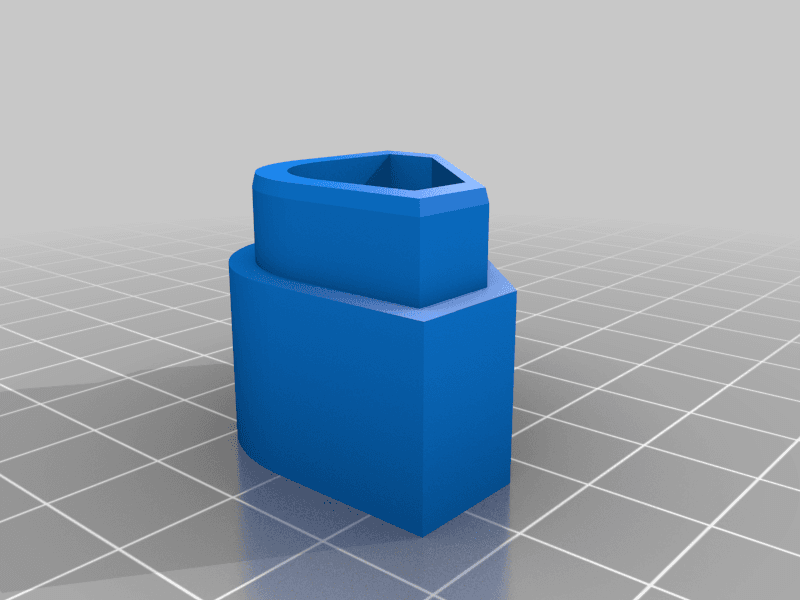
ANYCUBIC Photon Zero to Wash and Cure Station Adapter
8 downloads · 5 years ago · Model originally uploaded to Thingiverse at https://www.thingiverse.com/thing:4699499.
ANYCUBIC Wa
This model is restricted by licensing terms.
View license.
Model originally uploaded to Thingiverse at https://www.thingiverse.com/thing:4699499.
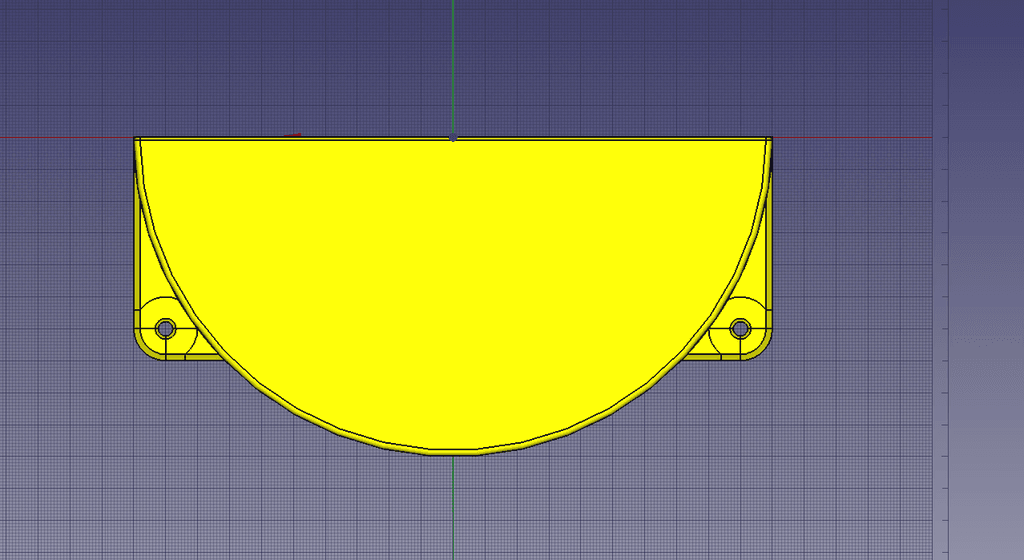
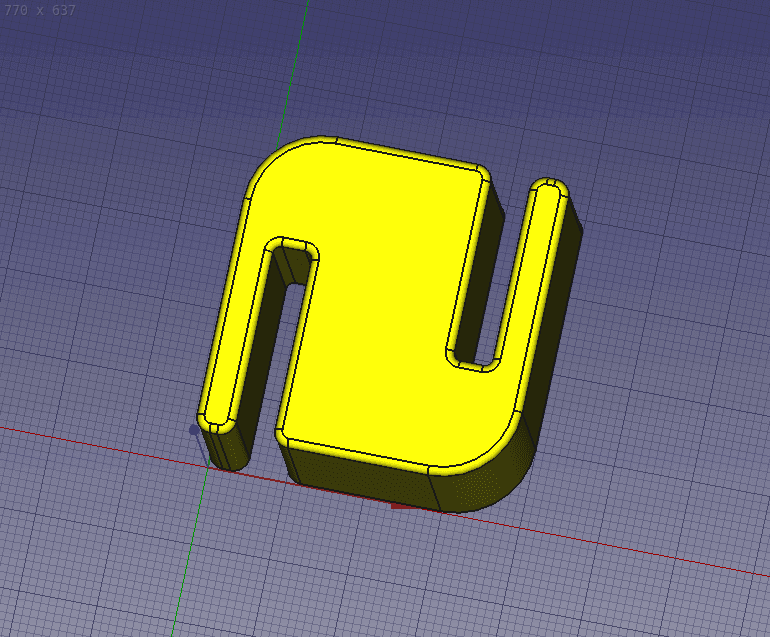
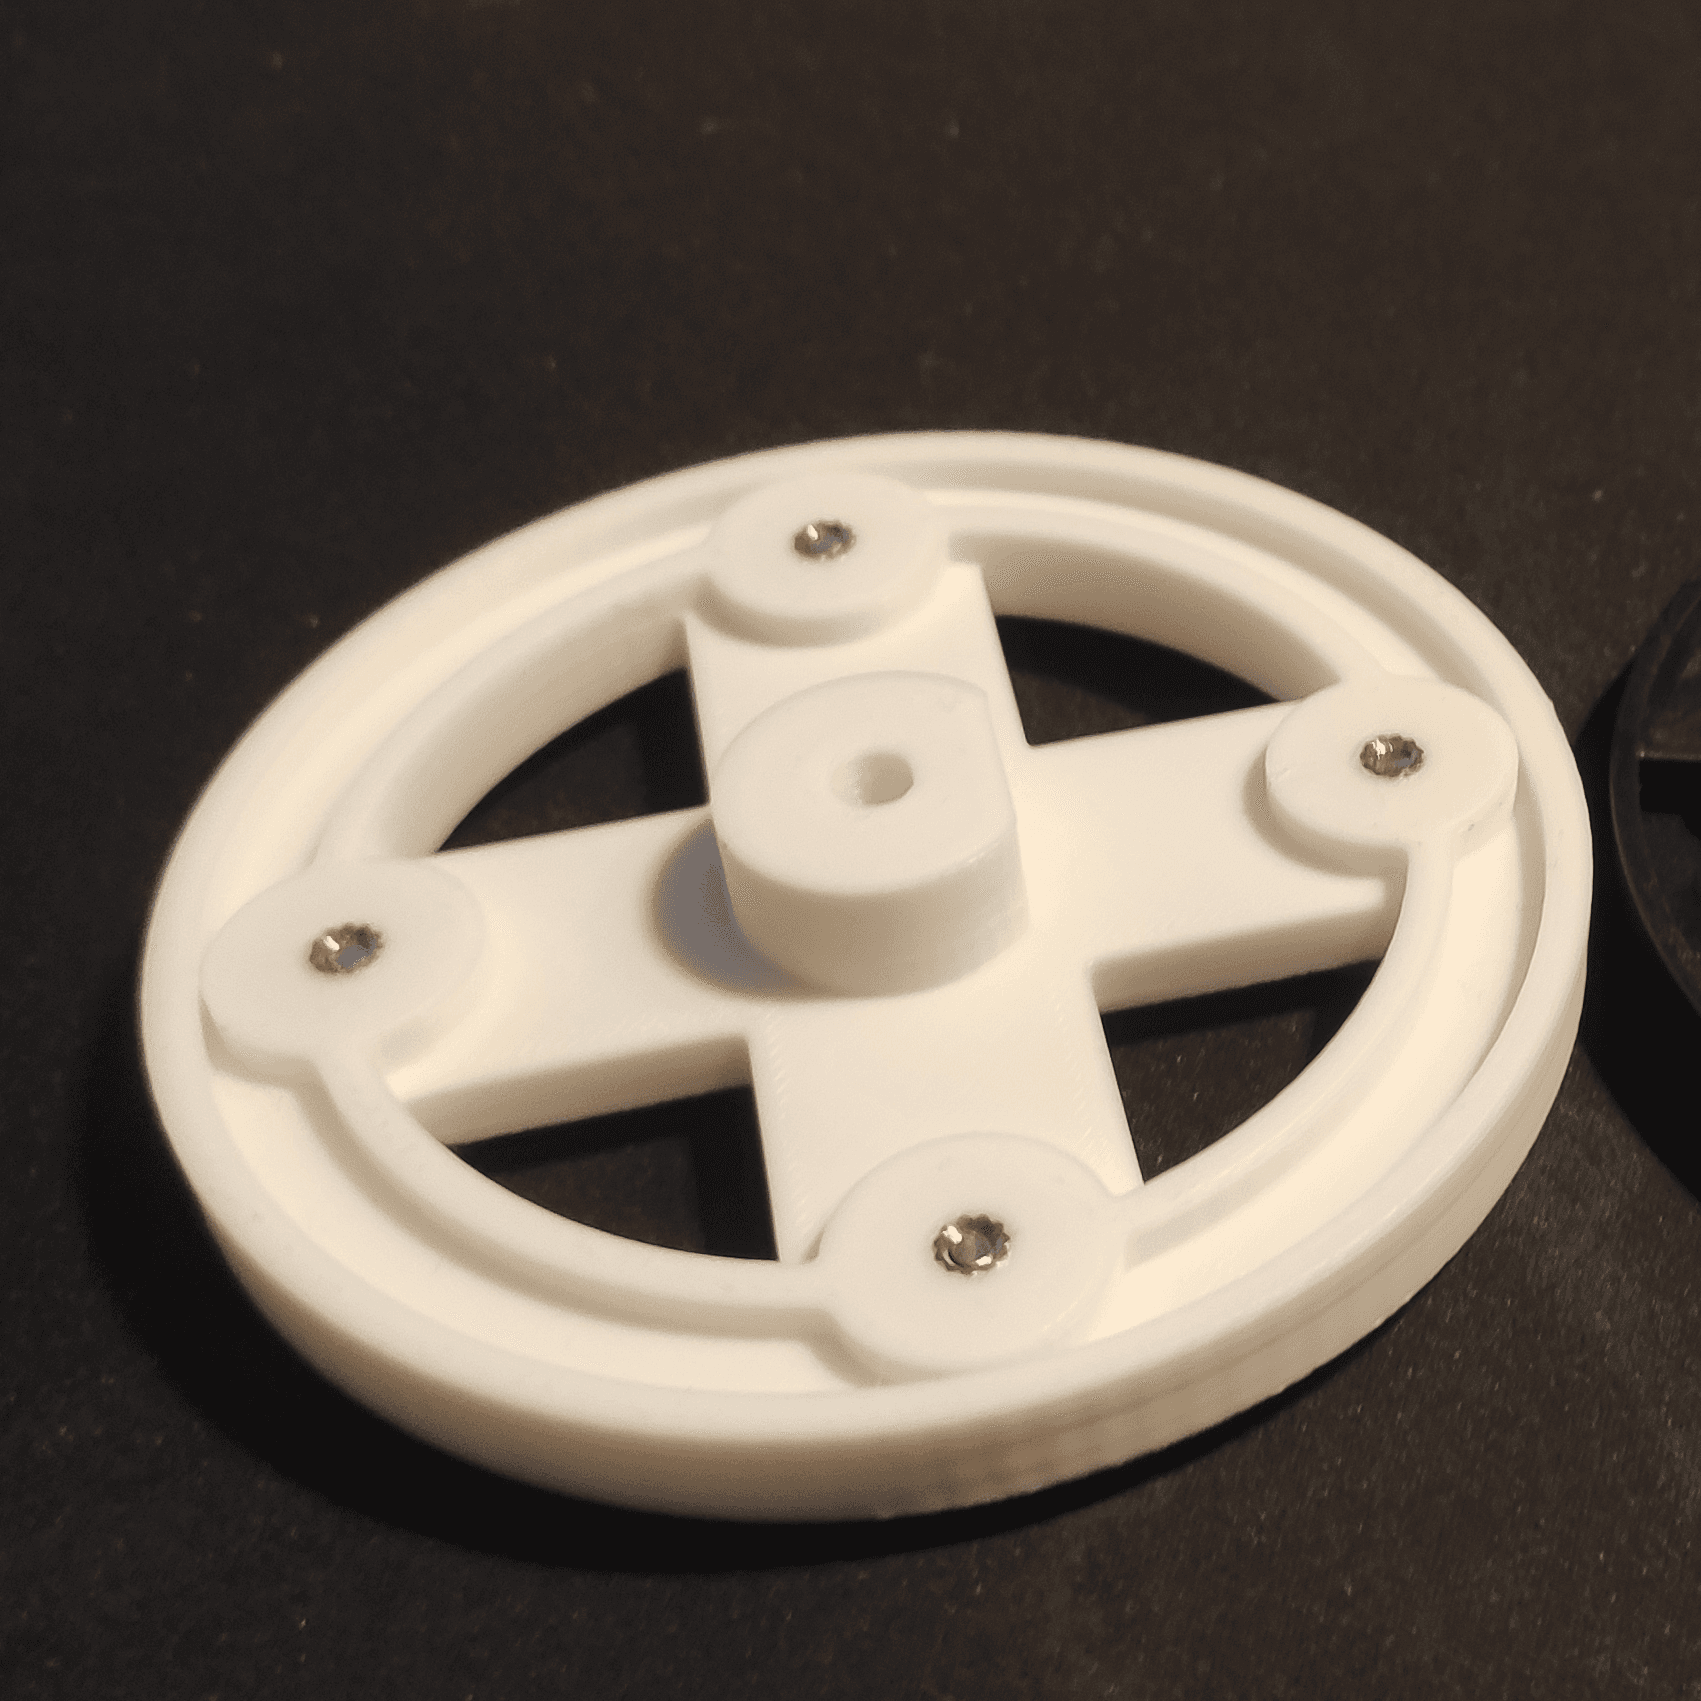
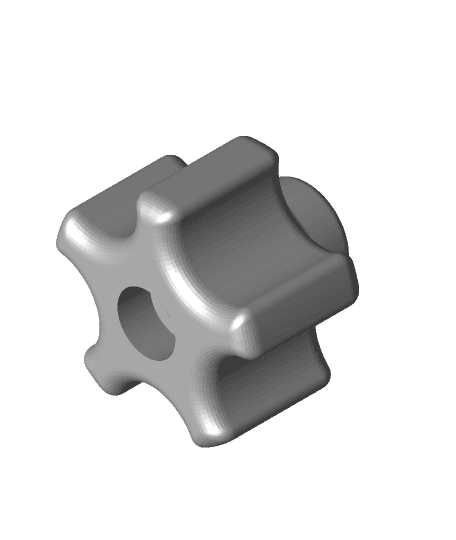
ANYCUBIC Wash and Cure Station Adapter for mounting the buildplate from the ANYCUBIC PHOTON ZERO for Washing models/plate Engineered By: Anthony Musgrove Tested By: Anthony Musgrove Contact: anthony@hunter3dprinting.com.au CAD: Creo Parametric 3.0 Creation Date: 28/12/2020 Additional Hardware Needed: 1x M6x16mm BOLT (Bunnings, a few dollars) 1x M6 NUT (Comes with pack of bolts from Bunnings) (Bunnings Link: https://www.bunnings.com.au/pinnacle-m6-x-16mm-stainless-steel-hex-bolt-and-nut-10-pack_p2320001) 1x M6 FLAT WASHER (12mm OD) (Bunnings Link: https://www.bunnings.com.au/pinnacle-m6-stainless-steel-flat-washer-12-pack_p0130533) Print Settings (all_bracket_parts.stl): * Layer Height: 0.2 * Wall Count: 3 * Infill: 15%, Lines * Material Tested: PLA+ (Purple, 3DFillies) * Printed Temp: 210 degrees C * Support Material: Enable supports build-plate only - support may be used for washer recess (against buildplate) and possibly a little bit on the rounded edges. * Print Time: 34 minutes (approx) on CTC Replicator Dual Print Settings (bolt_wheel.stl): * Layer Height: 0.2 * Wall Count: 3 * Infill: 30%, Gyroid * Material Tested: PLA+ (Purple, 3DFillies) * Printed Temp: 210 degrees C * Support Material: Enable supports, build plate only, it will be used for the NUT recess. * Print Time: 34 minutes (approx) on CTC Replicator Dual Files: all_bracket_parts.stl ALL bracket parts, oriented in their designated print orientation - don't change orientation! bolt_wheel.stl The wheel/knob to tighten and loosen the bolt. Oriented in print position - print as it is, with supports. Assembly: * Print all_bracket_parts.stl (all three parts, top, bottom and middle) * Print bolt_wheel.stl with the separate print settings above. * Ensure no elephant foot on any of the holes - clean up with a deburring tool to ensure correct fitment. * Superglue inside the NUT hole, spray the NUT with Accelerator, and install NUT in place, let it fuse well. * Superglue the washer recess on the MIDDLE part, then spray the WASHER with Accelerator, and install WASHER in place, let it fuse well. * Prepare the top piece for installation - the centre slot piece should have superglue placed on top of it, and then the middle piece slides down onto it, with the washer side UP - the WASHER side MUST go TOWARDS the NUT on the BOTTOM piece. * Slide the middle piece down the spine, letting the spine go through the spine hole, all the way down until the middle piece is firm up against the alignment slider * Once fused, place enough super glue over the washer, and the plastic piece, ready for the surface with the NUT to also slide down the spine - press this firmly together and spray with accelerator. * Superglue inside the bolt-wheel (knob) bolt fitment area. Spray the top of the bolt with accelerator and install the head of the bolt into the bolt-wheel (knob) bolt fitment area. let it fuse well.ANYCUBIC Photon Zero to Wash and Cure Station Adapter
8 downloads · 5 years ago in and
This model is restricted by licensing terms.
View license.
Anycubic Wash Cure Adapter Elegoo Mars
Cure plate Turntable Bracket
Bundle

Celestial Moon Jewelry & Key Organizer STL File for 3D Print

Midnight Wisteria Dragon Bowl STL File for 3D Print

Steampunk Airship Station STL File for 3D Print

Pinewood Junction Railway Station STL File for 3D Print

Enchanted Crystal Jewelry Tree STL File for 3D Print

Mars Colony Command Base STL File for 3D Print

Curing Platform for Anycubic Wash and Cure

Tray for DIY Resin 3D Print Washing Station
CureCan - The UV Resin Curing Station In a Coffee Can
Wash & Cure turntable holder

UV Curing Station
Wash & Cure basket hanger
Elegoo Mercury X Washing Station Replacement (internal) Wheel
Creality LD-002R Platform Holder for Wash Station
Anycubic Wash and Cure 2.0 risers
.jpg&w=3840&q=75)
Skyrim logo necklace
Loving Clown