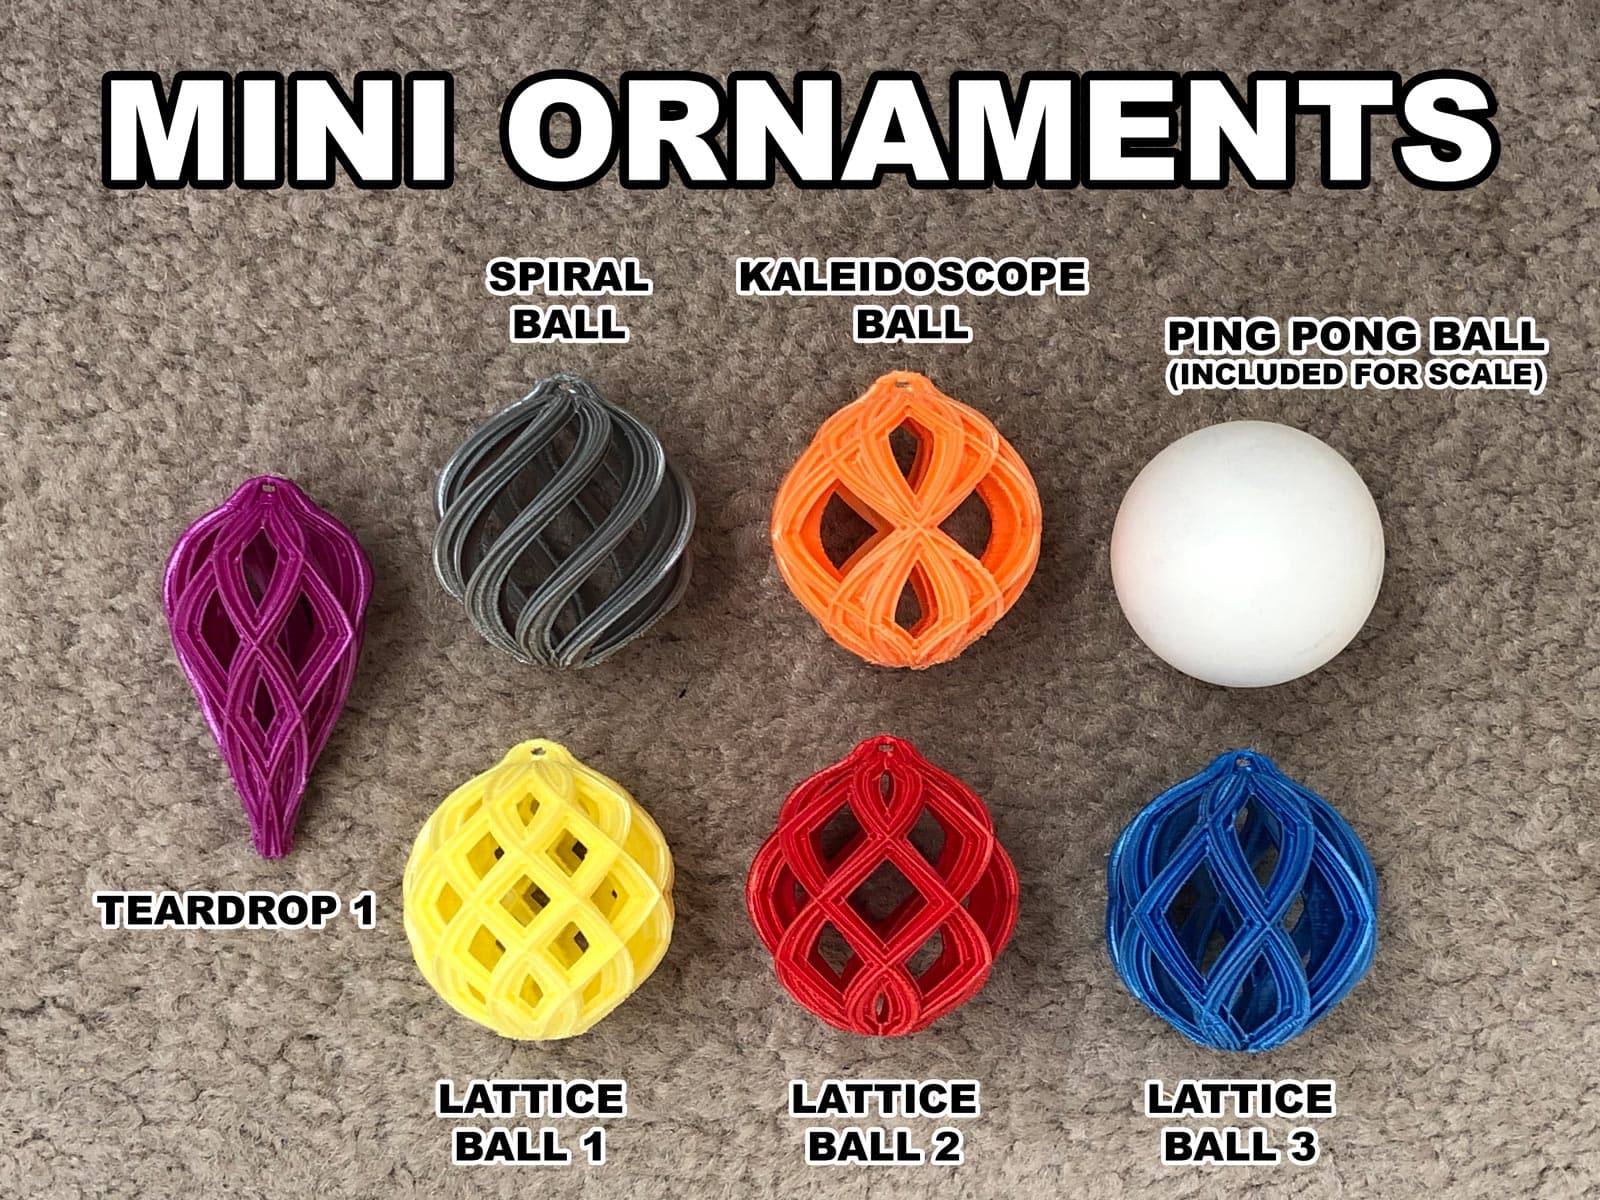
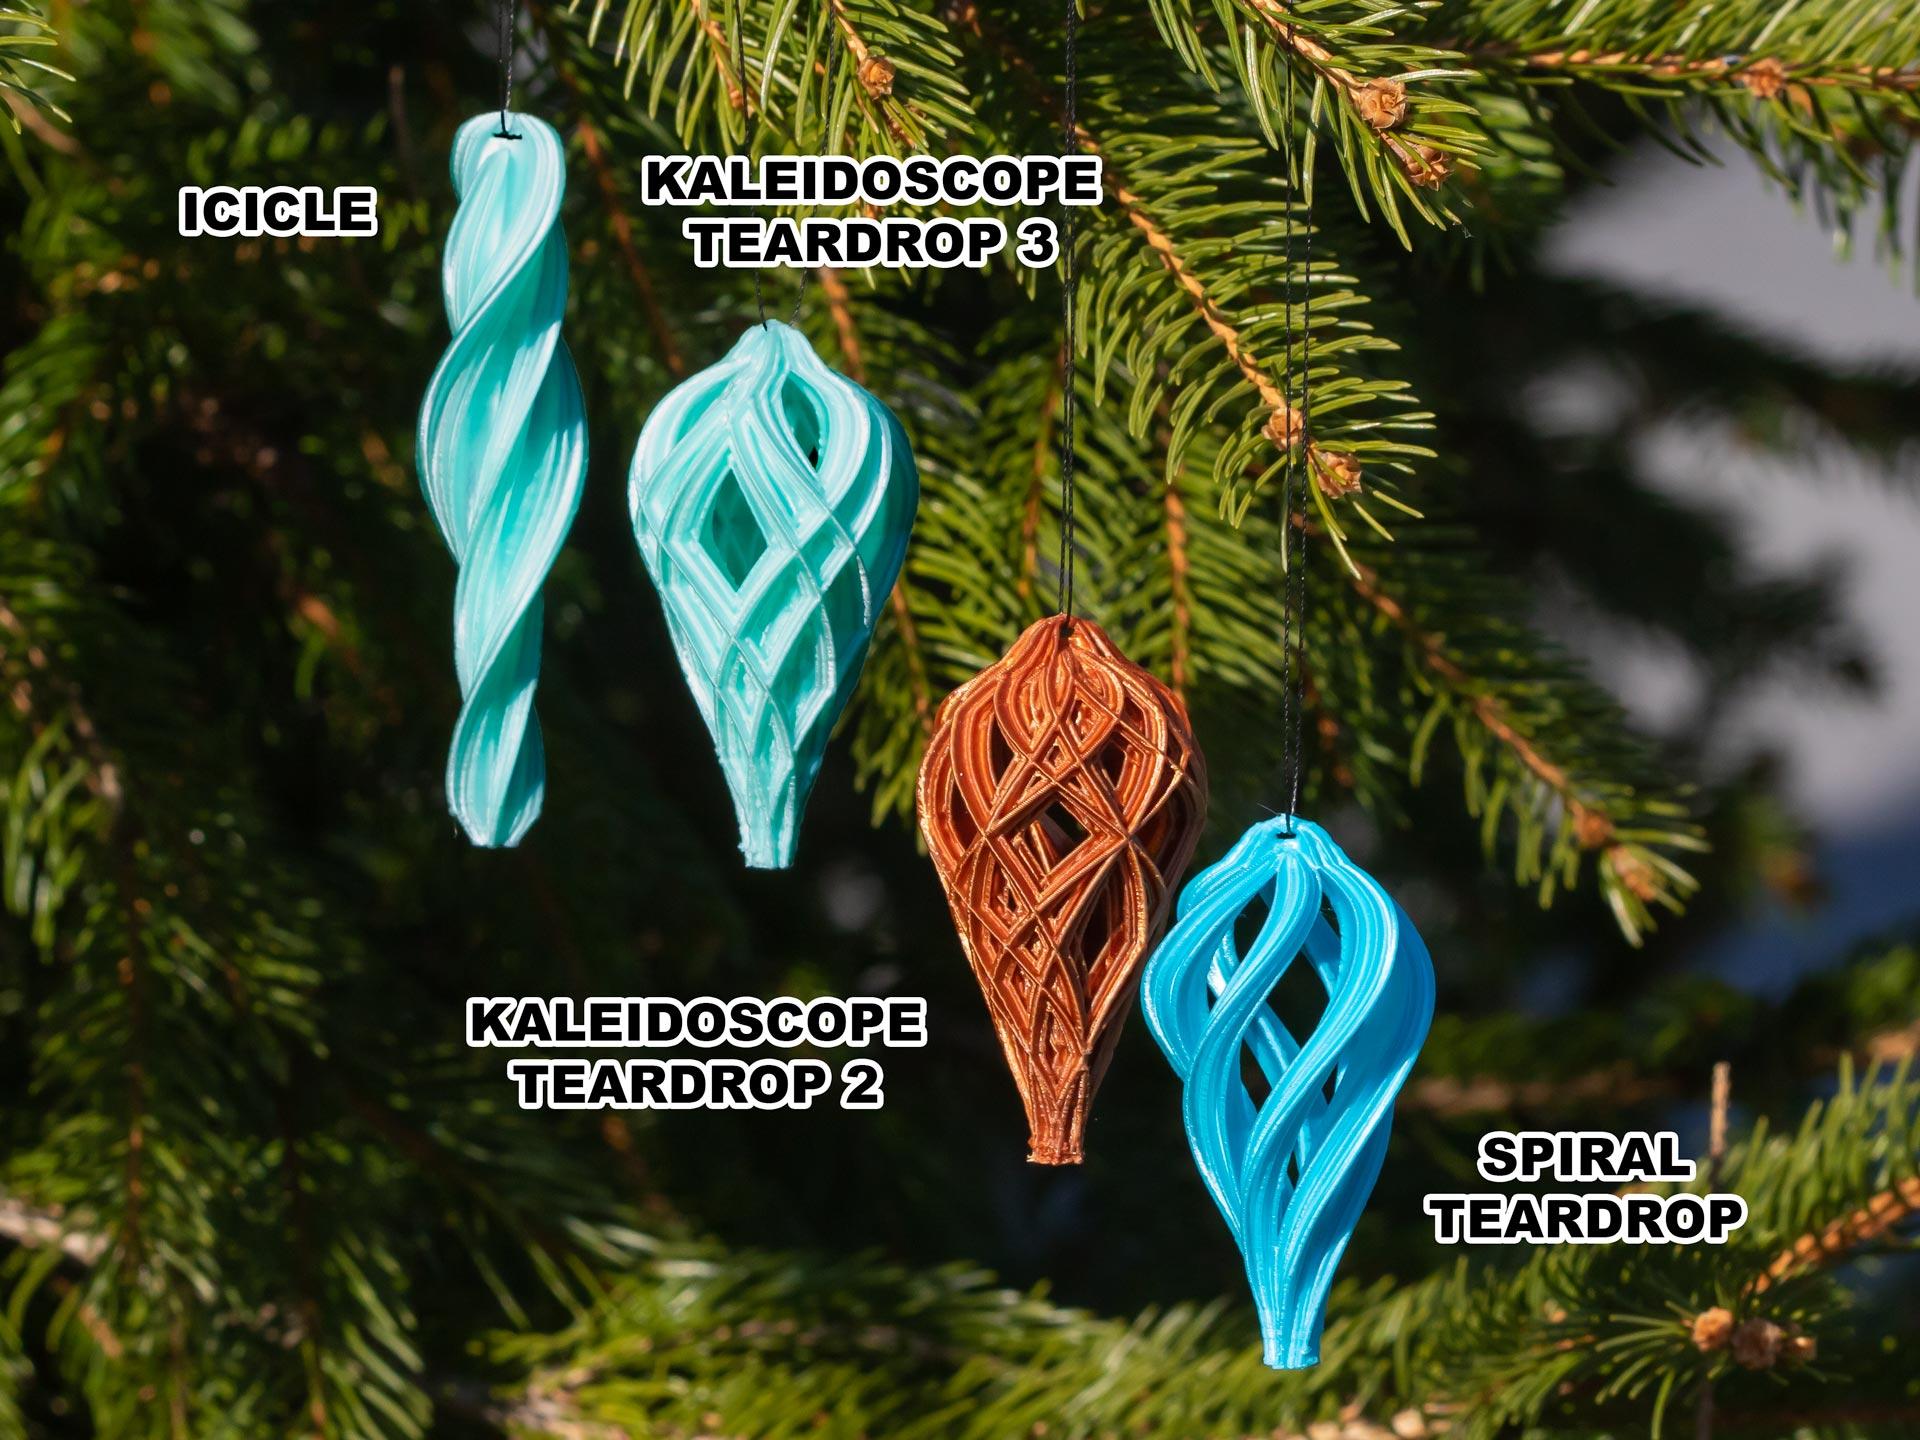
Little trees need love, too! Give them the attention they deserve with these tiny ornaments. The balls are each the size of a ping pong ball (table tennis ball).
Not for commercial use. Please see license agreement.
Warning: May be habit forming
Like potato chips, you can't stop at just one. Fortunately, you don't have to. They take only about 50 - 90 minutes to print and weigh less than 6 grams. Looking for something you can print with that roll of filament that's almost empty? These only take 2-3 meters of filament.
Built-in Supports
I've included built-in supports for the teardrop ornament. With this, no other supports are needed for that ornament. As I add new ornaments, I'll include versions with built-in supports when necessary.
GLOBAL PRINT SETTINGS All of the ornaments have been designed to work with these settings.
I haven't found that any of these require brims or rafts, but it all depends on your printer. My printer has a heated glass buildplate, which makes a big difference.
Thickness Settings
- Layer Thickness: 0.15mm
- Wall Thickness: 0.4mm (1 line)
- Top/Bottom thickness: 0.45mm (3 layers)
Print Speed
- Overall Speed: 60mm/sec
- Outer Wall Speed: 30mm/sec
- Travel Speed: 80mm/sec
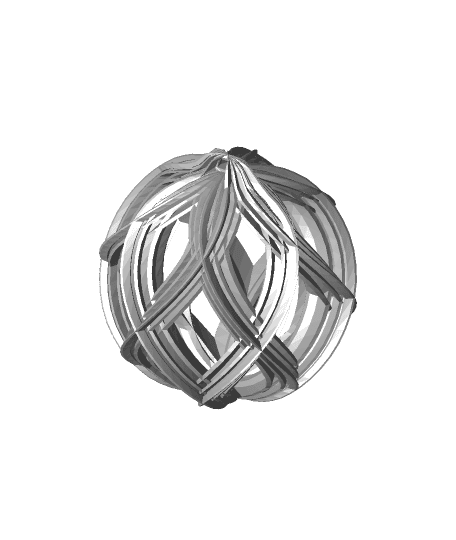
Print Settings for Balls The SPIRAL ball requires NO INFILL. ALL OTHER BALLS only require infill for the first 3mm. I recommend 15% infill density using Lines pattern.
- Support Placement: Touching Buildplate
- Support Overhang Angle: 63 degrees
- Support Pattern: Concentric
- Support Density: 10%
- Minimum Support Area: 2mm
- Print Settings for Teardrop
- Infill: 25% Line for the first 15mm only
- Supports: None if you use the built-in supports
Adding Infill to Part of an Object in Cura I've included a couple screenshots of the Cura interface to show the tools I use.
- Set the main infill density setting to 0%. You'll override this for the area that needs infill in the steps that follow.
- Select your model, then press the E key (or select "Support Blocker" - 6th tool from the top on the left toolbar), and click anywhere on your model. It should add a transparent blue cube.
- Select the cube, scale it, then move it to the bottom of the model.
- Select "Per Model Settings" (5th tool from the top of the toolbar on the left) and select "Modify Settings for Overlaps" (3rd from left).
- Choose Select Settings.
- From the list, select "Infill Density". If you are printing a ball (or any object that requires supports) you must also select "generate support".
- Set the infill density.