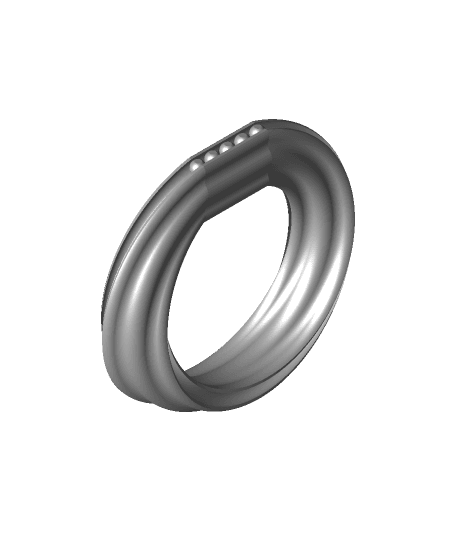
Mobius Bearing Track | #3Dprint #pdo | NoahMillerDesign
byNoahMillerDesignThis model was designed for the #3Dprint #pdo challenge.
A couple quick notes to those 3D printing this model:
This model was designed to be printed on a resin 3D printer. If you can get it to print on an FDM printer, more power to you, however the curvature and tight tolerances really need the precision of a resin printer. For those printing in resin, if you’re having trouble keeping the print stuck to the bed, try adding supports close enough to the base that their bottom pads overlay slightly with the bottom of the model. Depending on how well tuned your printer is, you my also need supports under the middle section at the top.
I was thinking through ideas for this challenge and was reminded of something I had seen many years ago. For a competitive robotics competition that I was involved in, there was a custom trophy that someone had hand made. The trophy was a steel linear bearing track that had been bent and welded into a loop. This inspired me to see what similar things I could come up with that would really push my printer to its limits and show off what 3D printing can do.
With this inspiration rattling around in my head, I came up with the idea to make a bearing track, but to have it be mobius. For those unfamiliar, a mobius strip is a “one-sided surface that can be constructed by affixing the ends of a rectangular strip after first having given one of the ends a one-half twist.” Basically, it’s a three dimensional path that only has one “side.”
I designed this model starting out with two paths. However, as the two paths form a loop, they twist over each other and connect to the opposite path. This effectively merges the two paths into one, thus creating a “mobius bearing track.” With this created, I was quite satisfied with the result. It was complex and visually appealing, yet still viable for 3D printing.
I almost called it good, but then I decided to add one more feature. In between the “two” tracks of the existing mobius loop, I added a tube that is a perfect loop, without any twists. I then created a channel between the mobius loop and the normal loop so that the bearings could be moved back and forth between them. Try using the X-ray style render to get a better look at the inside loop. Lastly, I added the five bearings to the bottom of the model. Once the model is printed and removed from the build plate, the bearings can move freely around each loop, and back and forth between them, without falling out.
