“Go, Bunnies, Go!” – A springtime automata
byDaveMakesStuff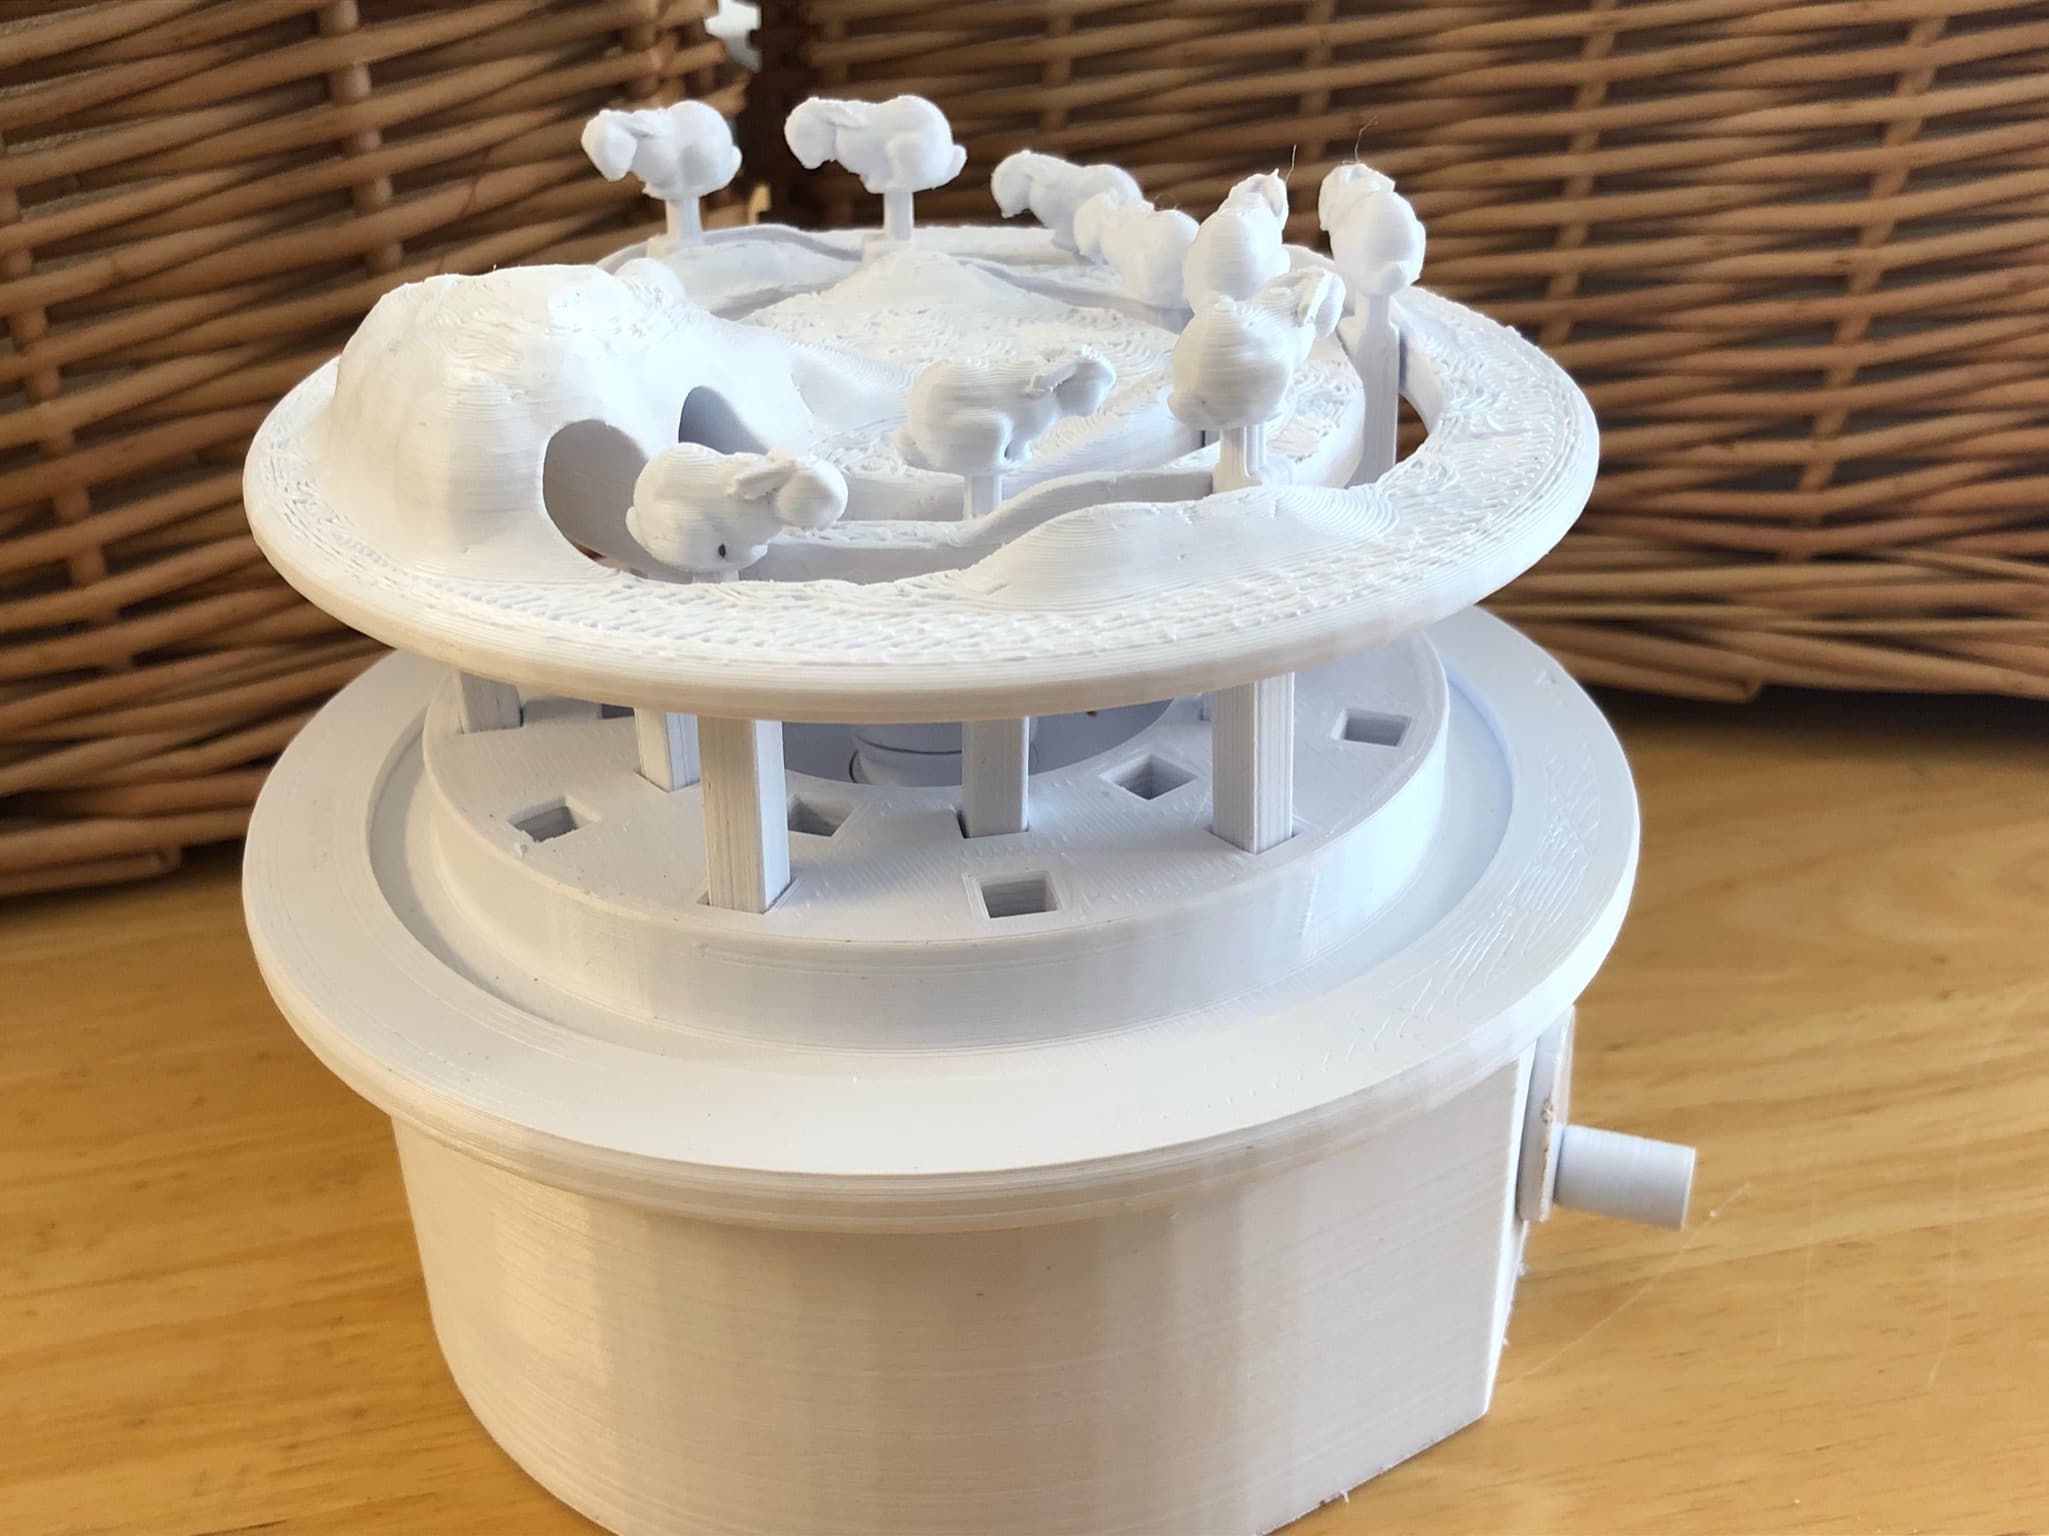
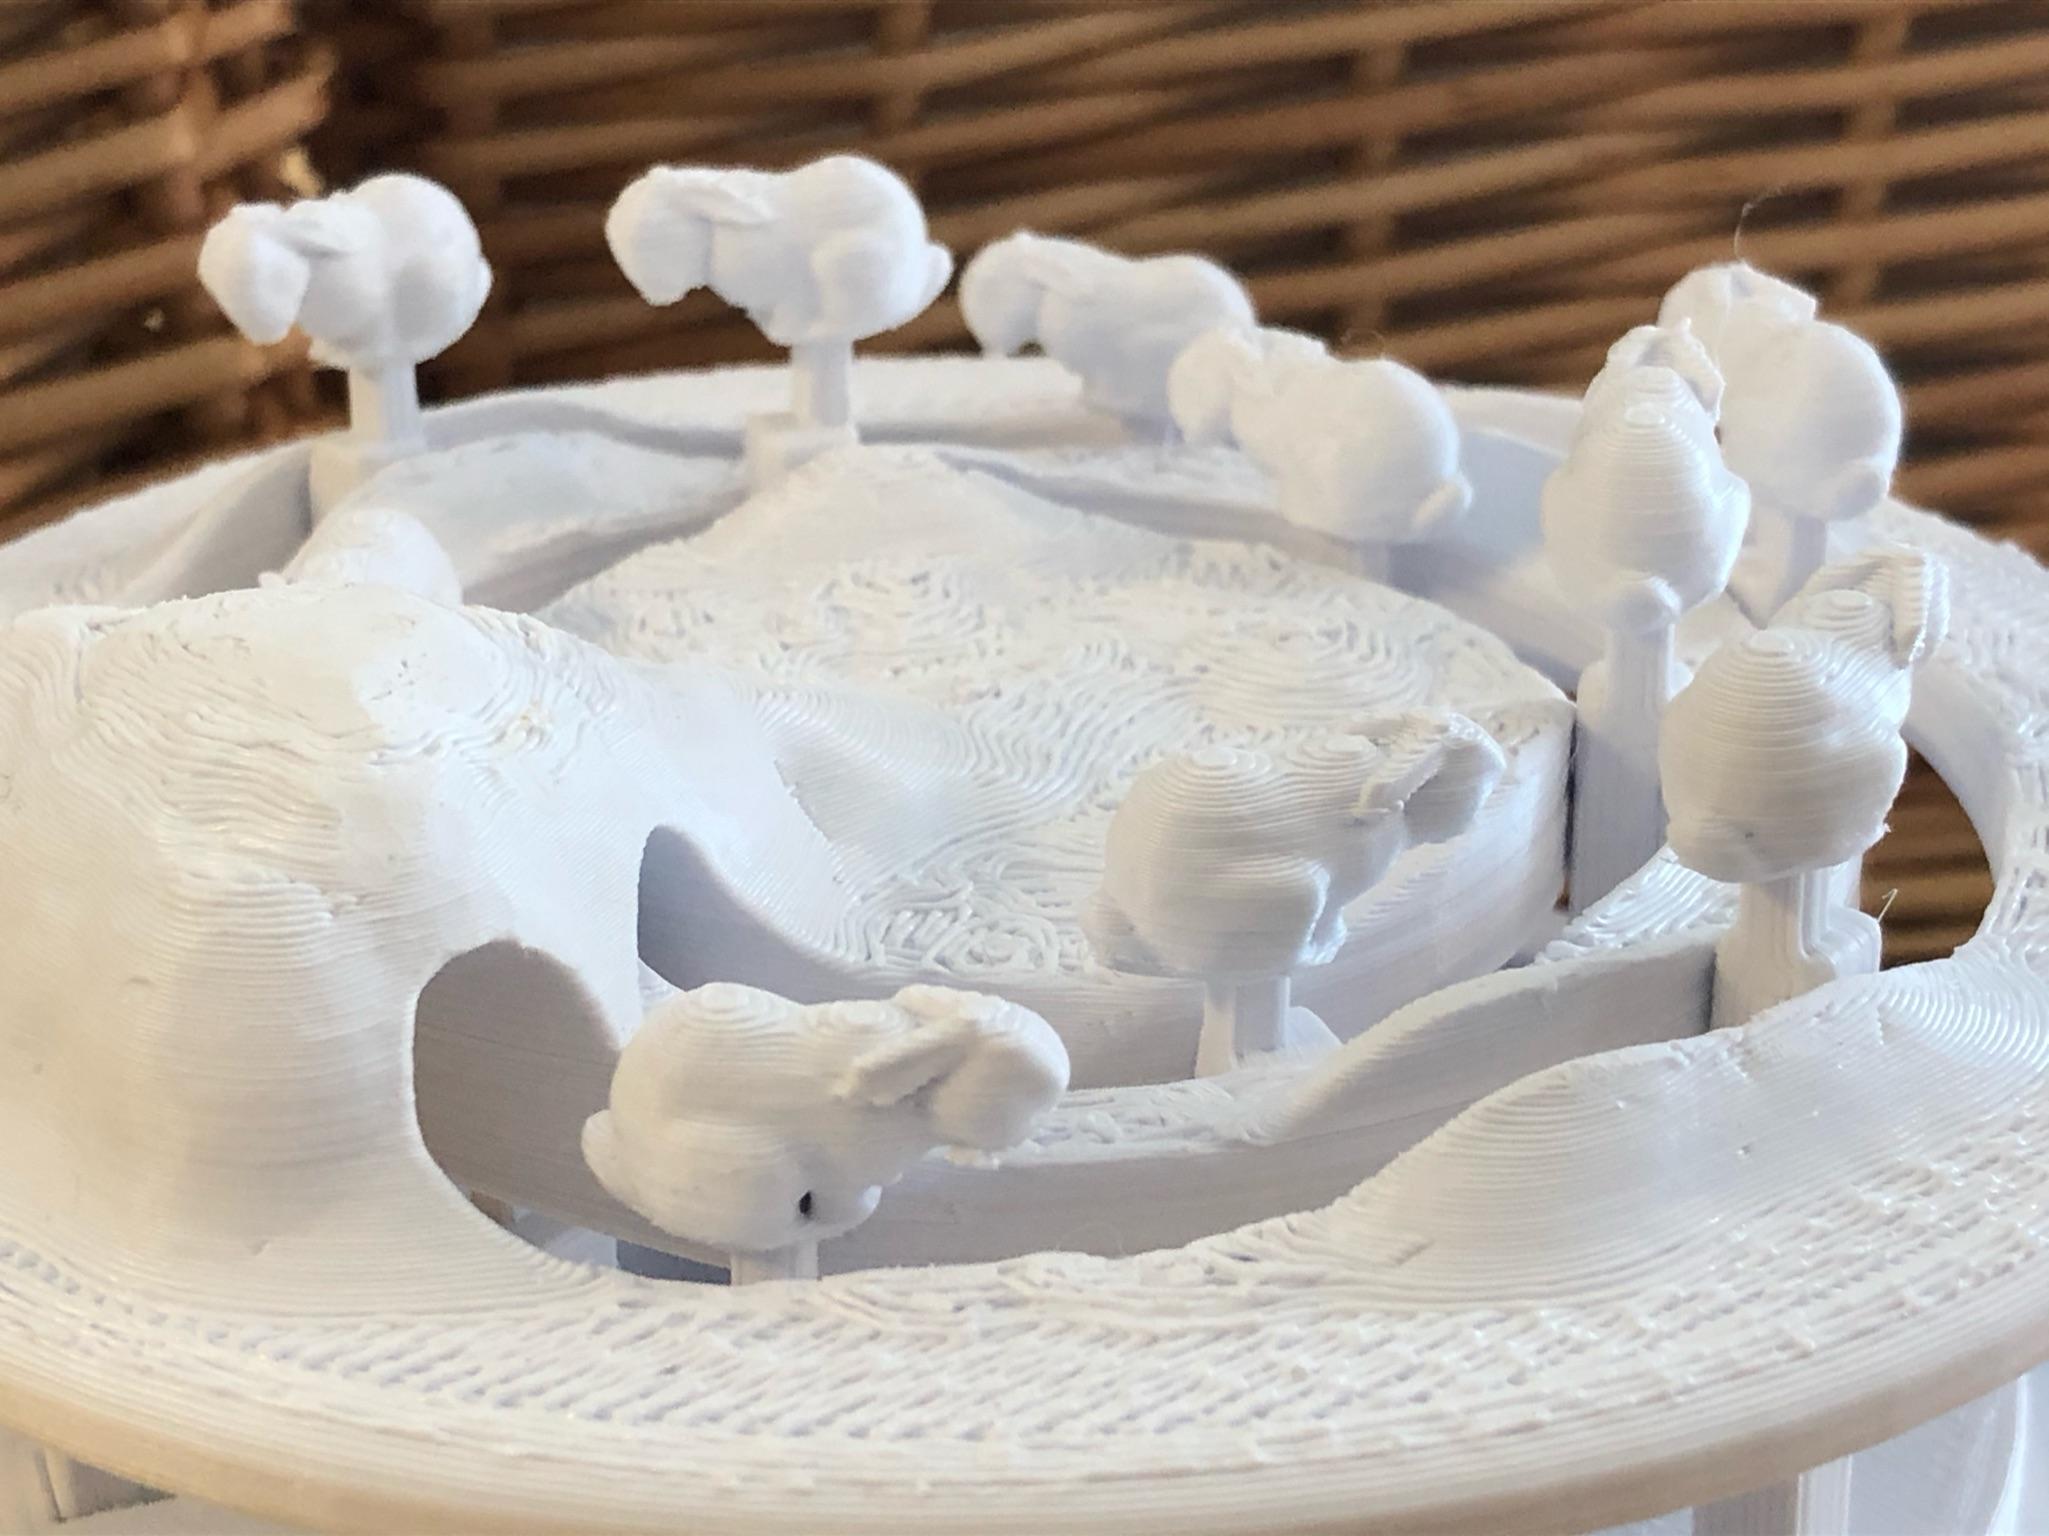

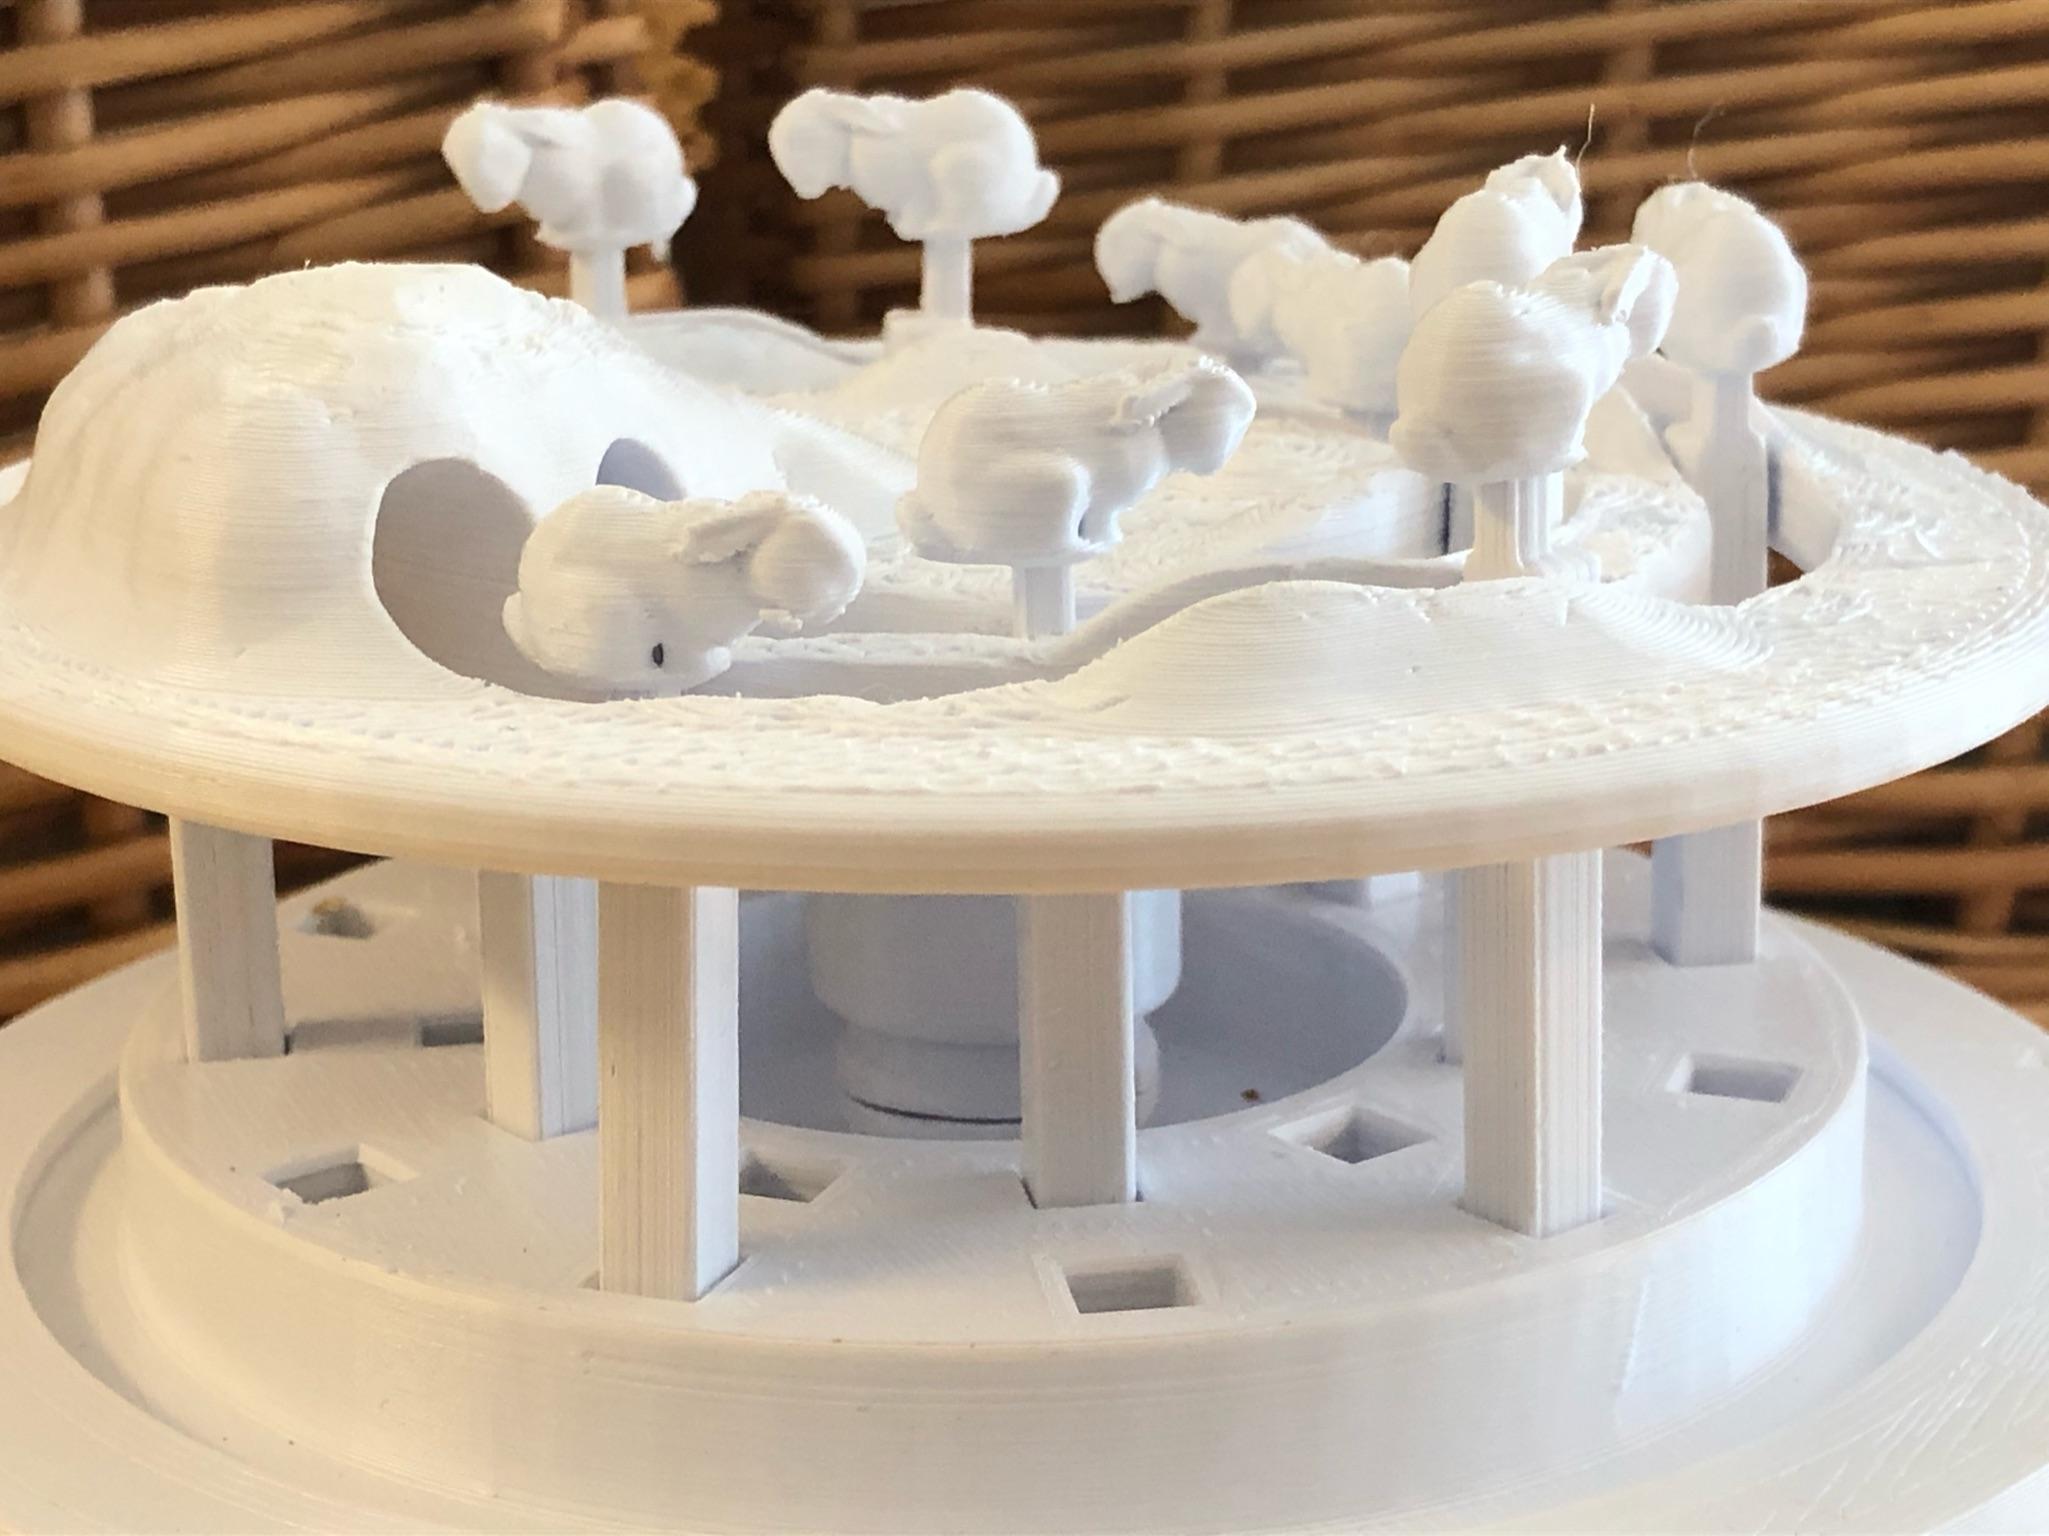
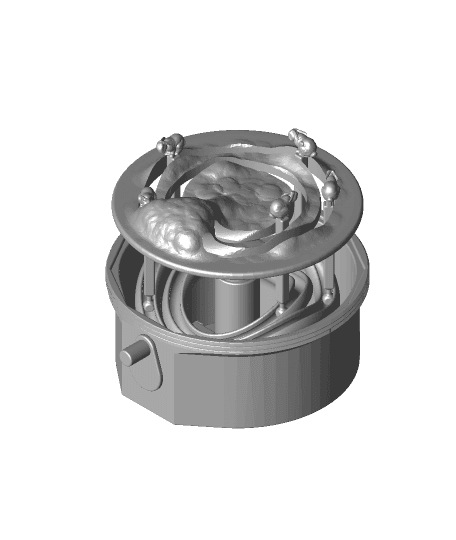
I started with just two bunnies and then look what happened!
The outer ring of bunnies jumps three times while bunnies in the inner ring jump only two times. All the bunnies must dive into the burrow at exactly the right time or they’ll bang their little bunny heads!
See here for a video of the automata in action: https://youtu.be/qjkFrhv4enk
This automata is an advanced print. You’ll need good knowledge of optimal print settings for your machine and the skills and tools to do some post-print processing.
This assembly video (https://youtu.be/wfsd5Y0_sJE) is for a similar cam-based kinetic sculpture: https://youtu.be/wQxTIqx9OIY . The only difference is that this bunny automata has a modular cam assembly.
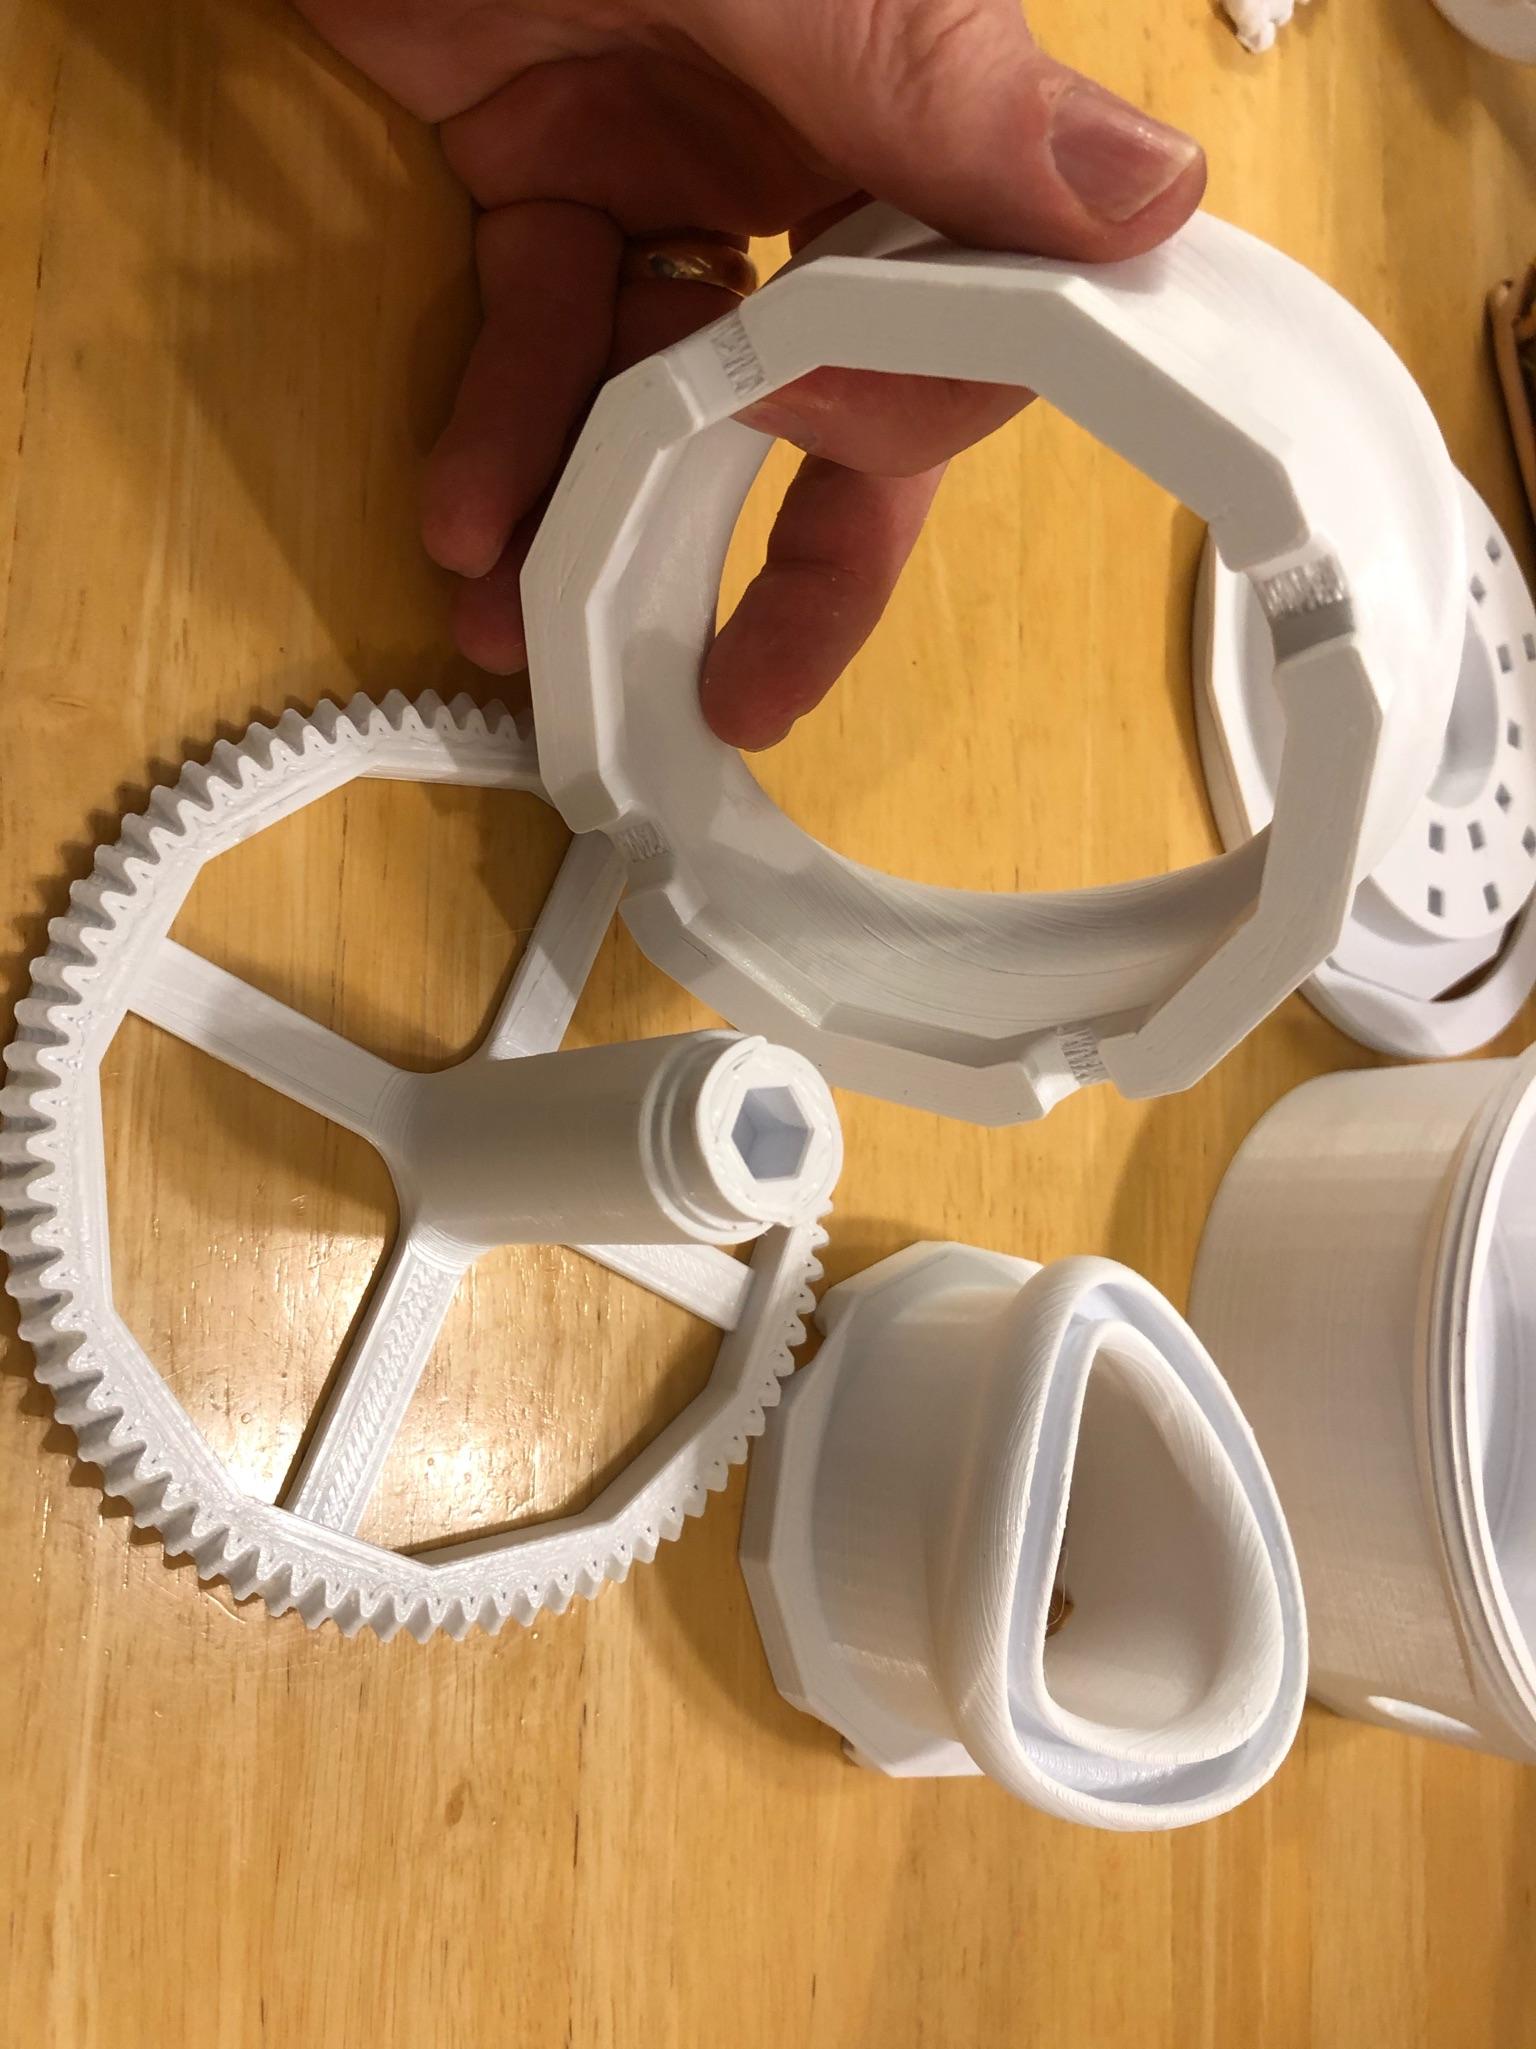
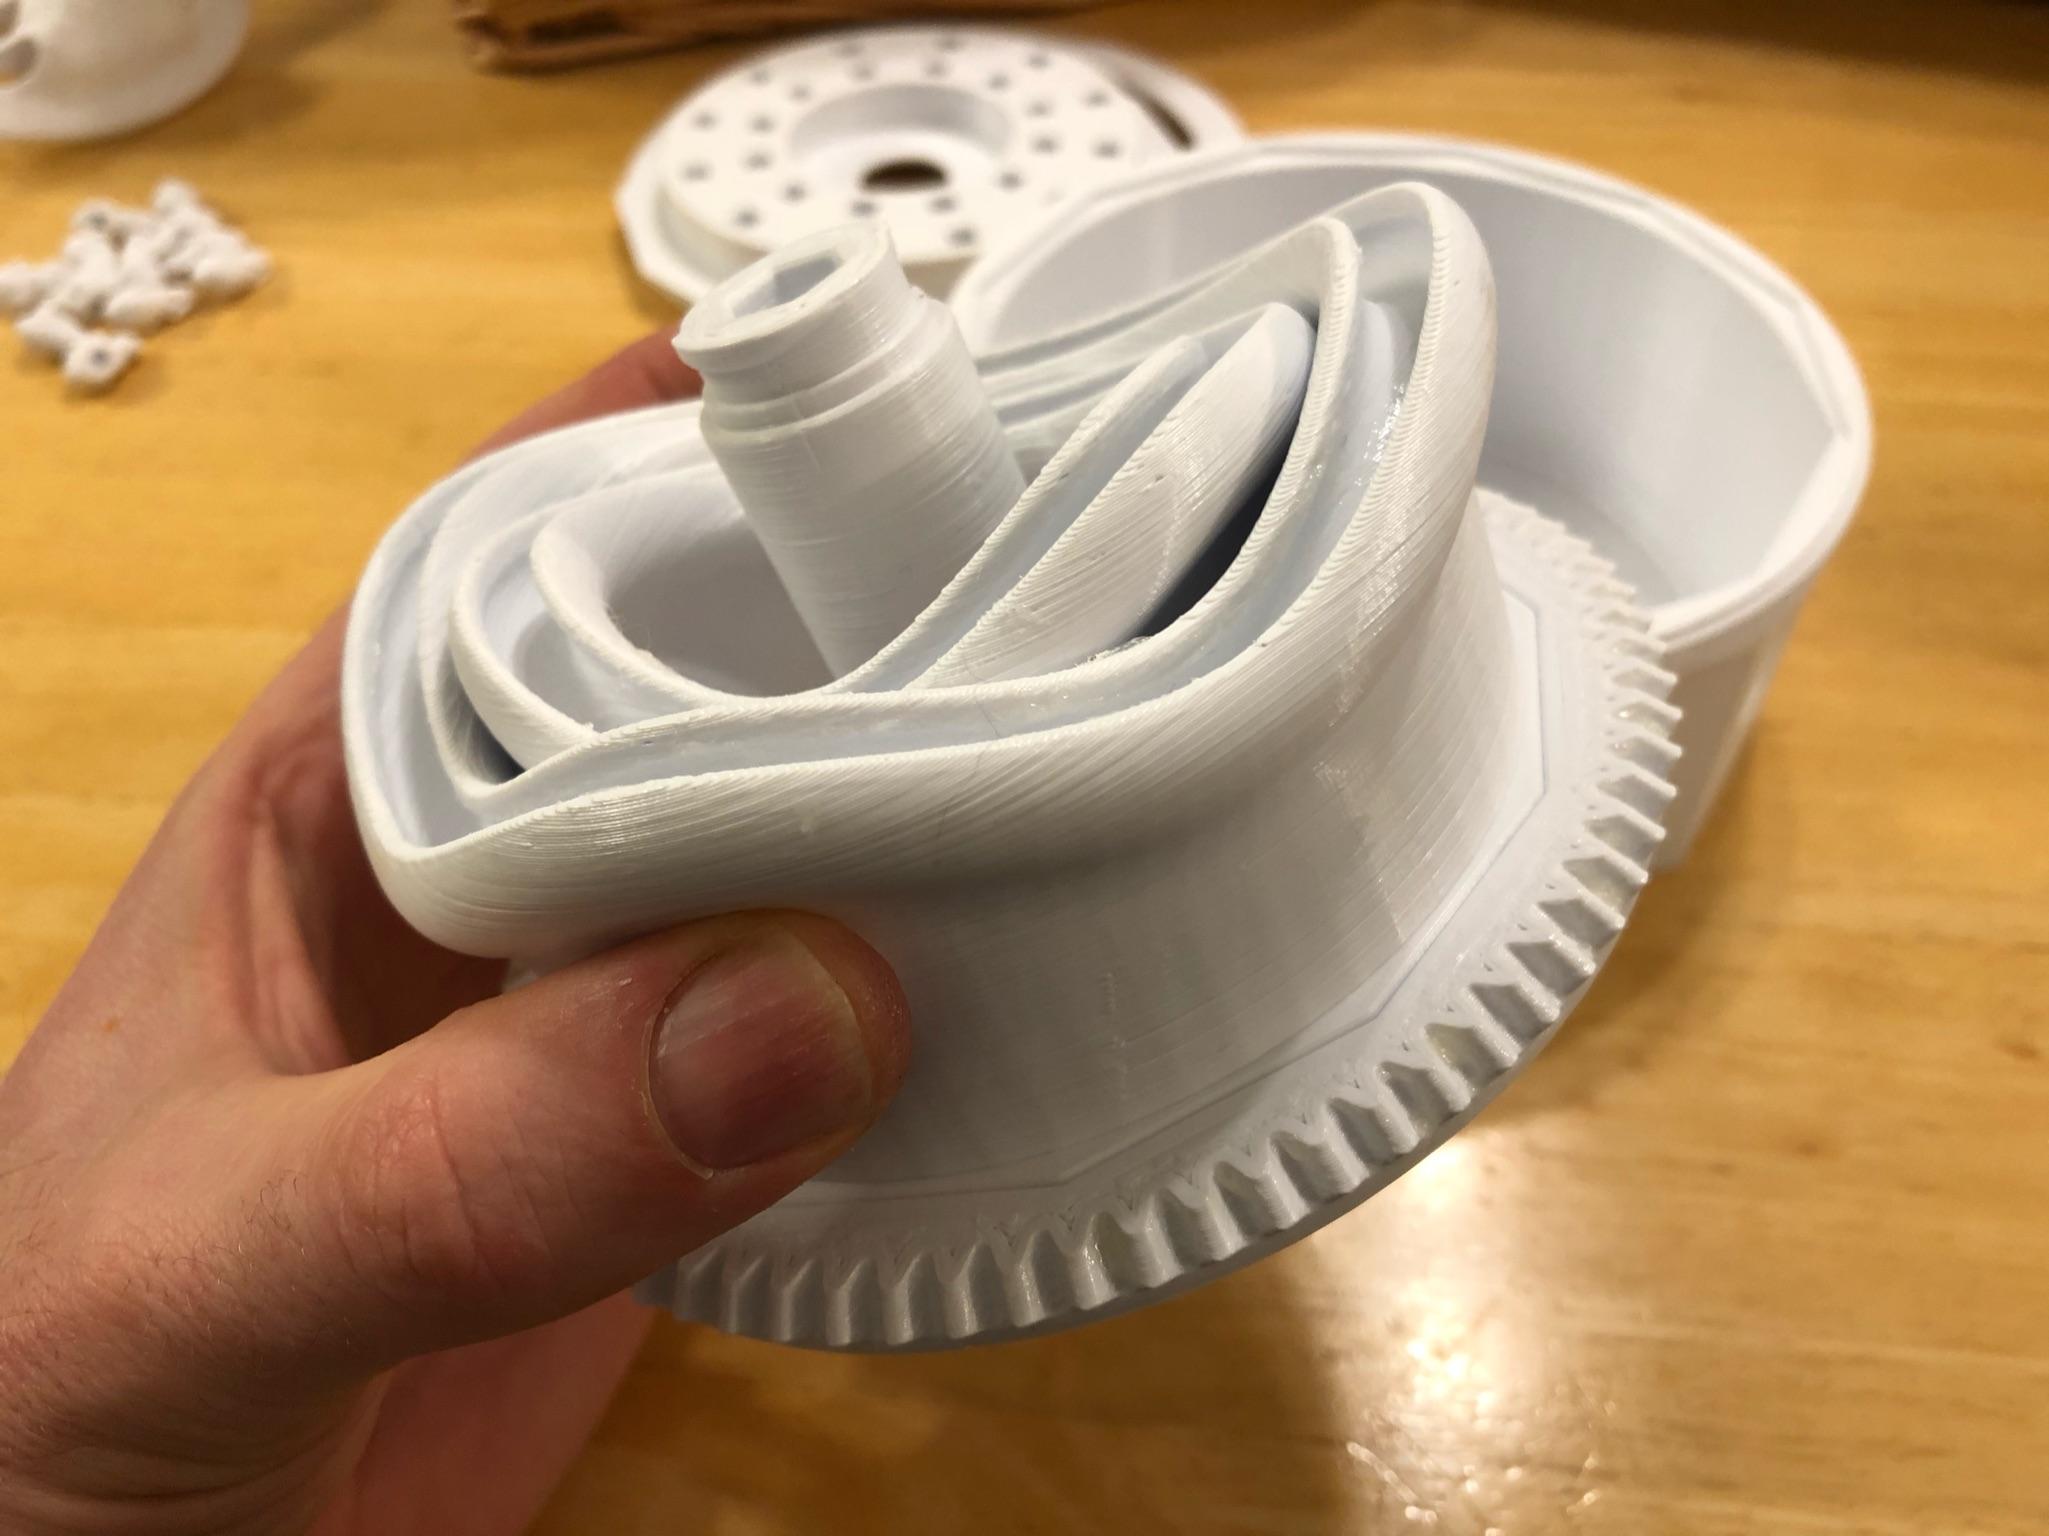
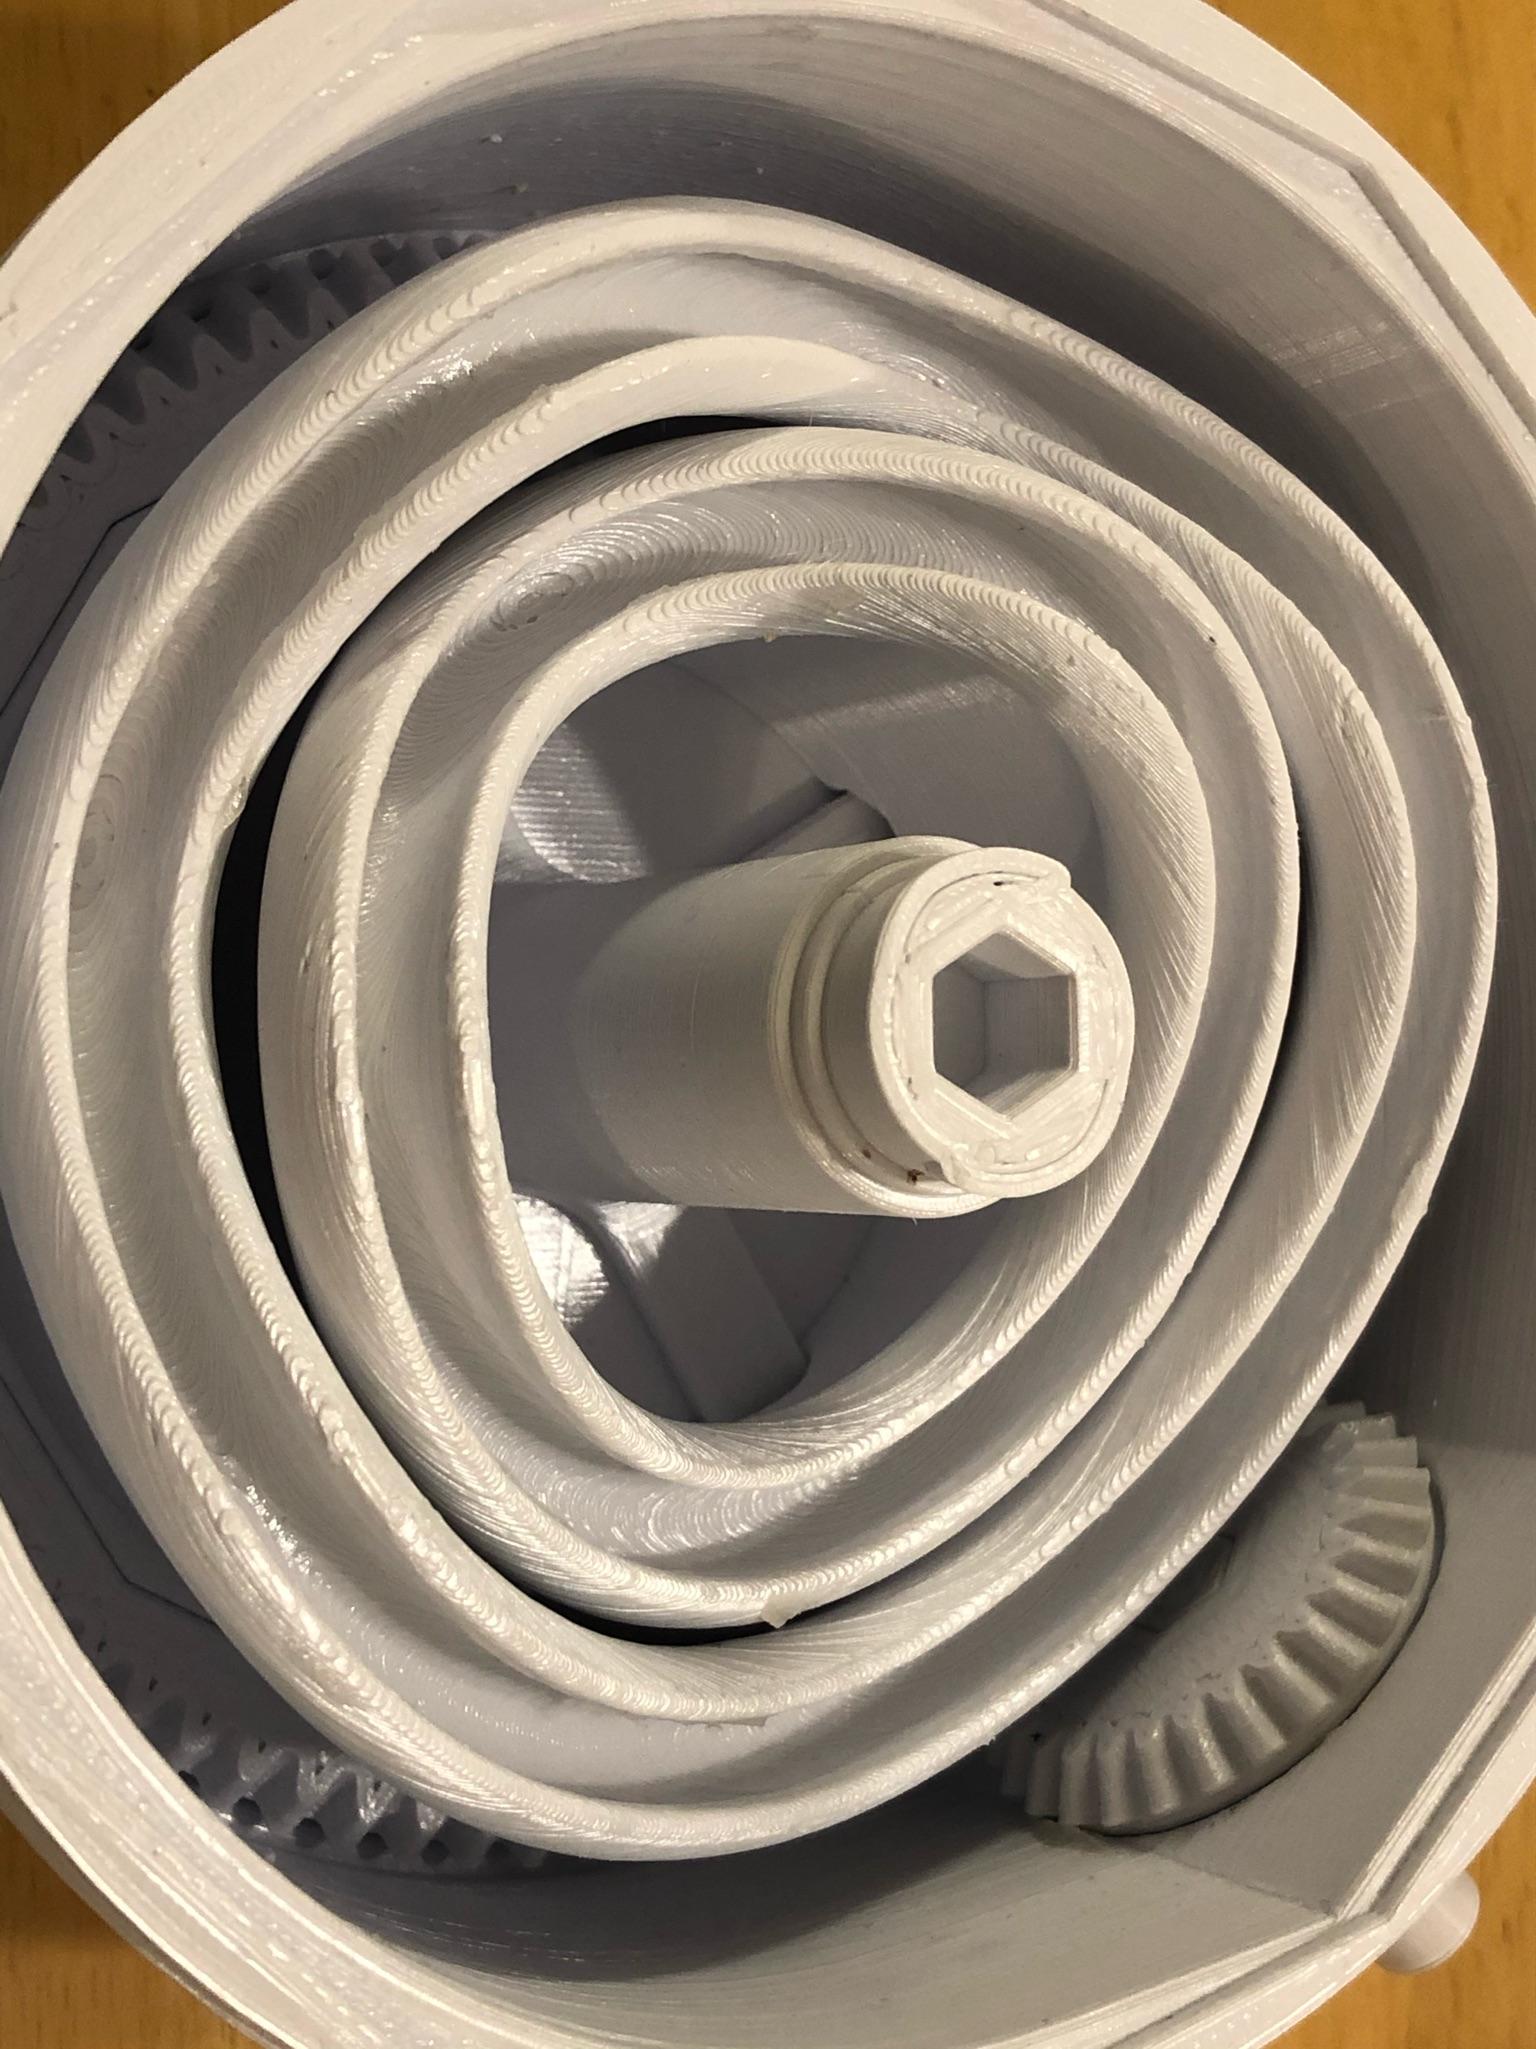
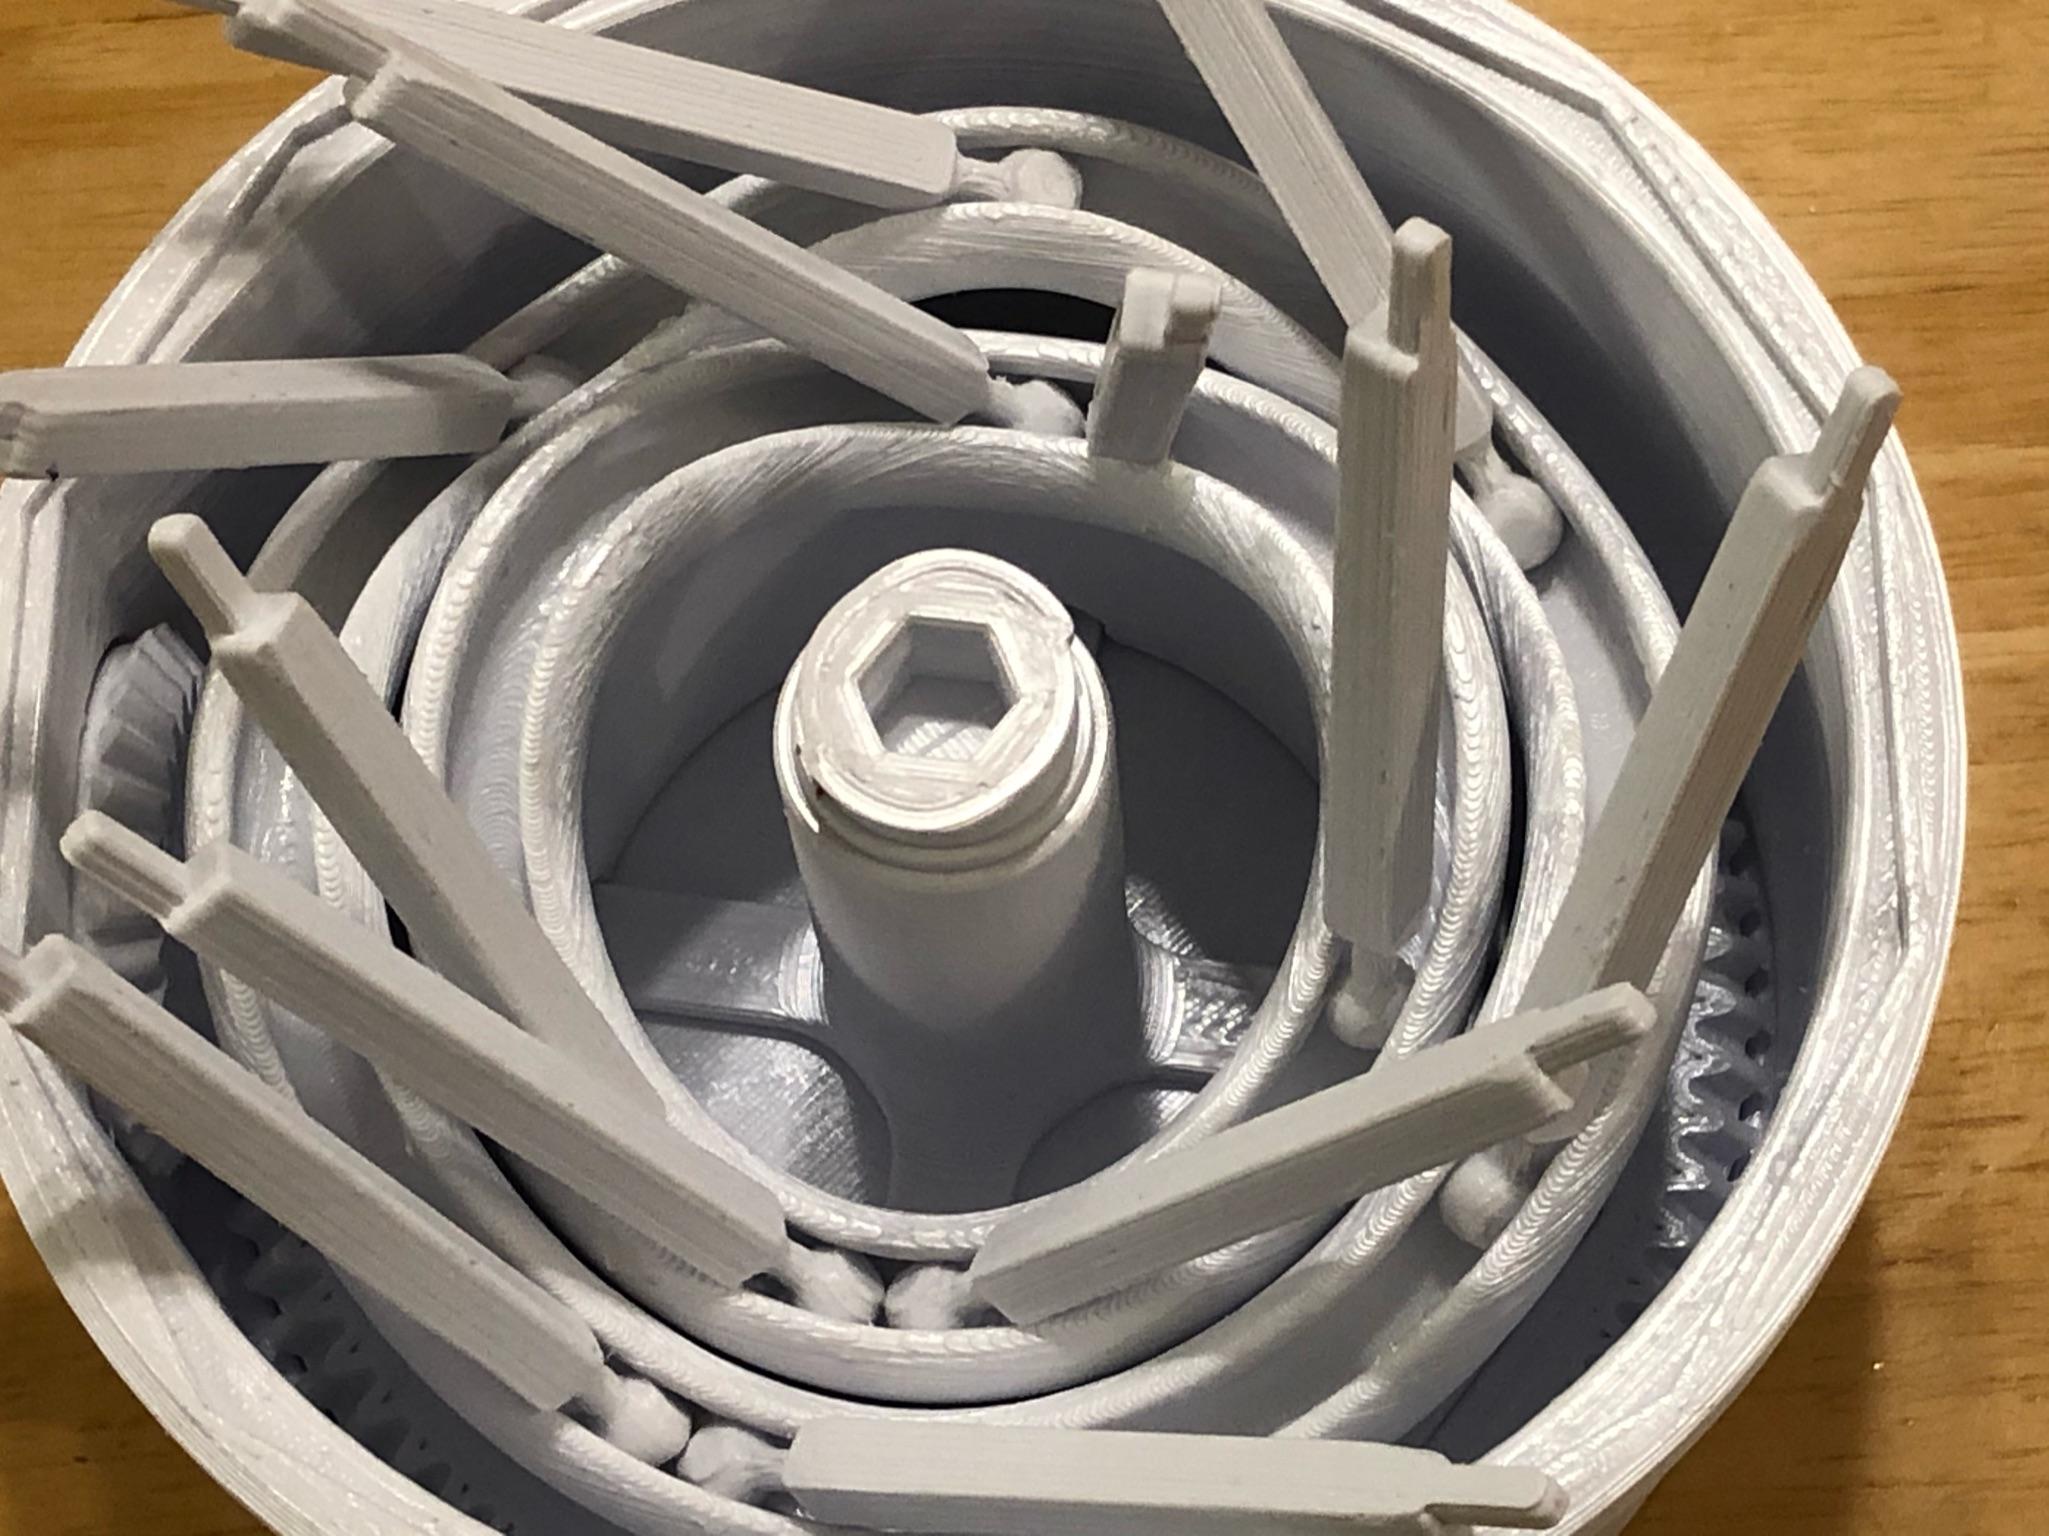
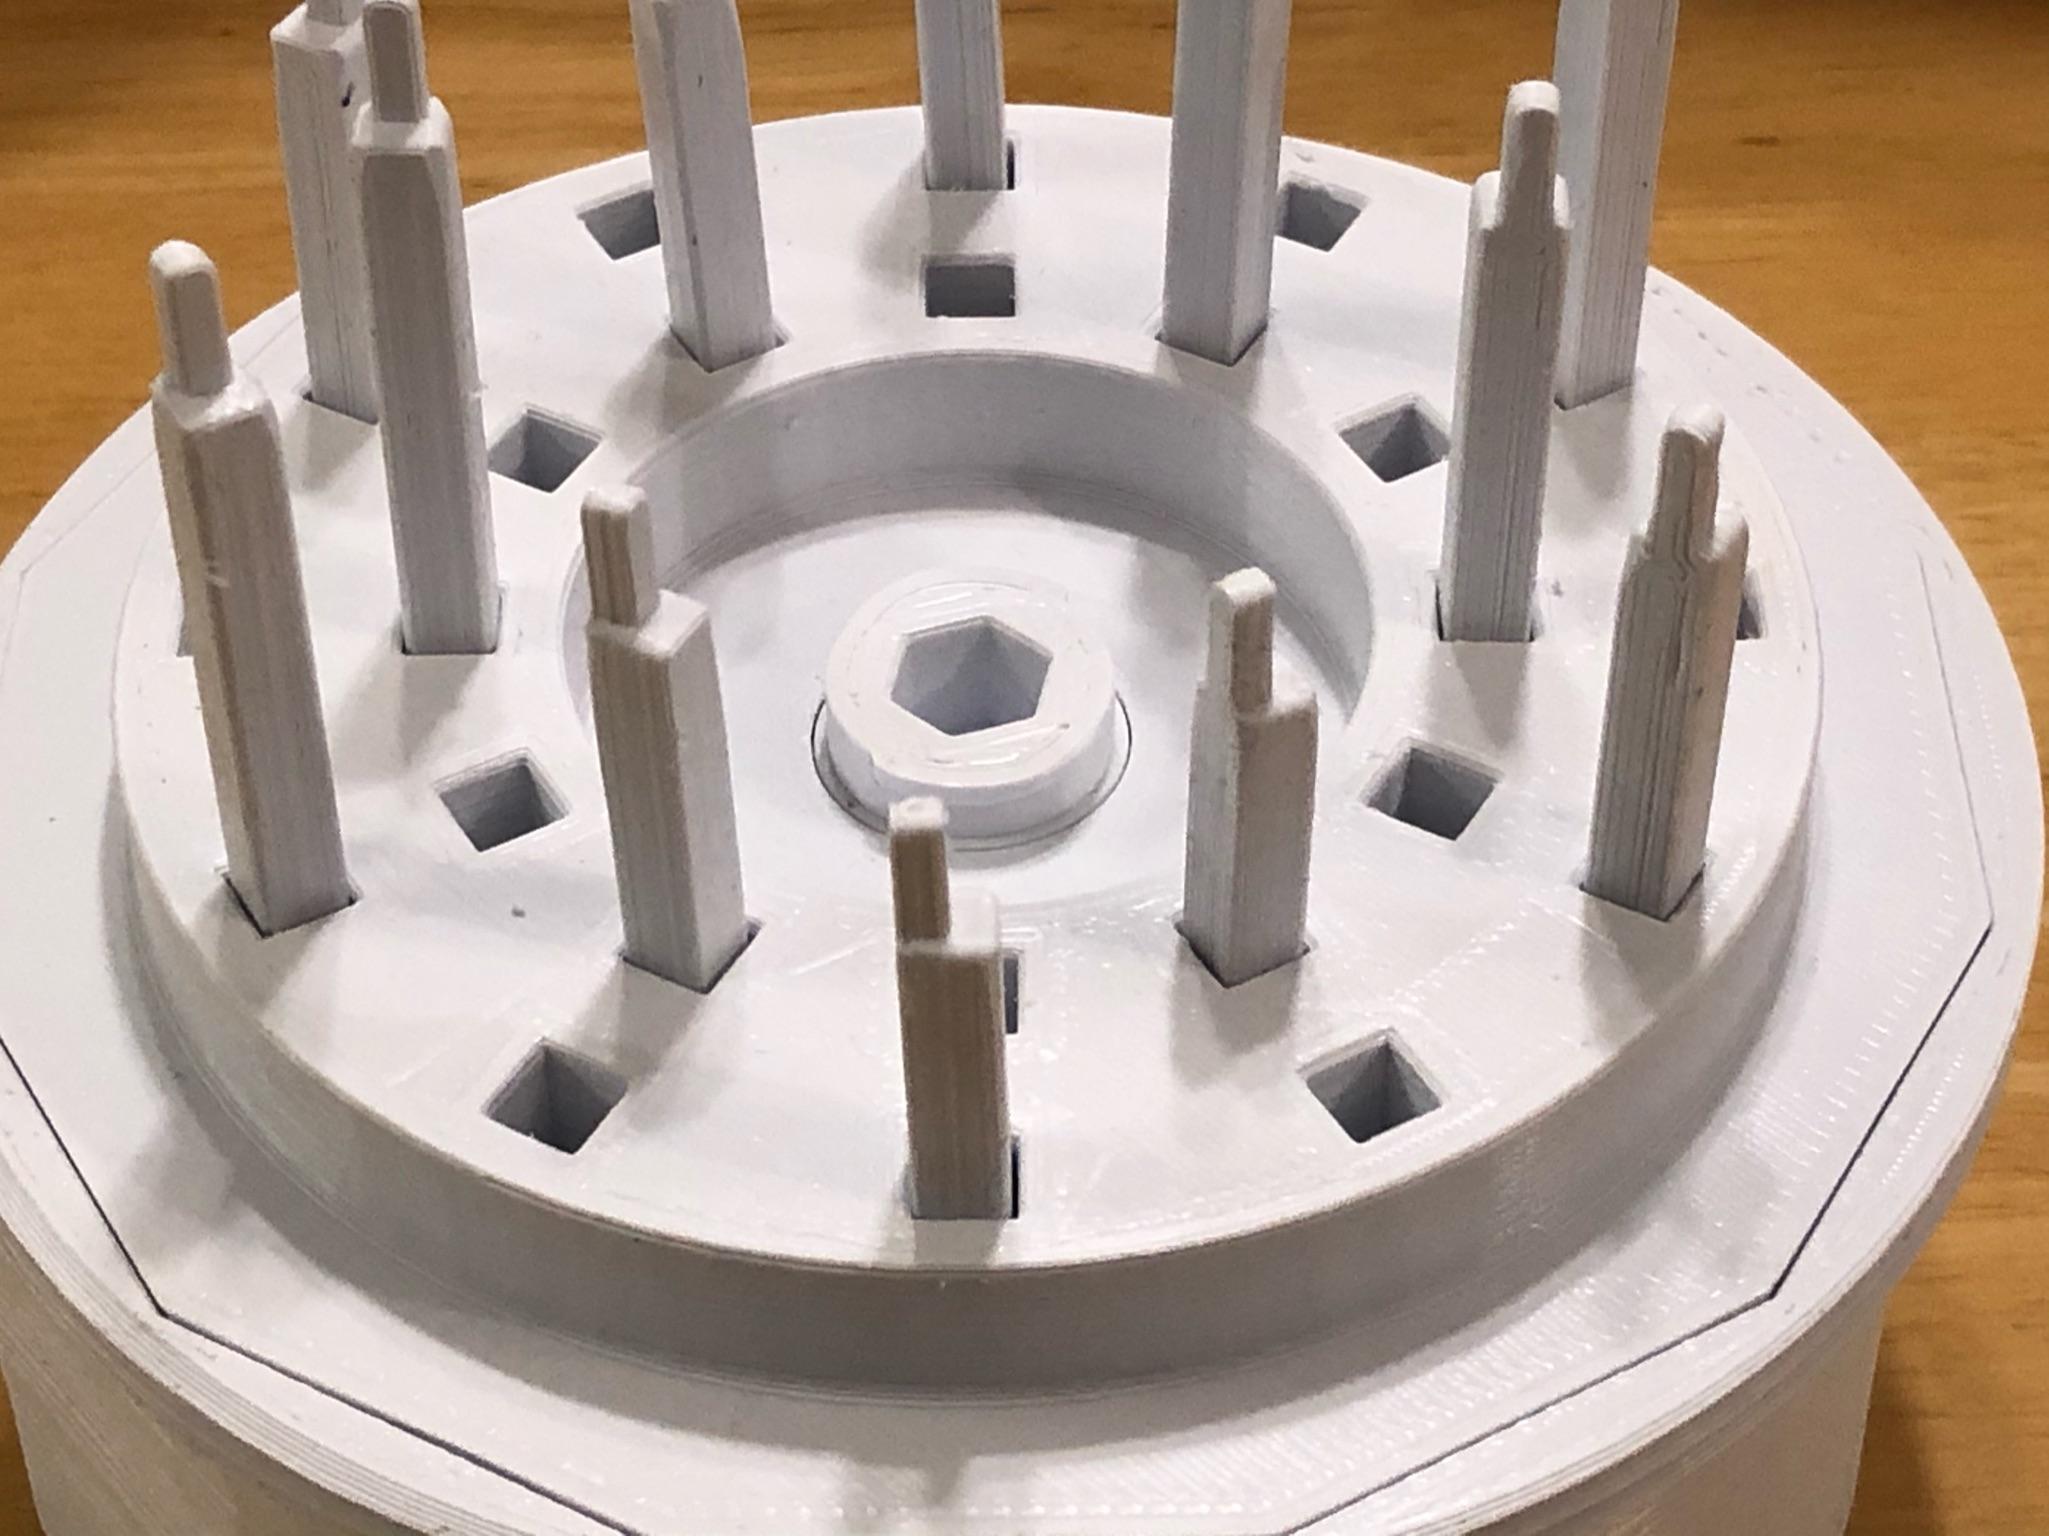
The attached pictures also show the automata in various stages of assembly.
This automata is an entry into the Spring 2022 Thangs #MakerMadness design competition.
Printing
Print as many of the “Follower (Thin Neck)” and “Bunny” files as you want. The model shown has six in each ring for a total of twelve.
Print one of each of the remaining files. Carefully remove any burrs or imperfections in the print especially on surfaces that move against one another.
The “Spinning Terrain” prints best upside-down with tree supports. When removed, the tree supports leave a nice textured “ground” surface. The hex attachment also prints best when oriented upwards.
The critical bit of cleanup here is that the “followers” slide perfectly through the guides in the “lid.” If there is either too much friction or too much slack the machine will jam.
Lubricate any moving surfaces with Vaseline prior to assembly.
Assembly
-
Assemble the crank. Place the “grip pin” through the hole in the “crank” and secure it in place with the “grip.” The grip should be able to spin freely on the crank.
-
Put the cam assembly together. Push the “Outer Bunny Cam” and “Inner Bunny Cam” on to the “Cam Support and Bevel Gear.” In order to achieve proper timing of movement, the cams must be placed on the cam support in the proper orientation. To find the right orientation, align the ridge on the posts of the “Spinning Terrain” and “Cam Support and Bevel Gear” and position the cams such that the lowest point of the cam coincides with the borrow that the bunnies dive under. Place the cam assembly in the “Base.”
-
Place the “Drive Bevel” inside the base against the hole in the side wall, ensuring that the teeth are properly meshed with the larger bevel gear. Attach the crank assembly from the outside.
-
The next step is the trickiest. Insert the ball end of one of the “followers” into the cam. You will notice that there are two flat face on the ball. These flat faces permit the ball to be pushed into the cam slot in one direction only, and then to be locked in place with a 90-degree turn. Hold the “Double Track Lid” slightly above the top of the base and push the square end through. Do this with all followers. It’s tricky but doable!
-
Once all the followers are in place, seat the “Double Track Lid” onto the “Base” and secure in place with the “Lid Screw Top.”
-
The next step is to secure the “Spinning Terrain” apparatus on to the visible end of the “Cam Support and Bevel Gear”. Notice that there are identical ridges on the ends of both. These ridges need to line up in order for the “Spinning Terrain” apparatus to be timed properly with the cam-driven bunnies. They also allow for the “Compression Collar” to hold them precisely and securely together. Slide the “Compression Collar” over one of the ends. Insert the male hex of the “hoops” into the female hex of the cam and twist the “Compression Collar” in place. The compression collar is not always needed, but it does help to reduce wiggle.
-
Stick the bunnies on the followers
-
You may need to do some filing and shaping if there are any misalignments
-
Turn the crank and hope that the little bunnies don’t hit their little bunny heads!
#makermadness!