.JPG&w=3840&q=85)
.JPG&w=256&q=75)
.JPG&w=256&q=75)
.JPG&w=256&q=75)

.PNG&w=256&q=75)
.PNG&w=256&q=75)
.JPG&w=256&q=75)


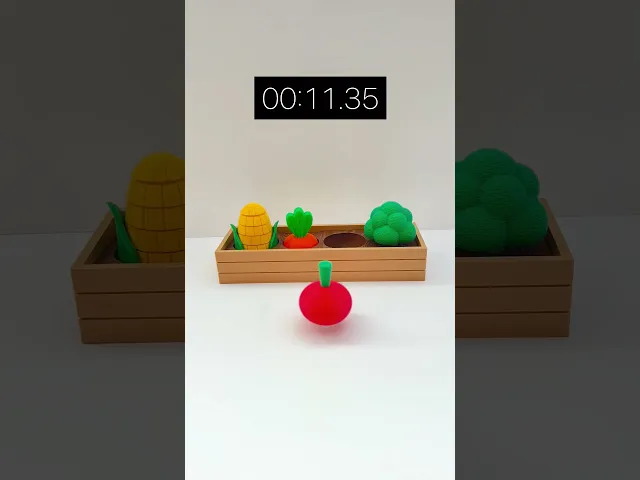
Rotating Radish Fidget + Garden
These radish spinning tops might just become your favorite desk distraction;)
Update 3/20/2025: I added two new files to this model: (1) a radish top with no stem and (2) the stem. These print separately and fit together snugly. (I had gotten feedback that the stem on the original model was prone to breaking off so this should fix that problem 💪)
3D Print Settings: PLA works great Layer Height 0.2mm 15% Infill No supports needed
Dimensions of Radish: 1.5 in x 2 in.
Important Print the Radish Top and Peg with 15% infill Print the Radish Bottom with 60-70% infill (this is important because it lowers the center of gravity and helps it spin better:)
Note: I recommend printing these pieces on a smooth print plate so the bottom of each piece is real smooth and fit together nicely.
To print a multi-colored radish For Radish Top pause print at layer height 15.0 mm (or layer 75) to change the filament color (see photo) For Radish Bottom pause print at layer height 14.0 mm (or layer 70) to change the filament color (see photo)
I have also included a 3mf file with the following print profiles: Print Plate #1: Radish top & Radish peg, 2 colors: 15% infill Print Plate #2: Radish bottom 2 colors; 70% infill Print Plate #3: Radish garden bed of dirt, 1 color Print Plate #4: Radish garden planter box, 1 color
To assemble:insert the peg into the hole of the radish top and then the radish bottom connecting the two pieces together. You may also use superglue if necessary to secure the peg in place or the two halves of the radish together.
Have fun printing!

Twisty Fidget Tree (2 Styles)

Alphabet Layered Fidgets

Big Beads: Sports Themed

Cupcake & LED Candle Set (with Cupcake Stand and Magnetic Match)
Spill the Tea Fidget

Football Layered Fidget

Potted Flowers and Watering Can

Flower Stand for Potted Flowers with Watering Can

Pixel Flower Fidget (2 sizes) with Stems, & Vases (3 styles)
.JPG&w=3840&q=75)
Fidget Fabric Fried Egg Set (play or coaster set)

Twisty Pint Fidget (2 Styles)

Clicky Phone Fidget (2-in-1 Fidget)

Fry Pan, Spatula and Fork

Green Eggs (requires mesh fabric), Slinky Ham and Plate

Number & Symbol Big Beads (for Horizontal and Vertical Stringing)

Big Letter Beads
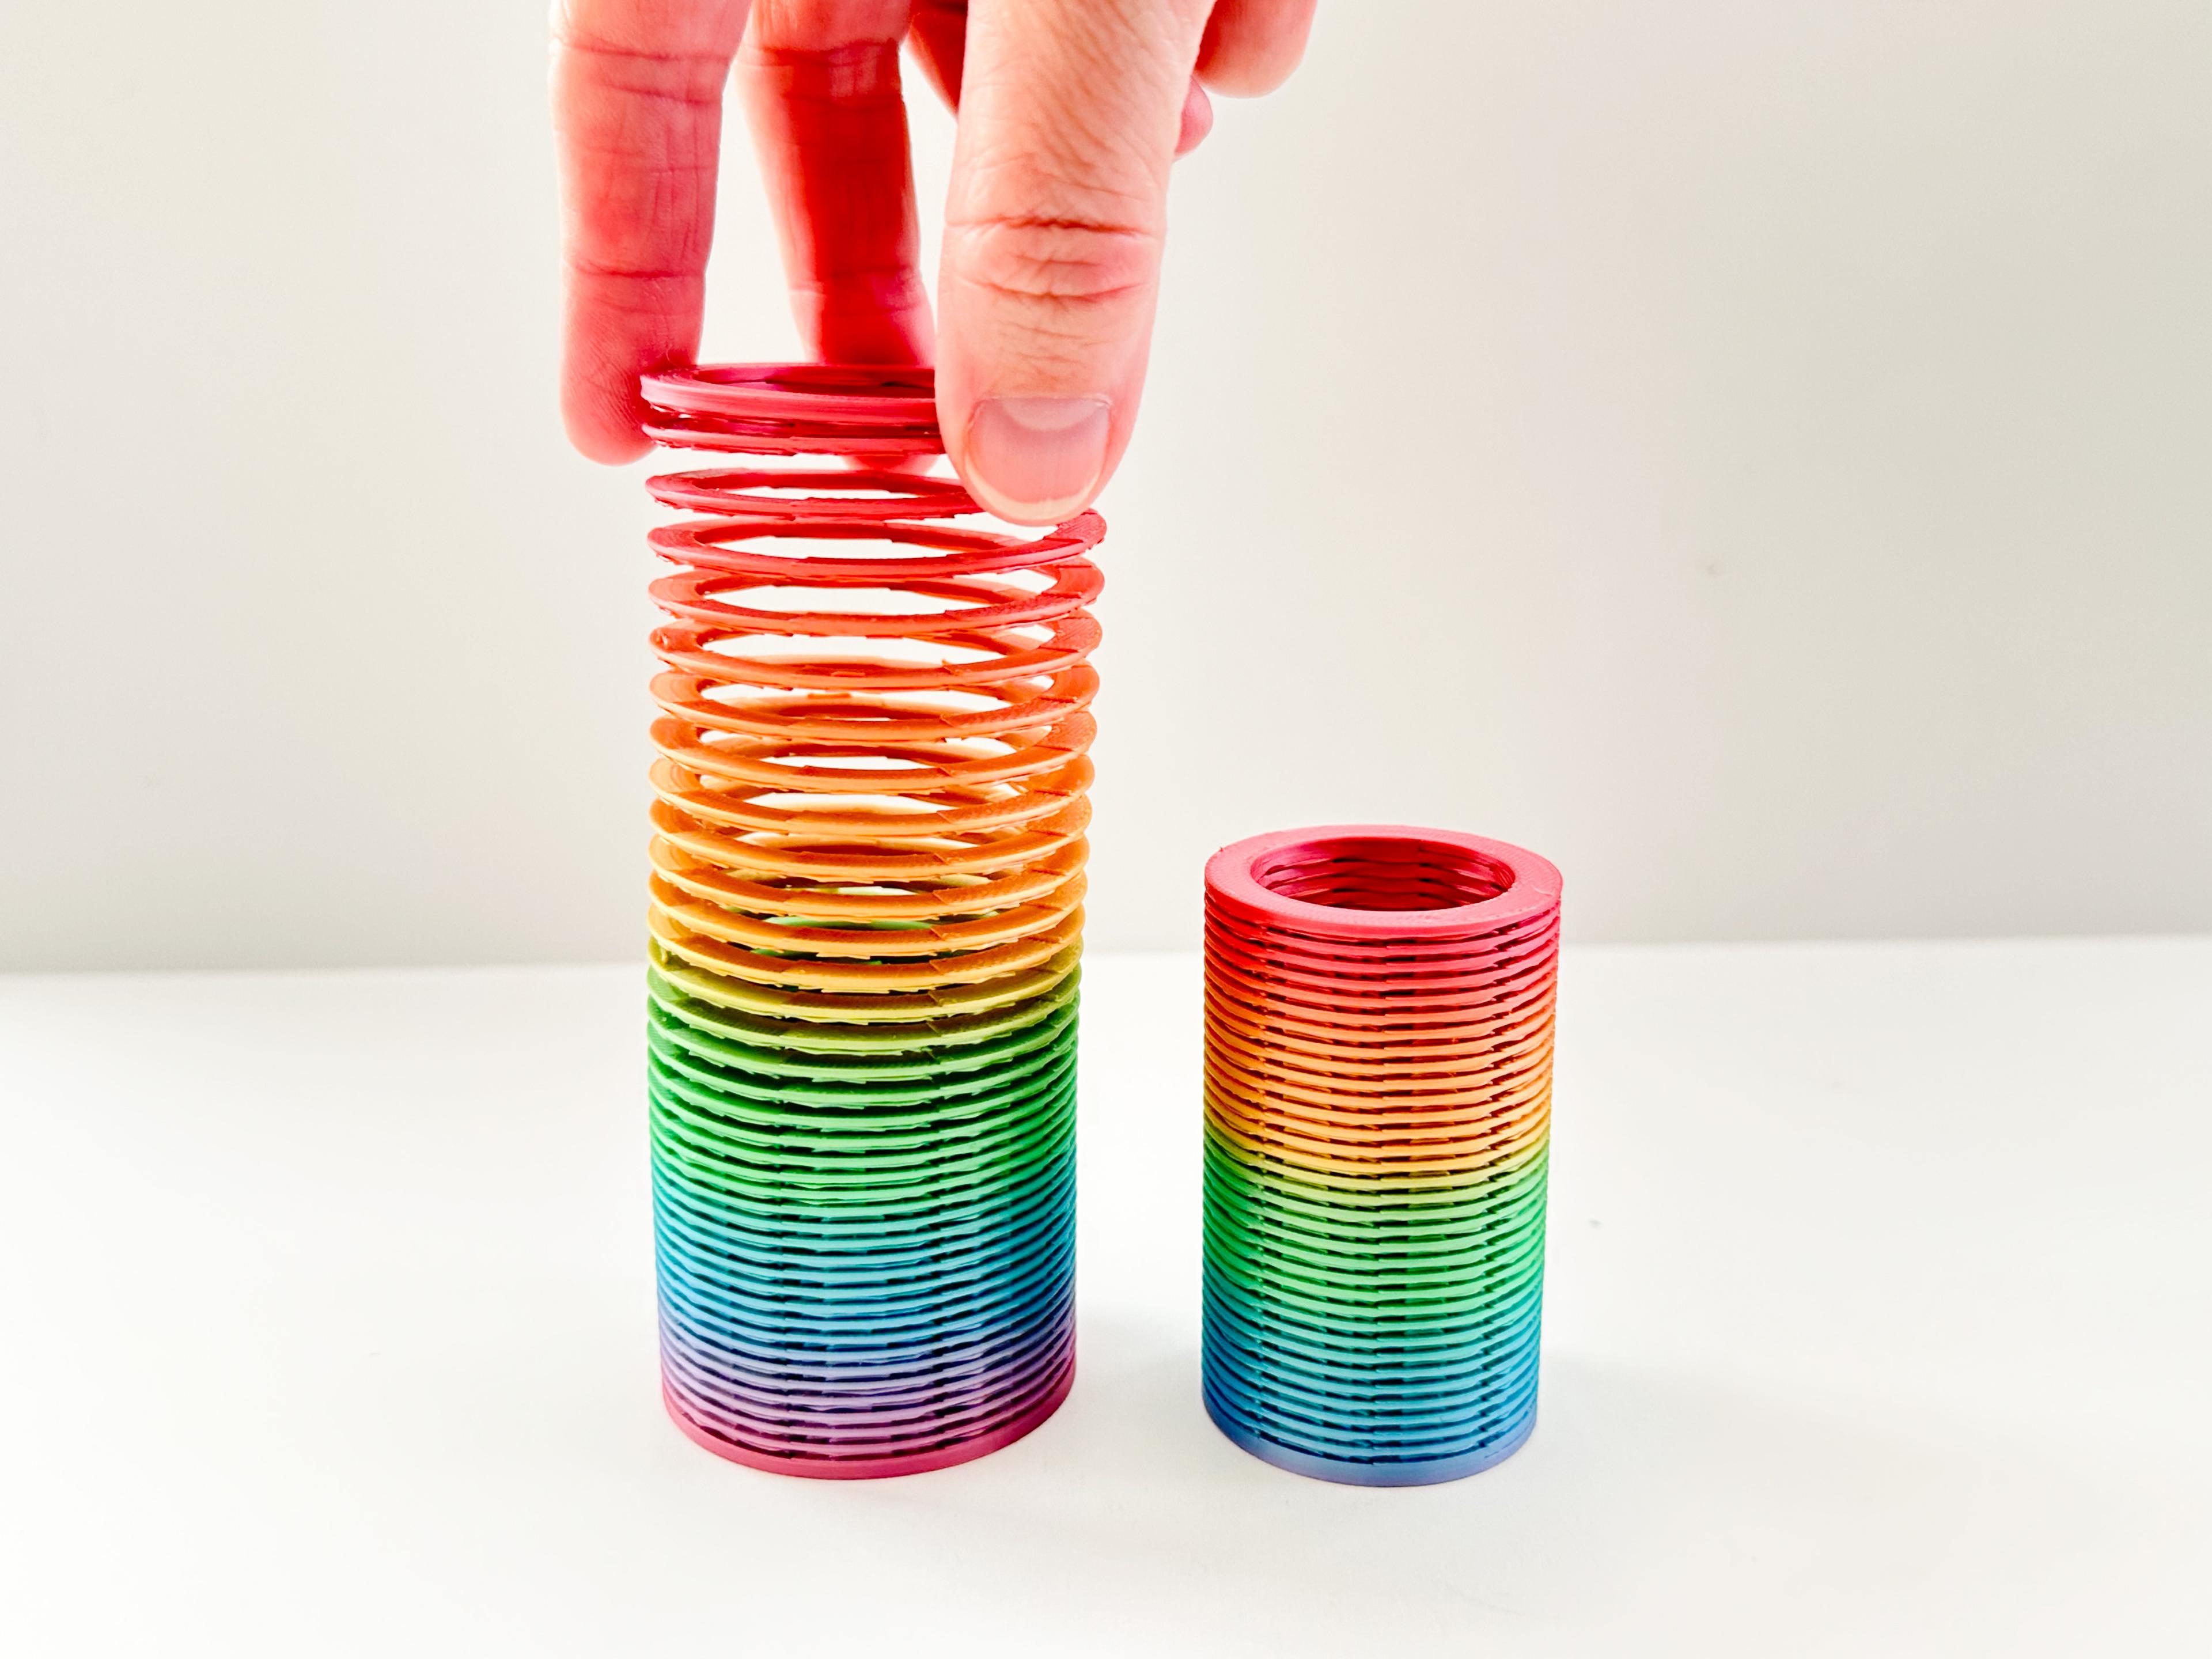
Slinky (2 sizes)

Pear Spinner Fidget
.JPG&w=3840&q=75)
Carrot Garden (2 sizes)
.JPG&w=3840&q=75)