
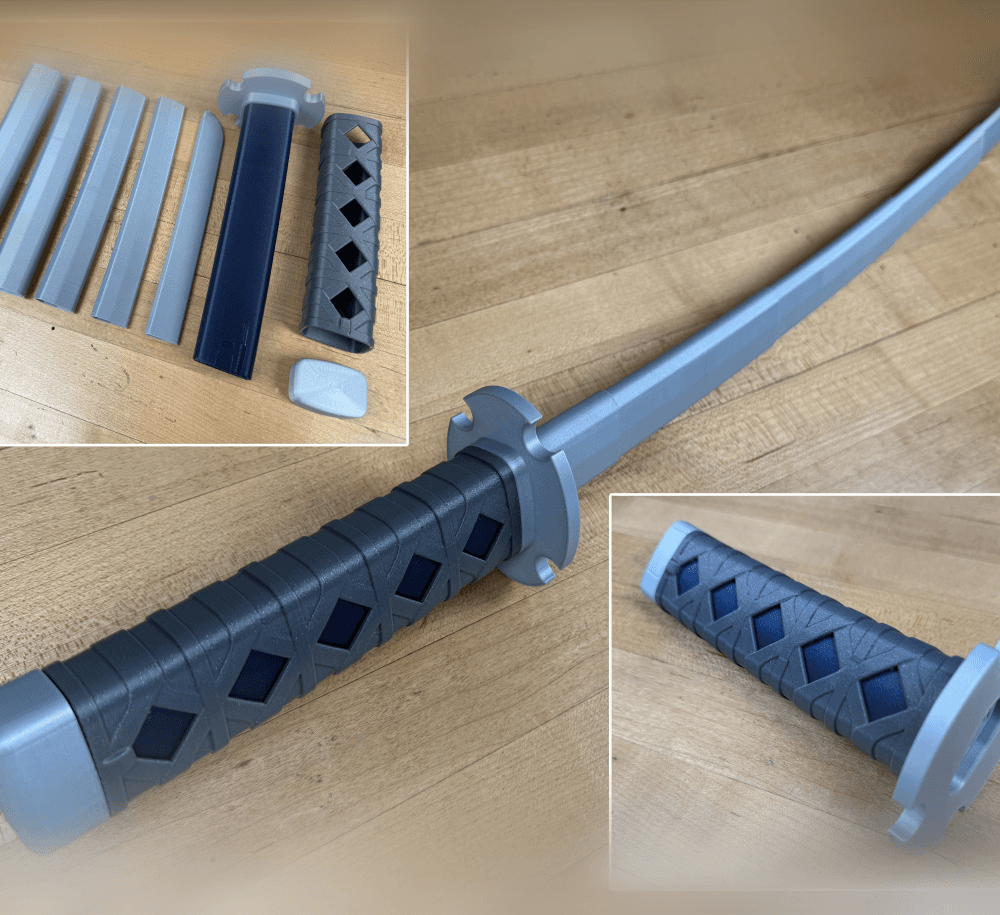
Sword-Saber Test Print
14K downloads · 5 years ago · This is a test print for the collapsing swords and Light Sabers. If you can print thing without the
This model is restricted by licensing terms.
View license.
This is a test print for the collapsing swords and Light Sabers. If you can print thing without the rings sticking together then you should be able to successfully print the full sword.
The test print is a total of 24mm high so I change retraction settings every 8mm. Then I compare the changes until I achieve the best result.
Each printer is going to be different but in my case I used a negative “extra restart” distance to reduce the size of the layer seam. Retraction distance/speed, wipe, coast, temperature, speed may also have an effect.
Sword-Saber Test Print
14K downloads · 5 years ago in and
This model is restricted by licensing terms.
View license.
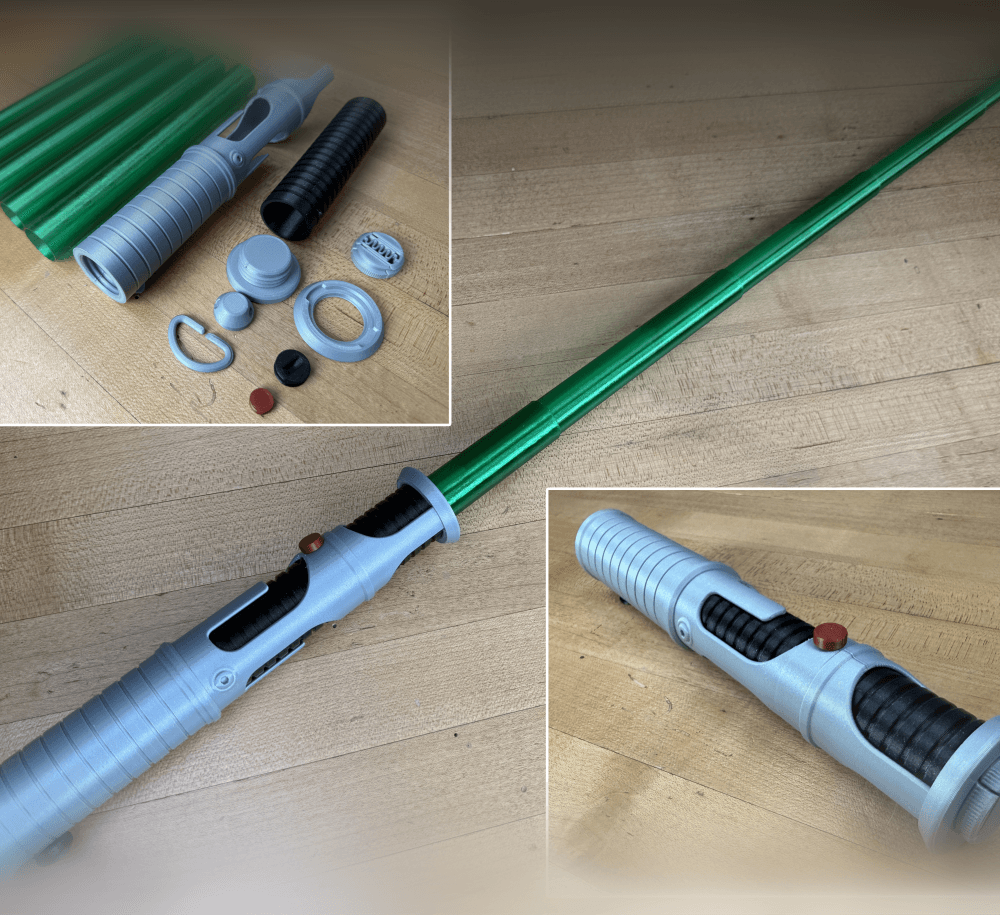
Quinlan Vos Collapsing Lightsaber

Master Sword Horizontal Wall Mount

Expanding Master Sword

Lightsaber Belt Clip

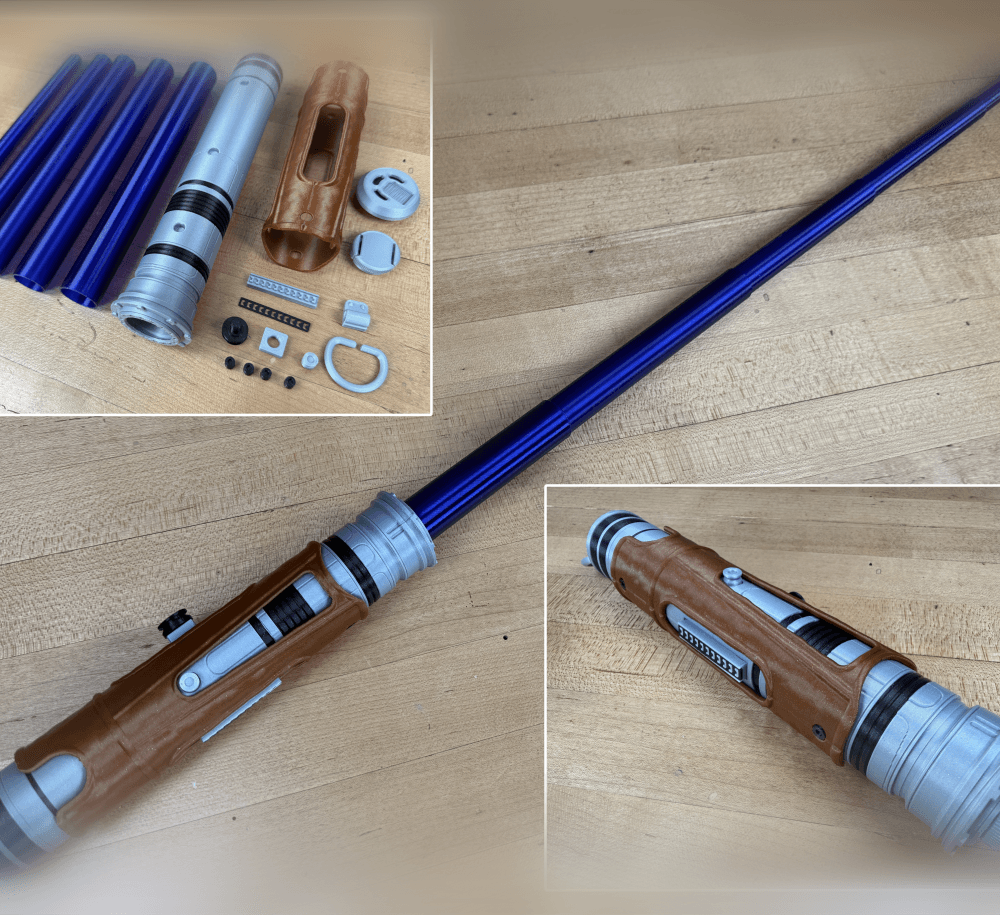
Luke’s ROTJ Multi-Part Collapsing Lightsaber

BYOK #10

Fallout Access Granted Illuminated Panel
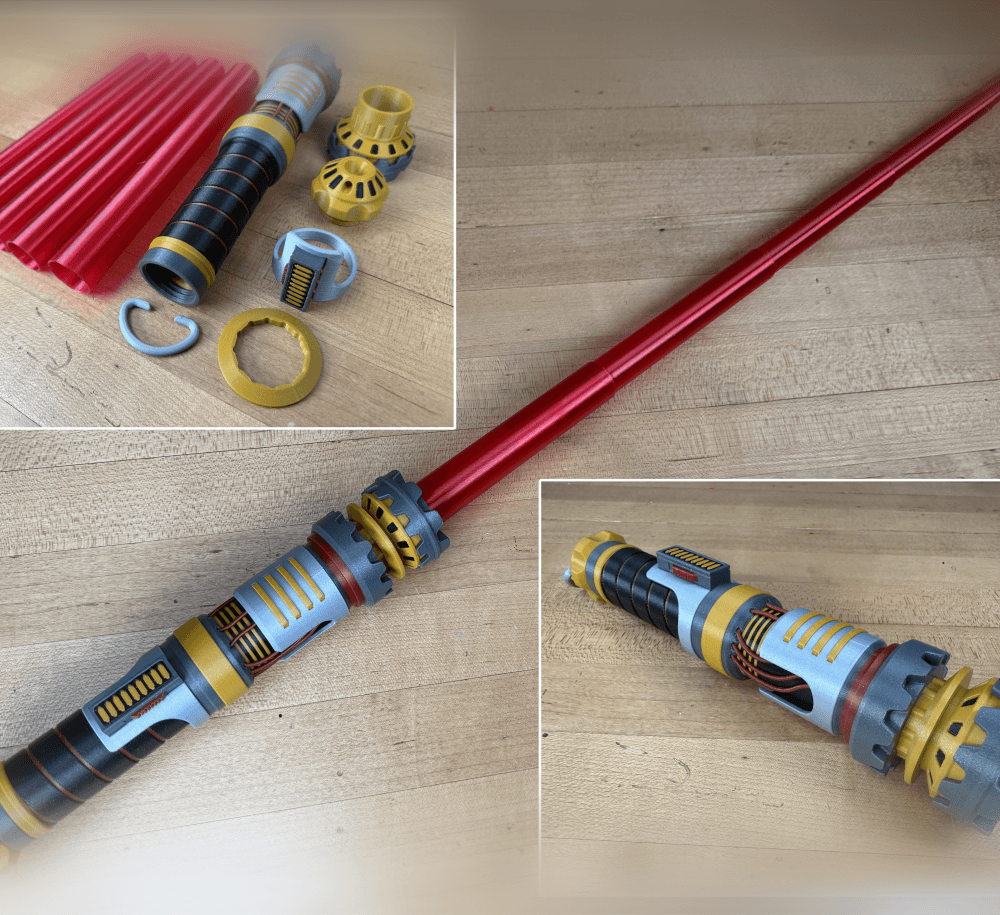
The Incinerator Multi-Color
The Incinerator Collapsing Lightsaber

Fallout Access Granted Panel
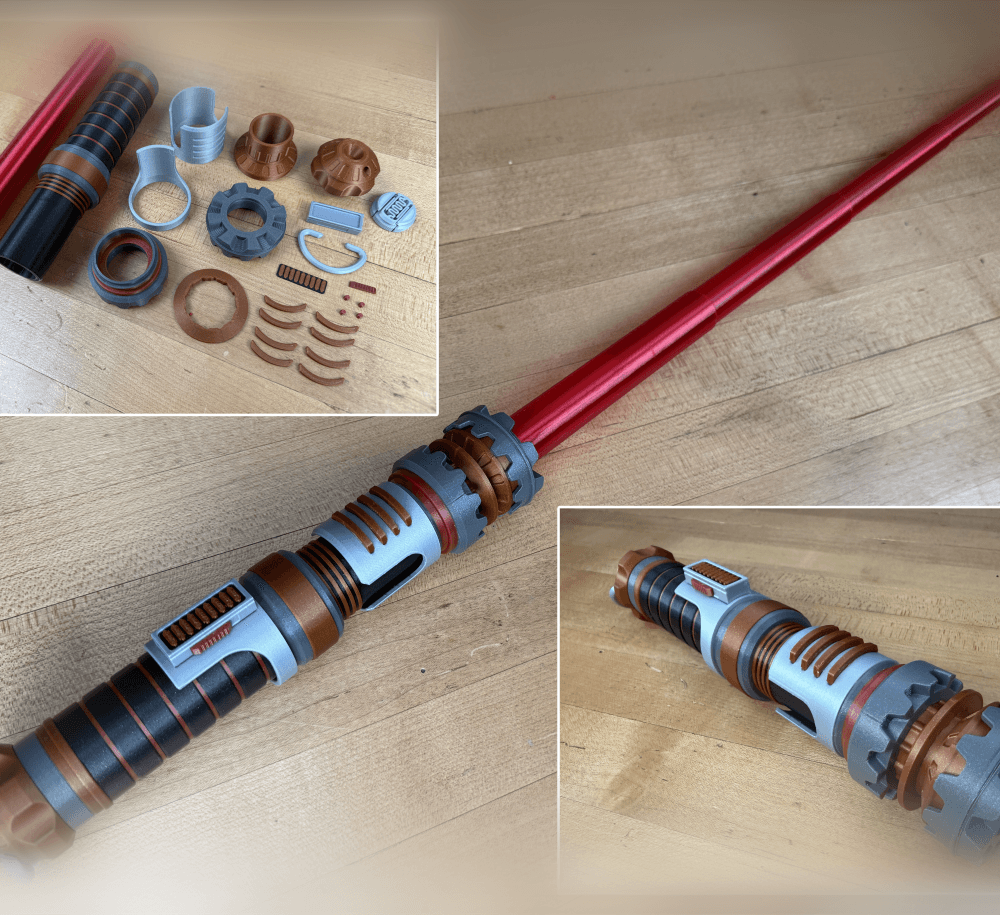
Devon Izara's Collapsing Lightsaber
Sakonji Tomioka Katana

Master Sword Vertical Wall Mount

Collapsing Easter Basket

Buster Sword Wall Mount

Textured Planetary Egg Container
Ezra Bridger 3rd Collapsing Lightsaber

Illuminated Galaxy Edge Control Panel #2

Illuminated Galaxy Edge Control Panel #1

Did you go up or down with the retraction settings? think I'm getting close just wanna see what you did.
There are different settings; distance, speed, coast, wipe, extra restart distance.
How do i make my own collapsable models? I want to know how you made this test print so I can try modelling my own version of It in blender myself. sorry if its a dumb question but I don't know how people make collapsable swords and stuff as there isn't any tutorials online
I use Autodesk Inventor, its more similar to Fusion. No sure about blender but I'm trying to make some time to learn.
None of my shells fused together but neither do they stop themselves when extending, they simply fall through each other. I checked out your "Printing collapsible lightsabers and swords" with your recommendations but no luck. Any further advice?
Its just a test to verify that they wont fuse. There is a newer test that measures at what clearance they fuse to give you a better idea of success. If no seams touch or there are no strings, then there shouldn't be a issue.
hey do i use supports or no i use a creality k1 with a 0.4 nozzle
No supports
Hey I printed this and it wasn't fused but when I printed the actual sword, 2 layers fused and I used the same settings
Two layers, what do you mean by that? Typically if this happens its because the test print was slightly attached but came apart because it was not very tall. Once printed at full height, its harder to separate. Or, the blades came loose from the bed. You will need good bed adhesion. Personally I like like a clean smooth PEI sheet for PLA.
Hello. Thanks for making this great model! Have you tried printing these with scarf joints? I love scarf joints because you can barely see the seams. If so, what settings do you recommend in Orca Slicer 2.2.0? I'm using a Bambu A1 with Overture PETG.
I played around with the many different settings and I'm getting a lot of stringing on the inner arcs of the test print. Thanks for any help you can provide.
I am aware of the setting but I have not tired it yet. I think I will in the near future.
If I split up the blades, how do I assemble it?
What setting should i use to print collapsing katana at 70 percent scale
Scaling it down will make it harder, especially without reducing your nozzle size. I would get the replaceable blade version and print the blades separately in vase mode.
how can i split each sword piece into a different model so i can just print 1 at a time
You should be able to separate the bodies in your slicer. Also why print the parts individually, this really only tests bed adhesion and layer seam.
My mid circle had fused entirely with outer one on the Seam. Any tip for this?
Is it only on the first layer? If so, raise your first layer height.
Ok! Also what would be a good Layer Height for this test (and the swords)? Atm i am using 0.2mm.
That’s what I’m using
my z Seam are making the smallest piece stick together on my bambu x1 carbon do you now what setting I should tweak in bambu studio
retraction settings.