


Planetary Compartment Container
Planetary Compartment Container
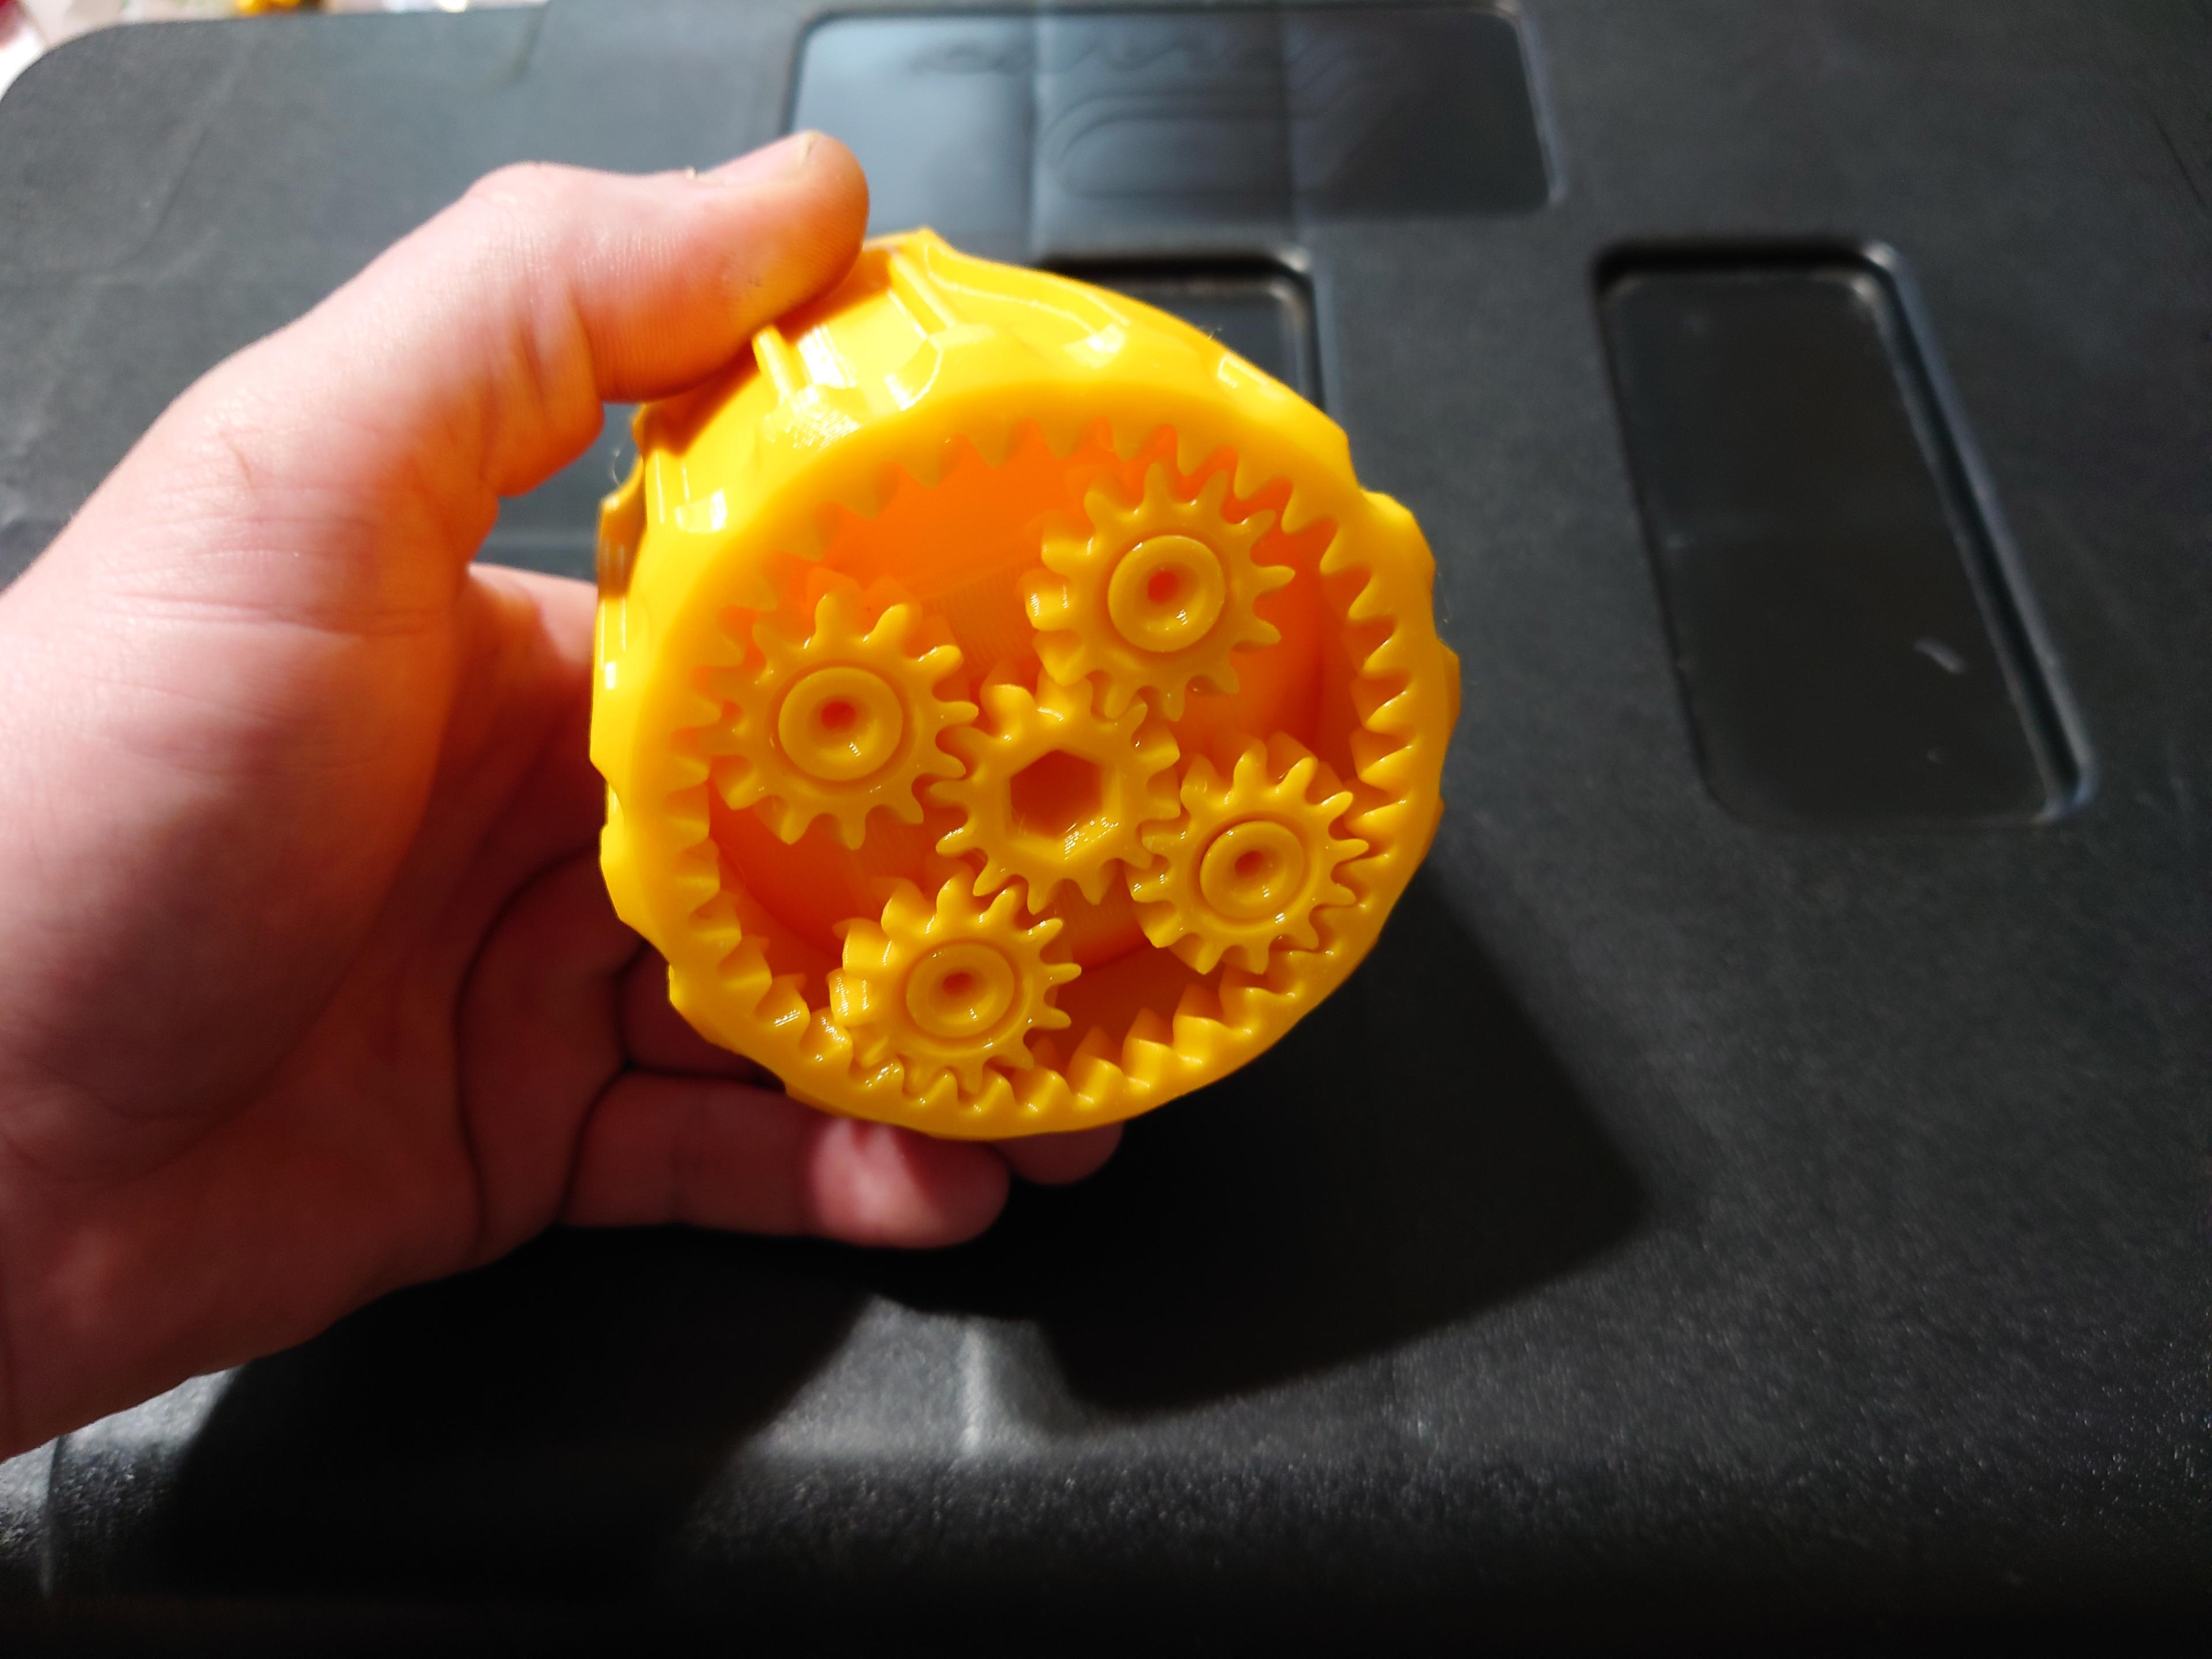
This container has three separate compartments, turning the knob on top of the container indexes through the different compartments at a 4:1 ratio. This is done with the use of a planetary gear stage on the bottom of the container. Turning the knob drives the sun gear which causes the carrier to spin which in this case is the inner dividing cylinder. The 4:1 ratio is a result of the planetary gears rotating quicker around the larger 32 tooth ring gear verses the smaller 12 tooth sun gear.
Size The OAL's are 135mm tall by 94mm in diameter.
Other Planetary Containers: Mini Pencil Egg
This container was derived from the Mini Planetary Demo Unit that I designed to learn more about planetary gears. Check that one or the [Original Demo Unit I made out, it really helps to better understand how these gears work when you can hold it in your hand. You may find they are more complex than you thought.
Print instructions
Prints in place, designed for a .4mm nozzle, .2mm layer heights, no supports at 100%.
After printing mine, I added a hex hole to the design of sun gear. If you need to free the gears up, do it here with a 6mm hex wrench, don't over torque the knob because the shaft could fail.
Printed with 3D Fuel’s Silver PLA
Printed on the Muldex rep-rap IDEX printer.
Support and Licensing If you would like to help support more free models, or get permission to sell physical copies of my models, consider joining my Patreon
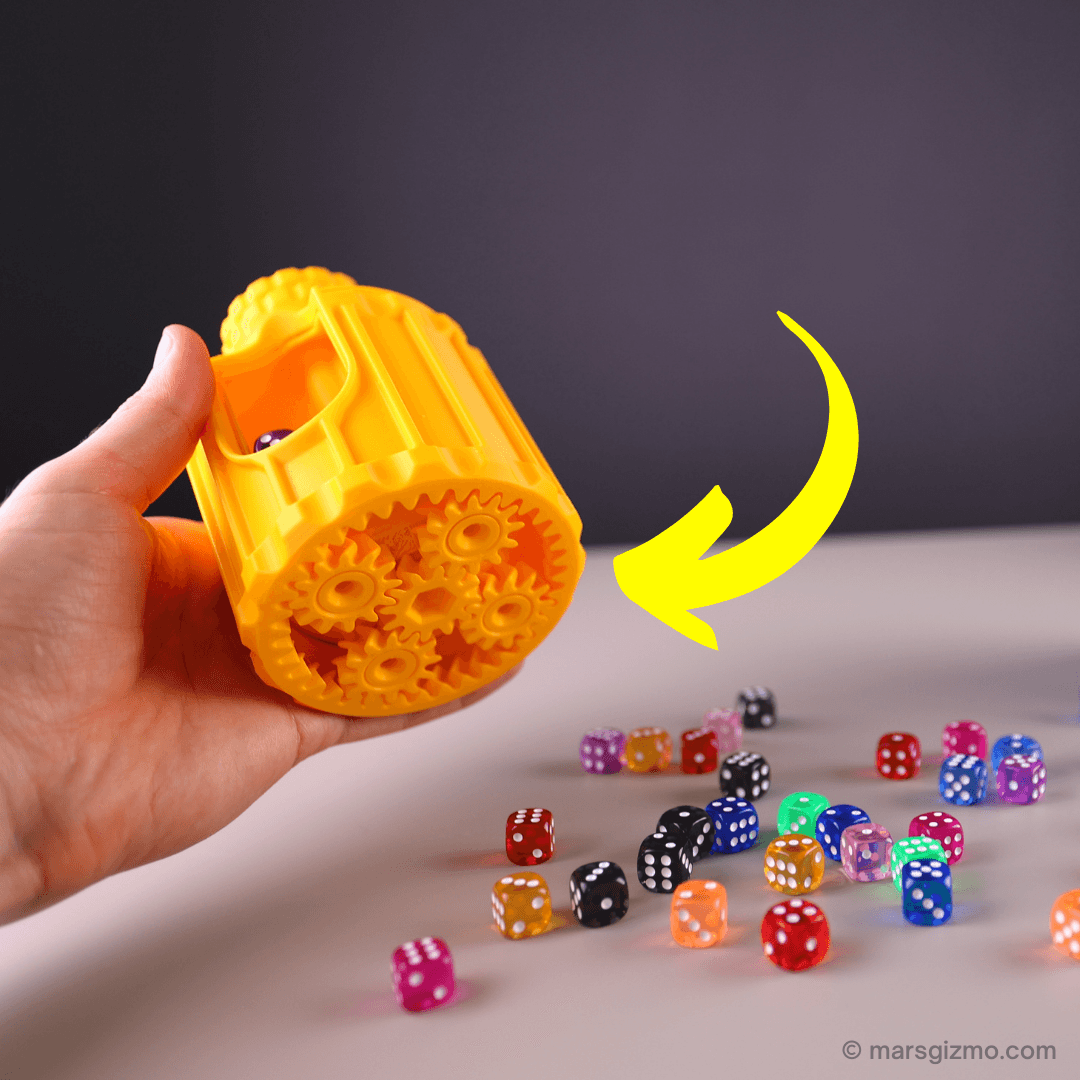
Planetary Compartment Container
Quinlan Vos Collapsing Lightsaber

Master Sword Horizontal Wall Mount

Expanding Master Sword

Lightsaber Belt Clip

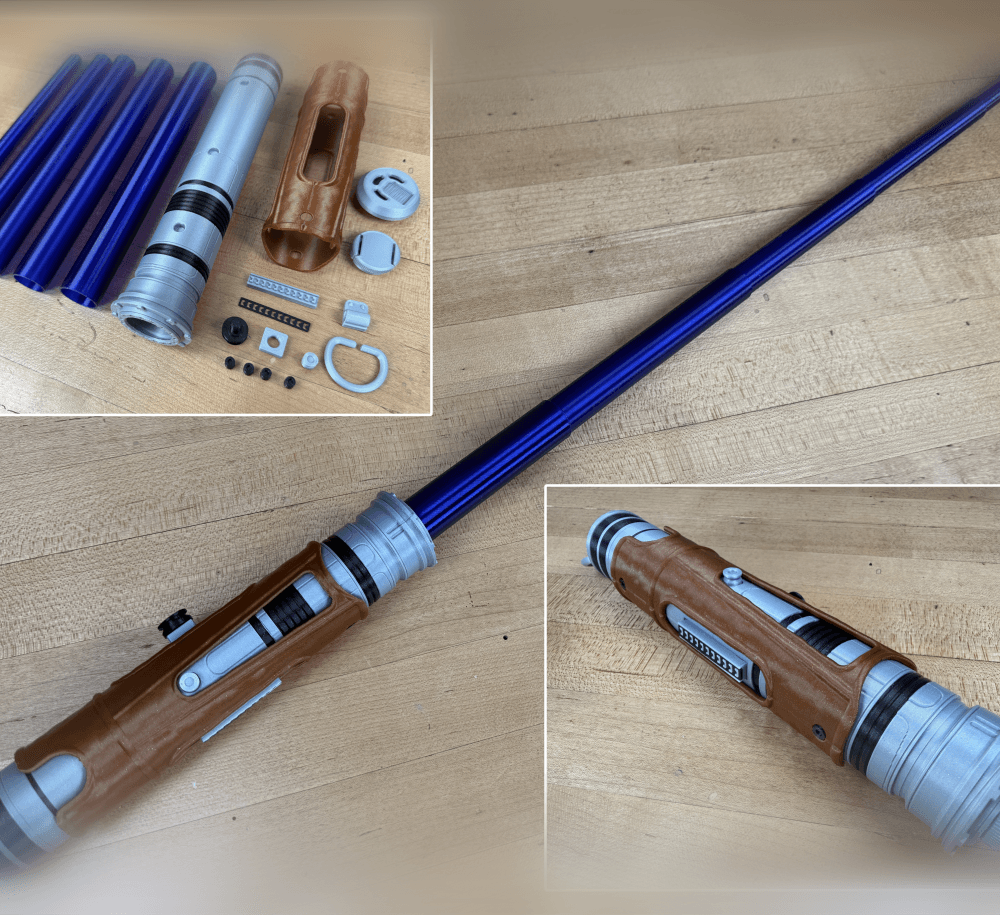
Luke’s ROTJ Multi-Part Collapsing Lightsaber

BYOK #10

Fallout Access Granted Illuminated Panel
The Incinerator Multi-Color
The Incinerator Collapsing Lightsaber

Fallout Access Granted Panel
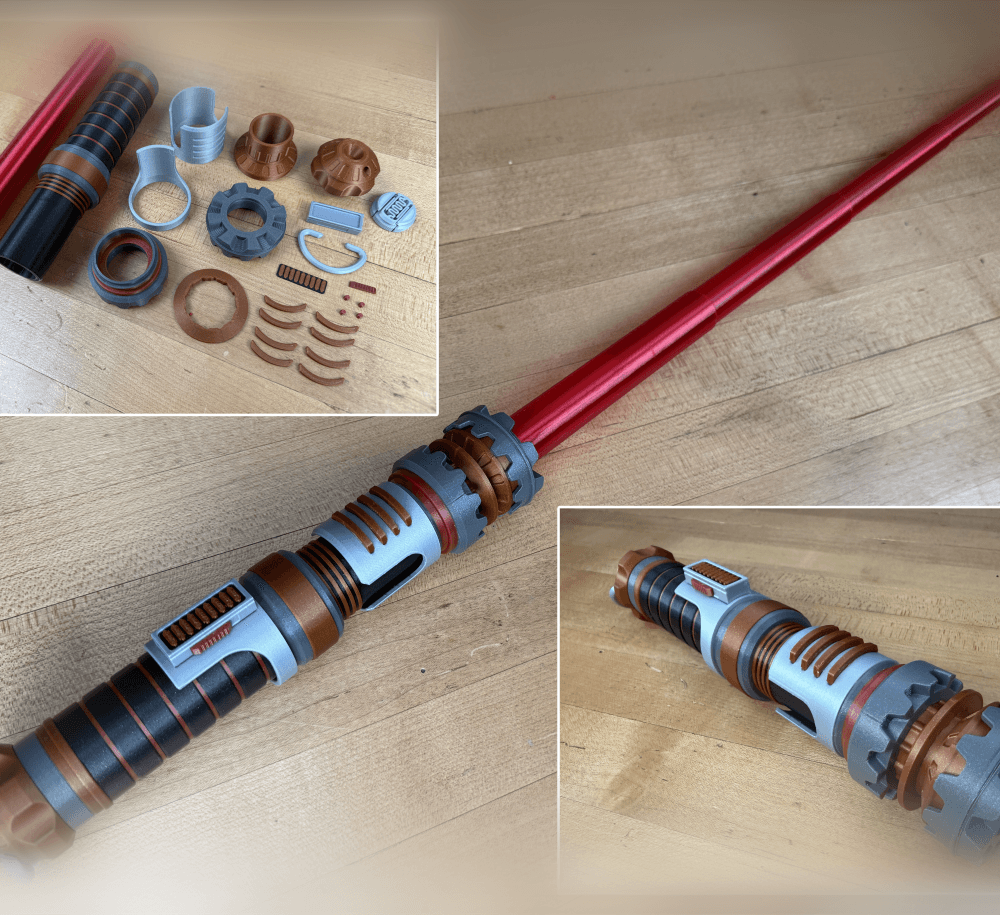
Devon Izara's Collapsing Lightsaber
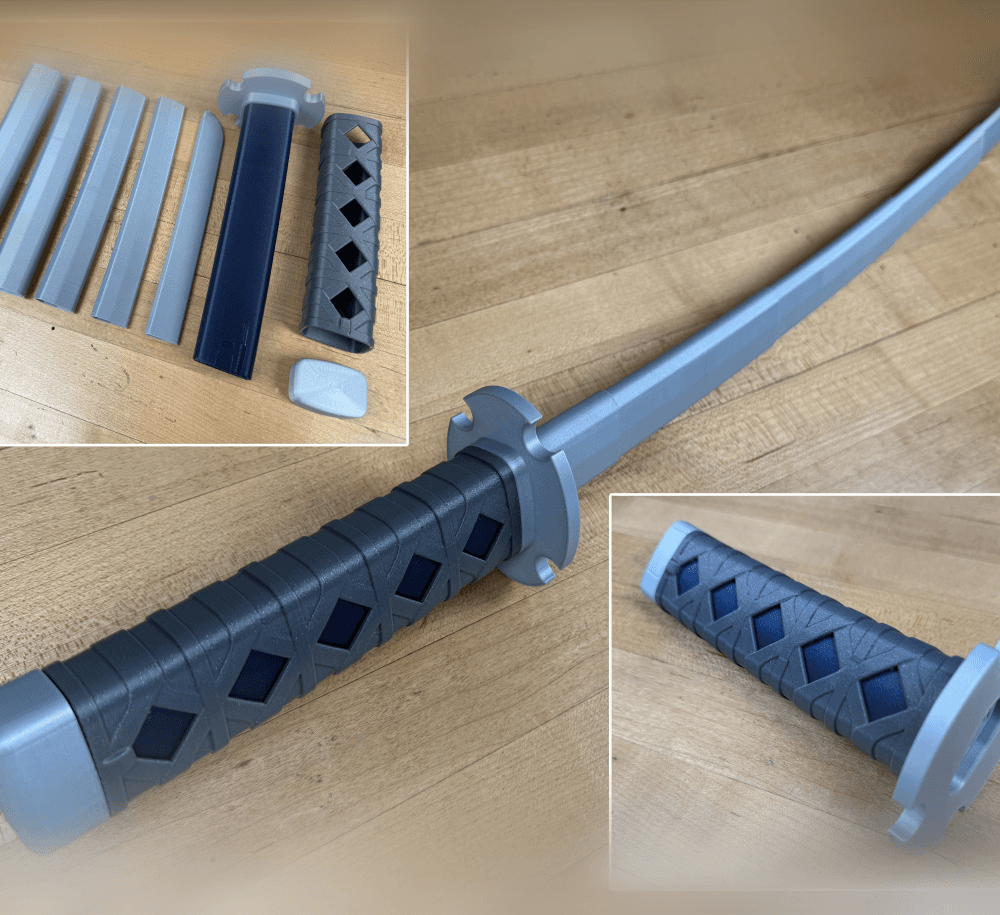
Sakonji Tomioka Katana

Master Sword Vertical Wall Mount

Collapsing Easter Basket

Buster Sword Wall Mount

Textured Planetary Egg Container
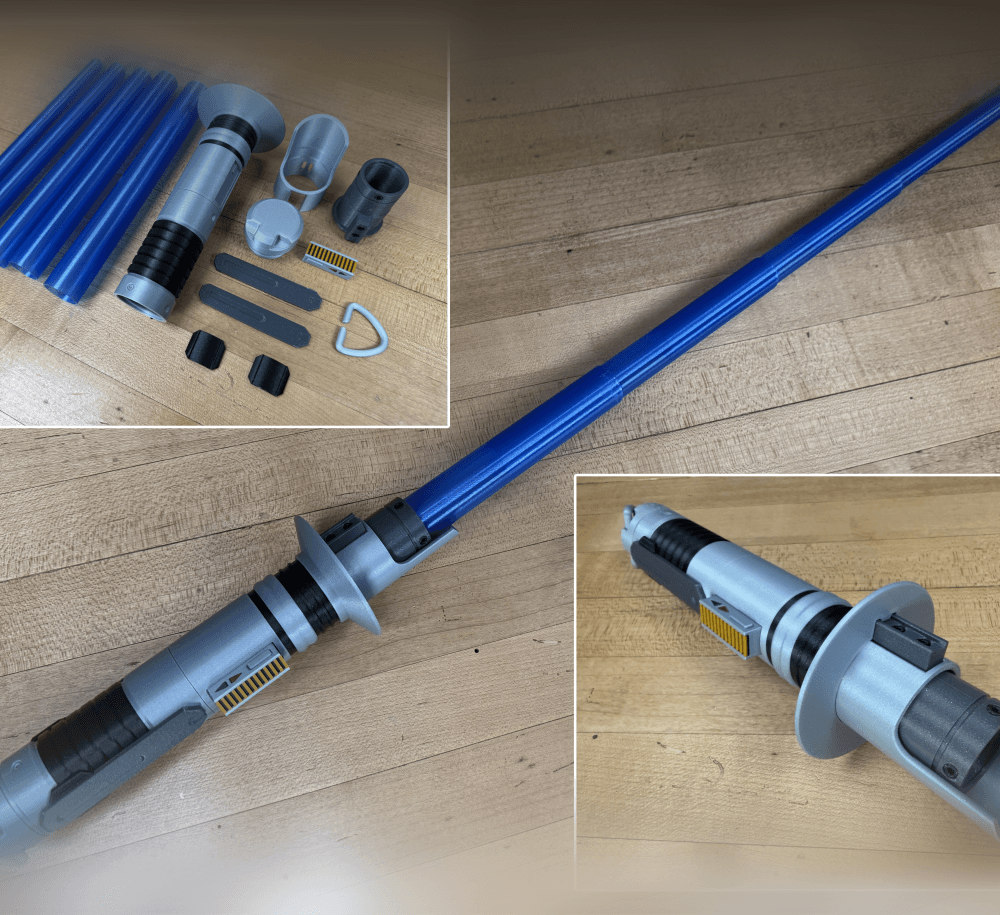
Ezra Bridger 3rd Collapsing Lightsaber

Illuminated Galaxy Edge Control Panel #2

Illuminated Galaxy Edge Control Panel #1

so when you say at 100% is that infill at 100%?
No sorry 100% scale. 10% infill is fine, there is not much of it. Its mostly walls.
If you use a Cura slicer. Go to setting>wall>horizontal expansion and set it to -0.3, if it still doesn't work decrease it more.
As the designer I have not used this setting but its good advice if you have issues not related to the seam or elephants foot. I think PS has a similar setting too. You can also cheat by turning down the extrusion multiplier/flow rate by a few percent.
Hi, I absolutely love this design but I was unsuccessful in printing it. After 26 hours everything looked perfect but basically all the gears were fused with the surrounding parts and I broke them try to free them. I really want to sort out what I should do differently (still a newb to 3d printing). The teeth were fuses where they touched but also fused to the "bearings" they sat on so there was just too much to overcome and they all sheared off at the base of where the bearing/axles are mounted. It's too awesome not to try again so if anyone has any tips please share!
Can you tell if its fusing at the first layer, at the layer seam, or everywhere?
This is a pretty big print, consider using this Gear Demo as a test print.
Don't get stuck on it, if you are new to printing I would print some other things and come back to it. You will probably learn the solution with the gained experience.
This design is so cool! 👏😎
Thanks bro!🤗